
ADLER-AD-1912-Waterproof-Universal-Radio
Safety Instructions
- Read carefully and always follow the instructions included with the device.
- The manufacturer is not responsible for any damage resulting from improper use.
- The product is intended for indoor use only.
- Do not use the product for any purpose incompatible with its use.
- The device is powered by 3 LR03 AAA 1.5V batteries.
- Be careful when using near children. Do not let children play with the product.
- Do not allow children or anyone unfamiliar with the device to use it without supervision.
- Never put the entire device in water.
- Never use the product if it has been dropped or damaged in any way or if it is not working properly.
- Do not attempt to repair a damaged product yourself, as this may result in an electrical shock.
- Always take a damaged device to a professional service center for repair.
- Any repairs should only be performed by authorized service technicians.
- Improper repair may cause dangerous situations for the user.
- Never place the product on hot or warm surfaces or appliances, such as an electric oven or gas burner.
- Never use the product near flammable materials.
Read carefully and always follow the instructions included with the device. For more detailed guidance on other ADLER appliances, see the ADLER AD 4225 Hand Mixer Inox 800W Instruction Manual or the ADLER AD 8083 Beverage Pantry 50W Instruction Guide.
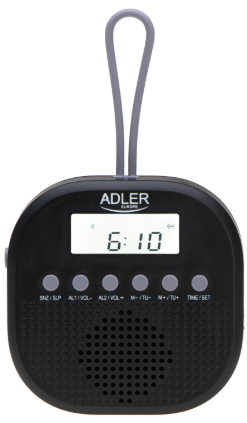
Description of the Device

- A: Power button (A) B: Snooze/sleep button C: AL1/VOL- button
- D: AL2/VOL+ button E: M-/TUNE- button F: M+/TUNE+ button
- G: TIME/SET button H: LCD screen I: Pendant ring
- J: Speaker K: Lock L: Battery compartment
Battery Installation
- Using your fingernails, pull the battery compartment flap (L) toward you to open the compartment.
- Insert 3 LR03 (AAA) batteries into the battery compartment, paying attention to the battery polarity drawn inside the compartment.
- Turn the lock (K) to the vertical position to protect the compartment from water and moisture.
- Use the M+/TUNE+ and M-/TUNE- (E, F) buttons on the ADLER AD 1912 Waterproof Universal Radio to make settings.
- Use the TIME/SET button (G) to confirm the setting.
- Press the Power button (A) (A) to put the unit into standby mode.
- Using the M+/TUNE+ and M-/TUNE- buttons ( E, F), and confirm with SET/SCAN (G).
- Press the power button (A) to put the unit into standby mode.
- Press the AL1/VOL button (C), and the time will flash on the display.
- Repeat step (3) to set the minutes.
- Snooze function. After turning on the radio or alarm, you can press the SNOOZ / SLEEP button (B) to sleep for a few more minutes. Sleep function
- To activate the sleep function, press the SNOOZ /SLEEP button (B) on the unit; the LCD will show “90, 80, 70, 60, 50, 40, 30, 20, 10, OFF” successively.
- Press the power button (A) to turn on the device.
- Press M+/TUNE+ or M-/TUNE- (E, F) to change the frequency and search for active stations.
- Press AL1/VOL- or AL2/VOL+ to select your preferred volume. Semi-automatic scanning..
- Press and hold the M+/TUNE+ or M-/TUNE- ( E, F) buttons for 2 seconds to start an automatic search.
Cleaning & Maintainanace
- Clean the radio with a soft, dry cloth and wait until all parts are completely dry.
- Always unplug the power cord before cleaning the unit.
- Any marks on the surface can be wiped with a slightly dampened cloth without any additives.
- Do not use aggressive cleaners, brushes with nylon bristles, sharp or metal cleaning utensils, knives, harscrapers,s, and the like. These can damage the surfaces of the radio.
- Always store the radio in a dry and clean place.
Technical Description
- Power supply: 4.5V (3x AAA 1.5V LR03 battery)
- FM: 87.5 – 108MHz
- Waterproof class: IPX4 Power: 1W
Environmental Instructions
- Dispose of cardboard packaging and polyethylene (PE) bags in the appropriate containers for separate collection of municipal waste according to their description.
- If there are batteries in the device, remove them and separately return them to the collection and storage facility. Return the used device to a suitable collection and storage facility, as the hazardous substances in it may pose a threat to health and the environment.
- Waste electrical equipment is waste that contains substances harmful to humans, animals, and the environment.
- These substances can lead to contamination of the soil, water, or air, and through this they can get into the human body and lead to numerous health ailments, such a vision, hearing, and speech disorders; they can also lead to kidney, liver, and heart damage, and cause skin diseases.
- Harmful substances can also have adverse effects on the respiratory and reproductive systems and lead to cancerous changes. Consumption of plants growing on the contaminated soils, and products made from them, may risk the above-mentioned health effects.
- Do not dispose of the device in the municipal waste container!!! Service: If you wish to purchase spare parts or report any complaints, please contact directly with the seller who issued the receipt directly.
Customer Service
- Website: service@adlerglobal.com.
- Ph: 0800 9753 003
- Timings: Mo – Fr, 8:30 am – 5:00 pm
FAQs
Q: What makes the ADLER AD 1912 radio waterproof?
The AD 1912’s IPX6-rated waterproofing makes it perfect for baths, kitchens, and outdoor activities because it can resist splashes, rain, and shower use.
Q: Can I use it while charging?
Depending on the model, you can use it while plugged in to a USB power source.
Q: How do I adjust the volume?
To adjust the sound level, use the buttons on the front or side panel or the volume knob.
Q: Does it have a digital display?
Indeed, the AD 1912 has a digital display that indicates the mode, battery level, and station frequency.
Q: Can I save my favorite stations?
You may easily access your favourite channels with the help of station presets, which are supported by certain models.
Q: Is it suitable for outdoor use?
Yes, it is waterproof and long-lasting, which makes it perfect for showering, camping, the beach, and poolside.
Q: Is it suitable for kids?
Yes, it is durable and waterproof, but when exposed to water, adult supervision is advised.
Q: Can I charge rechargeable batteries inside the radio?
No, there isn’t a battery charging feature on the AD 1912. For rechargeable batteries, use a different charger.