
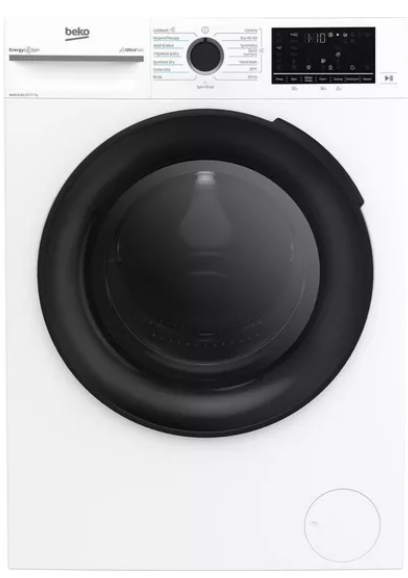
Beko BM5D510745UW 7Kg Capacity Washer Dryer
Safety Instructions
This section includes the safety instructions necessary to prevent the risk of personal injury or material damage.
- Use original spare parts and accessories only.
- Do not repair or replace any component of the product unless it is specified in the operation manual.
- Do not modify the product.
- The service life of your product is 10 years.
- During this period, original spare parts will be available to operate the product properly.
- Do not use this product for commercial purposes or outside its intended purpose.
- The manufacturer assumes no responsibility for any damage due to misuse or mishandling.
- Personnel kitchens of stores, offices, and other work environments.
- Agricultural establishments, by customers of hotels, motels, and other accommodation facilities
- Bed and breakfasts, hostellike environments. Common areas of apartment blocks or laundries.
- Use the child lock to prevent children from interfering with the product.
- Do not forget to close the loading door when leaving the room where the product is located.
- Keep all detergents and additives used for the product out of children’s reach.
Package Information
Packaging materials of the product are manufactured from recyclable materials in accordance with our National Environment Regulations. Do not dispose of the packaging materials together with the domestic or other wastes. Take them to the packaging material collection points designated by the local authorities.
Installation
Please read the “Safety Instructions” section first! Your product automatically detects the amount of laundry placed inside when selecting a programme. To do this, select the Drum Cleaning* programme and cancel the spin function. Start the programme without laundry. Wait for the programme to finish, which will take about 15 minutes. *The programme name may vary depending on the model.
Wait for the programme to finish, which will take about 15 minutes. *The programme name may vary depending on the model. For the appropriate programme selection, review the programme descriptions section.
- Please contact the nearest Authorised Service for the installation of the product.
- Preparation of the location and electrical, tap water and waste water installations at the place of installation is under the customer’s responsibility.
- Before installation, visually check if the product has any defects. Damaged products cause risks to your safety.
Appropriate Installation Location
- Place the product on a hard, rigid and level floor. Do not place it onto a carpet with high pile, or other similar surfaces, on top of an underlay, or onto flooring with excessive amounts of springiness, e.g., some types of acoustic flooring systems.
- Placing on an improper floor can cause noise and vibration problems.
- Do not place the product on the power cable.
- Do not install the product in places where the temperature may fall below 0 ºC. Freezing might damage your product.
- Leave a minimum space of 1 cm between the product and the furniture.
- When installing the appliance on a stepped surface, keep it away from the edges.
- Do not place the product on any platform.
- Do not place or use heat sources such as cooktops, irons, ovens, heaters, etc. on the product.
Assembly of Bottom Panel Covers
These products do not have plugs and covers.
- In order to increase the sound comfort of the product, attach cover A after removing the package foam.
Cover A

Tilt the product back slightly. Rest the tabs of Cover A against the lower panel. Complete the assembly by rotating the cover. Cover B and the Cap are optional. If available, attach cover B and the Cap.
Cover B

Rest the tabs of Cover B against the lower panel. Complete the assembly by rotating the cover.
Cap

Insert the cap by pushing it with your finger.
Removing Transportation Bolts
- Loosen all transportation safety bolts with an appropriate wrench until they turn freely.
- Bend the inner part by pressing it at the grip areas and pulling the part out.
- Attach the plastic covers supplied in the User Manual bag to the holes on the rear panel.

Connecting to Water Supply
The water pressure required for the operation of the product is between 1-10 bars (0.1-1 MPa). To ensure a smooth operation of the machine, 10 – 80 litres of water shall be supplied in a minute from a fully opened tap. If the water pressure is higher, install a pressure-reducing valve.
Models with a single water inlet shall not be connected to the hot water tap. In such a case, the laundry will get damaged, or the product will switch to protection mode and will not operate. Do not use old or used water inlet hoses on a new product. It may cause water leakage from your product and stain your laundry.y
- Connect the special hose supplied with the product to the water inlet on the product.
- Otherwise, your laundry may come out as hot at the end of the washing cycle and thus they may be worn.
- Tighten all hose nuts by hand. Ensure that all hose connections are fully tight.
- Never use a tool when tightening the nuts.
Drain Hose to the Drain
- Attach the end of the drain hose directly to the wastewater drain, washbasin or bathtub. Your house will be flooded if the water drainage hose is disconnected during water draining. There is also a risk of burning due to the high washing temperatures. In order to prevent such situations and make sure that the product performs water intake and drain processes without any problem, fix the drain hose securely.

- Connect the hose to a minimum height of 40 cm and a maximum height of 90 cm.
- If the hose is placed on the floor (or at a maximum height of 40 cm from the floor) and then its height is increased, discharging of water becomes difficult, and laundry may come out very wet from the machine. Thus, follow the heights provided in the figure.
- To prevent the wastewater from going back into the product again and to ensure easy drainage, do not immerse the end of the hose in the wastewater or do not insert it into the drain for more than 15 cm. If it is too long, cut it short.
- The end of the hose should not be bent, it should not be squeezed on, and the hose must not be pinched between the drain and the product. Otherwise, water discharge issues may emerge.
- If the length of the hose is too short, use it by adding an original extension hose. The overall length of the hose shall not be longer than 3.2 m. To prevent water leaks, always secure the connection between the extension hose and the draining hose of the product with a suitable clamp so that it does not come off and cause leaks

Adjusting the Feet
In order to ensure that the product operates more silently and vibration-free, it must stand level and balanced on its feet. Adjust the feet to ensure balance. Otherwise, the product may move from its place and cause bumping, noise and vibration problems.
- To loosen the nuts on the feet, rotate the nuts clockwise using the hand tool.
- Adjust the feet until the product stands level and stable. To lower the feet, rotate them counterclockwise. To raise the feet, rotate them clockwise.
- To retighten the nuts, rotate them counterclockwise using the hand tool.

Electrical Connection
Connect the product to a grounded outlet protected by a 13-amp fuse. Our company shall not be responsible for the damages that shall be incurred due to using the product without grounding according to local regulations.
- Connection must comply with national regulations.
- The electrical connection cable infrastructure of the product must be adequate and suitable for the product requirements. It is recommended to use a Ground Fault Circuit Breaker (GFCI).
- Power cable plug must be within easy reach after installation.
- If the current supply to the fuse or breaker in the house is less than 13 amps, have a qualified electrician install 13-amp supply.
- The voltage specified in the “Technical specifications” section must be equal to your mains voltage.
- Do not make connections via extension cables or multi-plugs. Overheating and burning may occur due to the connecting cable.
Damaged power cables should be replaced by the authorised service in order to prevent possible danger.
Fitting a Different Plug
As the colours of the wires in the mains lead of this appliance may not correspond with the coloured markings identifying the terminals on your plug, proceed as follows:
- Connect the green-yellow or green (earth) wire to the terminal in the plug marked ‘E’ or with the symbol f for coloured green and yellow or green.
- Connect the blue (neutral) wire to the terminal in the plug marked ‘N’ or coloured black.
- Connect the brown (live) wire to the terminal in the plug marked ‘L’ or coloured
red.
With the alternative plugs, a 13 A fuse must be fitted either in the plug or adaptor or in the main fuse box. If in doubt, contact a qualified electrician.

Handling the Product
- Unplug the product before handling it.
- Disconnect the water outlet and water main connections. 3 Drain all the water that remains in the product. See Draining Remaining Water and Cleaning the Pump Filter
- Install the shipping bolts in reverse order of the disassembly procedure. See Removing the Shipping Bolts
Operating the Product
Control Panel

- Programme Selection Button
- Temperature Level Lights
- Spin Level Indicator Lights
- Display
- Start / Pause Button
- Auxiliary Function Button 3
- End Time Setting Button
- Drying Level Adjustment Button
- Auxiliary Function Button 2
- Auxiliary Function Button 1
- Spin Speed Adjustment Button
- Temperature Setting Button
Symbols on the Display

- Temperature Indicator
- Spin Speed Indicator
- Duration Information
- Door Lock Is Engaged Symbol
- Programme Follow-up Indicator
- No Water Indicator
- Add Garment Indicator
- Auxiliary Function Indicator 3
- Delayed Start Enabled Indicator
- Drying Level Indicator
- Child Lock Enabled Symbol
- Auxiliary Function Indicators 2
- Auxiliary Function Indicators 1
- No Spin Indicator
- Rinse Hold Indicator 16 Cold Water Indicator
Preparing the Machine
- Check if the hoses are connected tightly.
- Plug in your machine.
- Turn on the tap completely.
- Place the laundry inside the machine.
- Put detergent and softener.
Selection of Washing Program
- Determine the programme suitable for the type, quantity and soiling level of the laundry in accordance with “Programme and consumption table”.
- Select the desired programme with the Programme Selection knob.

Washing Programmes
Use the following main programmes depending on the type of fabric. After selecting the appropriate washing program, by pressing the Drying button before starting the program, you can set your machine to switch to the drying step (automatically or scheduled) at the end of the washing program, without any pauses/interruptions.
Each time you press the button, the step in which the drying process will take place is shown in the row of information, and the related symbol lights up. You can see when the programme will finish on the display of the machine, according to the drying selections you will add to the washing programmes. If you want, by keeping pressing the button, you can dry for the maximum time allowed. You can take a glance at the programmes for which you can select the drying function in the Programme and Consumption tables.
EnergySpin
It ensures more effective use of your detergent with high mechanical movement during washing. Thus, it preserves your washing quality without the need to apply heat to your laundry for a long time and reduces your energy consumption. This technology is used in programs that contain symbols or colours displayed on the panel.
Eco 40-60
The Eco 40-60 program is suitable for washing normally soiled cotton laundry labelled to be washable together at 40 °C or 60 °C. This programme is the standard test programme according to the environmentally friendly design and energy labelling regulations.
In order to evaluate compliance with EU environmentally friendly design and energy labelling regulations, the washing and drying cycle should be run by selecting the cupboard dry function from the eco 40-60 programme. The washing and drying cycle can clean normally soiled laundry declared to be washable at 40 °C or 60 °C in a single cycle, and dry them so that they can be put in a cupboard immediately.
Cottons
You can wash your durable cotton laundry (sheetsbed linens, towels, bathrobes, underwear, etc.) in this programme. When the quick wash function button is pressed, the programme duration becomes notably shorter, but effective washing performance is ensured with intense washing movements. If the quick wash function is not selected, effective washing and rinsing performance is ensured for your heavily soiled laundry. ry
Synthetics
Use this programme to wash your clothes, such as t-shirts, blouses, synthetic/cotton blend fabrics, etc. The quick wash function shortens the programme duration significantly and ensures effective washing performance for lightly soiled laundry. The quick wash function is not suitable for heavily soiled laundry. If your product does not have a specific curtains programme, you can use this programme. Wash your curtains at 40 °C maximum and with a spin speed up to 800 rpm.
Hand Wash
Use to wash your woollen/delicate laundry. Select the appropriate temperature complying with the tag of your clothes. Your laundry will be washed with a very gentle washing action in order not to damage the clothes.
Shirts
This programme is used to wash the shirts made from cotton, synthetic synthetic-blended fabrics altogether. It reduces wrinkles. Steam is applied at the end of the programme to help the wrinkle-reducing function. The special spin profile and steam applied at the end of the programme reduce the wrinkles on your shirts. When the quick wash function is selected, the Pre-treatment algorithm is executed.
It is recommended to operate the cycle with no more than 6 shirts to minimise wrinkles in your shirts using this cycle. When washing more than 6 shirts, there may be differences on the wrinkle levels and humidity on shirts at the end of the cycle. ** When you select the drying function with the Shirts programme, do not load your product with more laundry than recommended below: Otherwise, wrinkles or humidity problems can occur on your shirts.
Temperature Selection

- Whenever a new programme is selected, the recommended temperature for the programme appears on the temperature indicator.
- It is possible that the recommended temperature value is not the maximum temperature that can be selected for the current programme.
- Press the Temperature Adjustment button to change the temperature.
- Temperature decreases gradually.
- Finally, the Cold light that indicates cold washing illuminates the display.
- You can also change the temperature after the washing starts.
- You can also change the desired temperature after the washing programme starts.
- However, you need to do this before the heating phase starts.
Spin Speed Selection

Whenever a new programme is selected, the recommended spin speed of the selected programme is displayed on the Spin Speed indicator. It is possible that the recommended spin speed value is not the maximum spin speed that can be selected for the current programme. Press the Spin Speed Adjustment button to change the spin speed. Spin speed decreases gradually. Then, depending on the model of the product, “Rinse Hold ” and “No Spin ” options appear on the display.
- This function holds the laundry in the final rinsing water.
- If you want to spin your laundry after the Rinse Hold function:
- Adjust the Spin Speed. Press the Start/Pause button.
- The programme will resume. The machine drains the water and spins the laundry.
- If you want to drain the water at the end of the programme without spinning, use the No Spin function
- You can change the spin speed after the washing starts if the washing steps allow it. Changes cannot be made if the steps do not allow it.
Auxiliary function selection for drying

When you select a new washing program, press the Auxiliary Function Selection button to set the drying option suitable for this program.
Drying Programmes
In drying programmes, there is a spinning step. Your machine performs this process to shorten the drying duration. When the drying programme is selected, the spin speed setting is in the range of the Maximum spin speed. In programmes that do not allow the drying setting, when the Drying auxiliary function button is pressed, the drying light will not change, and a warning noise will be heard. For only drying programmes, set the appropriate drying option by pressing the Auxiliary Function Selection button.
Synthetic Dry
Use this programme to dry synthetic laundry with a dry weight of up to 4 kilograms. You can only dry in this programme.
Cotton Dry
Use this programme to dry cotton laundry with a dry weight of up to 7 kilograms. You can only dry in this programme.
Washing and Drying Programmes
7 Kg Wash & Dry Use this programme to dry up to 7 kg of cotton laundry right after the washing programme, without making any other selections.

In the 7 kg Washing and 7 kg Drying programme, it is recommended to fill the machine to the level shown in the figure above for ideal drying conditions (you can see the level arrow when you open the loading door).
Wash & Wear
Use this programme to wash 0.5 kg of laundry (2 shirts) in 40 minutes or to wash 1 kg of laundry (5 shirts) in 60 minutes.
HygieneTherapy
Hygienic washing with hot air (programme duration 28 min.) The hygienic ventilation programme ensures that the temperature of the laundry is kept at relatively high temperatures with a precise heating method, and hygienic cleaning is performed via air. Use this programme for fast hygienic cleaning of your cotton or synthetic dry clothes with hot air.
Auxiliary Function Selection

Select the desired auxiliary functions before starting the programme. Whenever a programme is selected, icons of the auxiliary function symbol that is selected together with it illuminate.
Fast
After selecting a programme, you can press the Quick Wash setting button to shorten the programme duration. For some programmes, the duration can be shortened by over 50%. Despite this, a good washing performance is achieved thanks to the changed algorithm.
Steam
This function helps to reduce the creases in your cotton, synthetic and mixed clothes, shorten the ironing time and remove the dirt by softening. Under conditions where the steam function is applied at the end of the programme, your laundry may be warmer at the end of the washing. This is expected within the programme working conditions.
Water Mode
This auxiliary function key allows you to select the additional functions of Water Saving, Pre-Wash, and Extra Rinse or Extra water depending on the model of your machine. You can find detailed information about the selection in the description of the respective auxiliary function.
Water Saving
Select this function by pressing the Water Mode auxiliary function key once for all programs indicated as selectable in the Program and Consumption table. This function is intended for lightly soiled laundry that requires only a small amount of detergent (see “Tips for Correct Washing”). It enables environmentally friendly washing by reducing the amount of water used, without compromising on washing performance.
Extra Rinse
You can use this function for all programs indicated as selectable in the Program and Consumption table. Select this function by pressing the Water Mode key twice for programs where the additional Water Saving function can be selected, or by pressing the Water Mode key once for programs where the additional Water Saving function cannot be selected.
Drying
This function allows the laundry to dry after washing. Check in the programme table which programmes this auxiliary function can be selected for.
Child Lock
Use the Child Lock function to prevent children from tampering with the product. Thus, you can avoid any changes in a running programme.
To activate the child lock
Press and hold the Drying Level Adjustment button for 3 seconds. After the countdown as “CL 3-2-1” on the display is over, the “CL On” (Child Lock On) symbol appears on the display. You may release the Drying Level Adjustment button when this symbol is displayed.
To deactivate the child lock
Press and hold the Drying Level Adjustment button for 3 seconds. After the countdown “CL 3-2-1” on the display is over, the “CL Off” (Child Lock Off) symbol appears on the display.
Drying Steps

Iron Dry
- Drying is performed until the Iron Dry step is reached at the drying level.
Cupboard Dry
- Drying is performed until the Cupboard Dry step is reached at the drying level.
Extra Dry
- Drying is performed until the Cupboard Extra Dry step is reached at the drying level.
Timed Drying – minutes
To achieve the desired dryness level at a low temperature, you can choose from drying durations of 30, 90 and 150 minutes. When drying a small amount of laundry (maximum 2 items), the timed drying steps in Cotton or Synthetic dry programmes should be selected. If the laundry is not at the desired dryness level at the end of the drying programme, timed drying can be selected to finish the process. When this function is selected, the machine performs drying for the set time regardless of the drying level.
End Time
When the end time function is selected, the remaining time until the programme starts is shown in hours, such as 1h, 2h, and the remaining time to complete the programme after your programme starts is shown in hours and minutes, as in the 01:30 example.
With the End Time function, the end time of the programme may be set up to 24 hours. After pressing the End Time button, the programme’s estimated ending time is displayed. If the End Time is set, the End Time indicator is illuminated.

In order for the End Time function to be activated, and the programme is completed at the end of the specified time, you must press the Start/Pause button after adjusting the time.

If you want to cancel the End Time function, turn the product off and on by turning the program selection knob to the On/Off position.
- Open the loading door, place the laundry and put detergent, etc.
- Select the washing programme, temperature, spin speed and, if required, the auxiliary functions.
- Set the End Time of your choice by pressing the End Time button. End Time indicator lights.
- Press the Start/Pause button. The time countdown starts.
Starting the Programme

- Start the programme by pressing the Start/Pause button.
- The flashing light of the Start/Pause button starts to illuminate steadily, indicating that the programme has started.
- The loading door is locked. “Locking Door” expression appears on the display while the door is being locked.
Loading Door Lock
There is a locking system on the loading door of the product that prevents the opening of the loading door in cases when the water level is unsuitable. “Door Locked” symbol appears on the display when the loading door is locked.
Opening the Door in Case of a Power Failure
- Turn off and unplug the product.
- Open the pump filter lid.
- Pull down the loading door emergency handle with a tool and release. Then open the loading door.
- If the loading door does not open, then repeat the previous step.
Changing the Selections
 Changing the Selections
If the water level in the product is suitable when you press the Start/Pause button, the door lock will be deactivated, and the door will open, allowing you to add garments. The door lock icon on the display goes off when the door lock is deactivated. After adding garments, close the door and press the Start/Pause button once again to resume the washing cycle.

If the water level in the product is not suitable when you press the Start/Pause button, the door lock cannot be deactivated and the door lock icon on the display remains on.

Switching the Product to Pause Mode
Press the Start/Pause button to switch the product to pause mode. The pause symbol will flash on the display.

Changing the programme selection after the programme has started
The programme change is allowed when the current programme is running unless the Child Lock is enabled. This action will cancel the current programme.
Changing the auxiliary function, speed and temperature
Depending on the step the programme has reached, you can cancel or activate the auxiliary functions.
Cancelling the Programme
The programme is cancelled when the programme selection knob is turned to a different programme or the product is turned off and on again using the programme selection knob.
Standby Mode
Your machine has the “Standby Mode” feature. The choices you make when exiting the energy-saving state may change. Check your selections’ accuracy before starting the programme. Adjust your settings again if necessary. This is not an error.
Maintenance and Cleaning
The service life of your product will be extended, and frequent problems will be reduced if it is cleaned at regular intervals.ls
Cleaning the Detergent Drawer
Clean the detergent drawer at regular intervals (once every 4 to 5 washes) as mentioned below to prevent the accumulation of powder detergent. Clean the syphon if excess amounts of water and fabric softener mixture remain in the softener compartment.

- Press the marked part of the syphon within the softener compartment and then pull the drawer towards yourself to take it out.
- Lift and remove the syphon from behind as shown.
- Rinse the rawer and syphon in the sink with plenty of warm water. Use gloves or a suitable brush to prevent contact of residues in the drawer with your skin.
- Firmly fit the syphon and the drawer back after cleaning.
Cleaning the Loading Door and the Drum
For products with a drum cleaning programme, please see the Operating the product section.

Foreign metal substances will cause rust stains in the drum. Clean the stains on the drum surface by using cleaning agents for stainless steel. Never use steel wool or wire wool. These will damage the painted, chrome-coated coated and plastic surfaces. We recommend that you wipe the door gasket with a dry and clean cloth at the end of the programme. This will remove residues on the door gasket in your product and prevent the formation of malodours.
Cleaning the Body and Control Panel
Wipe the body of the product with soapy water or non-corrosive mild gel detergents as necessary, and dry with a soft cloth. Use only a soft and damp cloth to clean the control panel. Do not use cleaning products that contain bleach.h
Cleaning the Water Intake Filters

- Close the taps. Remove the nuts of the water intake hoses to access the filters on the water intake valves and clean them with an appropriate brush. If the filters are too dirty, remove them from their placeswitha pliers and clean them in this way.
- Take out the filters on the flat ends of the water intake hoses together with the gaskets and clean thoroughly under running water.
- Replace the gaskets and filters carefully and tighten their nuts by hand.
Draining Remaining Water and Cleaning the Pump Filter
The filter system in your product prevents solid items such as buttons, coins and fabric fibres from clogging the pump impeller during the draining of washing water.
To clean the dirty filter and drain the water
- Unplug the product to cut off the supply power.
- Open the filter cover.
- Follow the procedures below in order to drain water.
- Place a large container at the end of the hose to collect the water from the filter.
- Keep a cloth ready to clean the water that may spill.
- Completely turnofff nd remove the pump filter when the water in the product leaks out.
- Clean any residues inside the filter as well as fibres, if any, around the pump impeller region.
- Replace the filter.
- If the filter cap is composed of two pieces, close the filter cap by pressing on the tab. If it is one piece, seat the tabs in the lower part into their places first, and then press the upper part to close.

Troubleshooting
- Some water has remained in the product due to the quality control processes in the production.
- This is not a failure; water is not harmful to the product. The product does not take water in.
- The product is standing unbalanced. Adjust the stands to balance the product.
- A hard substance has entered the pump filter. Clean the pump filter.
- Laundry quantity in the product is too little. Add more laundry to the product.
- The product is leaning on a rigid item. Make sure that the product is not leaning on anything.
- If there is no power, the loading door of the product will not open.
- To open the loading door, open the pump filter cap and pull down the emergency handle positioned at the rear side of the said cap.
Warranty
The standard guarantee starts from the date of original purchase of the product and lasts for a period of twelve (12) months unless Beko plc (the “Manufacturer”) agrees to extend the guarantee for the product in writing.
If you have any questions about the guarantee Beko BM5D510745UW 7Kg Capacity Washer Dryer on your product (including how long it is valid), please contact your retailer or our Customer Service Team on 0333 207 9710 (UK and Northern Ireland) or 01 862 3411 (Republic of Ireland) This guarantee does not in any way diminish or affect your statutory rights in connection with the product. This guarantee is in addition to your statutory rights as a consumer.
If you have any questions about these rights, please contact the retailer from which you purchased the product. In certain circumstances, your statutory rights may offer additional or higher levels of protection than those offered under the terms of this guarantee.
What is covered by this guarantee?
- The costs of a Beko plc Authorised Service Beko BM5D510745UW 7Kg Capacity Washer Dryer Representative or Approved Engineer (together the “Service Representatives”) to repair.
What is not covered?
- Transit and delivery damage.
- Cabinet or appearance parts, including but not limited to control knobs, flaps and handles.
- Accessories and/or consumable items, including but not limited to ice trays, scrapers, cutlery baskets, filters and light bulbs.
- Repairs necessary as a direct or indirect result of:
- Time taken off work.
- Damaged food, clothing or other items.
- Meals taken at restaurants or from takeaways.
- General compensation for inconvenience.
Does Beko offer replacements?
This is a repair-only guarantee. On occasion, the Manufacturer may, at its sole discretion, replace your product with a new product instead of repairing it. Subject to agreement, the Manufacturer will cover the costs and arrange for the delivery of the new product and for the return of the old product. Any costs related to disconnecting the faulty product and installing the replacement product will not be borne by the Manufacturer unless previously agreed to in writing. The original guarantee will continue to apply to the replacement product; the new product will not come with a new guarantee.
When will the repair take place?
Our Service Representatives work Monday to Friday, 9.00 am to 5.00 pm. For missed appointments. Payment of these costs is due immediately upon the Service Representative providing you with an invoice. The Manufacturer reserves the right to terminate the guarantee if you fail to pay the costs for the service call promptly.
How to Obtain Service for Your Appliance
Please keep your purchase receipt or other proof Beko BM5D510745UW 7Kg Capacity Washer Dryer of purchase details in a safe place; you will need to have this documentation available should the product require attention under guarantee.
Contact us through our website
Send us a secure message through our online contact us form. Please visit our website, click Contact Us and choose a product support topic from the list of options. Complete the required details and click send message.
Product registrations
For UK registrations, please visit beko.co.uk/register and for the Republic of Ireland, visit beko.ie/register.r
Customer Service
- Website: www.beko.com.
- Tel: 0333 207 9710
FAQs
Q: What is the Beko BM5D510745UW washer dryer designed for?
The BM5D510745UW is a washer-dryer with a 7 kg capacity that can wash and dry regular clothes all at once. It saves time and space while producing effective cleaning and drying outcomes by combining several wash cycles with drying routines.
Q: Can I wash and dry a full 7kg load?
No. The dryer function can only handle up to 4 kilograms; however, the washing function can handle up to 7 kg. Mechanical strain or poor drying efficiency may result from overloading the dryer.
Q: Can I delay the start of a cycle?
Yes, you can plan a wash up to 24 hours in advance using the washer-dryer’s Delay Start feature. Before hitting Start/Pause, choose the delay time.
Q: Can I wash delicate fabrics in this machine?
Indeed, delicate products are the focus of the Wool/Delicate program. For sensitive fabrics, use a mild spin cycle and steer clear of high drying heat.
Q: How often should I clean the drum?
Once a month, do an empty hot wash (90°C) with a drum cleaning to get rid of bacteria, odours, and detergent residue.
Q: What warranty does the Beko BM5D510745UW come with?
Beko usually offers a two-year basic warranty that covers manufacturing problems. Extended warranties may be available in certain areas following registration.
Q: Can I pause a cycle mid-way?
Indeed. To stop a cycle, use the Start/Pause button.
Q: Can I install this machine on carpeted flooring?
Yes, but make sure the machine is stable and level. Steer clear of putting it on soft, thick carpet, as this could affect vibration stability and ventilation.