
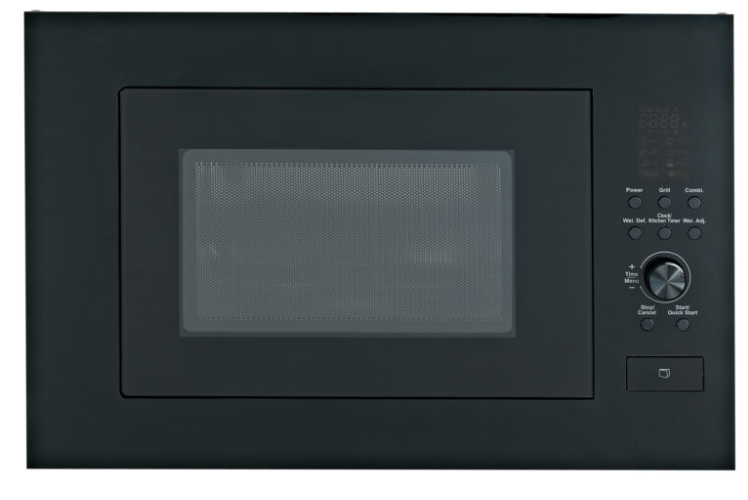
Bellini BMWM28 Built-In Black Microwave
Safety Instructions
This manual explains the proper installation and use of your appliance. Please read it carefully before using, even if you are familiar with the product. The ma
- Children should be supervised to ensure that they do not play with the appliance.
- When heating food in plastic or paper containers, keep an eye on the oven due to the possibility of ignition. Only use utensils that are suitable for use in microwave ovens.
- Microwave heating of beverages can result in delayed eruptive boiling; therefore, care must be taken when handling the container.
- The contents of feeding bottles and baby food jars shall be stirred or shaken, and the temperature checked before consumption to avoid burns.
- Eggs in their shell and whole hard-boiled eggs should not be heated in microwave ovens since they may explode, even after microwave heating has ended.
- Electric Shock Hazard: Touching some of the internal components can cause serious personal injury or death. Do not disassemble this appliance.
Electrical Safety
Improper use of the grounding can result in electric shock.
- If it is necessary to use an extension cord, use only a 3-wire extension cord.
- A short power-supply cord is provided to reduce the risks resulting from becoming entangled in or tripping over a longer cord. The extension cord must be a grounding-type 3-wire cord. 3.
Materials Used in the Microwave
| Utensils | Remarks | ||
| Browning dish | Follow the manufacturer’s instructions. The bottom of the browning dish must be at least 3/16 inch (5mm) above the turntable. Incorrect usage may cause the turntable to break. | ||
| Dinnerware | Microwave-safe only. Follow the manufacturer’s instructions. Do not use cracked or chipped dishes. | ||
| Glass jars | Always remove the lid. Use only to heat food until just warm. Most glass jars are not heat-resistant and may break. | ||
| Glassware | Heat-resistant oven glassware only. Make sure there is no metallic trim. Do not use cracked or chipped dishes. | ||
| Oven cooking bags | Follow the manufacturer’s instructions. Do not close with a metal tie. Make slits to allow steam to escape. | ||
| Paper plates and cups | Use for short–term cooking/warming only. Do not leave the oven unattended while cooking. | ||
| Paper towels | Use to cover food for reheating and absorbing fat. Use with supervision for short-term cooking only. | ||
| Parchment paper | Use as a cover to prevent splattering or a wrap for steaming. | ||
| Plastic | Microwave-safe only. Follow the manufacturer’s instructions. Should be labeled “Microwave Safe”. Some plastic containers soften as the food inside gets hot. “Boiling bags” and tightly closed plastic bags should be slit, pierced, or vented as directed by the package. | ||
| Plastic wrap | Microwave-safe only. Use to cover food during cooking to retain moisture. Do not allow plastic wrap to touch food. | ||
| Thermometers | Microwave-safe only (meat and candy thermometers). | ||
| Wax paper | Use as a cover to prevent splattering and retain moisture. | ||
Materials to be Avoided in a Microwave Oven
| Aluminum tray | May cause arcing. Transfer food into a microwave-safe dish. |
| Food carton with a metal handle | May cause arcing. Transfer food into a microwave-safe dish. |
| Metal or metal-trimmed utensils | Metal shields the food from microwave energy. Metal trim may cause arcing. |
| Metal twist ties | It may cause arcing and could cause a fire in the oven. |
| Paper bags | May cause a fire in the oven. |
| Plastic foam | Plastic foam may melt or contaminate the liquid inside when exposed to high temperatures. |
Turntable Installation
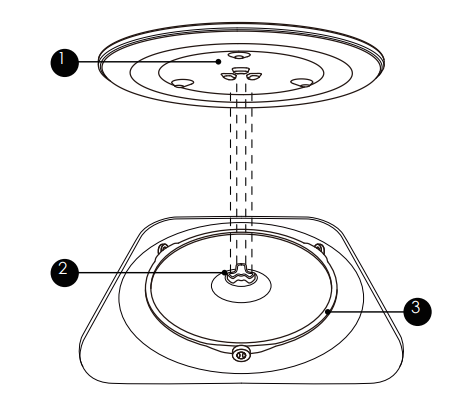
Cleaning the cooking compartment and putting the turntable in place. For new installations, make sure all packaging and shipping tape has been removed from the turntable shaft. Before using the appliance to prepare food for the first time, you will need to put the turntable in place correctly. You must clean the cooking compartment accessories, which will dry out when used in the microwave oven and may split or crack.
How to put the turntable in place: 1. Place the turntable in the assembly ③ into the recess in the cooking compartment. 2. Place the glass tra ① on the turntable ring assembly ③. Fit the raised, curved lines in the center of the glass tray bottom between the three spokes of the shaft. Make sure that the glass tray ① engages in the turntable shaft ② in the centre of the cooking compartment floor. The rollers on the ③ should fit inside the turntable bottom ridge.
- Never use the appliance without the turntable. Make sure that it is properly engaged.
- The turntable can turn clockwise or anti-clockwise.
- Never place the glass tray upside down. The glass tray should never be restricted.
- Both the glass tray and the turntable ring assembly must always be used during cooking.
- All food and containers of food are always placed on the glass top for cooking.
- Never restrict the movement of the turntable.
- If the glass tray or turntable ring assembly cracks or breaks, contact your nearest authorized service center.
Connection
- This appliance is only intended for domestic use.
- This oven is intended for built-in use only.
- It is not intended for counter-top use or for use inside a cupboard.
- Please observe the special installation instructions.
- The mains voltage must correspond to the voltage specified on the rating plate.
- Adapters, multi-way strip,,s and extension leads must not be used.
- Overloading can result in a risk of fire.
- The socket must be installed, and the connecting cable must only be replaced by a qualified electrician. If the plug is no longer accessible following installation, an all-pole disconnecting device must be present on the installation side with a contact gap of at least 3mm.
Installation
If the plug is no longer accessible following installation, an all-pole isolating switch must be present on the installation side with a contact gap of at least 3mm. The fitted cabinet must not have a back wall behind the appliance. Minimum installation height: 85cm. Do not cover ventilation slots and suction holes.
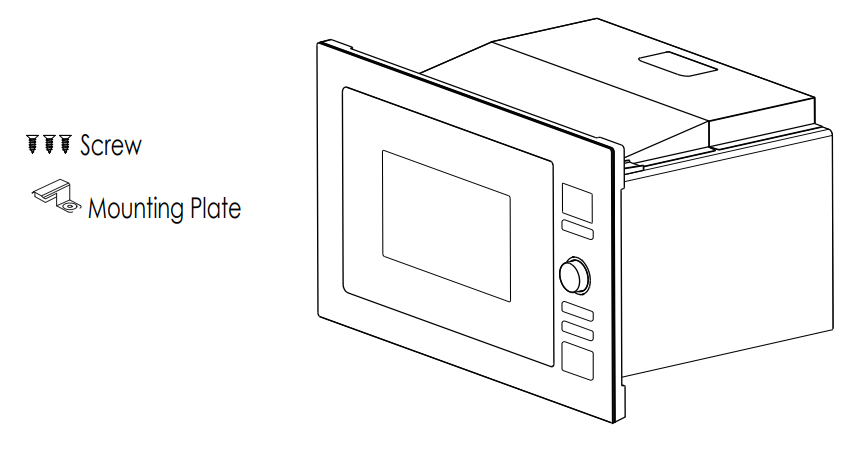
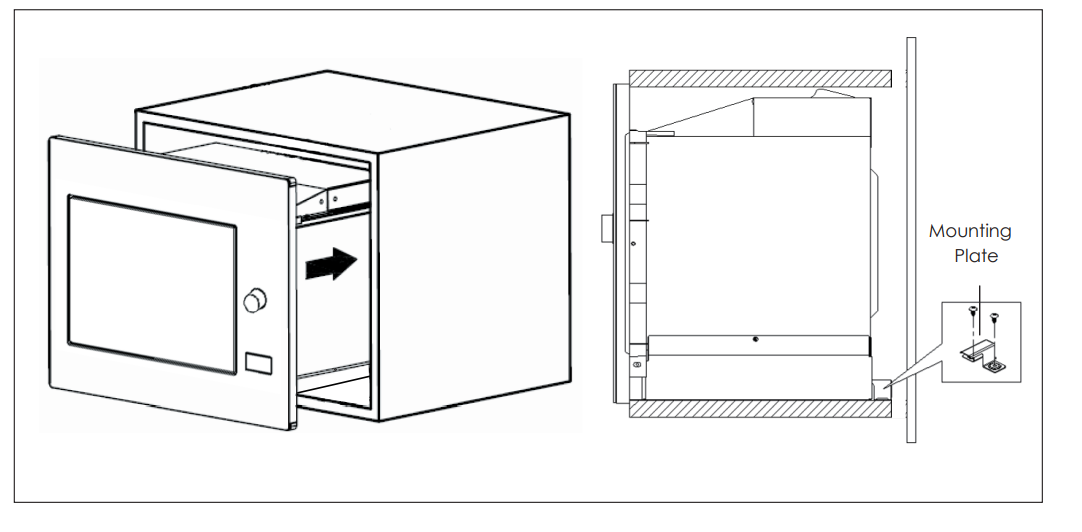
Built-in Furniture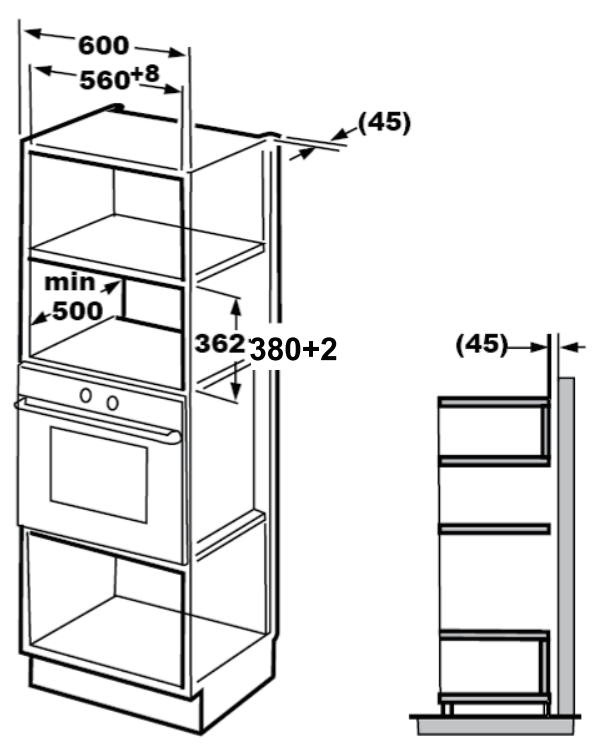
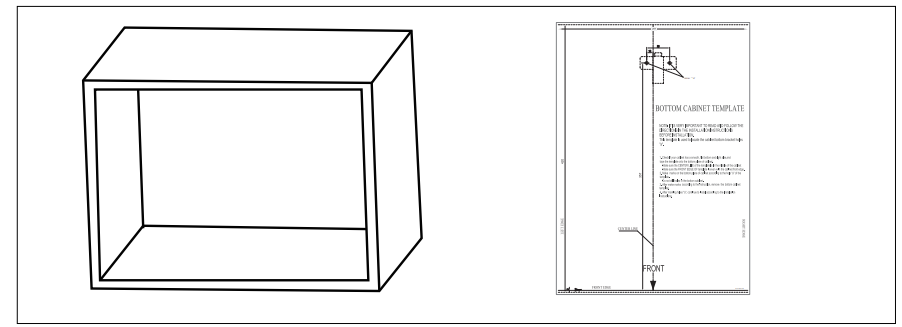
Cabinet
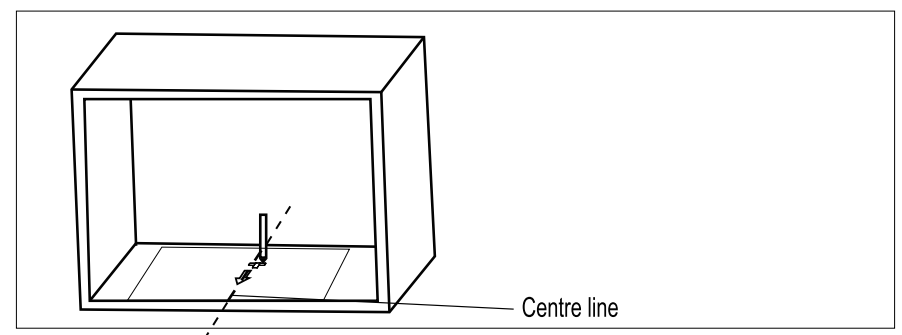
- Read the instructions on the BOTTOM CABINET TEMPLATE. Put the template on the bottom plane of the cabinet.
- Make the marks on the bottom plane of the cabinet according to the marks”a”| the template
- Remove the bottom cabinet template and fix the mounting plate with the screw.
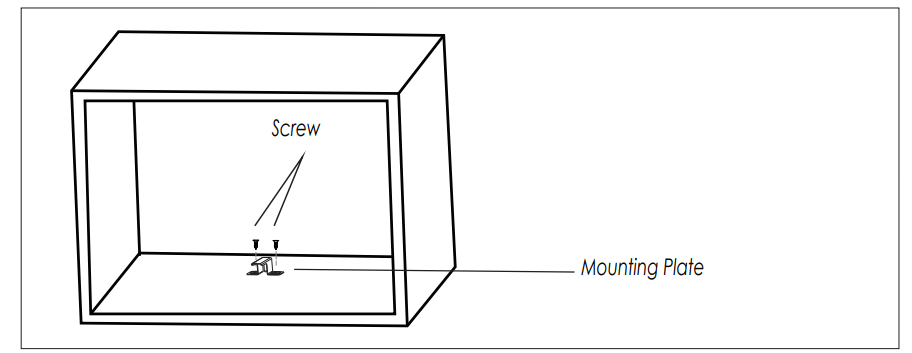
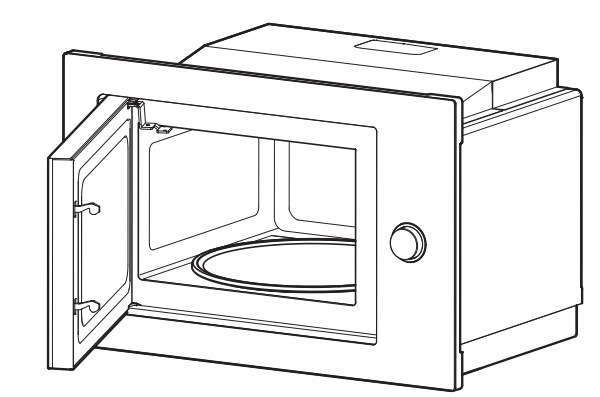
Install the Oven
- Install the oven in the cabin
- Make sure the back of the oven is locked by the mounting plate
- Do not trap or kink the power cord
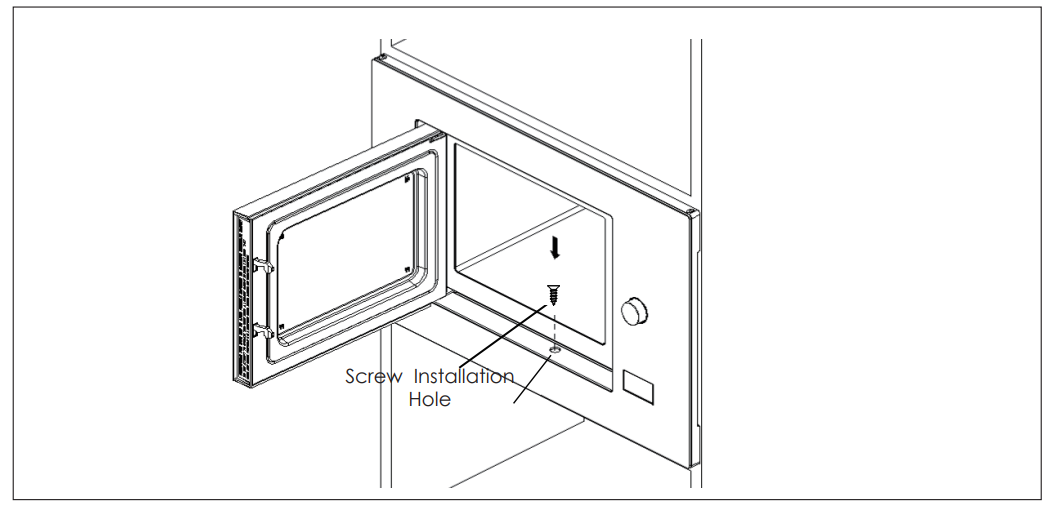
- Open the door, fix the oven to the cabinet with the Screw at the installation hole.
Control Panel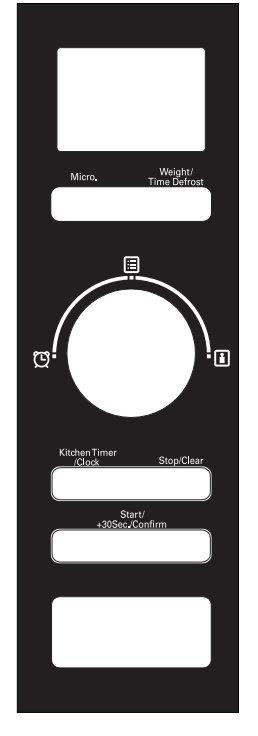
Operation Instructions
Clock Setting
When the microwave oven is electrified, the LED will display “0:00”, buzzer will ring once.
- Press “Kitchen Timer/Clock” twice to select the clock function; the hour figures will flash.
- Turn ” ” to adjust the hour; the input time should be within 0–23.
- Press “Kitchen Timer/Clockk, the minute figures will flash.
- Turn ” ” to adjust the minute; the input time should be within 0–59.
- Press “Kitchen Timer/Clock to finish clock setting. “;” will flash, and the time will light.
Microwave Cooking
Press ” Micr “, the LED will display “P10 o 0 “.Press “Micro. ” repeatedly or turn ” “to choose the power you want, and “P100”, “P80”, “P50”, “P30”, or “P10″ will display for each added press. Then press” Start/+30Sec./Confirm to confirm, and turn ” ” to set cooking time from 0:05 to 95:00. Press ” Start/+30Sec./Confirm ” again to start cooking.
- Press Micro. ” Once, the screen displays “P100
- Press ” Micro” once again or turn on” power.
- Press” to confirm
- Turn ” to adjust the cooking time until the oven
- Press ” ” to start cooking e P80″. s “20:00”.
Kitchen Timer
- Turn ” Pres P Kitc hen Timer/Cloc ” k once, LED will display 00:00. Turn” to enter the correct r. (The
- The minimum cooking time is 95 minutes.)
- Press ” Start/+30Se c…/Confirm ” to confirm the setting.
Quick Start
- In waiting state, Press ” [ and 30 seconds directly.
- In waiting state, turn ” ” left to set the cook with 1 % microwave power, and 90 minutes, and then press” Start/+30Sec./Confirm” to start cooking.
Frost By Weight
- Press “
- Turn “to select the weight of food from 100
- Press
By Time
- Press ” Weight/Time Defrost ” twice, and the oven will display DEF DEF
- Turn ” ” to select the def. The MAX time is 95 minutes.
- Press ” “to start will not be changed. d
Multi-Section Cooking
(3)Press” |Start/+30Sec./Confirm” to increase the cook time by 30 seconds each time, except for weight defrost. Example: If you want to defrost food for 5 minutes and then cook with 80% microwave
- Press ” Press ” Weight/Time Defrost.
- Turn ” ” to select the defrost time till “5:0 y.
- Press ” once, the screen d Micr o..
- Press ” to conf Start/+30Sec./Confirm P80″.
- Turn ” ” to adjust the cooking time till the oven is “7:00”.
- Press” onc” ” Micro % microwave power.
- Press ” ” to start cooking, and the buzzer will sound once for Start/+30Sec./Confirm e first section, defrosting time counts down; buzzer will sound once again entering the second cooking. When cooking finishes, the buzzer sounds five times.
- Lock quitting: In locked state, press ” ” for 3 seconds, there will be a lon Stop/Clear g “beep denoting that the lock is released.
Inquiring Function
- In a state microwave cooking, press “Micro. “for 3 seconds.
- After 3 seconds, the oven will turn back to the former state.
- In cooking state, press 2) I Kitc hen Timer/Clock ” to inquire the time, and the time will display for 3 seconds.
Auto Menu
- Turn ” Y” right to choose the menu, and “A-1” to “A-8” will display, which means pizza, meat, vegetable, pasta, potato, fish, beverage, and popcorn.
- Turn ” ” to choose the default weight in the menu
- Press ” ” to start cooking
If you want to use “Auto Menu” to cook fish for 350g.
- Turn ” ” clockwise till “A-6” display.
- Press “
- Turn ” “to select the weight of fish till “350.”
- Press “
| Menu | Weight | Display |
| A-1 Pizza | 200 g | 200 |
| 400 g | 400 | |
| A-2 Meat | 250 g | 250 |
| 350 g | 350 | |
| 450 g | 450 | |
| A-3 Vegetable | 200 g | 200 |
| 300 g | 300 | |
| 400 g | 400 | |
| A-4 Pasta | 50g(with 450 cold water) | 50 |
| 100g(with 800 cold water) | 100 | |
| A-5 Potato | 200 g | 200 |
| 400 g | 400 | |
| 600 g | 600 | |
| A-6 Fish | 250 g | 250 |
| 350 g | 350 | |
| 450 g | 450 | |
| A-7 Beverage | 1cup(about 120ml) | 1 |
| 2cups(about 240ml) | 2 | |
| 3cups(about 360ml) | 3 | |
| A-8 Popcorn | 50g | 50 |
| 85g | 85 | |
| 100g | 100 |
Troubleshooting
| Normal | |||
| The microwave oven is interfering with TV reception. | It is similar to the interference of small electrical appliances, like a mixer, a vacuum cleaner, and an electric fan. It is normal. | ||
| Dim oven light | In low-power microwave cooking, the oven light may become dim. It is normal. | ||
| Steam accumulating on the door, hot air out of the vents | In cooking, steam may come out of food. Most will get out from the vents. But some may accumulate in a cool place like an oven door. It is normal. | ||
| The oven started accidentally with no food in it. | It is forbidden to run the unit without any food inside. It is very dangerous. | ||
| Trouble | Possible Cause | Remedy | |
| The oven cannot be started. | (1) The power cord is plugged in tightly. | Unplug. Then plug again after 10 seconds. | |
| (2) The fuse-blown circuit breaker works. | Replace the fuse or reset the circuit breaker (repaired by professional personnel of our company) | ||
| (3) Trouble with o et. | Test the outlet with other electrical appliances. | ||
| The oven does not heat. | (4) The door is not closed well. | Close the door well. | |
Disposal
- To dispose of the packaging and the appliance, please go to a recycling centre. For safety, cut off the appliance power supply cable and disable the door closing device.
- By ensuring this product is disposed of correctly, you will help prevent potential negative consequences for the environment and human health, which could otherwise be caused by inappropriate waste handling of this product.
- For more detailed information about the recycling of this product, please contact your local council office and your household waste disposal service.
Warranty
In this warranty
- Australian Consumer Law means the law as set out in Schedule 2 of the Competition and
Consumer Act 2010; - Company means GSM Retail Australia Pty Ltd ABN 53 007 682 475 of 142-144 Fullarton Road, Rose Pa, 5067. Telephone 1300 373 199.
- Consumer Guarantees means the guarantees under the Australian Consumer Law;
- Subject to the other clauses of this warranty, the Company warrants to the Consumer that the Bellini product will be free of manufacturing defects and will perform to the Company’s specifications.
- This warranty commences on the date of purchase of the Bellini product by the Consumer and continues for the benefit only of the Consumer until the expiry of three (3) years (Warranty Period).
- A replacement Bellini product may differ from the original product purchased by the Consumer.
This warranty will not apply to any Bellini product
- Installed by any person other than a qualified tradesperson; or
- Subjected to misuse, neglect, negligence, or accidental damage; or
- Operated in any way contrary to any operating or maintenance instructions; or
- Improperly handled, installed, or maintained; or
- Altered or modified before or after installation; or
- You must provide proof of your purchase of the Bellini product and the date of purchase, too
The benefit of this warranty.
Retain & File With Your Receipt
Your Purchase Receipt/Invoice is proof of the date of purchase. GSM Retail Australia Pty Ltd reserves the right to discontinue items, modify designs, and change specifications without incurring obligation.
- Purchased from:
- Co. Name:
- Address:
- Date of Purchase:
- Serial number:
Customer Support
- Website: www.kleenmaid.com.au
- Tel: (02) 9310 1207
FAQs
Q: What are the basic power and electrical specifications?
With a rated input power of 1450 W (microwave mode), this microwave runs at 240 V and 50 Hz.
Q: Can I defrost food with this microwave?
Yes, you can thaw food according to weight or time, then cook it for a while if you’d like.
Q: Is cleaning and maintenance easy for this unit?
Indeed. Regular cleaning is also necessary for the door frame, seal, and adjacent components. To preserve the glass door, stay away from metal scrapers and aggressive cleansers.
Q: For what types of households or kitchens is BMWM28 most suitable?
It is ideal for homes looking for a straightforward, effective microwave for regular cooking tasks, including defrosting, reheating, and meal preparation without the mess of countertop equipment.
Q: What is the internal capacity of the BMW28?
The microwave’s 28-liter capacity is perfect for everyday cooking or reheating larger meals because it can accommodate large plates, bowls, and family-sized quantities.