
![]()
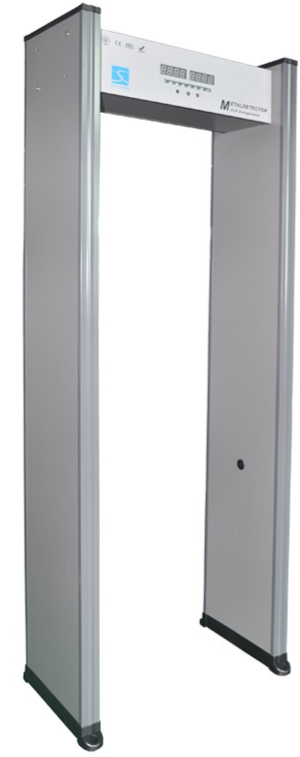
Cablematic XLD Walk Through Metal Detector
Operation Instructions
Before the operation.
- It’s available for both indoor and outdoor use. Please use the canopy to protect it from the rain.
- Choose a smooth and stable installation place, don’t touch the detector during security checking to avoid a false alarm.
- Make sure there’s no big metal object or strong magnetic field around the detector within 2 meters.
- Keep the detector far from the power line and communication cable.
- The detector probe must not be installed in high temperatures or circumstances.
- Do not disassemble the control units except by a professional technician.
- Please wait one minute for its self-diagnosis when the machine starts.
- We advise having a power cord on the ceiling, easier to connect to the detector.
- Follow the user manual and make sure the right wire Cablematic XLD Walk Through Metal Detector connection is made when the machine starts.
Maintainace
- Can’t Start The Machine
1) Check whether the power sockets are properly installed. - Check whether the power switch is on.
- Check if the fuse blew out (Only for XLD-A model).
2. Can’t Account for Passengers
1) Don’t work in the strong sunlight, as it uses an infrared sensor.
2) Check the left and right infrared sensor probes for parallel alignment.
3. Alarm Without Metal 1) First, exclude all the metal ourselves and go through the detector. Find out which zones are alarmed and low down the zone sensitivity accordingly until it is no longer alarmed.
2) Check whether have interference nearby, such as a big movable machine, high-power equipment.
3) Check whether there are similar products nearby; if so, change the frequency(Original frequency shown on the package carton box).
4) Make sure no big wind and smooth around the installation place. - With Metal But No Alarm 1, follow the user manual and increase the zone sensitivity and total sensitivity. 2) The factory default setting can detect a coin diameter of 25mm. Make sure the metal size is bigger; if not, adjust the sensitivity accordingly.
- Single Zone No Alarm Make higher sensitivity, then test aagainCh ange the corresponding zone signal collection card if the problem is the same in the highest sensitivity.
- Unnormal Communications
1) Follow the user manual and confirm whether the problem is with the left sensor or the right sensor.
2)When confirmed which door frame has communication problems, pull out its probe and reinsert for several times, then test again. If the problem is the Cablematic XLD Walk Through Metal Detector same, then replace the corresponding signal collection card, main board, and wire step by step until you confirm the problem. - Whole Machine Non-inductivity
1) Check whether the communication is ok, follow the above 6 steps.
2) If communication is ok, replace the mainboard or signal board step by step. - LCD Screen Problems, LED Bar Graph Not Lighting, Buttons Not Working. 1) Replace the parts from another Walk Through metal detector to find the failure parts
Interference
- The interference during the walkthrough metal detector working is mainly as follows:
Electronic Jamming
- Working frequency for the Walk Through metal detector is 4KHz-8KHz.The work environment should exclude the electronic products that have almost the same working frequency, , sc h asas a generator, TV, etc.
Moving metal objects: Interference.
- The Walk Through metal detector will be interfered with by the moving metal objects, around the work environment should not include turnstile and from vehicle etc. big moving metal objects.
Interference Between Products
- And Products.. During using 2 pieces or more Walk Through metal, avoid using the same frequency(the work frequency can be seen on the packing box); the minimum distance between two doors should be above 0.7m to avoid mutual interference for the Walk Through metal detectors.
Installation instructions
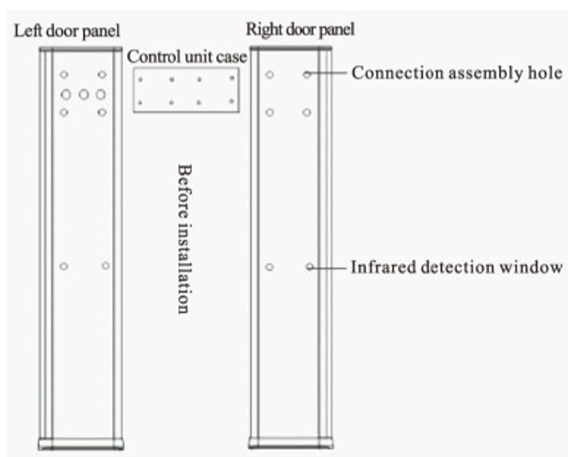
Accessories
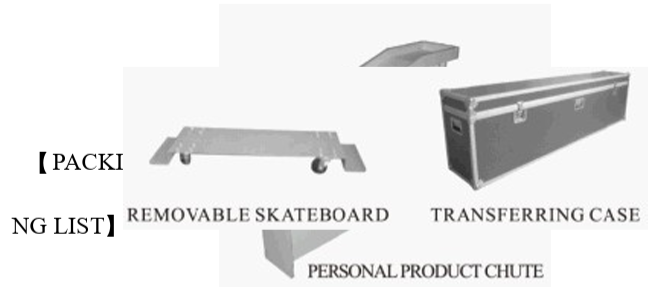
Thank you very much for buying our Walk Through metal detector. Please check and ensure the following parts are complete. If there is anything lost or damaged, please feel free to contact us.
Technical Parameters
Electric Current: AC85-264V/47.5-60Hz Power: <20W Workplace environment -20℃≈+50℃ Package: two cartons/unit Net Weight: 70kg Standard: GB15210-2003, CE Inner Dimension: 1990(H)X 700(W)X 500(D)mm External Dimension: 2230(H)X 835(W)X 580(D)mm (Size is with real products accurate, can be customized)
Specifications
The size, Measurement, and weight of the metal excluded the coin, key, jewelry, and belt buckle in case false alarm. For the places where need to prevent losing precious metal materials, such as industrial and mining enterprises, banks, private mansions, etc, and the places where need to prevent the carrying of dangerous goods, such as airports, prisons, customs, and exhibition halls, it’ll be your wise choice for installing the SUNLEADER walkthrough metal detector.
Warranty Card
- Please keep this card with reasonableness, and show it when maintaining it.
- This card will be invalid without the signature or stamp of the designated dealer.
- Please confirm whether the data filled in the three guarantees and acknowledgment of receipt is correct or not when purchasing it, and then hand it over to the dealer.
Customer Support
- Website: comercial@cablematic.com
- Ph: 2035146931
- Timings: 09:00 h to 18:00 h from Monday to Friday
FAQs
How does the XLD metal detector work?
It scans people from head to toe using numerous detecting zones with sophisticated electromagnetic fields to find metallic objects and determine their location.
Is professional installation required?
Not always. Trained personnel can install the XLD by following the user manual. It has a modular architecture that makes power connection, calibration, and assembly simple.
What is the typical setup time?
Depending on the environment and level of competence, most installs take 30 to 45 minutes.
What power supply is needed?
The machine usually comes with a normal power line and runs on AC 100–240V, 50/60Hz. For reliable operation, a steady power source is advised.
Can it be used outdoors?
The main purpose of the XLD is indoor use. Only covered or weather-protected spaces are suitable for outdoor use. Unless a waterproof model is indicated, exposure to dust or rain should be avoided.
How many detection zones does it have?
With its six, eighteen, or more detecting zones (depending on the model), the Cablematic XLD makes it possible to precisely locate metallic hazards on various body areas.