
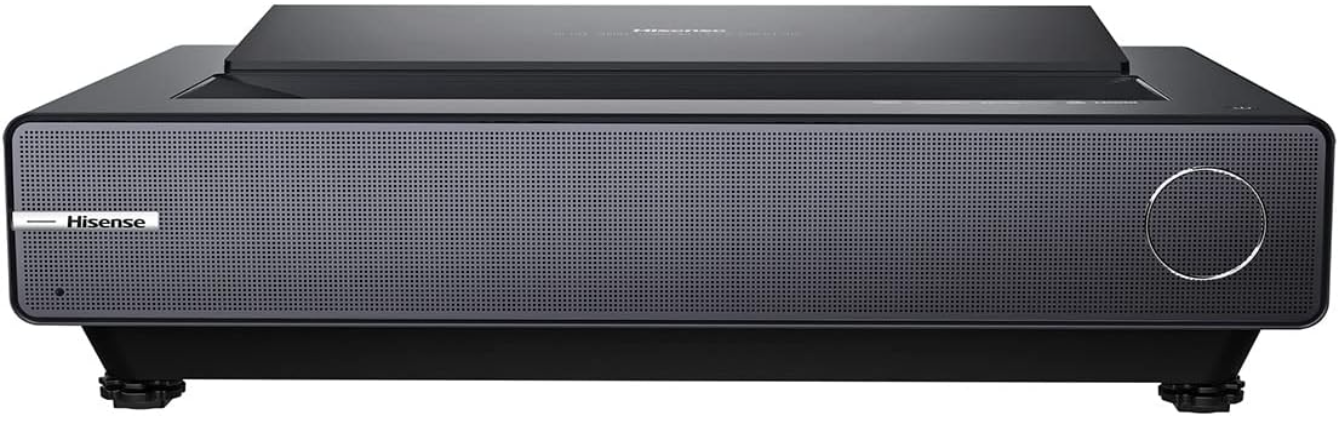
Hisense PX1HE Triple Laser Ultra Throw Projector
Safety Instructions
Always disconnect the power cord from the AC outlet before replacing parts or modules.
- To prevent electrical shock, use only a properly grounded 3-prong outlet or extension cord.
- Safety regulations require that after a repair, the set must be returned to its original condition.
- Do not supply a voltage higher than that specified for this product.
- This may damage the product and may cause a fire. High-humidity areas
- In an area where any water could enter or splash into the unit.
- High humidity and water could damage the product and cause a fire.
- Continuing to use the product may cause fire or electric shock.
- Do not pull out or insert the power cable from/to an outlet with wet hands.
- Do not damage or modify the power cable. It may cause fire or electric shock.
- Before starting the work, secure a sufficient working space.
- While the main power is on, do not touch any parts or circuits other than theones specified.
- Be sure to handle the circuit board by holding the large parts as the heat sink or transformer.
- Perform a safety check when servicing is completed.
- Verify that the peripherals of the points have not undergone any deterioration during servicing.
- Also, verify that the screws, parts, and cables removed for servicing purposes have all been returned to their proper locations in accordance with the original setup.
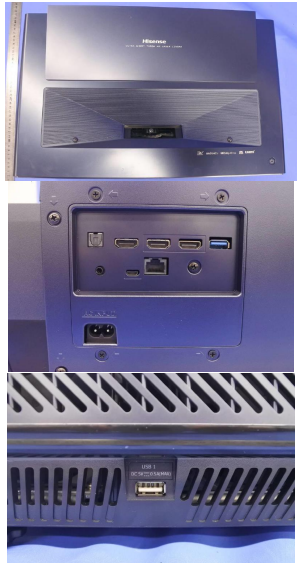
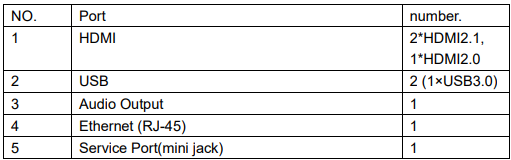
Unit and External Ports
List of circuit boards

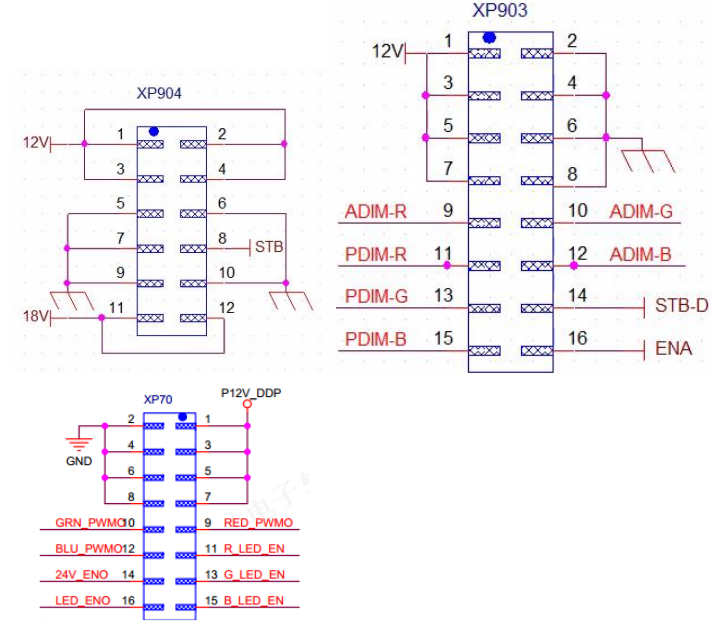
Power Board PIN List
- Pin 1, 3, 5, and 7 are the 12V power supply pins for the display board
- Pins 9, 10, and 12 are the R, G, and B analog dimming pins (current adjustment pins) that the display board outputs to the power supply board, and the maximum is 5V.
- Pins 11, 13, and 15 are the R, G, and B digital dimming pins that the display board outputs to the power supply board, and are square waves with a duty cycle.
Factory/Service OSD Menu and Adjustment
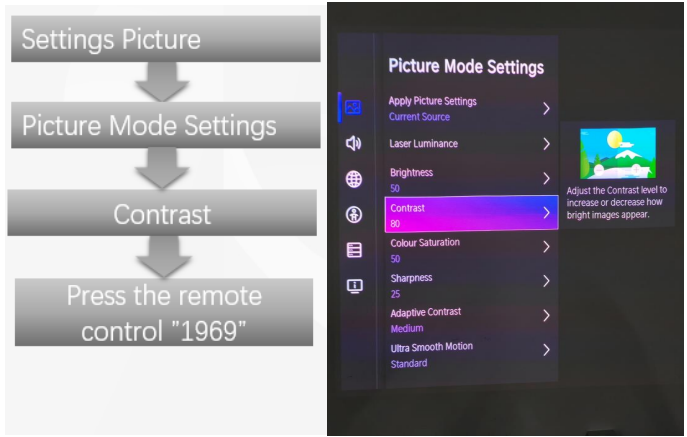
With the user’s RC
- Power Laser Cinema on
- Press the button on the RC, then call up the “Menu” option.
- Move and “ok “button on RC to select settings–picture-advanced settings-contrast
- In contrast, input figure 1->9->6->9 in sequence on RC.

- Call up an “M” on the left-top of Laser Cinema, then press the button again, the Factory menu appears then.
- DC power off and DC power on the Laser Cinema, which can exit Factory OSD.
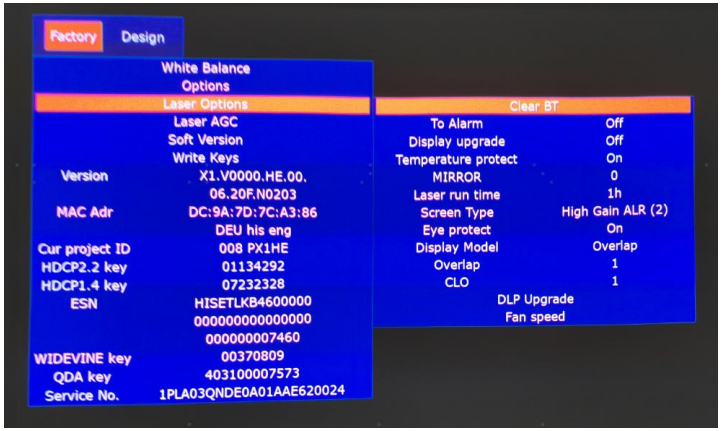
Factory OSD Menu
Factory OSD menu list: if you want to learn more about Laser Cinema, you’d better read it, but do not adjust the value, please. The Factory menu may have differences for diverse markets and customers.
Options

Laser Options
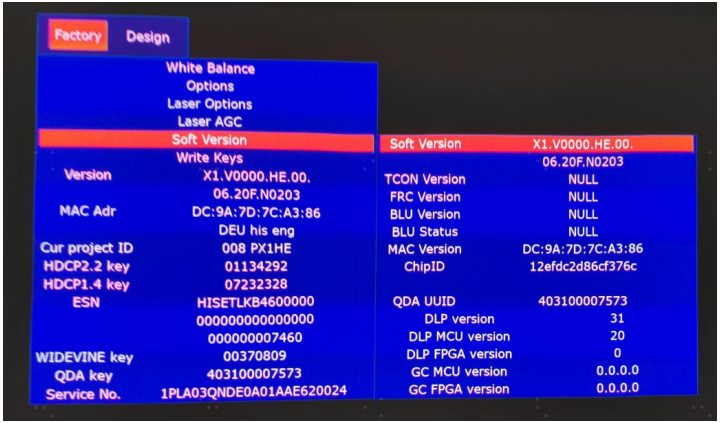
Soft Version
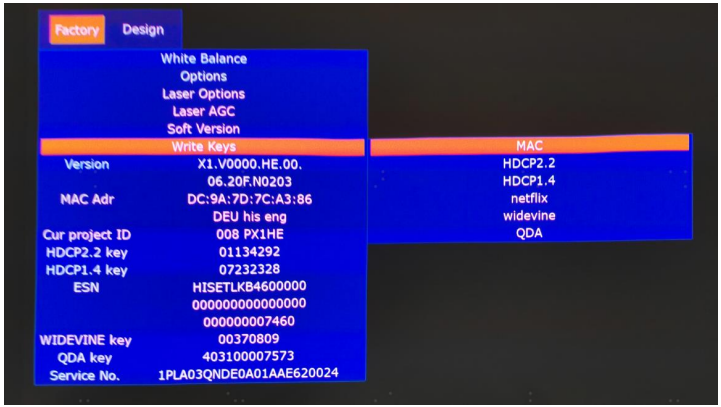
Write keys
Clean the EEPROM
- Select the item “Options”–“Clear all” in Factory mode
- Press the button to clear the EEPROM data
- Laser Cinema restarts automatically
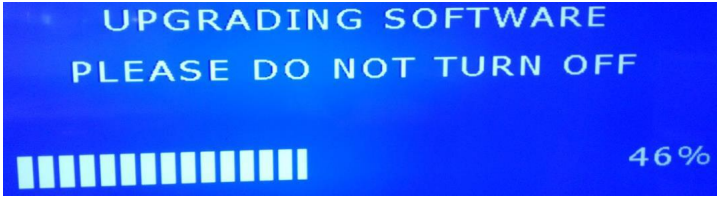
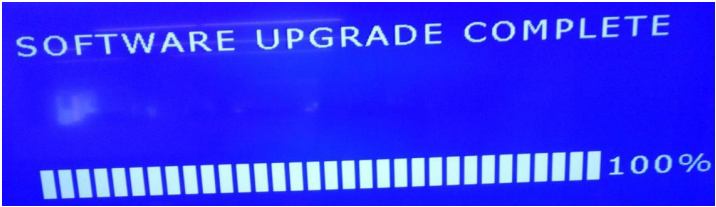
Software Upgrade Method
- Main software upgrade directly with USB
Laser Cinema in user mode
- The main software can be upgraded with a USB disk.
Laser Cinema in factory mode
- If Laser Cinema is in Factory mode, it only have difference in the chapter.
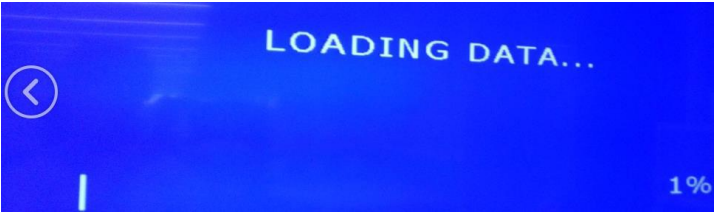
- Laser Cinema is in factory mode, only AC power off LASER CINEMA and insert the USB disk, next AC power on, LASER CINEMA can identify automatically to update, till call up “Loading data” interface, update process bar is 1%.
Display Board Light
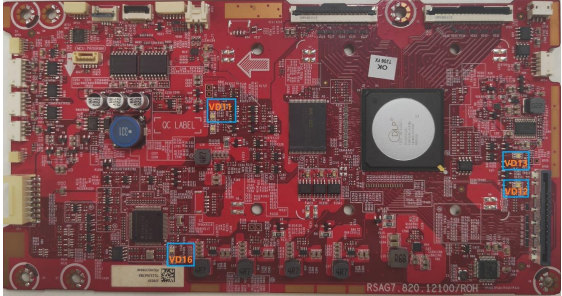
VD11(DLP power up)
- Normal: red LED is on
- Abnormal: If the red LED is off or the blue LED is on, it means the Display boaris failingre.
- VD12(V-by-one status LED)
- Normal: Red LED and blue LED are off.
- Abnormal: If the red LED and the blue LED is light on.
- VD16(MCU status LED)
- Normal: blue LED is flashing
- Abnormal: If the blue LED is always on or off, it means the Display board is failing. ing..
- VD13(DLPC6540 status LED)
- Normal: the blue LED iflashesor the red LED is always on.
- Abnormal: If the blue LED is always on or off, it means the Display board is failing.
Special Operating Procedure
- Function: When a person approaches, a prompt box will pop up (countdown 5S).
- Screen prompt: In order to protect your eyes, do not look into the lens.
- Turning off the eye protection function: Settings->system->console settings->Eye Protection
- Fault determination: If the Eye protection board fails, the eye protection function is not effective.
Power Indicator
- Function: When the Laser Cinema is turned on, the Power Indicator can be lit.
- When the Laser Cinema is in error, the Power Indicator flashes to report the error.
Automatic dust removal-users cannot close.
- Function: The machine will automatically trigger the automatic dust removal function every 500 hours of operation, and the fan of the whole machine will run at high speed for 3 minutes.
- Is it normal to watch the dust removal process→yes
- Does the subtitle disappear during the dust removal process? → not disappear, keeps prompting
- What happens when the dust removal ends → the subtitle prompt disappears directly after the dust removal ends
Temperature reminder
- When the ambient temperature reaches 36, the screen will activate overheat protection, and when the ambient temperature reaches 45, the machine willautomatically shut down.
- Screen prompt: When powered on again, it will prompt “The previous shutdown was due to the high temperature of the Laser Cinema, and it was automatically turned off for protection.”
- Fault determination: If there is a warning of overheating, first check if there are any obstructions around the machine, which may cause poor heat dissipation. If so, remove obstructions.
Cleaning and Maintenance
- Keep dry, avoid long periods of inactivity. When using the HDMI interface to connect or disconnect multimedia devices, be sure to do it after turning off the LASER CINEMA. Regular cleaning
- Host: Use an air blower to clean the dust, not touch or wipe with your hands. For oil stains and fingerprints, wipe carefully with a microfiber cleaning cloth to avoid damage to the optical coating.
- Screen: Clean the screen with a brush or microfiber cleaning cloth. If there are dirt, fingerprints, etc. on the screen, try wiping it with clean water using a dust-free cloth first; if that doesn’t work, gently wipe it with a dust-free cloth dipped in alcohol.
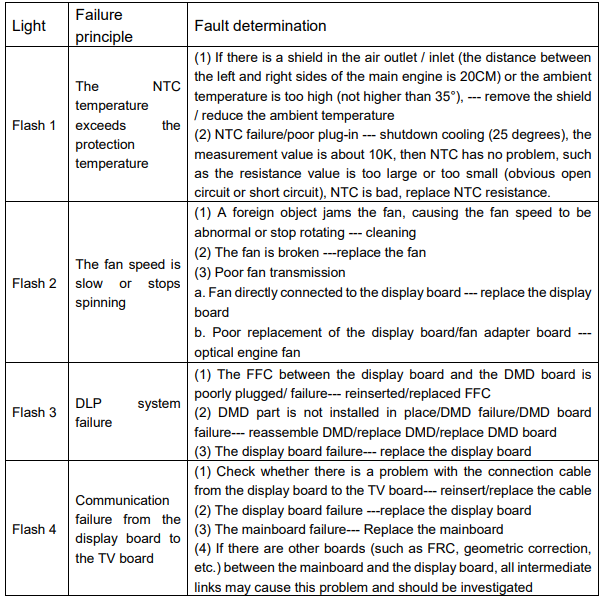
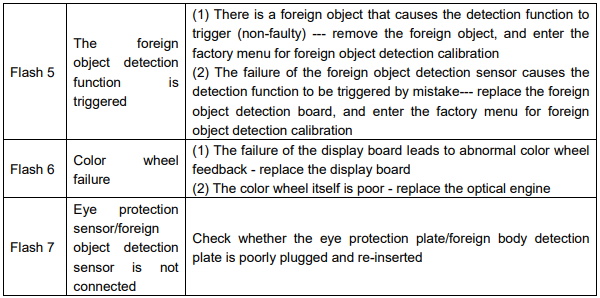
Troubleshooting
Warning indicator light
- Child entrapment and suffocation are not the only problems of the past. Junked or abandoned refrigerators are still dangerous – even if they are sitting “for just a few days”.
- If you are getting rid of your old refrigerator, please follow the instructions below to help prevent accidents.
- Remove doors. Leave shelves in place so children may not easily climb inside. Have refrigerant removed by a qualified service technician.
Disposal of the appliance
Packaging materials: Packaging materials. Hisense WMS017M6XBE Use & Care Refrigerator with the recycling symbol is recyclable. Dispose of the packaging in a suitable waste collection container to recycle it.
Before disposal of the appliance
- Pull out the main plug from the main socket.
- Cut off the power cord and discard the main plug.
Customer Service
- Website: https://global.hisense.com/
- Tel: 0191 387 0804
- Opening hours: Monday to Friday 9.00 am – 6.00 pm Saturday 9.00 am – 5.00 pm