
JANUS Pana40Plus 2D-3D Detector Controller

Installation
- Use the fixing kits provided with the detectors. See below ‘Mounting Diagram’ for different installations and mounting kits.
- On the CE detector is the fitted slide filter, carefully back in with the end cap.
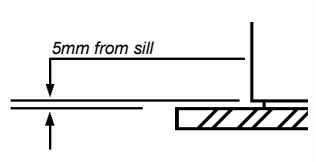
- Position the detectors on the doors approximately 5mm above the sill.
- Mark or spot through the 5 fixing holes.
- Remove the detectors from the door before drilling.
- Screw the detector to the door using the fixing kits provided.
2D Fixtures
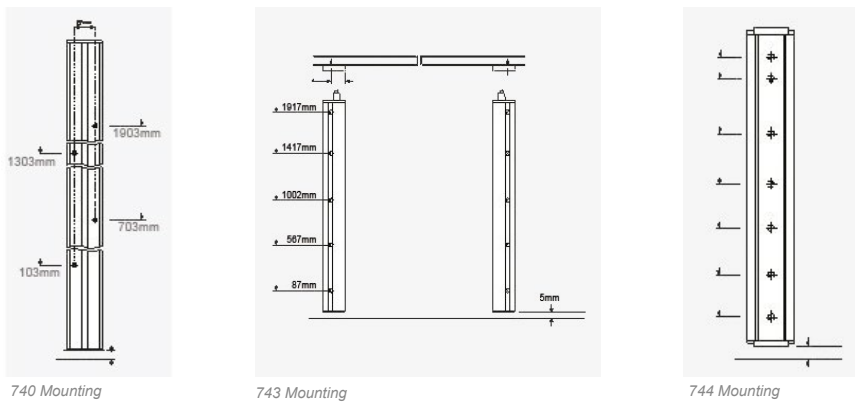
Detector Mounting Diagram for 740/770 Profiles
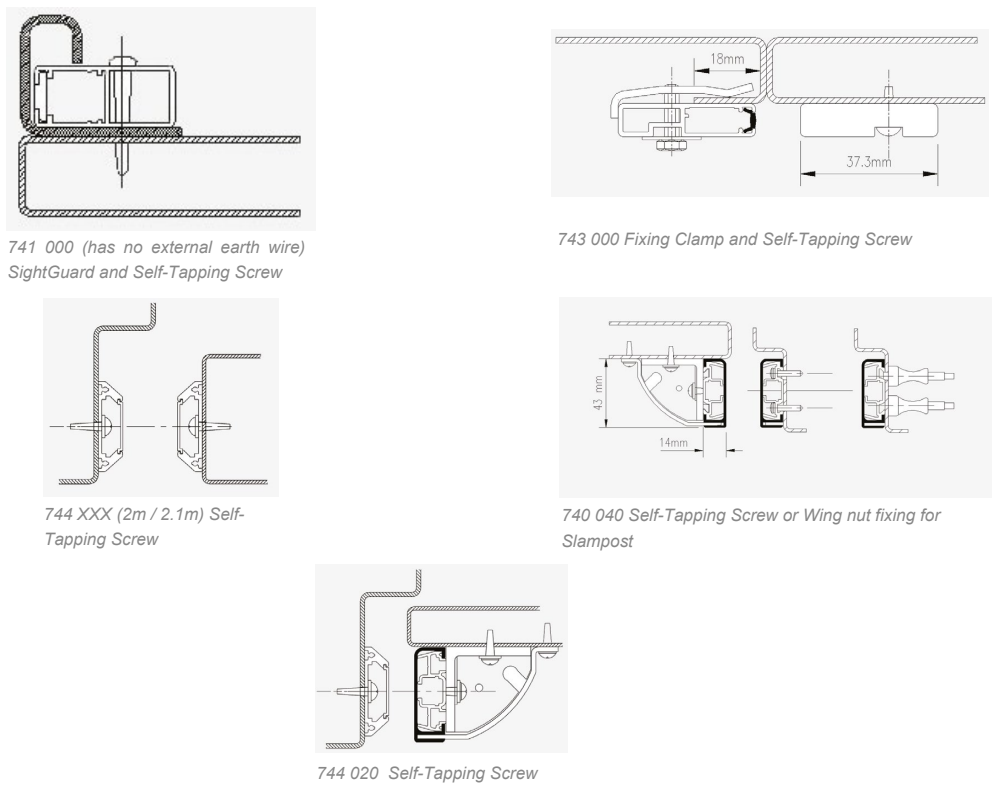
3D Fixtures
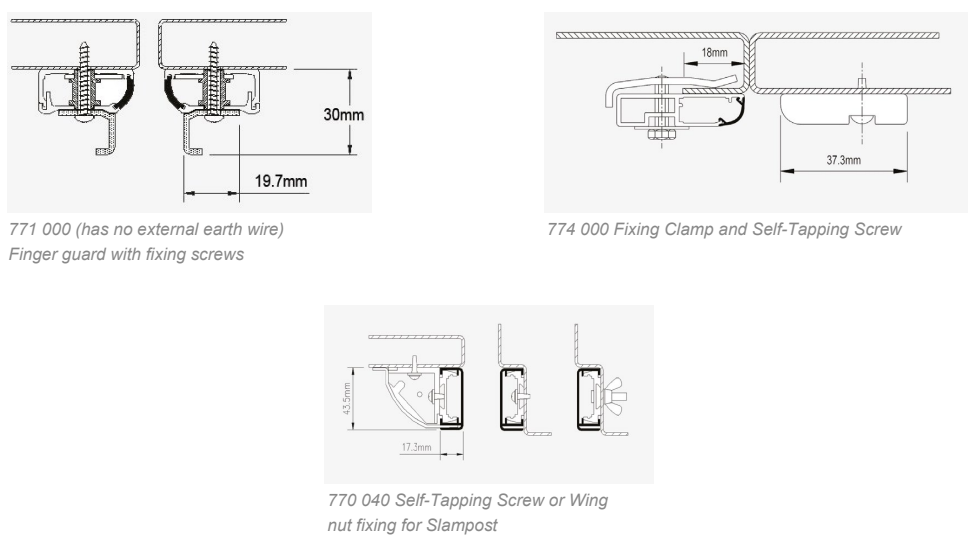
Detector Mounting Diagram for 740 / 770 profiles

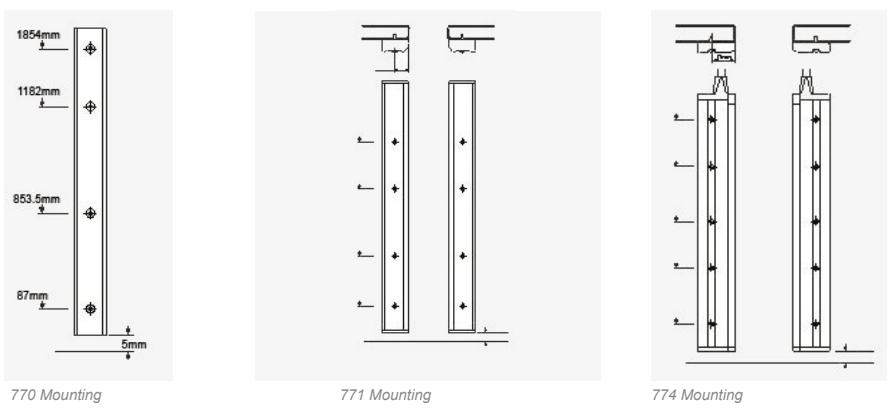
Detector Mounting Diagram for 741 / 743 / 771 / 774 profiles
The detectors should be screwed into place using 5 equidistant fixings as shown below:

Step-by-Step Guide
- Step 1: Using the fi: xing kit provided with the detectors, see ‘Mounting Diagrams’ for different installations and mounting kit options
- Step:2 Position the detectors on the doors approximately 5mm above car sill

- Step 3: Mark or spot through the 5 fixing holes
- Step 4: Remove the d: detectors from the door before drilling. Screw the detector to the door using the fixing kit provided
- Step 5: Attach cable: secure the ly with the P-clips and screws provided.

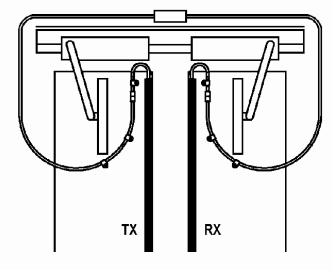
Static Kit Installation diagram for 2D Only
Installation Kit i 616 800-010 for installing a set of 9mm or 15mm profile detectors in a fixed position at either end of the lift car sill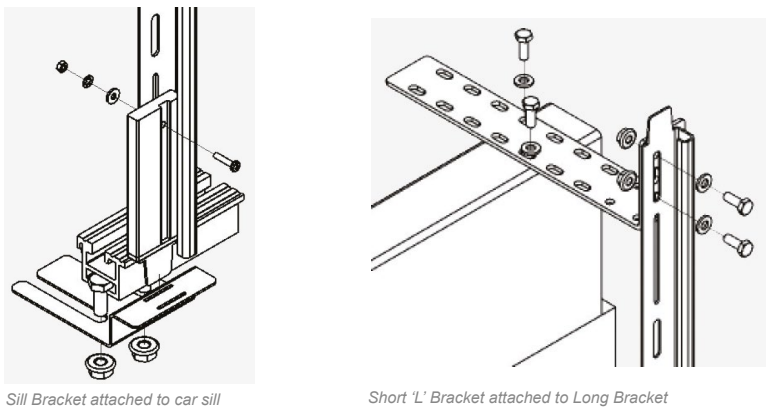
Long Bracket
This Long Bracket is effectively used to support the detector and increase its overall length so that it can be secured to the top of the elevator car. The detector is secured to the Long Bracket by using the M3.5 nuts, bolts, and washers provided in the fixing kit.
Mounting Profiles
Customer Support
- Address: Janus Henderson 801 Pennsylvania JANUS Pana40Plus 2D-3D Detector Controller Ave, Suite 219109 Kansas City, MO 64105-1307
- Website: https://www.janushenderson.com/
- Tel: 800-525-3713.
- Tomings: Weekdays, 9 a.m. – 6 p.m.
FAQs
Q: What is the main function of the JANUS Pana40Plus Detector Controller?
To precisely identify cars, objects, or motion in parking, industrial, or traffic management systems, the Pana40Plus smart detector controller processes and controls information from 2D and 3D sensors.
Q: What is the difference between 2D and 3D detection modes?
The 3D mode offers depth and volume measurement, enabling more accurate item recognition, height detection, and motion tracking in complicated situations, while the 2D mode aanalyzesflaanalyzesmotion or presence detection.
Q: What types of sensors or detectors can be connected to the Pana40Plus controller?
Depending on the application, the controller can support a variety of suitable JANUS 2D and 3D optical, infrared, or radar-based sensors. Prior to installation, always refer to your user manual’s compatibility list.
Q: How do I connect the detector to the controller?
Utilise the specified communication ports or input terminals in accordance with the manual’s wiring schematic.
Q: Can I configure or calibrate the Pana40Plus through software?
Indeed. The software interface allows you to modify output behaviour, reaction delay, detection zones, and sensitivity.
Q: How do I know if the controller is working properly?
The LEDs on the front panel show the status of detection, communication, and power. While flashing or red indicators indicate problems or misconfigurations, a continuous green light often signifies normal performance.