
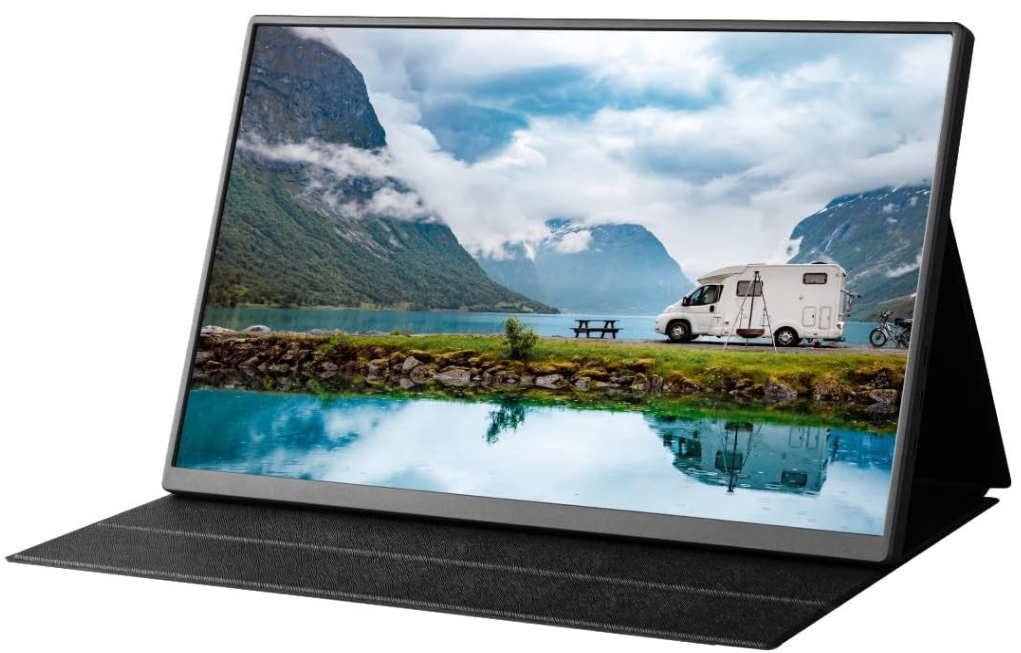
 Kogan XPRESSO 16 Inch Portable LED Monitor
Safety Instructions
- Handle the monitor with care and, to avoid damage, do not press the screen.
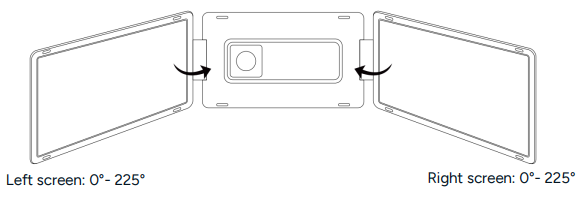
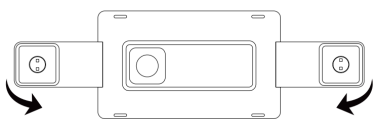
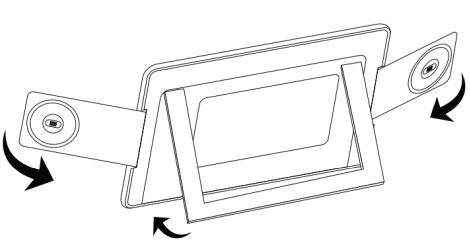
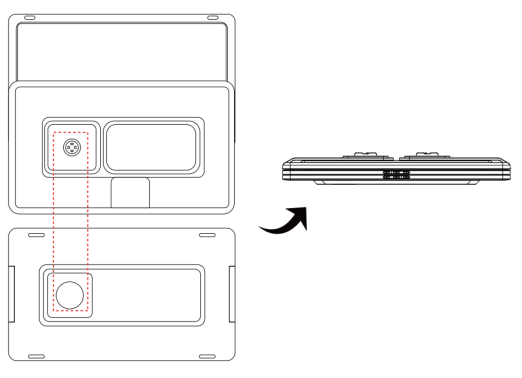
- Do not exceed the maximum turning angle shown below.
Components
- Monitor
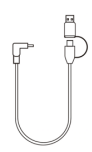
- USB-C Cable (Video and Power) with USB-A Adaptor (Power Only) (90cm)
- Mini HDMI to HDMI Cable (90cm) (Video Only)
- USB-C Cable (60cm) (Video & Power) (x2)
- Carry Case
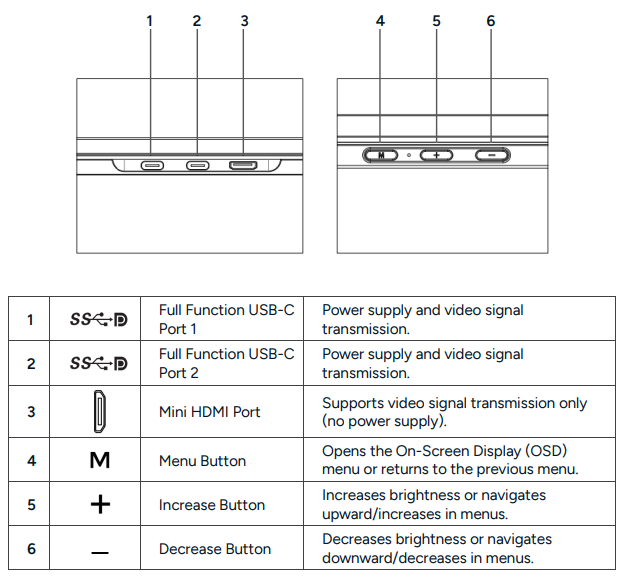
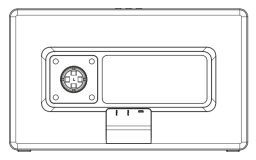
Description
Assembly
- Remove all components from the packaging.
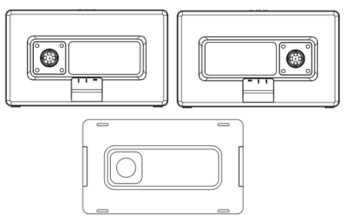
- The left and right screens are magnetically attached to the backplate. Detach both screens.
- Extend the side brackets on the rear of the backplate.
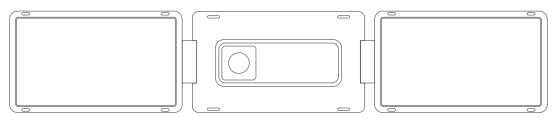
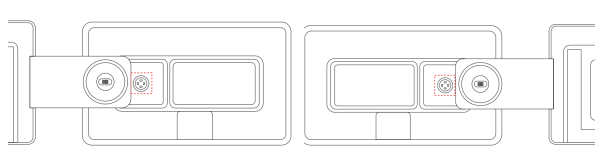
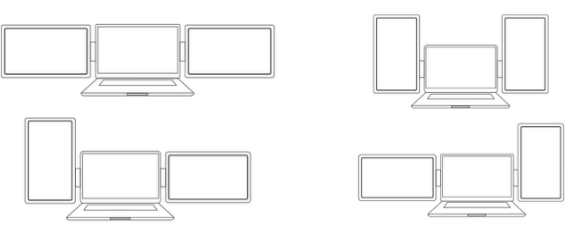
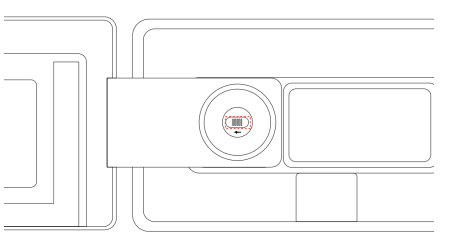
- Align the slot on each screen with the clasp on the side brackets and secure them in place. The screens can be configured according to your preferences.
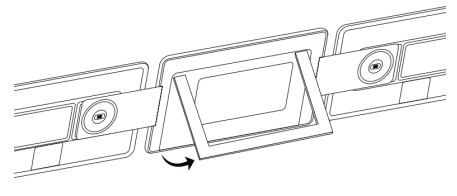
- Raise the rear stand to support the screens.
Disassembly
- Slide the clasps on each bracket to release the screens.
- Retract both brackets and the rear stand.
- Face the screens toward each other to magnetically attach them. Then, magnetically attach the backplate to the rear of the right screen.
Cable Setup
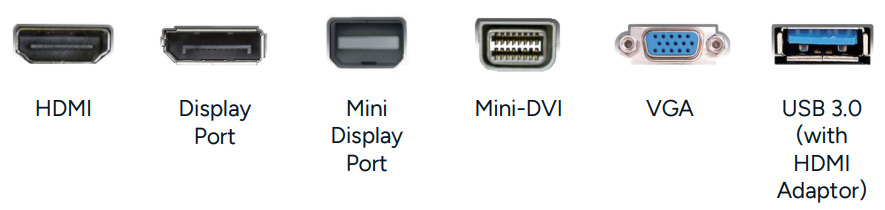
Identify Your Laptop’s Ports
Identify the available ports on your laptop using the table below.
Video Only
Power Only

Select the Appropriate Connection Setup
| Laptop Port | Cables Used |
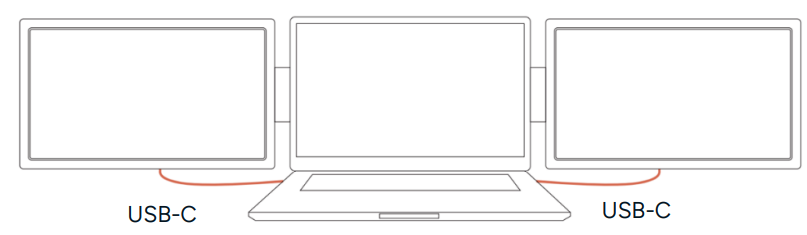
| Two Thunderbolt 3/4 or USB-C (with DP support) | Two USB-C cables. |
| One Thunderbolt 3/4 or USB-C (with DP support) | One USB-C to USB-C cable. One HDMI to Mini-HDMI cable. |
| No Thunderbolt/USB-C with DP support, but with HDMI. | One HDMI to Mini-HDMI cable. One USB-A to USB-C cable. |
| No HDMI port. | One alternate video output (DisplayPort, MiniDP, VGA, etc.) with a compatible HDMI adaptor. One HDMI to Mini-HDMI cable. |
Specifications
| Display | |
| Screen Size | Dual 16-inch IPS LCD Panels |
| Resolution | 1920×1200 (16:10) Full HD |
| Brightness | Adjustable |
| Power Consumption | 5V/2A per screen |
| Inputs and Connectivity (Per Screen) | |
| USB-C | Power + Video (DP + PD) |
| HDMI | Video only |
| Dimensions and Weight | |
| Weight | 2.4kg |
| Depth | 5.14cm |
| Height | 24cm |
| Width | 37cm |
Connectivity
Two USB-C or Thunderbolt 3/4 Ports
- If your laptop has x2 full-function USB-C or Thunderbolt 3/4 ports, connect both screens using the x2 provided USB-C cables.
- Ensure your laptop’s USB-C ports support both power and video transmission.
- Each port must provide sufficient power (at least 5V/2A).
- Some USB-C ports cannot output more than 5V/2A. If so, connect an external power supply using the provided USB-C to USB-A cable:
- Connect the USB-C end of the cable to the USB-C port on the screen.
- Connect the USB-A adaptor to a power adaptor (not provided).
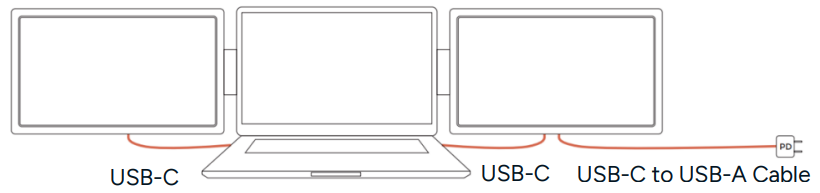
USB-C and HDMI Port Connection
If your laptop has x1 full-function USB-C port and x1 HDMI port
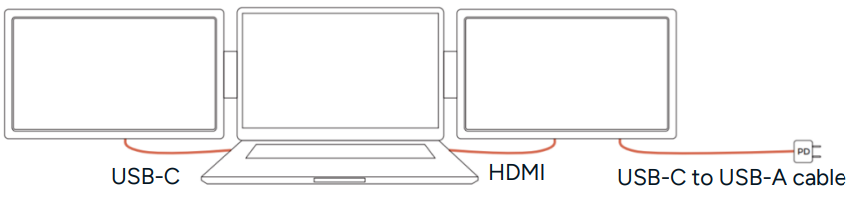
- Use the provided USB-C cable to connect one side of the monitor.
- Use the provided Mini HDMI to HDMI cable to connect the other side of the monitor.
- Connect the USB-C end of the USB-C to USB-A cable to the screen.
- Connect the USB-A adaptor to a power adaptor (not provided).
HDMI and USB-A Connection
If your laptop does not have any Thunderbolt 3/4 or full-function USB-C ports, but does include an HDMI port, connect the monitor using the following setup
- Connect one end of the Mini HDMI to HDMI cable to your laptop’s HDMI port, and the other end to the monitor’s Mini-HDMI port.
- Use the USB-A to USB-C cable to connect your laptop’s USB-A port to the monitor for power supply.
- The HDMI port supports video only and does not supply power.
- Ensure the USB-A port or external adaptor can provide sufficient power (5V/2A or above).
Video Output Adapter Connection
If your laptop does not have an HDMI port, you can still connect the monitor using a compatible video adaptor.
- Identify your laptop’s available video output port (e.g., DisplayPort, Mini DisplayPort, Mini-DVI, or VGA).
- Use an appropriate video adaptor (e.g., DisplayPort-to-HDMI or Mini-DP-to-HDMI adapter) to convert your laptop’s output to HDMI.
- Connect the adaptor to the monitor using the HDMI to Mini-HDMI cable.
- Use the USB-A to USB-C cable for the power supply.
Operation
Laptop Display Configuration
Windows
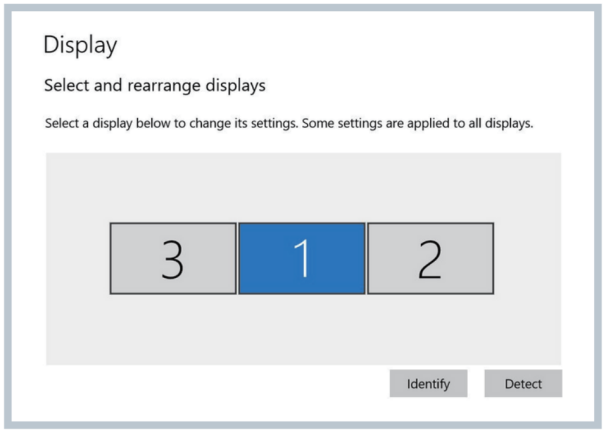
- Go to your Display Settings (Start → Settings → System → Display).
- Click and drag the screens to match your preferred configuration.
- To set different display modes for multiple screens, click 1/2/3 (use the ‘Identify’ button at the bottom to find each corresponding screen).
- Select the desired screen, then go to the ‘Multiple displays’ menu to configure the mode.
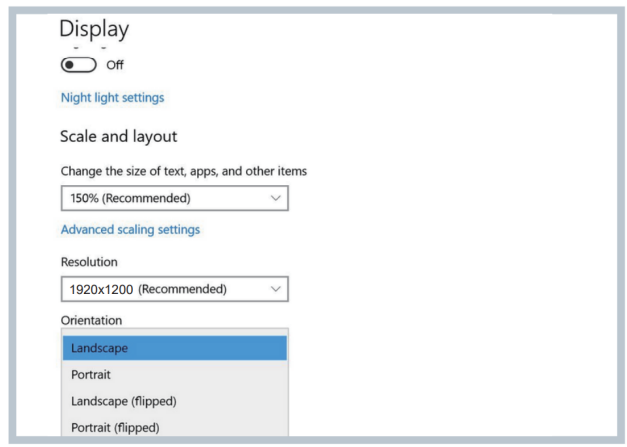
- If any of the screens appear upside down, click on the affected screen in the Display menu.
- Then open the ‘Orientation’ dropdown and select ‘Landscape (flipped)’.
- To increase zoom, open the ‘Change the size of text, apps, and other items’ dropdown and select ‘150%’.
Mac

- Open ‘System Preferences’.
- Select ‘Displays’ from the menu.
- Click the monitor’s name to choose ‘Mirror’ or ‘Extended’ display mode.
- Click ‘Arrangement’ in the display menu.
- Click any display screen in the interface shown to adjust its position.
- To change the screen orientation, select the desired option under ‘Rotation’.
On-Screen Display (OSD) Menu
Navigation
- Press ‘M’ to open the OSD menu.
- Use ‘+/–‘ to navigate or adjust values.
- Press ‘M’ to confirm.
- Press and hold ‘M’ to return to the previous screen.
OSD Settings
Backlight

- Brightness: 0-100.
- Contrast: 0-100.
- ECO Mode: Standard, Game, Movie, Text, FPS, RTS, Power Saving.
- DCR: Dynamic contrast (On/Off).
- Sharpness: 0-4.
Image
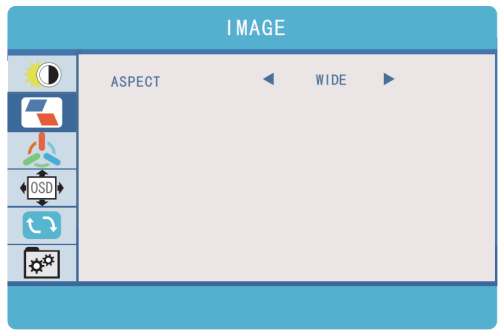
- Aspect Ratio: 4:3 or Wide.
Colour

- Colour Temp: Warm, Cool, User, Standard.
- RGB Adjustment: 0-100 each.
Set
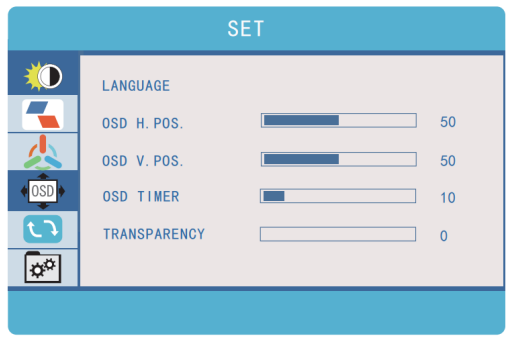
- Language: English, French, German, Simplified Chinese, Italian, Spanish, Portuguese, Turkish, Polish, Dutch, Japanese, Korean.
- OSD Timer: 10-60 seconds.
- Transparency: 0-100.
Reset

- Reset: Restore factory defaults.
- HDR Mode: Off, Auto, 2084.
Other
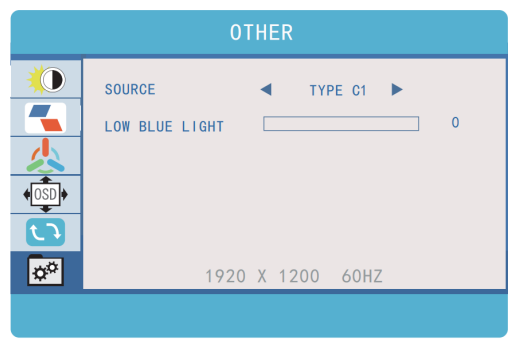
- Source: Type C1, Type C2, HDMI.
- Low Blue Light: Reduces blue-light output.
Disposal
This marking indicates that this appliance should not be disposed of with other household wastes. To prevent possible harm to the environment or human health from uncontrolled waste disposal, recycle it responsibly to promote the sustainable reuse of material resources.
Customer Support
- Website: https://www.kogan.com/
- Ph: 1300 056 426
FAQs
Q: What devices can I connect to the XPRESSO 16″ Portable LED Monitor?
Laptops, desktop computers, game consoles, tablets, and smartphones that output video via HDMI or USB-C (DisplayPort Alt Mode) are all compatible with the display. An adapter could be necessary for certain mobile devices.
Q: Does the monitor require an external power source?
Many gadgets will power the display directly when connected via USB-C. Use the provided USB-A or USB-C power cable to add more power if your device is unable to supply enough.
Q: Can I use the monitor in both landscape and portrait orientation?
Yes. The XPRESSO 16″ supports both orientations. Some devices may automatically rotate the image; others require changing display settings manually.
Q: Why is my screen dark or flickering?
Insufficient electricity is typically indicated by this. Make sure you are using a high-quality USB-C cable that supports video, or use the included USB power cord to supply more power.
Q: Does the monitor have built-in speakers?
Indeed, the monitor has built-in stereo speakers. The sound options on your connected device allow you to choose the audio output.
Q: Can I adjust the brightness and colour settings?
Of course. To adjust brightness, contrast, colour temperature, sharpness, and other display settings, use the On-Screen Display (OSD) menu buttons.
Q: How do I enable dual-screen mode on my laptop?
Once the monitor is connected, select your chosen viewing mode from Extend, Duplicate, or Second Screen Only in the laptop’s display options.
Q: Is the monitor compatible with gaming consoles?
Indeed. Through HDMI, it is compatible with the majority of consoles, such as the PlayStation, Xbox, and Nintendo Switch. Adapters might be necessary for some handheld-only devices.