
Mixx Audio Rue Wireless Earbuds
IMPORTANT
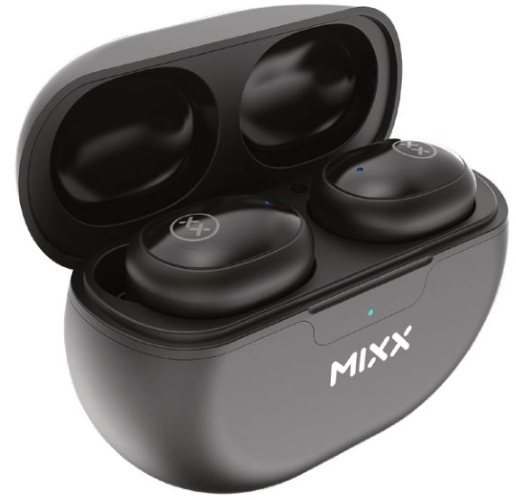
When first taking your earbuds out of the packaging, please remove the protective film covering the charging points.
LET’S STAY CHARGED
Note: If your earbuds and charge case do not have any power when you first unpack them, place the earbuds into the charge case and plug the charge case into a USB port using the USB-C cable [8 provided.
The Earbuds
- A voice prompt “Battery low” allows for 2 minutes of playtime before the earbud(s) powers down, stating “Battery low, power off”.
- The Earbuds LED Light [2] will flash WHITE once and then switch off. Charge the earbuds using the Portable Charging Case [5].
- Each LEFT and RIGHT earbud has a 4-line LED Charge Indicator L and R on the case.
- Place the earbuds in the case and close the lid to charge.
- The 4 LED indicators L and R will flash to show that the earbuds are charging for 15 seconds and then turn off.
The Portable Charging Case
To check the battery status of the case, open the lid of the Portable Charging Case [4].
- The LED Digital Display [6] will show the percentage of the battery remaining for 15 seconds.
- With a Type C charging cable. Always connect the case to a suitable USB wall charger, computer USB port, or a power bank using the USB Type-C charging cable [8] supplied.
- Plug the supplied cable into the USB-C port [5] on the charge case.
- When the LED Digital Display number reaches 100 (i.e., 100%), the case is fully charged, and the display will switch off. Charging the case may take up to 2 hours.
TIP: 15-MINUTE QUICK CHARGE
If you’re running low on power, charge your earbuds in the case for 15 minutes and get 2 hours extra playtime while on the go.
LET’S CONNECT
- First time pairing
- When you open the Portable Charging Case [4], both earbuds will turn on and connect together. A voice prompt will confirm with ‘Power on, pairing’. One Earbud LED Light [2] will flash WHITE to indicate pairing mode.
- Go to the Bluetooth settings on your audio device to select ‘MIXX StreamBuds Ultra’ from the list. Once paired successfully, you will hear ‘Connected’ and the Earbud LED Lights [2] will turn off.
- You can now enjoy your music, watch a video, or take a call hands-free. The earbuds will automatically reconnect to the last device they were paired with, confirming ‘Connected’.
FACTORY RESET
When in pairing mode, independently ‘tap’ 4 times until power off is announced, return the bud to the case. Repeat with another bud. This will complete the Factory Reset process.
LET’S PLAY
- Power on
Remove both earbuds from the case. They will automatically turn on and pair together. A voice prompt will state “Connected” as confirmation. To manually turn on, long-press each Touch Sensor [1] and [3] for 3 seconds. - Power off
Place both earbuds in the case. This will automatically turn off the earbuds and the Bluetooth. - Play / Pause
Tap and hold either Touch Sensor [1] or [3] - Increase Volume
Single tap RIGHT Touch Sensor [3] - Decrease Volume
Single tap LEFT Touch Sensor [1] - Previous Track
Double tap LEFT Touch Sensor [1] - Skip Track
Double tap RIGHT Touch Sensor [3] - Answer / End Call
Tap and hold either Touch Sensor [1] or [3] (Audio is picked up via the microphones [4] .)
You can customise your earbuds using the MIXX control app, see page 4 for further details.
LET’S ASK GOOGLE ASSISTANT / SIRI
To activate Siri or Google Assistant, please use the MIXX Control app. Your Voice Assist’s familiar ‘Beep’ will sound to confirm connection. You can now ask Siri or Google Assistant a question or state a command.
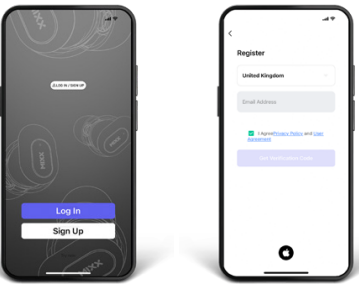
LET’S INSTALL THE APP
- Scan the QR code here to download the free MIXX Control app.

- Follow the on-screen instructions to create an account.

- Follow the on-screen instructions to connect to your earphones.
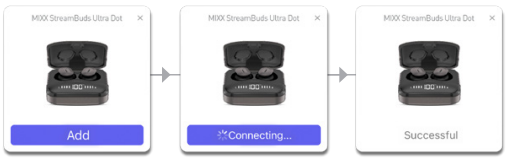
HOW TO CUSTOMISE YOUR EARBUDS USING THE APP
Scan the QR code here to view our online tutorials (https://bit.ly/3sN4fGd) for instructions on how to customise your earbud settings.
LET’S BE SAFE
IT IS IMPORTANT THAT YOU PLEASE READ THIS SECTION COMPLETELY.
For your protection
- Check with your doctor before use if you are fitted with a medical
device such as a pacemaker or a programmable shunt. - Ensure the product is correctly connected using the manufacturer’s original accessories included with the product.
- Do NOT make unauthorized alterations to this product.
- The product may contain small parts that can be a choking hazard.
- Please keep the product out of reach of children under 6 and animals.
- Whilst this product uses hypoallergenic materials, you may suffer some skin irritation after prolonged use.
- Do NOT listen to loud music for a long duration of time. We recommend turning the volume down before placing the device in your ears to avoid hearing damage.
- Do NOT use the product while operating machinery, including cars, trucks, or other vehicles.
- Do NOT use noise-cancelling mode or use your device in areas where the use of hearing is required for safety, e.g., while riding a bicycle, at a construction site, or railroad, etc.
- Clean only with a dry cloth – Wipe off sweat from the earbuds and the charging case before charging.
IMPORTANT:
Do NOT use a non-certified PD or QC3 wall charger, as this may damage the product. Only use the cable supplied to charge your device. If your product has become Mixx Audio Rue damaged in any way, does not operate normally, or has been dropped, please refer to a qualified person to have the product checked before continuing to use it.
WARNING:
- This product contains a Lithium battery. Incorrect disposal of this battery may result in an explosion.
- The operating temperature range for this product is 5º – 40º Celsius.
- Please avoid exposing the product, charging case, Mixx Audio Rue and cable connectors to prolonged rain, moisture, or liquid spills/splashing.
- Please remove your device from your ears immediately if it emits any loud, unusual noise or if you experience a warming sensation.
- If you experience any of the issues listed above, please turn off your device and contact MIXX Ltd at support@mixx-io.com
FCC Compliance
- This device complies with part 15 of the FCC Rules. Operation is subject to the following two conditions:
- This device may not cause harmful interference.
- This device must accept any interference received, including interference that may cause undesired operation.
Note: This equipment has been tested and found to comply with the limits for a Class B digital device, pursuant to part 15 of the FCC Rules. These limits are designed to provide reasonable protection against harmful interference in a residential installation.
- This equipment generates, uses, and can radiate radio frequency energy and, if not installed and used baaccording to then structions, may Mixx Audio Rue cause harmful interference to radio communications. However, there is no guarantee that interference will not occur in a particular installation. Suppose this equipment does cause harmful interference to radio or television reception, which can be determined by turning the equipment off and on. In that case, the user is encouraged to try to correct the interference by one or Mixx Audio Rue more of the following measures:
- Reorient or relocate the receiving antenna. • Increase the separation between the equipment and receiver.
- Connect the equipment to an outlet on a circuit different from that to which the receiver is connected.
- Consult the dealer or an experienced radio/TV technician for help. Changes or modifications to this product not authorized by Mixx could void the electromagnetic compatibility (EMC) and wireless compliance and negate your authority to operate the product.
- This product has demonstrated EMC compliance under conditions that included the use of compliant peripheral devices and shielded cables between system components. It is important that you use compliant peripheral devices and shielded cables between system components to reduce the possibility of causing interference to radios, televisions, and other electronic devices.
CONTACT
Responsible Party (contact for matters relating to FCC only):
FCC US Agent LLC 3722 Illinois Avenue Saint Charles, IL 60174
USA
- FCC ID: 2AXJ7-ULTRADOTS
- FCC ID: 2AXJ7-ULTRAHYBRID
- FCC ID: 2AXJ7-ULTRAMINI