
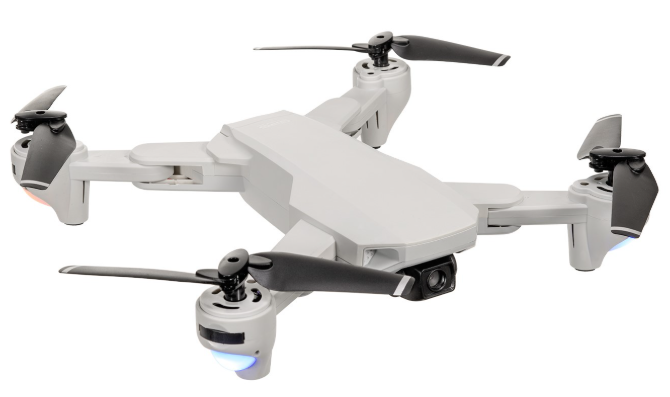
PRO FLIGHT PFBD302 Folding Drone with HD Camera
Safety Instructions
- This manual contains instructions for safety, operation and maintenance.
- Avoid exposure to water, as moisture can cause damage to the electronics.
- Never operate your drone when the controller or drone batteries are low.
- The battery charger included with the drone has been designed to safely charge the battery.
- Mishandling of batteries can result in a fire, personal injury, and /or property damage.
- If at any time the battery begins to balloon or swell, discontinue use immediately.
- If charging or discharging, discontinue and disconnect.
- Continuing to use, charge or discharge a battery that is ballooning or swelling can result in fire.
- Always store the battery at room temperature in a dry area for best results.
- Do not store the battery or drone in a car or direct sunlight.
- If stored in a hot environment, the battery can be damaged or even catch fire.
- Never use any other type of battery charger other than the one supplied with the drone.
First Flight
- Fully read and understand the safety warnings and precautions.
- Make sure both the transmitter and aircraft batteries are sufficiently charged.
- Find a suitable place to fly the aircraft, away from people, buildings and vehicles.
- Make sure the throttle stick is centred before turning on thetransmitter.
Battery Charging
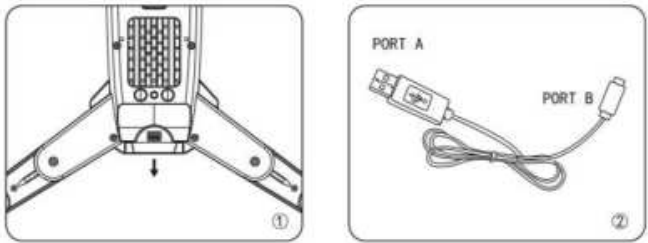
Use only the supplied USB Li-Po charger to charge your battery. Remove the battery from the battery compartment on the base of the aircraft. Slide the battery out to remove it. Plug the charger into a USB socket before attaching the battery. When thebattery is charging, the LED on the charger will flash green. When the battery is fully charged, the LED will be a solid green. Charging should take around 180 minutes. DO NOT leave the battery unattended whilst charging.
Mobile Phone Holder
Open the phone holder and place the phone securely onto the controller.
Drone
Folding the Arms
- Fold the front arms backwards until they sit close to the body of the drone.
- Fold the rear arm down until it is parallel to the body.
Replacement
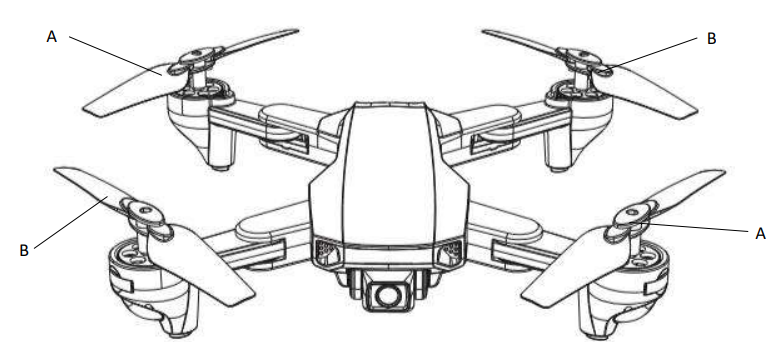
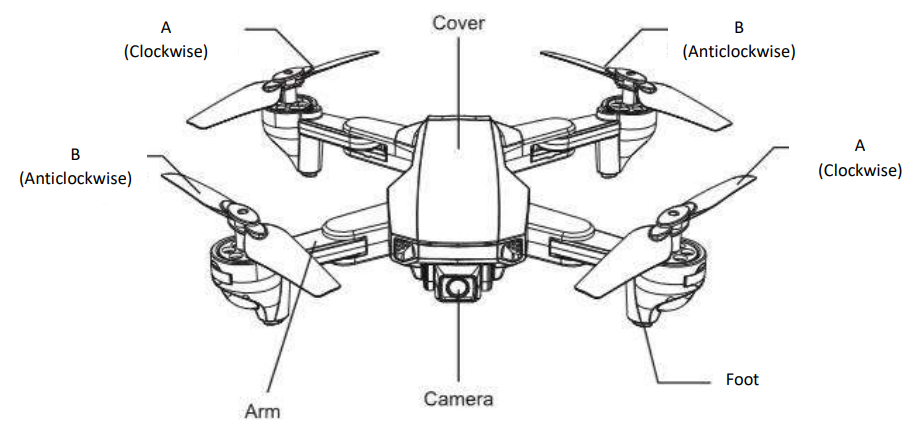
Should one of the fitted propellers become damaged, it can be replaced by removing the screw from the top of the propeller before sliding the propeller off the motor shaft. Refitting is the reversal of removal. It is important for the correct blade to be placed on the correct motor, or the aircraft will not fly correctly. Each blade is marked with an A or B on the top to indicate which motor it corresponds to.
Installing Batteries
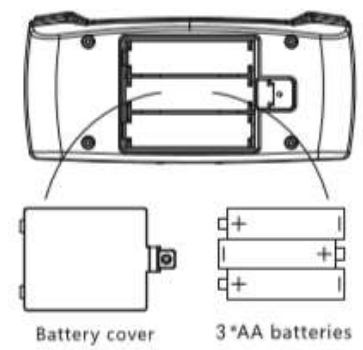
Unclip the battery covers from the rear of the controller and insert 3 x AA batteries, making sure the correct polarity is followed. Once the batteries are correctly installed, the battery cover must be refitted. (Batteries not supplied)
Overview
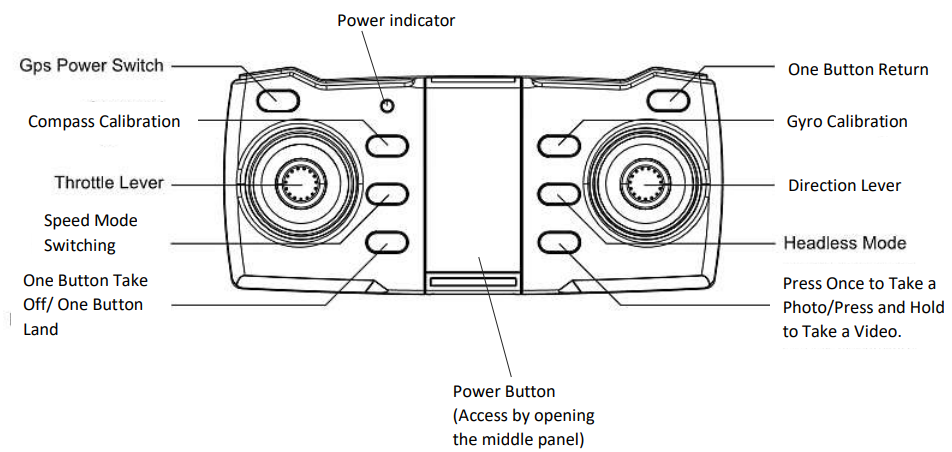
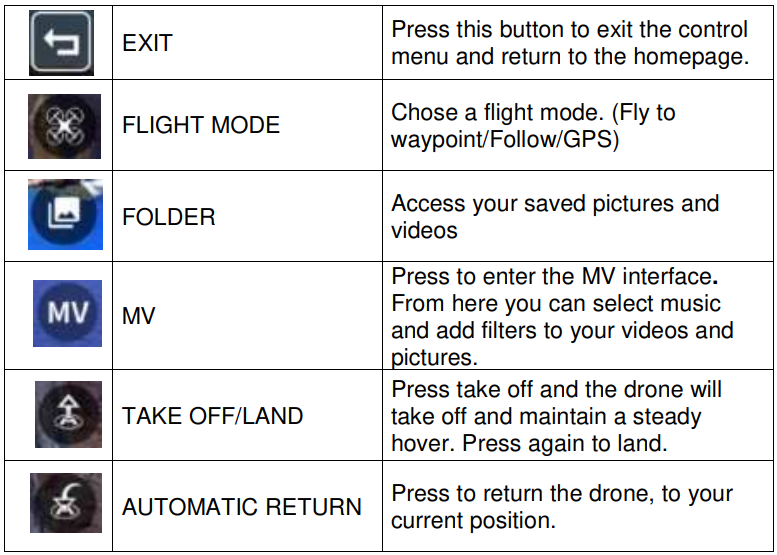
Functions
- SPEED MODE Press speed to change the flight mode between low speed (Beginner) and high speed (Advanced).
- COMPASS CORRECTION Press the compass correction button, and the drone LED will flash quickly.
- GYROSCOPIC CORRECTION: Place the drone on a flat surface.
- GPS SIGNAL indicates the current flight mode and the number of satellites.
- ONE BUTTON TAKE OFF/ONE BUTTON LAND Press once, and the aircraft will take off from the ground. Press and hold, and the aircraft will begin descending.
- ONE BUTTON RETURN Press the return button, and the controller will emit a sound. The aircraft will return home regardless of the current direction. Press again to cancel the function.
Prepration
Power on the drone by pressing the power button on the underside of the aircraft. Then press and hold the power button for 3 seconds, and the light will flash for around 3 seconds.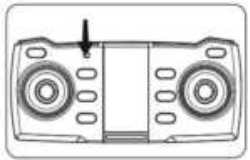
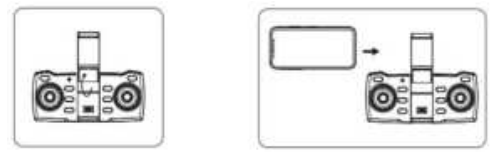
Turn on the controller by pressing the power button, and the indicator light shown will appear.
Compass Correction
Press and hold the geomagnetic correction button until you hear a beep and the front and rear lights of the drone flash. Pick up the drone with the base facing the ground and rotate until you hear a beep.
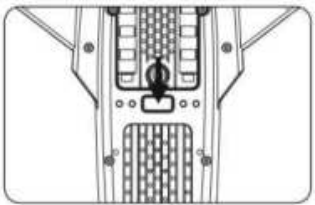
Push the throttle lever and the direction lever in the direction shown to unlock the aircraft for take-off.
How to Control
Ascending and Descending
Push the throttle lever up, and the drone will gain height. Push the throttle lever down, and the drone will descend.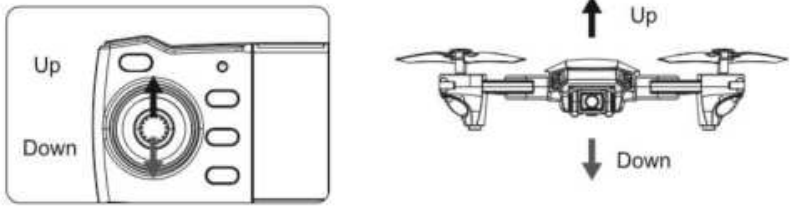
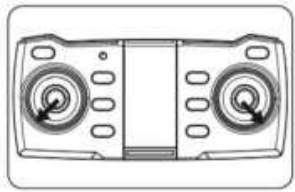
Moving Forward and Backwards
Push the direction lever up to move the drone forward and down to move the drone backwards.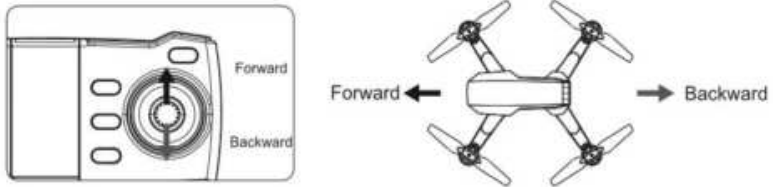
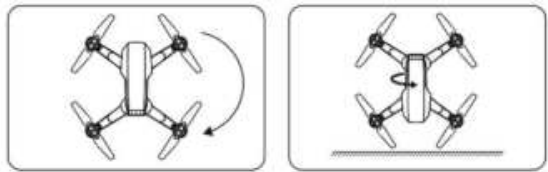
Left and Right Turn
Push the throttle to the left or right, and the drone will turn in the corresponding direction.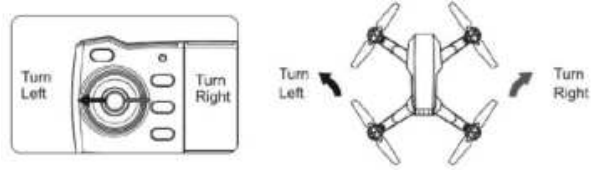
Flying
Push the direction lever left or right, and the drone will fly in the corresponding direction.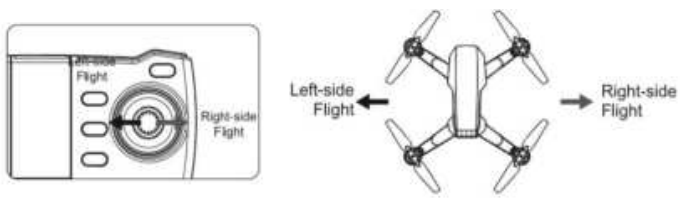
Controlling the Drone
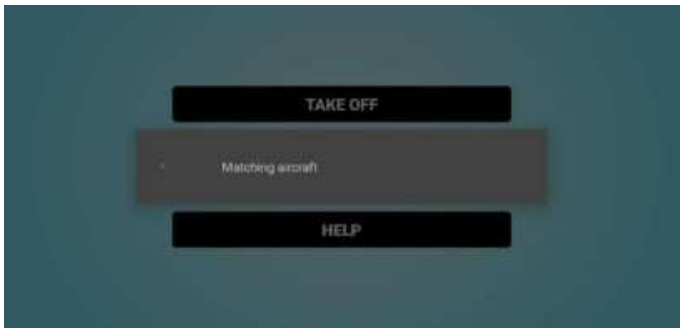
Once connected, press take off to access the controls. For ease of use, we recommend mounting your phone in the provided holder.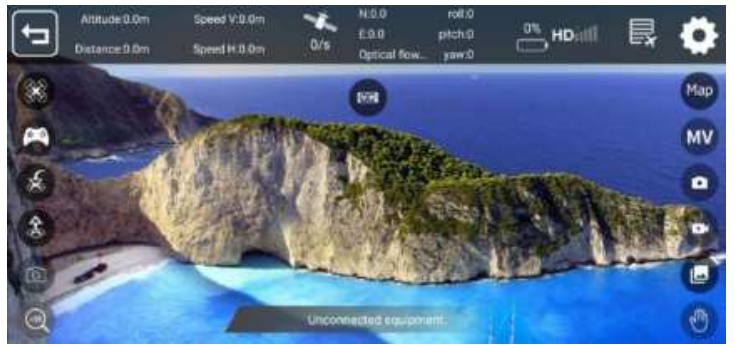
Display

- ALTITUDE AND DISTANCE: Displays the current flight altitude and distance travelled.
- SPEED: Shows how fast the drone is travelling vertically and horizontally.
- SATELLITES: Shows the number of GPS satellites in the drone’s range.
- LONGITUDE/LATITUDE: Shows the longitude and latitude position of the aircraft in its current flight.
- ROLL/PITCH/YAW: Shows the angles of the aircraft’s current movements.
- BATTERY LEVEL: Shows the current battery level of the drone.
- SIGNAL: Shows the drone’s connection status.
- FLIGHT RECORD: Press to enter the flight records of all your flights.
Wi-Fi Connection
Install the GPS SKY app on your device by scanning the relevant QR code below.
After you have installed the app, turn on the drone and open your phone’s Wi-Fi settings. The drone will have created a hotspot. Connect to the drone’s hotspot and then open the app. From here, you access: Media/ Help and the Take Off screen.
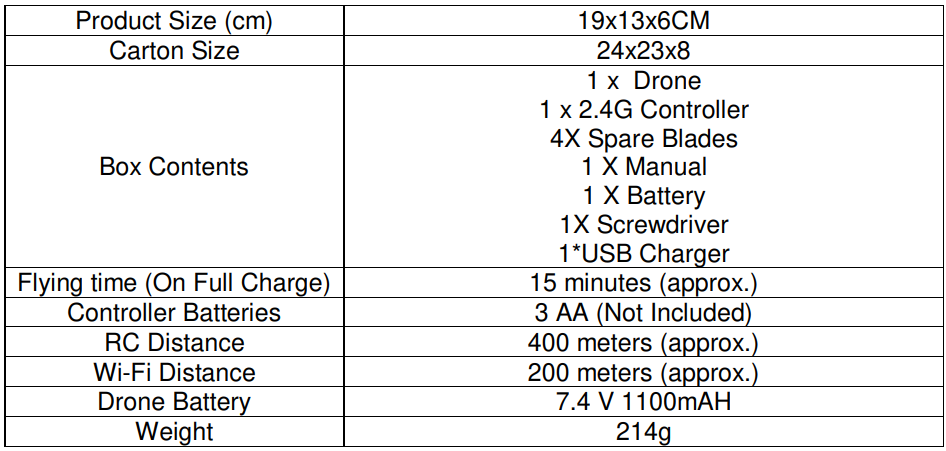
Technical Specifications
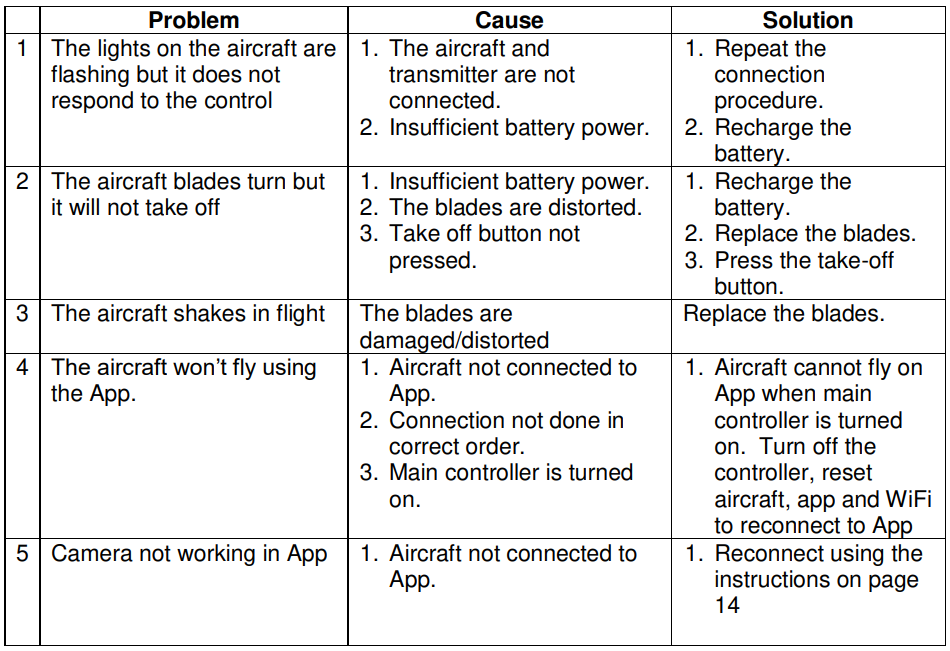
Troubleshooting
Customer Service
- Tel: 0330 390 3062
- Website: https://proflight.co.ke/