
Sony VPL-EW295 WXGA Conference Room Projector
Safety Instructions
On safety
- Check that the operating voltage of your unit is identical to the voltage of your local power supply.
- If voltage adaptation is required, consult with qualified Sony personnel.
- Unplug the unit from the wall outlet if it is not to be used for several days.
- To disconnect the cord, pull it out by theplug. Never pull the cord itself.
- The wall outlet should be near the unit and easily accessible.
- Do not look into the lens while the lamp is on.
- Do not place your hand or objects near the ventilation holes — the air coming out is hot.
- Do not move the projector when it is turned on and the cabinet cover is open.
- Never mount the projector on the ceiling or move it by yourself.
- Be sure to consult with qualified Sony personnel (charged).
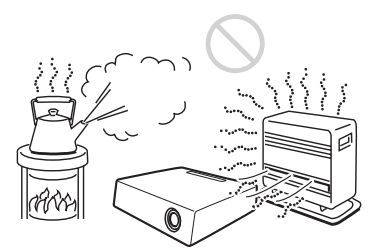
- If the ventilation holes are blocked, internal heat builds up, and it may cause a fire or damage the unit. To allow adequate air circulation and prevent internal heat build-up, follow the items below:
- Leave space around the unit (page 6).
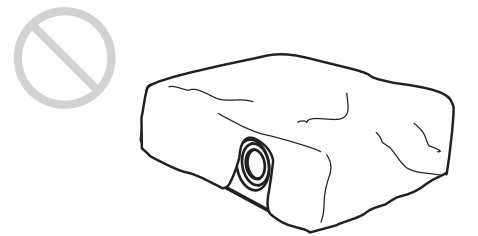
- Avoid using something to cover the ventilation holes (exhaust/intake).
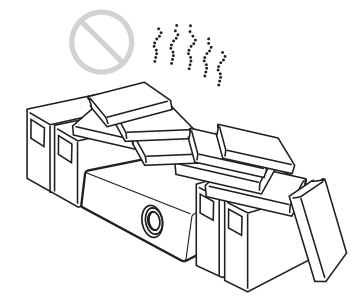
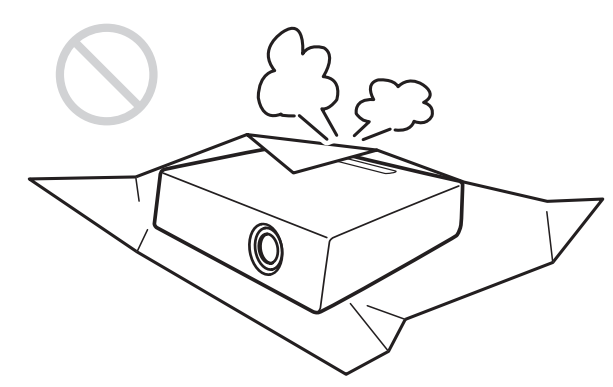
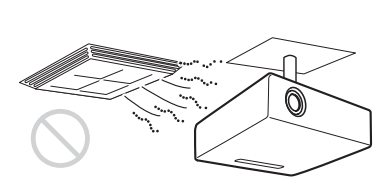
- Do not place the unit on surfaces such as an original packing sheet, soft cloth, papers, rugs, or scraps of paper. The ventilation holes may take in such materials.
- Do not place any object just in front of the lens that may block the light during projection. Heat from the light may damage the object. Use the picture muting function to cut off the picture.
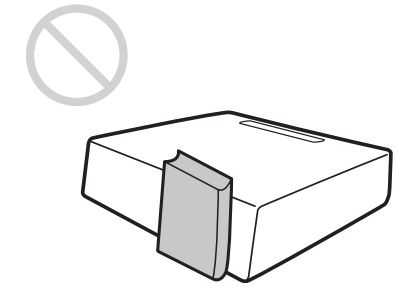
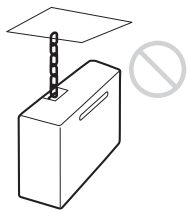
- Do not use the Security bar for the purpose of preventing theft when transporting or installing the unit. If you lift the unit by the Security bar or hang the unit by this bar, it may cause the unit to fall and be damaged, and may result in personal injury.
Installation
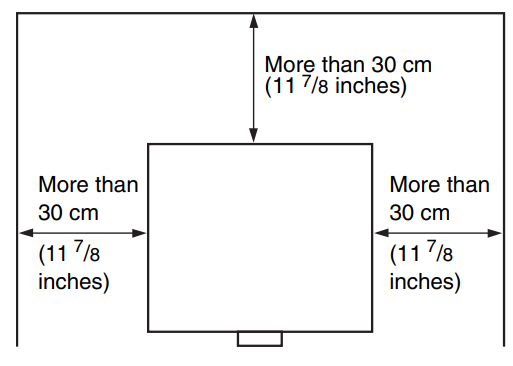
- When installing the unit, leave space between any walls, etc., and the unit as illustrated.
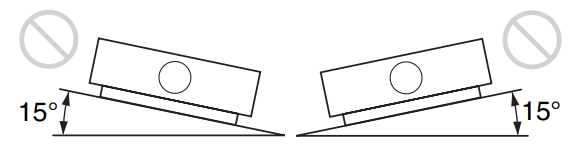
- Avoid using if the unit is tilted more than 15 degrees horizontally. 15° [15°|
- Avoid using the unit in a location where the temperature or humidity is very high or the temperature is very low.
- Avoid installing the unit in a location subject to direct cool or warm air from an air-conditioner.
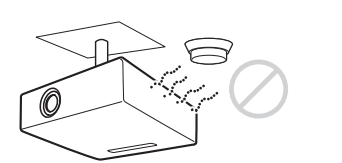
- Avoid installing the unit in a location near a heat or smoke sensor.
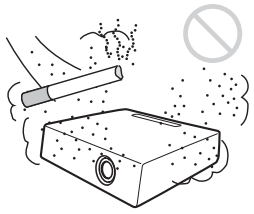
- Avoid installing the unit in a very dusty or extremely smoky environment.
- When using the unit at an altitude of 1,500 m or higher, set “High Altitude Mode” to “On” in the Installation menu.
Cleaning
- Be sure to disconnect the AC power cord from the AC outlet before cleaning.
- If you rub the unit with a stained cloth, the cabinet may be scratched.
- Do not touch the lens with your bare hands.
- Wipe the lens gently with a soft cloth, such as a glass cleaning cloth.
- Stubborn stains may be removed with a soft cloth lightly dampened with water.
- Never use solvents such as alcohol, acid, alkaline, abrasive detergents, or a chemical cleaning cloth.
- On cleaning the cabinet: Clean the cabinet gently with a soft cloth.
- Stubborn stains may be removed with a soft cloth lightly dampened with mild detergent solution and wrung, followed by wiping with a soft dry cloth.
Illumination
To obtain the best picture, the front of the screen should not be exposed to direct lighting or sunlight.
Screen
When using a screen with an uneven surface, stripes pattern may rarely appear on the screen, depending on the distance between the screen and the unit or the zooming magnification. This is not a malfunction of the unit.
Lamp
The lamp used as a light source contains mercury that has high internal pressure. A high-pressure mercury lamp has the following characteristics;
- The brightness of the lamp will be lowered as the lapse of time increases. The lamp may break with a loud noise as a result of shock, damage, or deterioration caused by the lapse of time.
- Therefore, it may break or will not light even before the specified replacement time.
- It may break after the replacement time has elapsed. Replace the lamp with a new one as soon as possible if a message is displayed on the projected image, even if the lamp normally lights.
LCD Projector
The LCD projector is manufactured using high-precision technology. You may, however, see tiny black points and/or bright points (red, blue, or green) that continuously appear on the LCD projector. This is a normal result of the manufacturing process and does not indicate a malfunction. Also, when you use multiple LCD projectors to project onto a screen, even if they are of the same model, the color reproduction among projectors may vary, since color balance may be set differently from one projector to the next.
Checking the Supplied Accessories
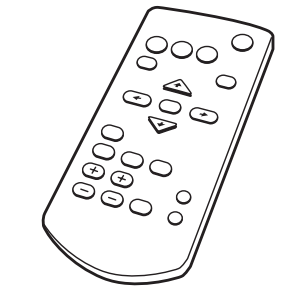
- RM-PJ8 Remote Commander (1) Lithium battery (CR2025) (1) The battery is already installed. Before using the remote commander, remove the insulation film.
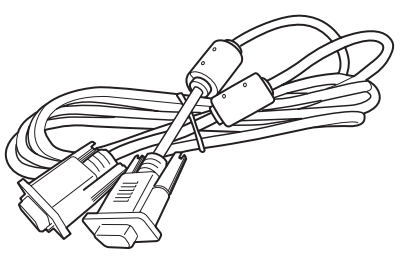
- AC power cord (1) Mini D-sub 15 pin cable (1.8 m) (I)
Quick Reference Manual (this manual) (1) Operating Instructions (CD-ROM) (1) Projector Station for Network Presentation application (CD-ROM) (1)
Using the CD-ROM Manuals
Insert the supplied CD-ROM into the CD-ROM drive of your computer, and the CD-ROM will start automatically in a few moments. Select the Operating Instructions you want to read. If the CD-ROM does not start automatically, open the “index.htm” file on the CD-ROM. You must have Adobe Acrobat Reader 5.0 or higher installed on your computer to read the Operating Instructions stored on the CD-ROM.
Installing Projector Station for Network Presentation
- Close all running applications.
- Insert the supplied CD-ROM into the CD-ROM drive of the computer.
- Open the CD-ROM and double-click the exe file.
- When the message “User Account Control” is displayed, click “Allow” or “Yes.”
- Follow the on-screen instructions to install the software.
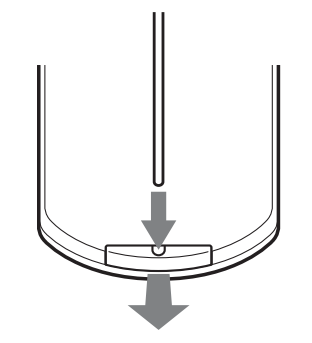
Installing Batteries
- Pull out the lithium battery compartment. Pull out the battery compartment with a stick as shown in the illustration.
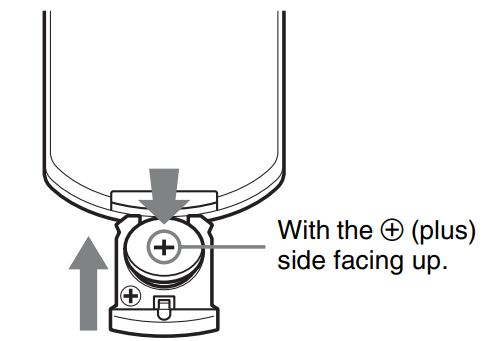
- Insert a lithium battery.
- Close the lithium battery compartment.
Selecting the Menu Language
The factory setting for the language for displaying menus, messages, etc. is English. To change the on-screen language, proceed as follows: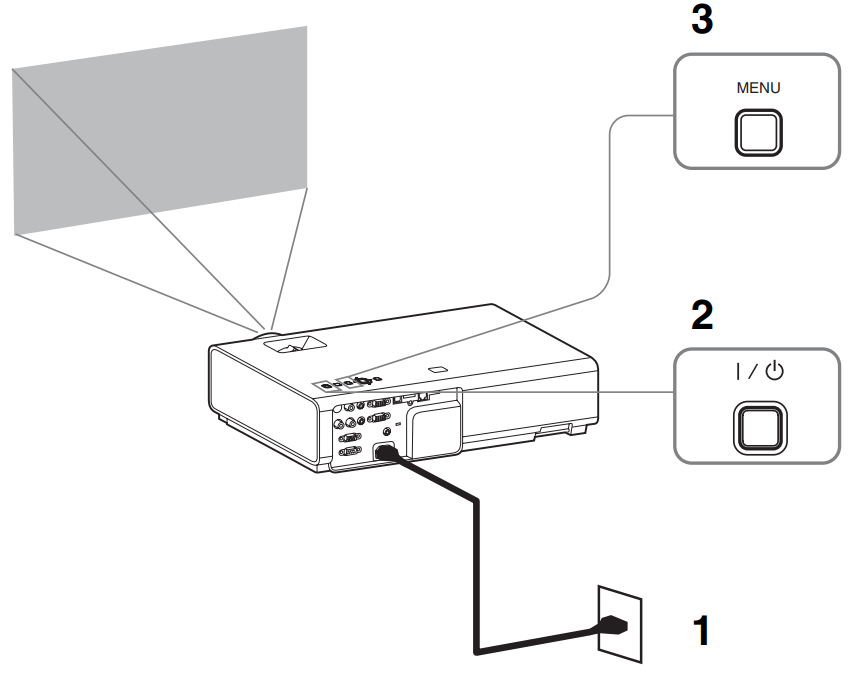
- Plug in the AC power cord into a wall outlet.
- Turn on the projector. Press the I/O key.
- Press the MENU key to display the menu.
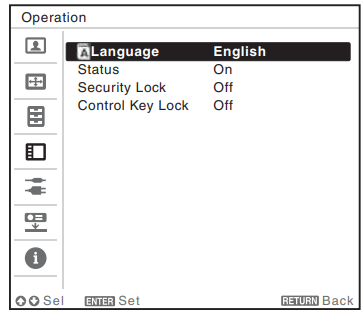
- Select the menu language.
- Press the + or + key to select the Operation (E) menu, then press the ENTER key.
- Press the + or * key to select “Language (A),” then press the ENTER key.
- Press the 4/*//* key to select a language, then press the ENTER key.
- Press the MENU key to turn off the menu screen.
Connecting the Projector
You can connect the projector to external devices witha KGB or HDMI output connector. In addition, you can use the following methods to connect the projector to external devices: USB connector (Type B) (oc.) For connecting to a computer with a USB connector (“Projecting an Image using USB Connection”).
USB connector (Type B) (•<)
For connecting to a computer with a USB connector (“Projecting an Image using USB
Connection”‘).

USB connector (Type A) (•-)
For connecting a USB memory device (“Using USB Media Viewer”).
LAN Connector
For connecting to a computer, tablet PC, or smartphone via a hub or router (“Presentation Function via Network”).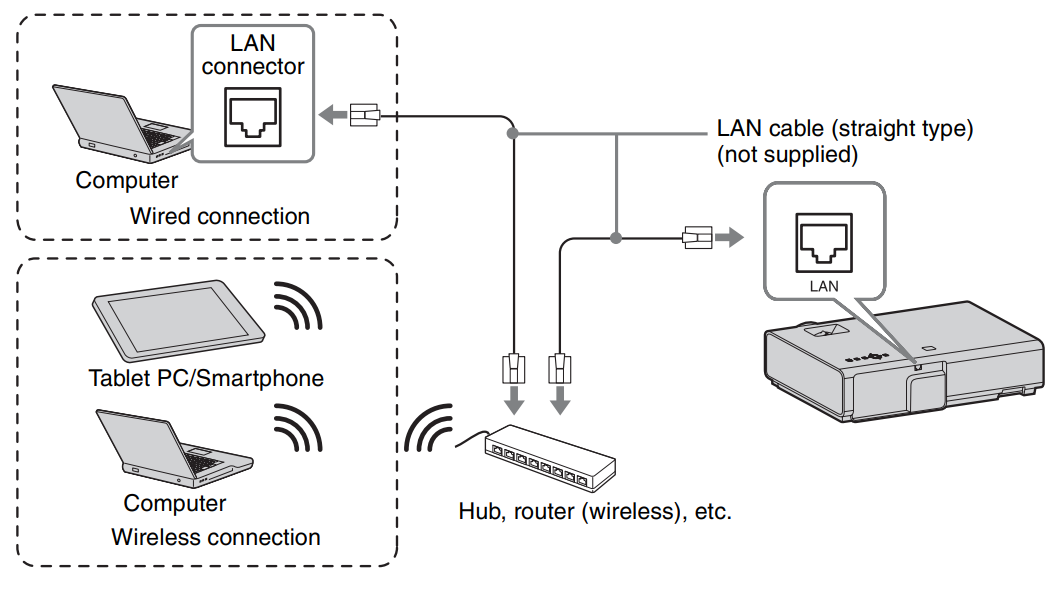
USB connector (Type A) (•<. )
For connecting a USB wireless LAN module IFU-WLM3 (not supplied) (“Presentation Function via Network”).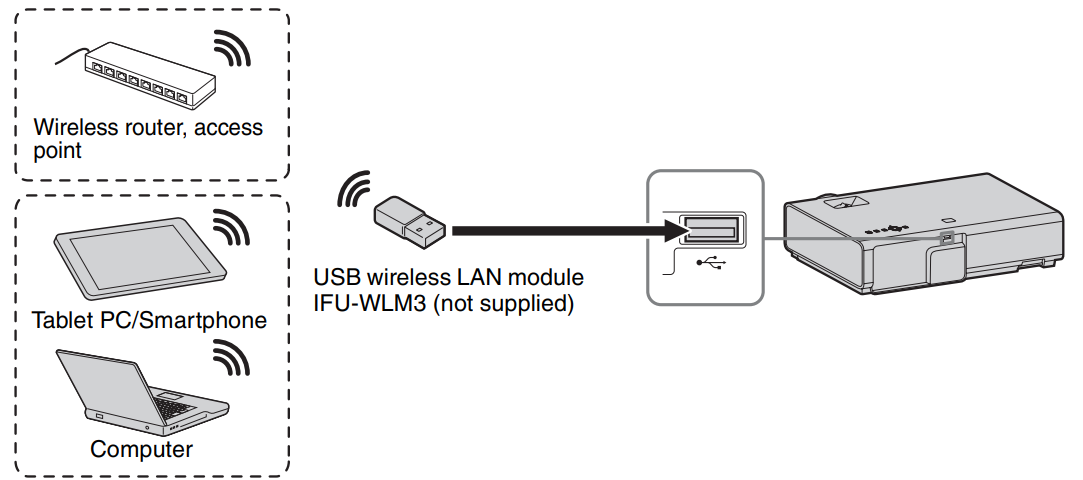
Projecting an Image
The size of a projected image depends on the distance between the projector anthe d screen. Install the projector so that the projected image fits the screen size. For details on projection distances and projected image sizes, see “Projection Distance”.
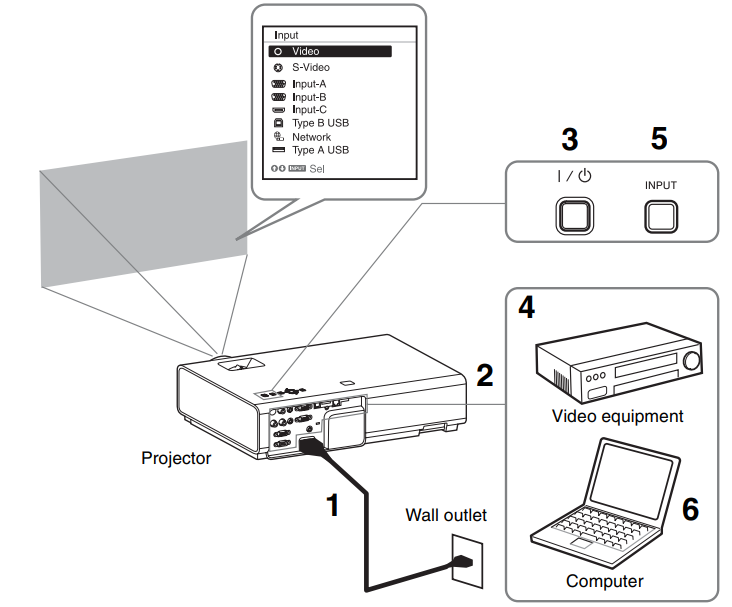
- Plug the AC power cord into the wall r computer’s output to the external display.
- Connect all equipment to the projector.
- The method to switch the output varies depending on the type of computer.
- Press the I/U key to turn on the unit. (Example)
- Turn on the connected equipment.
- To play video and audio using a USB Connection, see “Playing Video and Audio using USB Connection”.
- To use Presentation Function via Network, see “Presentation Function via Network”.
- When projecting a computer image, an outlet. switch you
- Adjust the focus, size, and position of the projected image (page 16).
- To use the application, one of the following conditions is required.
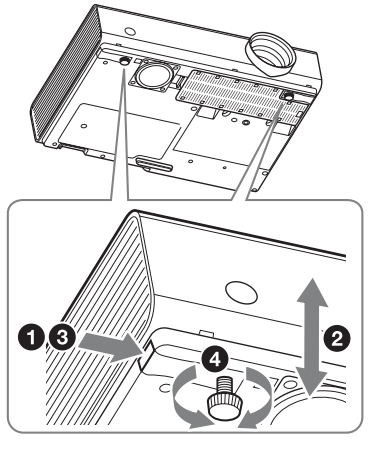
Adjusting the Projected image
Adjust the tilt of the projector with the front feet (adjustable). By changing the tilt of the projector with the foot adjust buttons/front feet (adjustable), you can adjust the position of the projected image.
How to adjust the angle
- Press and hold the foot adjust buttons.
- Lift the front of the projector to adjust the angle.
- Release the foot adjust buttons.
- Turn the front feet (adjustable) to set the angle of the projector precisely.
Changing the aspect ratio of the projected image
Press the ASPECT key on the remote commander to change the aspect ratio of the projected image. You can also change the setting in the Aspect of the Screen menu.
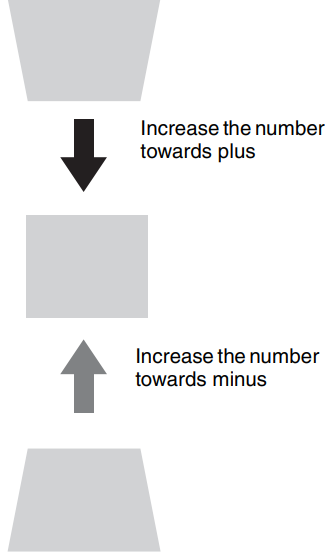
Correcting trapezoidal distortion of the projected image (Keystone feature)
Normally, the Keystone feature automatically adjusts the projecKeystone featureeystonefeaturee may not work automatically if the screen is tilted. In this case, set Keystone manually.
- Press the KEYSTONE key on the remote commander or select V Keystone in the Installation menu.
- Use the 4/*/*/* keys to set the value. The higher the value, the narrower the top of the projected image. The lower the value, the narrower the bottom.
Displaying a Pattern
You can display a pattern for adjusting the projected image or a grid pattern with the PATTERN key on the remote commander. Press the PATTERN key again to restore the previous image. You can use a grid pattern as a guide to write text or to draw lines and shapes on the whiteboard\ or blackboard without using a computer.
Turning Off the Power
- Press the I/O key on the unit or the remote commander.
- The projector shuts down and turns off.
- If you press the I/C key within 10 seconds again, the shutdown is cancelled.
- 2 Unplug the AC power cord from the wall outlet.
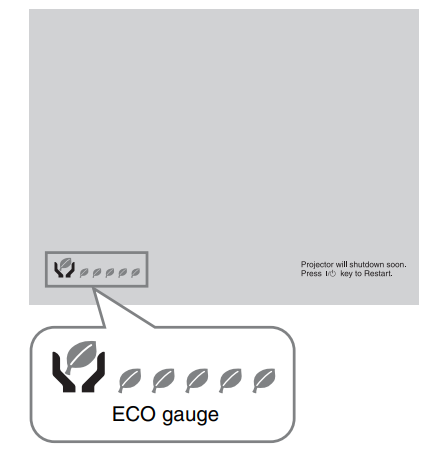
ECO Gauge
This gauge indicates the current effectiveness of the projector’s ECO function. (For details on the ECO function, see “ECO MODE key” and “ECO”.) The leaf icons are displayed when the projector is shut down. The number of displayed icons varies according to how much energy is saved as a result of using the ECO function.
Indicators
The indicators allow checking the status and notifying you of abnormal operation of the projector. If the projector exhibits an abnormal status, address the problem in accordance with the table below.
ON/STANDBY indicator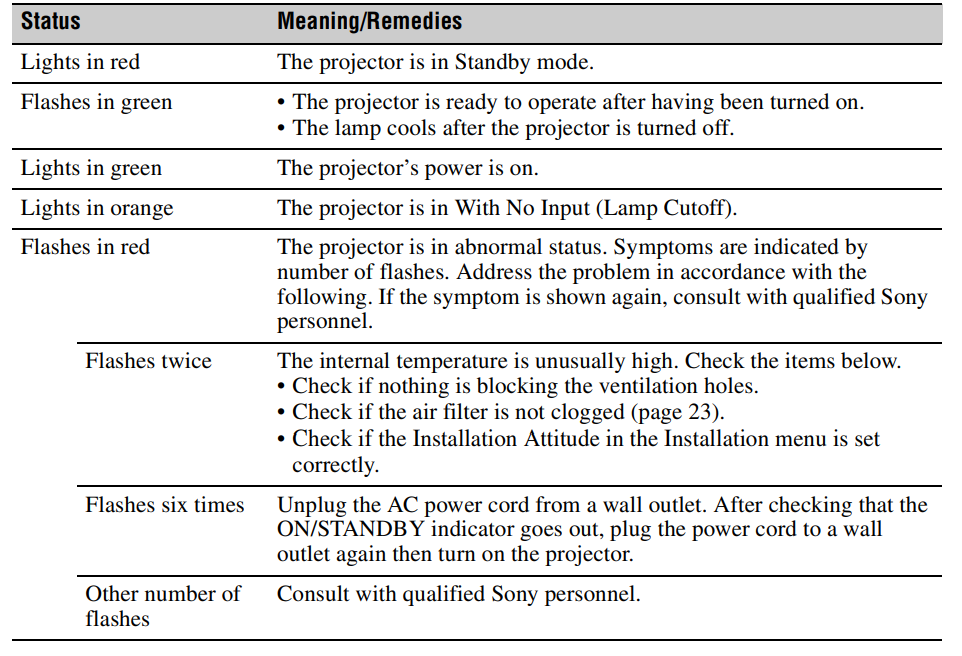
Replacing the Lamp
Use an LMP-E212 projector lamp (not supplied) for replacement.
- Turn off the projector, and disconnect the AC power cord from a wall outlet.
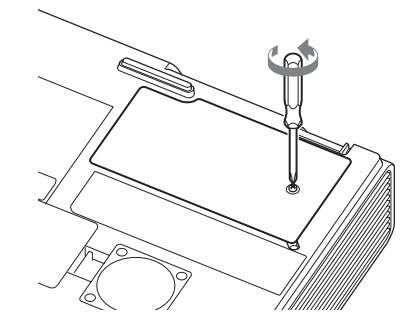
- When the lamp has cooled sufficiently, open the lamp cover by loosening 1 screw.
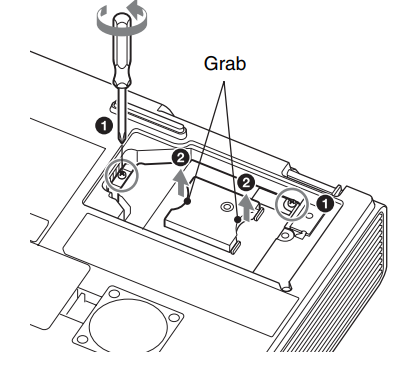
- Loosen the 2 screws on the lamp, then pull out the lamp by itshandleb.
- Insert the new lamp all the way in until it is securely in place. Tighten the 2 screws.
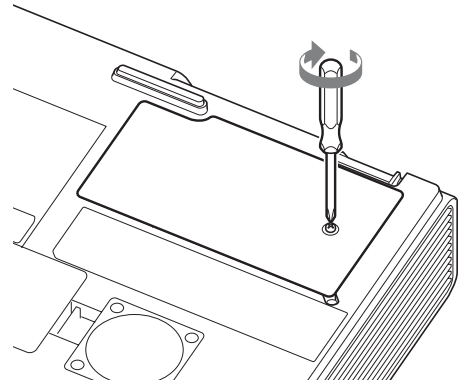
- Close the lamp cover and tighten the 1 screw.
- Connect the AC power cord to a wall outlet and turn on the projector.
- Reset the lamp timer for notification of the next replacement time. Select “Lamp Timer Reset” on the Function menu, then press the ENTER key. When a message appears, select “Yes” to reset thealarmmn timer.

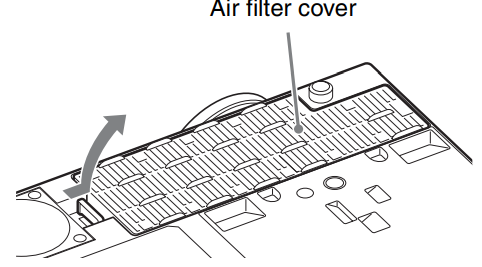
Cleaning the Air Filter
When a message appears on the projected image indicating time for a filter cleaning, clean the air filter (page 20). For details on a new air filter, consult with qualified Sony personnel.
- Turn off the projector, and disconnect the AC power cord from the AC outlet.
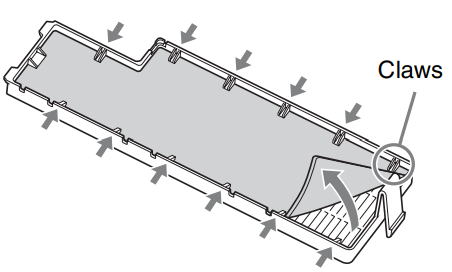
- Slide out and remove the air filter cover from the unit.
- Clean the air filter with a vacuum cleaner. Pull out and remove the air filter cover, and clean it with a vacuum cleaner.
- Reattach the air filter cover to the unit.
For the customers in the U.S.A.
This equipment generates, uses, and can radiate radio frequency energy and, if not installed and used in accordance with the instructions, may cause harmful interference to radio communications. However, there is no guarantee that interference will not occur in a particular installation.
- Reorient or relocate the receiving antenna.
- Increase the separation between the equipment and receiver.
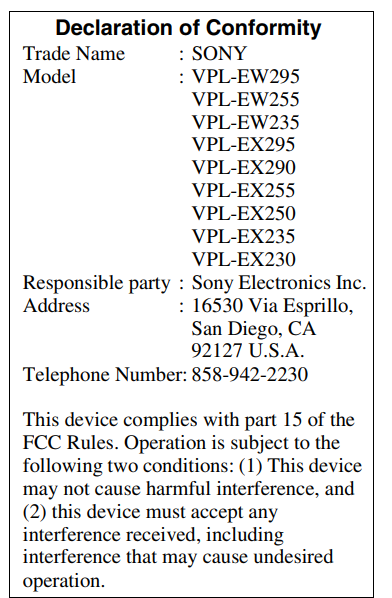
Operation is subject to the following two conditions: (I) This device may not cause harmful interference, and (2) this device must accept any interference received, including interference that may cause undesired operation.
Disposal
For the Customers in Europe
The recycling of materials will help to conserve natural resources. For more detailed information about the recycling of this product, please contact your local Civic Office, your household waste disposal service, or the shop where you purchased the product.
Notice for the customers in the countries applying EU Directives > Manufacturer: Sony Corporation, 1-7-1 Konan Minato-ku, Tokyo, 108-0075 Japan. For EU product compliance: Sony Belgium, bijkantoor van Sony Europe Limited, Da Vincilaan 7-D1, 1935
For the Customers ithe n the Republic of India
Reduction in the Use of Hazardous Substances in Electrical & Electronic Equipment. This product and its components, consumables, parts, or spares comply with the hazardous substances restriction of India’s E-Waste (Management) Rules. The maximum allowable concentrations of the restricted substances are 0.1% by weight in homogenous materials for Lead, Mercury, Hexavalent Chromium, Polybrominated Biphenyls (PBB) and Polybrominated Diphenyl Ethers (PBDE), and 0.01% by weight in homogenous materials for Cadmium, except for the exemptions specified in Schedule II of the aforesaid Rules.
Customer Service
- Website: https://www.sony.com/
- Ph: 800-326-9551