
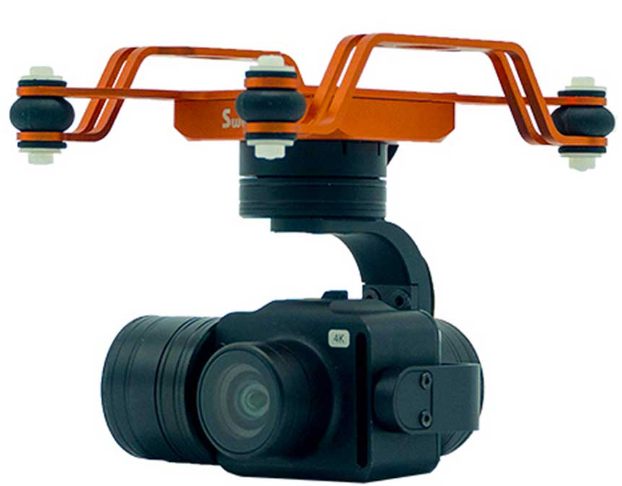
Swellpro Waterproof GC3 3-Axis Gimbal Camera
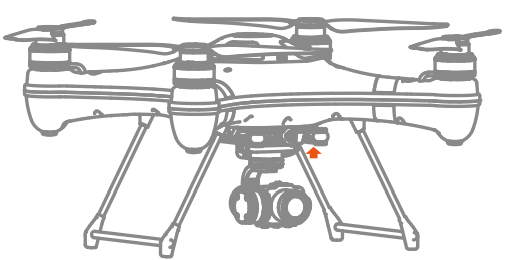
Installation
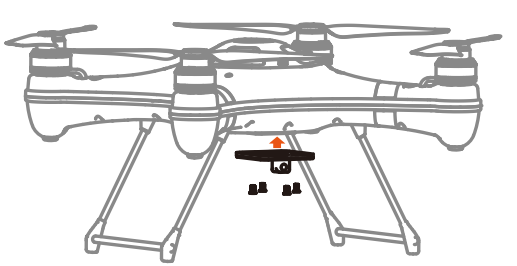
- If necessary, affix the quick-release plate to the bottom of the fuselage with the mounting lug closer to the front of the drone.

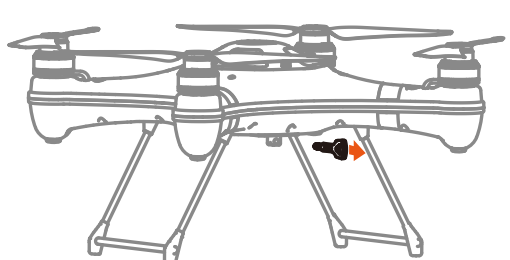
- Remove the quick-release screw from the mounting plate.
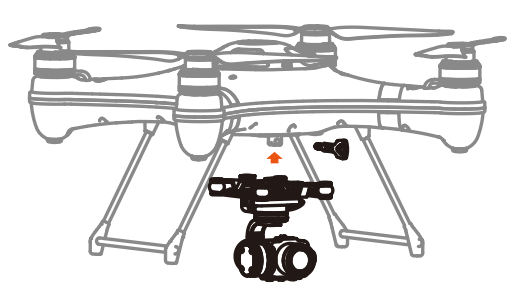
- Mount the gimbal, with the camera facing the front of the drone, onto the quick-release plate and secure it with the quick-release screw.
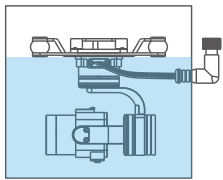
- Plug the gimbal into the drone, taking care to align the guides or pins on the plug with the socket. When aligned, press the plug firmly into the socket and tighten the waterproof ring.
Operating the Gimbal
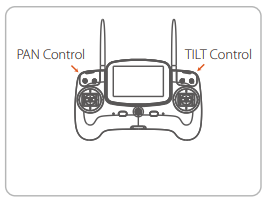
Gimbal Control
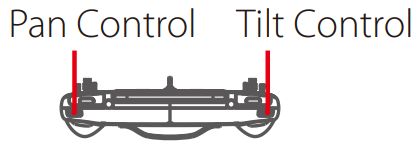
- Tilt Control Thumbwheel: Controls the camera tilt from looking forward to looking straight down(0° to -90°).
- Pan Control Thumbwheel: Controls the camera pan angle left and right of centre (-25° to 25°).
Camera
Installing a microSD Card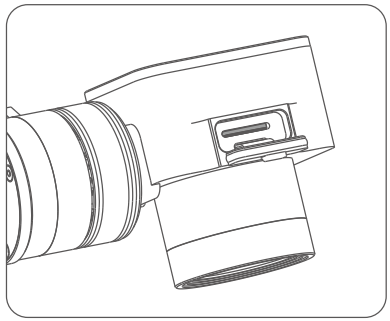
- Open the soft rubber sealing plug at the top of the camera.
- With the microSD label facing the back of the camera, gently insert the card into the card slot.
- Press the card down until you hear a faint click, and the card remains fully inserted.
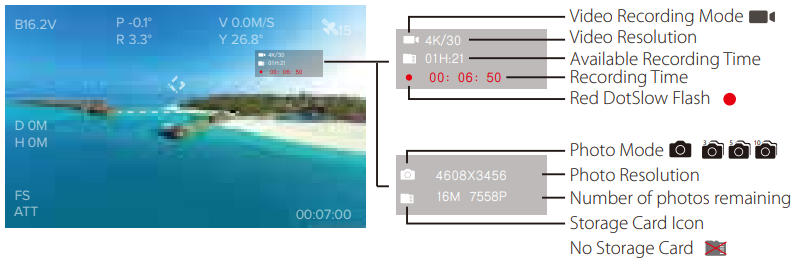
Camera Information Display
Camera Buttons
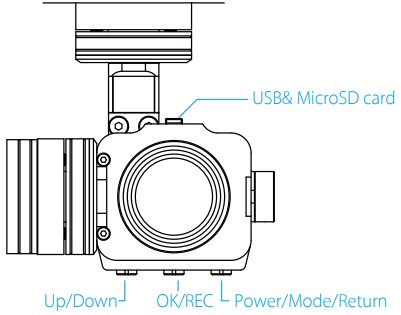
Power/Mode/Return button
- If the camera is OFF, press the Power button for 2 seconds to switch ON. The status indicator light will flash 3 times.
- To switch OFF the camera, press the Power button for 2 seconds to switch OFF; the status indicator light will flash 7 times.
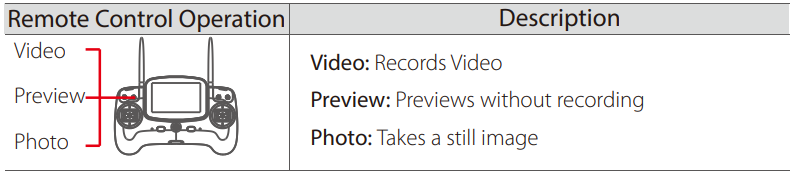
- In Preview mode, press the Power button to cycle modes: Video—Photo—Setup—Playback Preview— Video….
- In Setup mode, press the Power button to return to the previous menu.
OK/REC button
- In Video mode, press the OK button to start and stop recording
- In Photo mode, press the OK button to take a photo.
- In Setup mode, press the OK button to select the current option.
- In Playback mode, press the OK button to start playing the selected video, during playback pressing OK again will pause or restart the video.
- In Playback mode, long-press the OK button to delete the current file. The screen will show a confirmation message. Use the Up/Down to select the tick mark and press OK to confirm.
Up/Down button
- In Setup mode, press to move down through the menu, and press and hold to move upwards.
- In Preview mode, press to switch between Video and Photo mode.
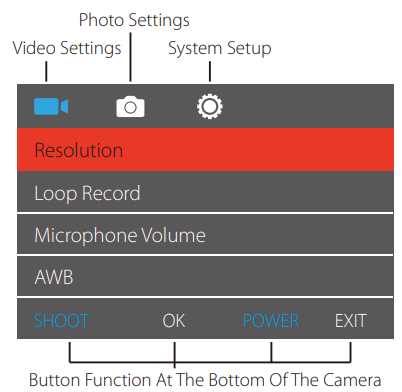
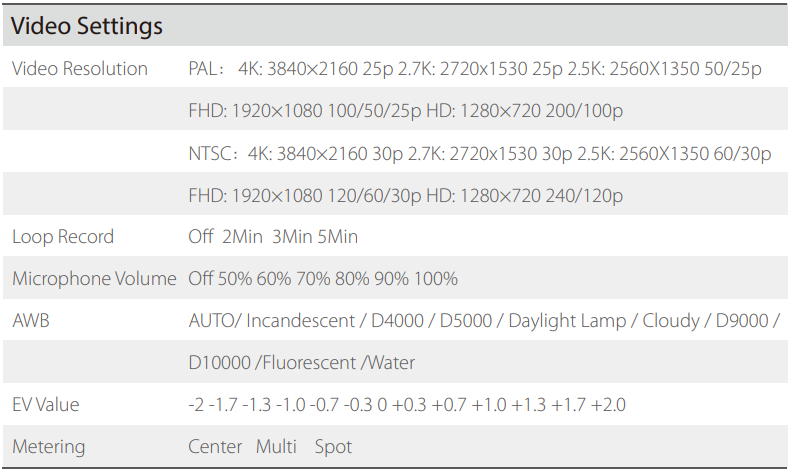
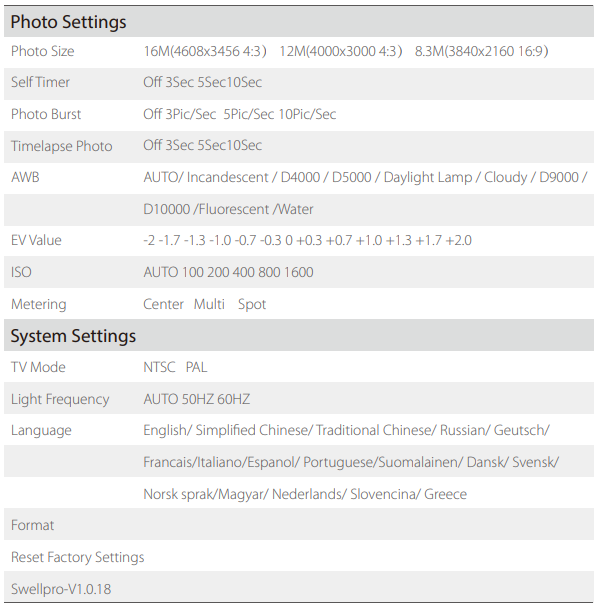
Camera Parameter Settings
Camera Indicator Light

Playback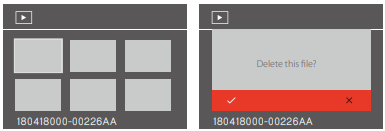
- In Playback mode, short-press the OK button to start playing the selected video. When playing, short-press the OK button to pause, short-press again to continue playing.
- In Playback mode, long-press the OK button to delete the current file. The screen will show a confirmation message. Use the Up/Down to select the tick mark and press OK to confirm.
Gimbal Calibration
The sensitive gyroscope and accelerometer in the gimbal have been calibrated by the factory. However, environmental conditions or a crash landing may require the gimbal to be recalibrated. If, after powering up the gimbal and allowing 15 seconds for the gimbal to complete its power-up process, the picture is not level, the Accelerometer requires calibration.
Accelerometer calibration
- Put the aircraft on a horizontal surface, power on the Remote Controller, and then the drone. Wait 15 seconds for the gimbal to complete its power-up process.
- Scroll BOTH the gimbal control wheels (Pan and Tilt) to the FAR-LEFT and hold in this position for 6 seconds until the gimbal appears to lose power.
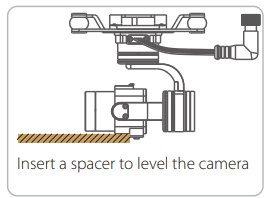
- Insert a spacer to support the camera in a perfectly level position. A thin book may be suitable.
- Hold the camera firmly in the level position and scroll the right-hand (TILT) control wheel to the hard right for 2 seconds.
- Power down the drone. Remove the Gimbal Lock and repower the drone.
- The calibration is complete.
- Put the aircraft on a horizontal surface, power on the Remote Controller, and then the drone.
- Scroll BOTH the gimbal control wheels (Pan and Tilt) to the FAR-RIGHT and hold in this position for 6 seconds until the gimbal appears to lose power.
- The gimbal will then recalibrate its gyroscope.
- Power down the drone for at least 10 seconds and then repower the drone.
- The calibration is complete.
Maintenance
Like any marine equipment, long-life and trouble-free operation relies on due care and maintenance of your equipment. After flying in salt or contaminated water, always thoroughly soak and rinse the gimbal in fresh water immediately after use or before the water can dry inside the gimbal mechanism.
Soaking and rinsing the gimbal
If salt or other sediments are allowed to dry inside the gimbal, thoroughly soak and clean all traces from the camera and gimbal before further use.
- Remove the camera from the drone.
- Locate a container just large enough to hold the gimbal camera in an upright position.
- Place the gimbal into the container.
- Fill the container with clean, fresh water, being careful to keep the electrical connector dry. Ensure the gimbal motors are completely immersed.
- Allow the gimbal to soak for 30 minutes.
- Rinse the gimbal once again and dry it before storage.
Lubricating the microSD card sealing plug
To ensure a waterproof seal, the microSD sealing plug needs to be clean and free of sand or other particles. A small amount of silicone lubricant can be applied to the microSD sealing plug.
Defogging of the camera lens
When cameras are subjected to changing temperature and humidity levels, it is normal for some fogging of the camera lens to occur. To minimise the risk of fogging of the camera lens:
- Only open the microSD hatch in dry, warm conditions.
- Store the gimbal in dry conditions with the microSD hatch open.
- Should the camera fog during use, open the hatch in dry conditions and allow air to circulate inside the camera housing. Condensation will usually dry within a few minutes.
Hydrophobic lens coating
The lens of your SwellPro camera has been treated with a hydrophobic coating to help disperse water quickly after landing on water or when flying in the rain. Over time, this coating can be removed by exposure to sunlight and the cleaning of the lens. The outer lens of the camera is glass and can be retreated as required with commercially available treatments such as ‘Rain-X’™.