
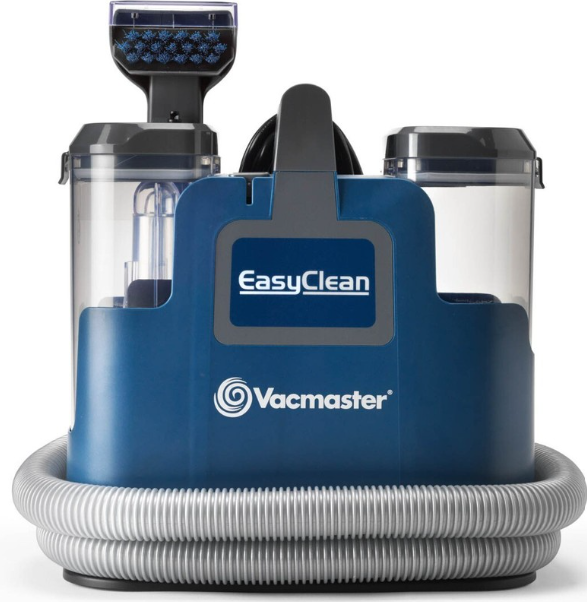
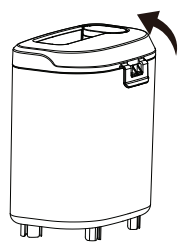
VacMaster SCB301 400 Series Spot Cleaner
Safety Instructions
- Fully assemble before operating.
- Operate the spot cleaner only at the voltage specified on the data plate.
- Do not expose to rain. Store indoors.
- Do not immerse. Use only on carpet moistened by the cleaning process.
- Close attention is necessary when used by or near children.
- Do not run the spot cleaner over the cord. Keep the cord away from heated surfaces.
- Do not unplug by pulling on the cord. To unplug, grasp the plug, not the cord.
- Do not handle the plug or spot cleaner with wet hands.
- Do not put any objects into openings.
- Keep hair, loose clothing, fingers, and all parts of the body away from openings and moving parts.
- Turn off all controls before unplugging.
- Do not put on chairs, tables, etc. Keep on the floor.
- To reduce the risk of health hazards from vapors or dusts, do not vacuum toxic materials.
- Do not use or store near hazardous materials.
- Do not pick up anything that is burning or smoking, such as cigarettes, matches, or hot ashes.
- Do not use the spot cleaner without tanks in place.
- Do not clean over the floor electrical outlets.
- Do not use the spot cleaner to pick up sharp, hard objects, small toys, pins, paper clips, etc.
- They may damage the spot cleaner or dust cup.
- Do not use sharp objects to clean out the hose, as they can cause damage.
- To help prevent matting and resoiling, avoid contact with carpets until they are dry.
- Keep children and pets away from carpets until they are completely dry.
- Do not store the spot cleaner with solution in tanks.
Double Insulation
Use only identical replacement parts. Read the instructions for Servicing Double-Insulated Spot Cleaner before servicing. Use this spot cleaner as described in this manual. Observe the following warnings that appear on the motor housing of your spot cleaner.
Technical Data
- Model: SCB301
- Rated Voltage: 120V AC
- Rated Frequency: 60Hz
- Nominal Current: 3.5A
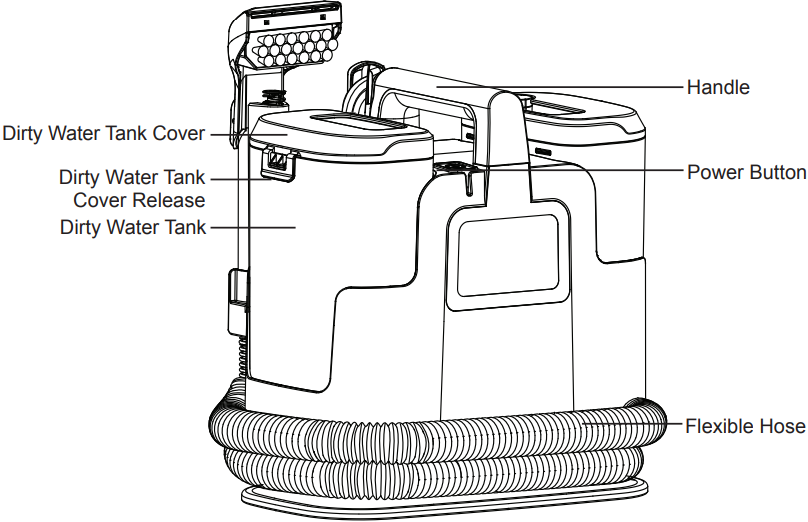
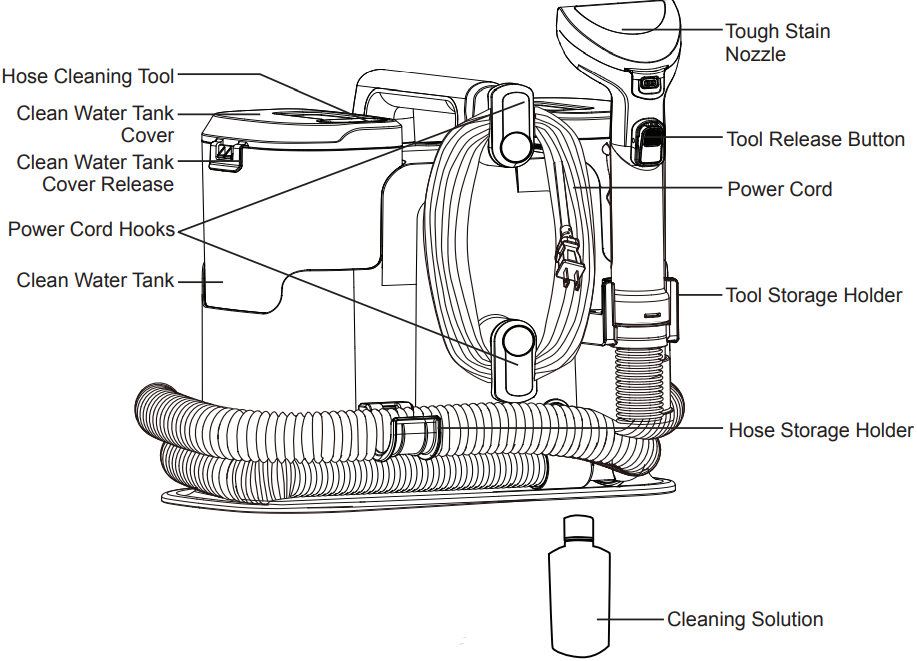
Know Your Product
Replacement Parts
| Item | Part No. |
| Tool Storage Holder | 671008101 |
| Dirty Water Tank | 671008102 |
| Clean Water Tank | 671008103 |
| Tough Stain Nozzle | 671001107 |
| Hose Storage Holder | 671008104 |
Assembly Instructions
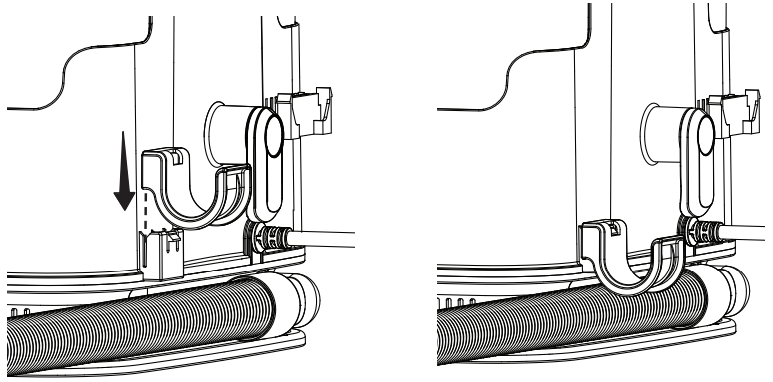
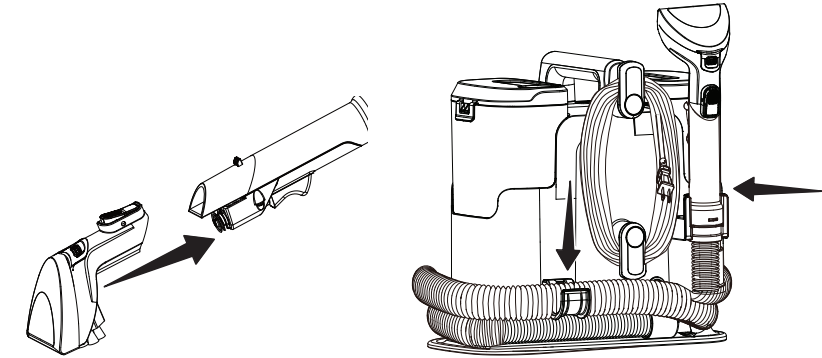
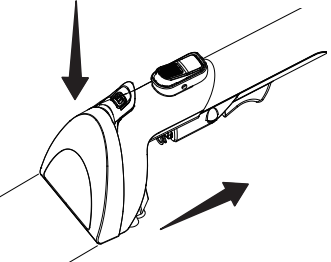
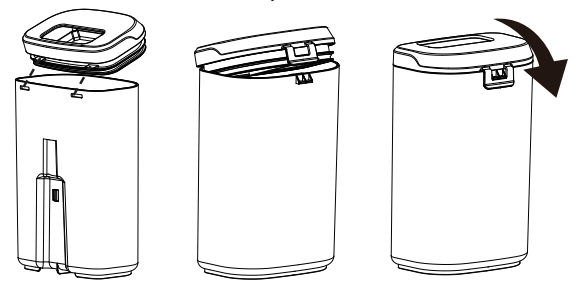
- Align the hose storage holder with the slot as shown.
- Slide down the hose storage holder until it is secured in place.

- Align the tool storage holder with the slot as shown.
- Slide down the tool storage holder until it is secured in place.
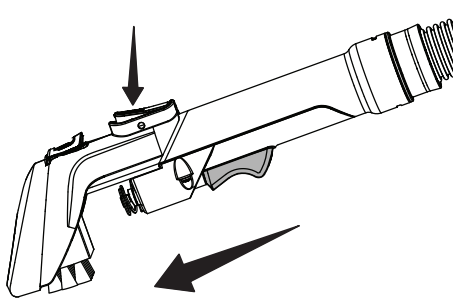
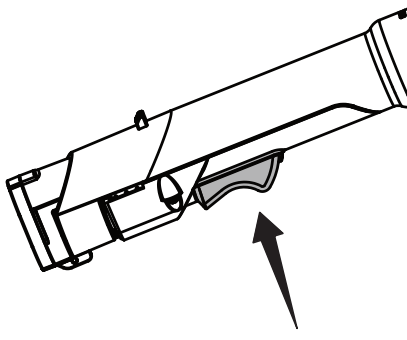
- Slide the tough stain tool onto the end of the suction hose until it clicks into place.
- To remove: Press the tool release button and pull away the tough stain tool.
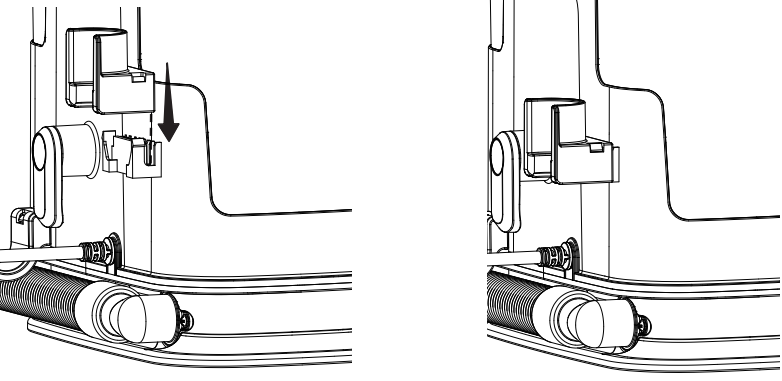
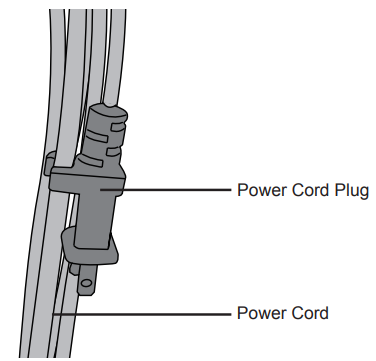
- Make sure both power cord hooks are in the proper position as shown. Wrap the power cord loosely around the cord hooks.
- Lock the power cord plug onto the power cord.

Operation
Filling the Clean Water Tank
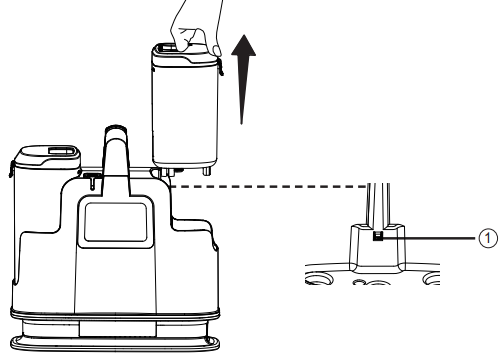
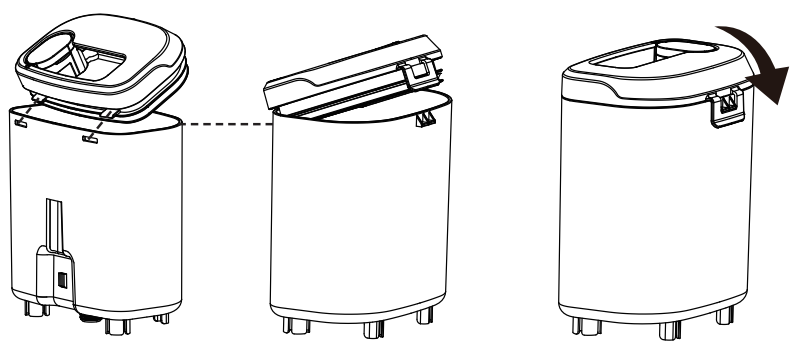
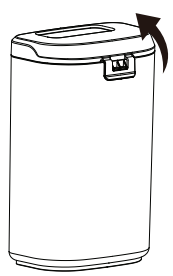
- Lift the clean water tank from the side of the unit.
- A security latch is positioned to keep the clean water tank in position to avoid unintentional release.
- The latch will automatically release when the tank is pulled upwards.
- Remove the clean water tank cover by undoing the clean water tank cover release.
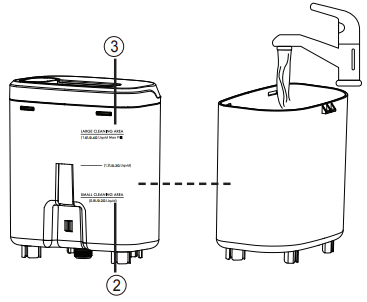
- Fill the tank with warm water (Max 104°F (40°C)) and solution.
- Ensure the correct proportion of water and cleaning solution is used by referring to the solution label.
- SMALL CLEANING AREA – 0.8L/0.2G Liquid ( 2 )
- LARGE CLEANING AREA – 1.6L/0.4G Liquid ( 3 )
- Insert the locking tabs into the slots of the clean water tank first, and then secure the clean water tank cover back into place until a click is heard.
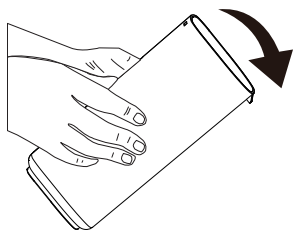
- Slide the clean water tank back onto the unit. The security latch will automatically secure once the clean water tank is in position. A click will be heard when correctly installed.
Using the Spot Cleaner
- Before using the spot cleaner, thoroughly vacuum the area to be cleaned.
- Always test a small hidden area for colorfastness and pile distortion.
- Test Colorfastness – Gently rub the surface with a dampened white cloth containing cleaning solution.
- Unwrap the hose from the unit. Make sure the tough stain nozzle is attached securely..
- Turn the power cord hooks inward from either side to release the power cord.
- Detach the power cord plug from the power cord.
- Plug the power cord into an outlet located near the floor.
- Press the power button to turn the spot cleaner on.
- Hold the tool about 1 inch over the stain to be cleaned. Squeeze the spray trigger to spray a generous amount of cleaning solution over the soiled area. Use the brush on the tool to agitate stains by scrubbing in a back-and-forth motion.
- To lift away the stain, apply downward pressure on the front of the cleaning tool and pull the tool backward slowly to vacuum up excess dirty liquids. Repeat as necessary.
- Empty the dirty water tank when the dirty liquid reaches the “Max Fill” line and there is a loss in suction. See instructions in the Emptying the Dirty Water Tank (pages 16-17).
- Once you have completed cleaning, press the power button; unplug the power cord plug from the outlet.
- Turn the power cord hooks to the proper position and wrap the cord loosely around the power cord hooks.


Emptying the Dirty Water Tank
Empty the dirty water tank when the dirty liquid reaches the “Max Fill” line and there is a loss in suction. During normal use, debris may accumulate in the dirty water tank. In order to keep the spot cleaner functioning properly, rinse out the dirty water tank with clean water after each use.
- Lift the dirty water tank from the side of the unit.
- A security latch is positioned to keep the dirty water tank in place to avoid unintentional release.
- The latch will automatically release when the tank is pulled upwards.
- Remove the dirty water tank cover by undoing the dirty water tank cover release.
- Empty the tank into a sink or toilet. Rinse the tank thoroughly with clean water. If continuing to use after emptying the dirty water tank, be sure to dry the outside of the tank before reinstalling.
- Insert the locking tabs into the slots of the dirty water tank first, and then secure the dirty water tank cover back into place until a click is heard.
- Reinstall the dirty water tank onto the unit. The security latch will automatically secure the dirty water tank in position. A click will be heard when correctly installed.


Maintaining Your Cleaner
To reduce the risk of shock, turn off and disconnect the power cord before performing any service or maintenance.
Cleaning Exterior and Attachments
- Turn off and unplug the spot cleaner. DO NOT drip water on the spot cleaner.
- To clethe exterior ororr to reduce static electricity and dust build-up, wipe the outer surface
with a clean, damp, and soft cloth. Wipe dry after cleaning.
Cleaning the Tough Stain Nozzle
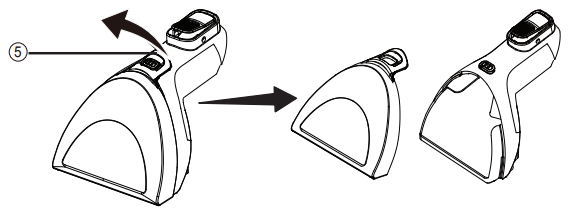
- Press the tool release button to remove VacMaster SCB301 400 Series Spot Cleaner the attachment from the hose.
- Pull up the cover release tab ( 5 ) on the nozzle to remove the cover.
- Rinse thoroughly with clean water. Allow the parts to dry before reinstalling.
Hose Cleaning Tool
- Remove the clean water tank and fill it with warm water (Max 40°C).
- Attach the hose cleaning tool to the suction hose.
- Press the power button to turn the spot cleaner on and hold the spray trigger for 30 seconds.
- Repeat as needed. Let the machine run for VacMaster SCB301 400 Series Spot Cleaner 5-10 seconds before turning off.
- Turn off and unplug the spot cleaner.

Cleaning the Filter Grill
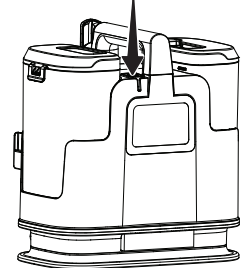
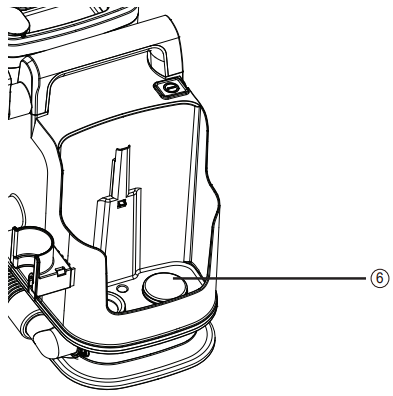
- Remove the dirty water tank from the side of the unit.
- Remove any dirt and debris from the filter grill ( 6 ) as shown.
Storage
Wrapping the power cord too tightly puts stress on the cord and could cause damage. A damaged cord is an electrical shock hazard and could cause personal VacMaster SCB301 400 Series Spot Cleaner injury or damage.
- Replace the uction hose and attachments in the storage position.
- Wrap the power cord loosely around the cord hooks. Attach the plug retainer clip to the power cord.
- Empty the clean water tank (if necessary). Rinse it out before replacing it on the unit. Open the clean water tank cap to allow it to air dry.
- Empty the dirty water tank, then rinse, clean, and dry before placing it back on the unit.
- Store the spot cleaner in a dry and cool indoor area.
Troubleshooting
Should you have any problem(s) with your vacuum cleaner, review the table below for solutions to minor performance issues. Disconnect the electrical supply before performing maintenance on the spot cleaner. Failure to do so could result in electrical shock or personal injury.
| PROBLEM | POSSIBLE CAUSE | SOLUTION |
| The spot cleaner is not operational. | Unplugged from the power outlet. | Plug in firmly to a suitable power outlet. |
| Defective power outlet. | Check with a good appliance. Be sure the power cord plug is fully plugged into an electrical outlet. | |
| The motor is damaged. | Have the damaged part checked by qualified personnel or contact the after-sales helpline 1-866-384-8432. | |
| Poor pick-up performance. | The dirty water tank is not installed correctly. | Check the dirty water tank for correct installation. Ensure it is installed in place. |
| The dirty water tank is full. | Empty the dirty water tank. | |
| The suction hose is clogged. | Clean the hose. | |
| The float valve is activated. | Empty the dirty water tank. | |
| Water escapes from the spot cleaner. | The dirty water tank is full. | Empty the dirty water tank. |
| PROBLEM | POSSIBLE CAUSE | SOLUTION |
| No solutions prouting out. | The clean water tank is empty. | Fill the clean water tank. |
| The hose nozzle will not spray after filling the clean water tank. | Air is trapped in the pump and hose. | Turn on the spot cleaner. If the hose does not spray, prime the pump by lowering the hose down to the floor and holding the trigger for up to 1 minute. |
| Motor noise becomes high-pitched. | The dirty water tank is full. | Empty the dirty water tank. |
WARRANTY
- This warranty does not cover filters or belts, which VacMaster SCB301 400 Series Spot Cleaner are expendable parts that can wear out from normal use within the warranty period.
- This warranty gives you specific legal rights, and you may also have other rights which vary from state to state.
Limitataions
This express warranty is the only warranty applicable. It excludes all other express oral or written warranties and all warranties implied by law with respect to the Goods, including any warranties of merchantability or fitness for a particular purpose.
ARY, Inc.’s maximum liability hereunder, arising from any cause whatsoever, whether based in contract, tort (including negligence), strict liability, or any other theory of law, shall not exceed the purchase price.
Customer Support
- Website: www.vacmasterfresh.com/product-registration/
- Visit: vacmasterfresh.com/contact-us/
- Tel: 1-866-384-8432.
FAQs
Q2: Is the spot cleaner portable?
Indeed, the SCB301 has a handy handle and a small, light design that makes it simple to use and carry around your house or car.
Q3: How do I use the VacMaster SCB301 spot cleaner?
Add the suggested cleaning solution to the clean water tank after filling it with warm water. Repeat as needed after applying the solution to the discoloured region and using the hoover to remove any remaining moisture and debris.
Q4: Can I use it on delicate fabrics?
Yes, but to make sure the fabric is durable and colourfast, always do a patch test on a small, hidden area first.
Q5: How often should I clean the tanks?
To avoid accumulation and odours, empty and rinse the recovery and clean water tanks after every usage.
Q6: How do I clean the filters?
After removing the filters, rinse them with warm water until they become clear. Before putting them back in place, let them air dry fully.
Q7: What should I do if the suction power decreases?
Examine and clean the recovery tank and filters. Check for obstructions in the hose and nozzle as well.