
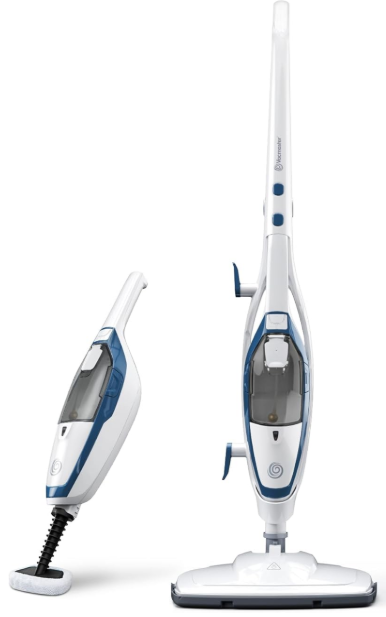
VacMaster SMF1501 2-in-1 Steam Mop
Safety Instructions
- Do not leave the appliance when plugged in.
- Unplug from the outlet when not in use and before servicing.
- Not for space heating purposes.
- Make sure the household voltage is the same as that indicated on the rating label of the unit.
- Always switch off, unplug from the socket after use or before cleaning the appliance or any maintenance task.
- Do not unplug by pulling and jerking the cord with force.
- Do not handle the plug or the appliance with wet hands.
- Do not use the appliance in any outdoor area. Commercial use will void the warranty.
- Do not step on or wrap the cord around arms or legs when using the appliance.
- Do not pull, lift, or carry the appliance by its supply cord.
- In order to avoid damage to the cord, do not pull the cord around sharp corners and edges.
- Keep the appliance away from the ovens and stoves, etc.
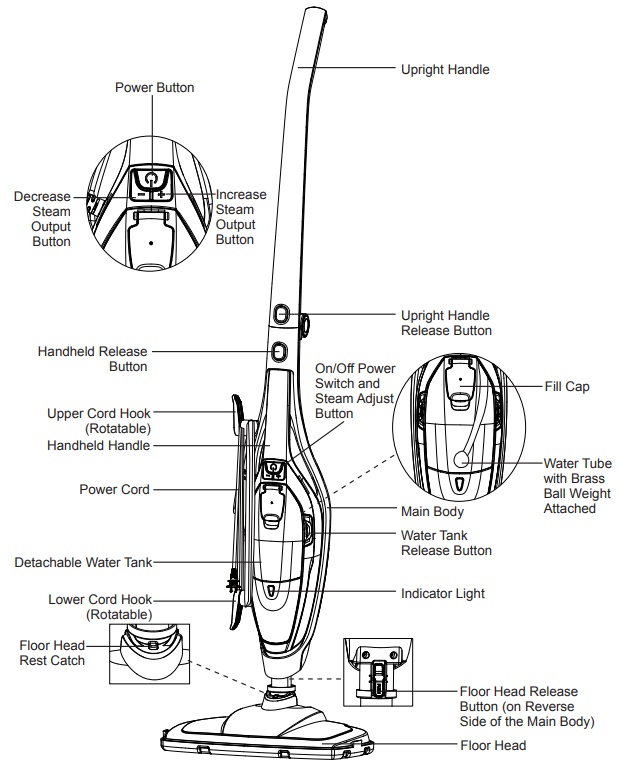
Know Your Product
Replacement Parts
- Item Part No.
- Textile Pad 731003104
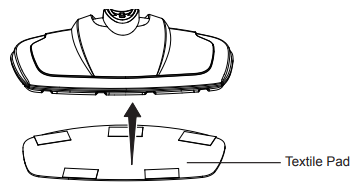
Assembly
- Attach the provided textile pad to the bottom of the floor head using the hook and loop fastener pads.
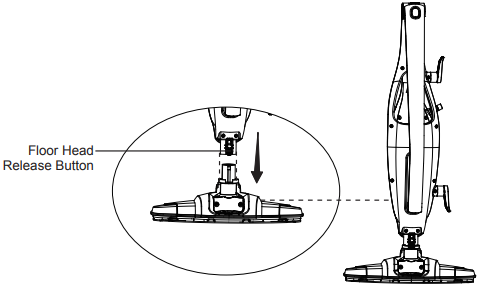
- Attach the main body to the floor head until the floor head release button on the back of the main body clicks into place.
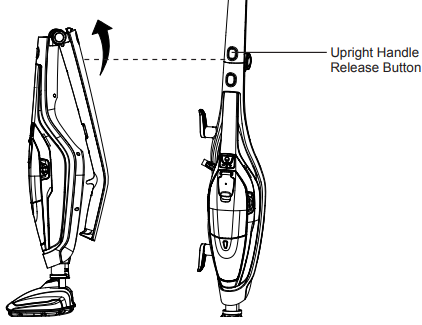
- Raise the upright handle into position until it clicks into place.
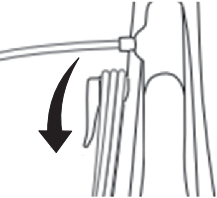
- Make sure the upper cord hook is in the upright position as shown. Wrap the power cord around the upper and lower cord hooks.
Operation
- Bare wooden floors or any surfaces where wood is exposed (as it will absorb moisture and may distort).
- Damaged hardfloors or hardfloors with gaps present (as they will absorb moisture and may distort).
Also, do not keep the steam mop in one place for an extended period, because the continual heat may cause damage to carpets and laminate flooring. Please disconnect and allow the unit to cool before changing pads and attachments.
Filling the Water Tank
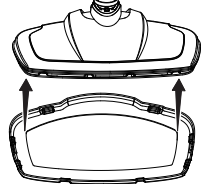
- Remove the water tank from the handheld steam cleaner by pressing the two water tank release buttons.
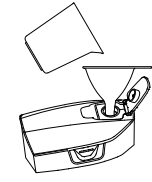
- Open the fill cap. Fill the water tank with cold distilled water with the provided funnel and water cup, and then close the fill cap.
- Press the water tank release buttons and refit the water tank to the handheld steam cleaner.
- Reposition the handheld steam cleaner back into the main body.

Using Your Steam Mop
Choose the correct accessory for steam cleaning. Use only y textile pad for cleaning on bare floor surfaces. Use both a textile pad and a carpet glider for cleaning on carpets or rugs. Vacuum or sweep the floor surface before steam cleaning.
Using an Upright Steam Mop
- Make sure the provided textile pad has been attached to the bottom of the floor head.
- Rotate the upper cord hook to quickly release the power cord.
- Plug the power cord into a grounded outlet.
- The indicator light will begin flashing white. After approximately 25 seconds, the flashing will stop, and the light will remain steadily illuminated white.
- Press the power button to turn on the steam mop, and the indicator light will illuminate green.
- The steam will begin to be emitted in the low steam setting.
- Adjust the steam volume as needed using the dedicated steam volume buttons.
- To increase the steam volume to high, press the “+” button; the indicator light will illuminate blue.
- To decrease the steam volume to low, press the “-” button; the indicator light will change back to green.
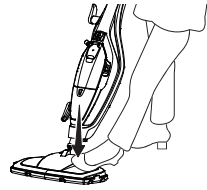
- Recline the mop by placing a foot on the floor, head, and pulling the main body back toward you.
- Move the mop slowly in a back-and-forth motion, paying particular attention to high-traffic areas and common spaces.
- When cleaning carpet, place the floor head with the textile pad attached into the carpet glider for easier maneuverability.
- Once you have completed cleaning, push the power button to turn off the steam mop and return the main body to the upright position, then unplug the power cord from the outlet.
Using a Handheld Steam Cleaner
This function is ideal for cleaning vertical surfaces es hard-to-reach places. The handheld cleaner has been designed for one-handed use.
- Make sure the steam mop is unplugged from the outlet and has cooled down.
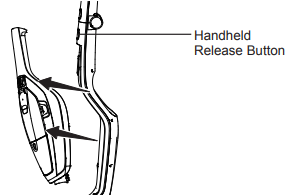
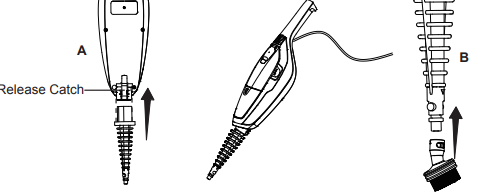
- Separate the handheld steam cleaner from the main body by pressing the handheld release button on the front of the main body. Pull the handheld steam cleaner up and out of the main body.
- To use all of the accessories (excluding the utility nozzle and squeegee attachment), attach the conic pipe to the handheld steam cleaner by following these steps:
- Slide the conic pipe into the nozzle of the handheld steam cleaner. Ensure the release catch on the underside of the nozzle is in line with the square hole on the conic pipe. Push together until it clicks into place.
- Ensure the corresponding gaps and circular sections on the accessory and conic pipe are aligned. Then, twist the accessory until the arrow markings on both parts match.
- Plug the power cord into an outlet.
- The indicator light will begin flashing white. After approximately 25 seconds, the flashing will stop, and the light will remain steadily illuminated white. The handheld steam cleaner will be ready for use.
- Press the power button to turn on the handheld steam cleaner. Adjust the steam volume by pressing the steam volume buttons according to your needs.
- Once you have completed cleaning or steaming, unplug the power cord from the outlet.
- After the handheld steam cleaner has cooled down completely, reattach it securely to the main body, ensuring it has a firm connection.
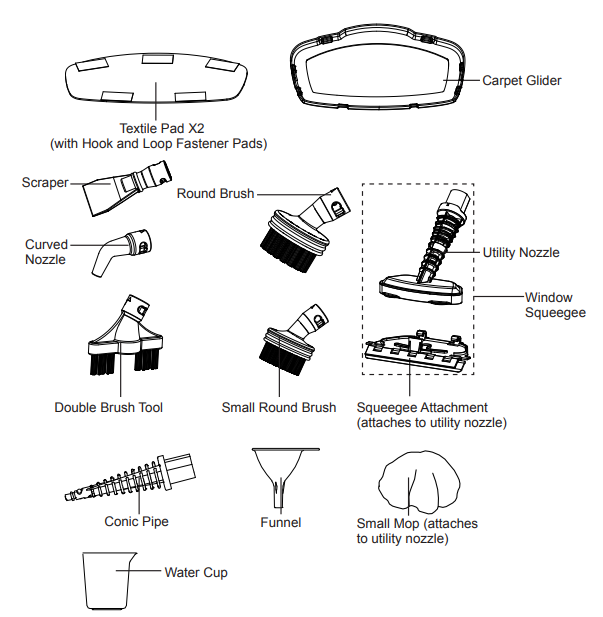
Attachments
Conic Pipe
This attachment is the base attachment for all handheld accessories, excluding the utility nozzle. It can also be used alone to clean places or crevices that are not easily accessible.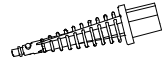
Curved Nozzle
This attachment is ideal for cleaning toilet bowls, taps, and drain covers. To remove non-permanent stains from carpets or upholstery, point the attachment directly at the stain and hold a clean cloth nearby to absorb any loosened dirt.
Scraper
This attachment is used to remove stubborn buildup or to help de-ice the refrigerator or freezer.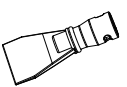
Round Brush
This attachment is designed for use on a variety of surfaces, including tiles, ovens, wheels, and glass.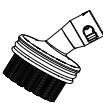
Small Round Brush
This attachment is for use on hard stainless-steel surfaces such as grates on a grill.
Double Brush Tool
This attachment is used to remove dirt from grooves and crevices.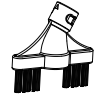
Utility Nozzle
This base attachment is used with the following accessories: Small Mop for covering the utility nozzle when cleaning upholstery and bedding. This accessory is useful for cleaning tile and or glass surfaces, cabinets, and countertops. As well as upholstery, curtains, blinds, pillows, and mattresses.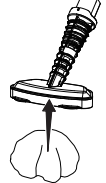
The squeegee attachment can be attached to the utility nozzle by inserting the hooks at the back of the squeegee attachment into the loops on the back of the utility nozzle, then securing the front of the utility nozzle into the locking clip on the top of the squeegee attachment (as shown).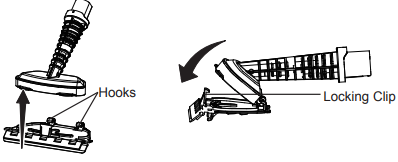
Remove the squeegee attachment after use by holding the locking clip forward. The utility nozzle should still be attached to the hooks at the back of the squeegee attachment. Pivot the utility nozzle up and unhook it from the squeegee attachment.
The squeegee attachment is ideal for cleaning tiled or glass areas such as windows or mirrors. To clean windows, start at the top, press the squeegee to the surface, and drag downwards in straight passes from top to bottom. Dry the rubber blade and window edge after VacMaster SMF1501 2-in-1 Steam Mop each pass. For small windows, spray the steam directly to the surface and wipe away moisture with the squeegee.
Run-Dry and Blockage Protection
If the steam mop is operated without water, then VacMaster SMF1501 2-in-1 Steam Mop after a few minutes, the pump that supplies the water to the boiler will stop, and the indicator light will change color to red. If this happens, switch the product off, refill the tank, and then switch back on. After the 25-second heat-up time, the pump will start to work, and steam will be emitted. The indicator light will change to red, and the pump will shut off if there is a blockage to the steam nozzle. If this happens, switch off and allow the product to cool before examining the nozzle for a potential blockage.
Rinsing the Water Tank
Regularly rinse the water tank to release any deposits that have collected at the bottom of the tank. Only use deionised, demineralised or distilled water (available from most supermarkets) and close the fill cap to allow vigorous rinsing.
Maintaining Mop
To reduce the risk of shock, disconnect the power cord and turn off. Allow the steam mop to fully cool down before performing any cleaning, maintenance, or storing. This product contains no serviceable parts. Do not try to repair it by yourself. If there is any servicing that VacMaster SMF1501 2-in-1 Steam Mop requires disassembly other than cleaning, contact customer service.
After Use
Follow the two maintenance steps below after every use.
- Turn the cleaner off and unplug it from the VacMaster SMF1501 2-in-1 Steam Mop outlet. Place immediately on a suitable surface (eg, tiled floor) where the residual heat/moisture in the floor nozzle/pad will not affect the surface. Wait until the cleaner has cooled down completely.
- Empty the water tank by opening the fill cap and pouring out the water. Allow the inside of the water tank to dry out before closing the fill cap.
Storage
We recommend storing the steam mop with the carpet glider attached, but the pads removed to minimise the likelihood of any water leaking onto surfaces. Rotate the upper cord hook upwards, then wrap the cord around the upper and lower cord hooks to secure the power cord.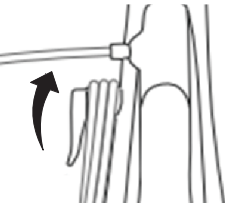
The upright handle is collapsible for compact storage by pressing the upright handle release button.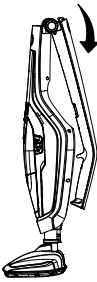
Technical Data
- 2-in-1 Steam Mop
- Model: SMF1501
- Rated Voltage: 120V AC 60Hz
- Rated Power: 1550W
- Water Tank Capacity (ml): 400ml
- Heating Time (s): 25s
- Run Time at the High Steam Setting: 16+/-3minute
- Run Time at the Low Steam Setting: 24+/-5minute
Troubleshooting
Should you have any problem(s) with your steam mop, review the table below for solutions to minor performance issues.
| PROBLEM | POSSIBLE CAUSE | SOLUTION |
| The steam mop will not power on (the indicator light will not illuminate). | The plug is not plugged into the wall outlet. | Be sure the power cord plug is fully plugged into the outlet. |
| Defective power cord. | Check the power cord condition; if there is any damage, contact customer service. | |
| Blown fuse or breaker. | Replace the fuse or reset the breaker in the home. | |
| The internal fuse is blown. | Contact with customer service. | |
| The indicator light illuminates red. | The water tank may be empty. | Fill up the water tank with water. |
| The steam nozzle may be blocked. | Clean the steam nozzle. | |
| Reduced steam or no steam. | The water tank may be empty. | Fill up the water tank with water. |
| The heat-up time is not finished. | Wait for approx. 25 seconds after being plugged in. | |
| The steam nozzle may be blocked. | Clean the steam nozzle. | |
| There is no power to the steam mop. | Make sure the steam mop is plugged into a good wall outlet. | |
| The power button has not been pressed. | Press the power button to turn the steam mop on. | |
| The water tank is not installed properly. | Install the tank properly. Refer to page 11. |
Customer Support
- Website: www.vacmasterfresh.com/product-registration/
- Visit: vacmasterfresh.com/contact-us/
- Tel: 1-866-384-8432.
FAQs
What types of floors is the steam mop safe for?
Tile, sealed wood, laminate, vinyl, and linoleum are among the sealed hard floors that the steam mop is safe to use on.
How long does it take to heat up?
Cleaning may be done quickly and effectively because the steam mop just takes 30 seconds to heat up.
How much water does the tank hold, and how long does it last?
Depending on the mode of use, the water tank’s capacity of about 450 ml (15 oz) allows for up to 20 minutes of continuous steam.
Can I adjust the steam output?
Indeed! You may change the steam intensity for various surfaces or cleaning requirements thanks to the unit’s adjustable steam control.
How do I switch to handheld mode?
To separate the handheld device from the main body, press the release button. For steam cleaning stovetops, grout, countertops, etc., attach the preferred attachment.