
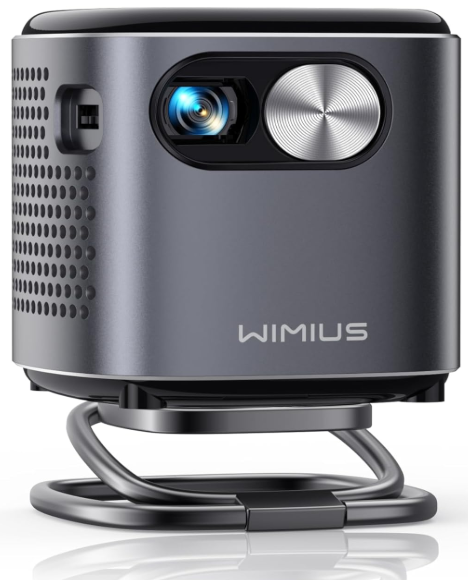
WiMiUS Q2 DLP Mini Projector
Content Package
- WiMiUS Q2 Projector

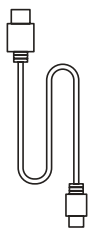
- Power Cable
- AC to USB-A Cable
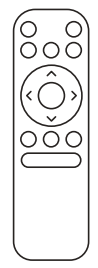
- Remote Control
- HDMI to Mini HDMI Cable
- Projector Steady
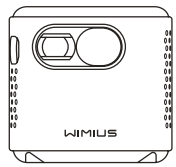


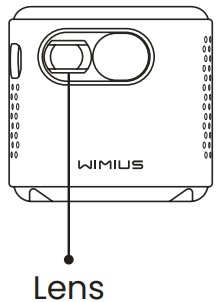
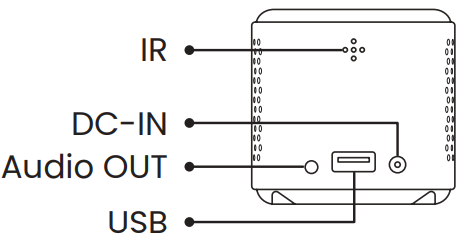
Structure
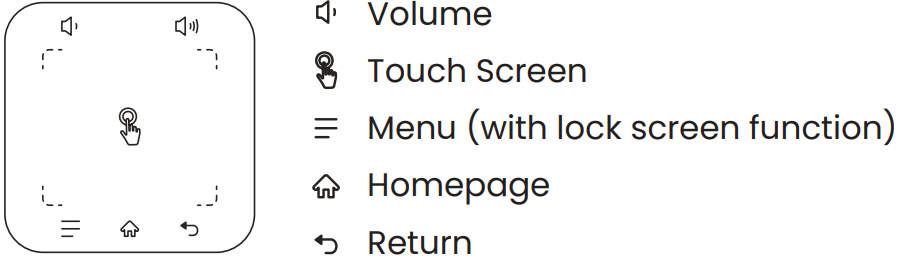
Remote Control

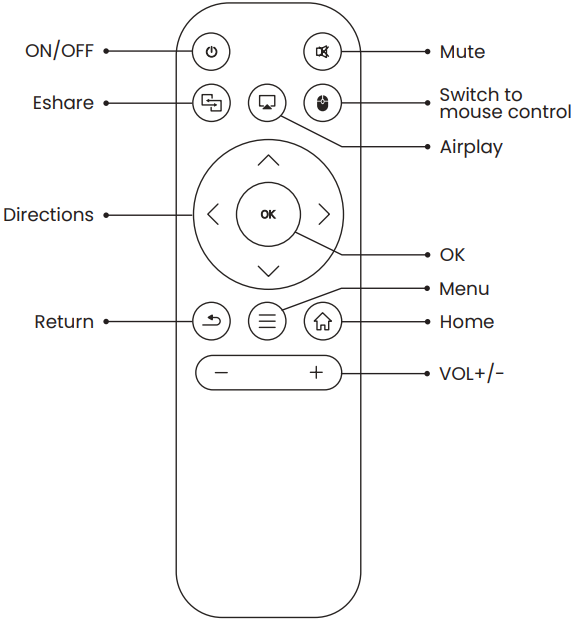
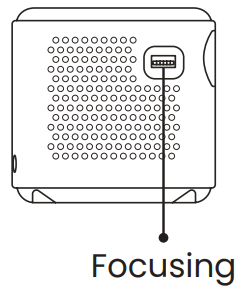
Image Adjustment
Focus Adjustment: Slide the pinion on the left of the device to adjust sharpness.
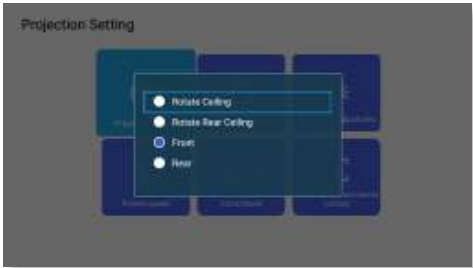
- Projection Mode
Select [Settings ] menu — Select [ Projection] — Select [Projection Mode], Press the arrow key to select and press “OK” to confirm the projection position. There are 4 modes: Rotate Rear Ceiling / Rear / Front / Rotate Ceiling.
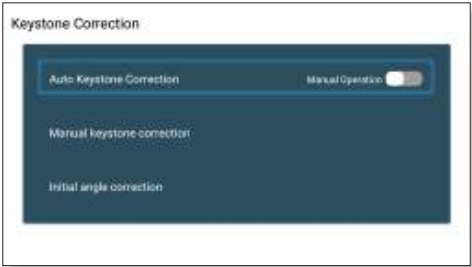
Keystone Correction
Slide the pinion on the left of the device to adjust sharpness. Select [Settings ] menu — Select [ Projection] — Select [Projection Mode], Press the arrow key to select and press “OK” to confirm the projection position. There are 4 modes: Rotate Rear Ceiling / Rear / Front / Rotate Ceiling. Select [Settings] menu — Select [Projection] — Select [Keystone Correction]–Select [Auto Keystone Correction], and press “OK” to confirm. The projector can auto-adjust the vertical plane to get a rectangular image. The tilted angle doesn’t exceed ±30°.
Manual Keystone Correction
Initial Angle Correction Select [Settings] menu — Select [Projection] — Select [Keystone Correction]–Select [Manual Keystone Correction], press “OK” to pick the point you want to adjust at first, and then press the button ” ▶ ” or ” ▼ ” to set the value (Horizontal and Vertical ±30°) needed as shown below.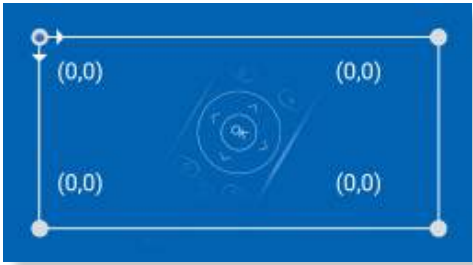
Initial Angle Correction
- Place the device on the horizontal plane and press OK to correct it.
- Don’t move the device during the correction.
Zoom Mode
There are 2 modes of Aspect Ratio: 16:9 or 4:3. Select [Settings] menu — Select [Projection] — Select [Zoom Mode], the projection screen can be zoomed 50%~100%, Press the button ” ◀ ▶ ” to set the value needed.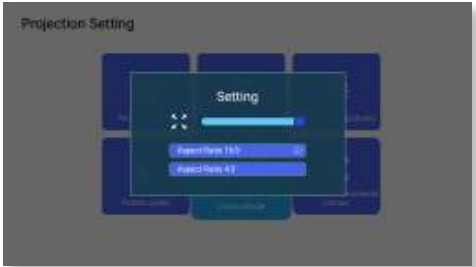
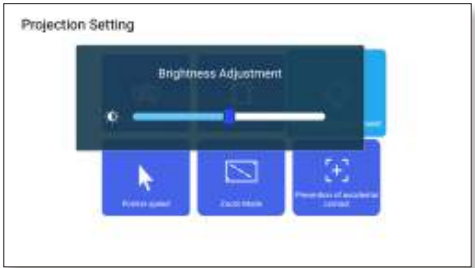
Brightness Adjustment
Select [Settings] menu — Select [ Projection] — Select [Brightness Adjustment], press ” ◀ ” or ” ▶ “to adjust the brightness you need.
Other Setting
Pointer Speed
Select [Settings] menu — Select [ Projection] — Select [Pointer Speed], press ” ◀ ” or ” ▶ “to adjust the mouse pointer move speed you need.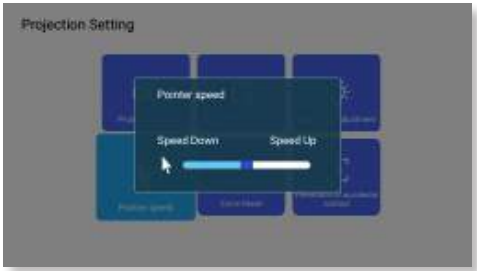 Prevention of Accidental Contact
Select [Settings] menu — Select [Projection] — Select [Prevention of Accidental Contact], to choose the time period you need, prevent accidental operation.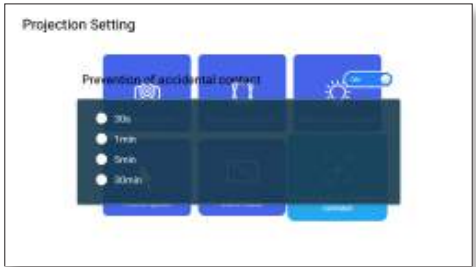
Settings
Select The Input Signal Source. Choose the “Source” on the home page, select the desired input signal source (USB/HDMI/AV). The device will detect the USB stick automatically; youneed to confirm whether to open. When playing a video, you can press the ” ” button to set the sound and mode of playback.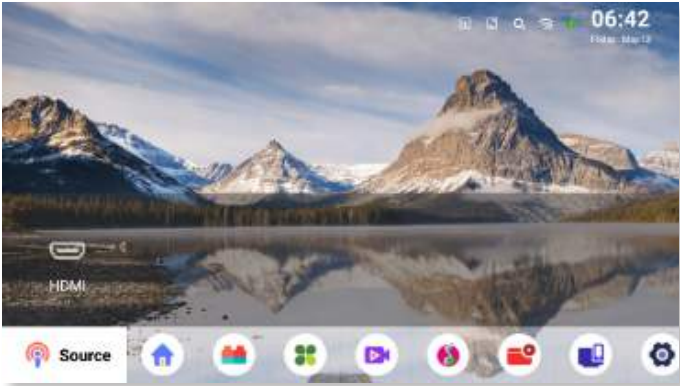
Wireless Connection
For IOS System
Attention: Your device and the projector should be on the same Home WiFi.
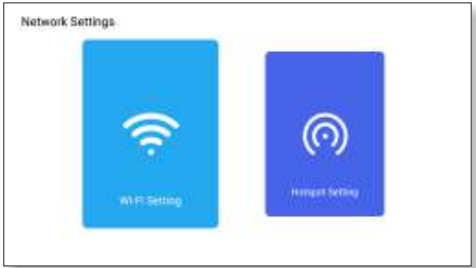
- Turn on the Network setting of the projector.
- Choose your Home WiFi to connect and enter the right password, then click “Link.”
- Please wait 3 seconds to establish the connection.
- Once connected, it will remember the password of the connected WiFi.
- Turn on the WiFi setting of your mobile device, then connect to the same Home WiFi.
- Then click “AirPlay” on the smartphone
- Select“Projector-7935” from the search results to connect.
- Succeed.
For Android System
- Turn on the Network setting of the projector.
- Choose your Home WiFi to connect and enter the right password, then click “Link.”
- Please wait 3 seconds to establish the connection.
- Once connected, it will remember the password of the connected WiFi.
- Turn on the WiFi setting of your mobile device, then connect to the same Home WiFi.
- Then click “Miracast” on the smartphone
- Select“Projector-7935” from the search results to connect.
- Succeed.
Eshare
Use your phone as a wireless mouse, keyboard, and remote control to transform the way you control and engage with large-screen devices.
- Connect your device to the Home WiFi.
- Visit “http://192.168.43.1:8000” with a web browser or scan the QR code to download the app.
- Launch Eshare and click “Projector-7935” to connect.
Bluetooth Connection
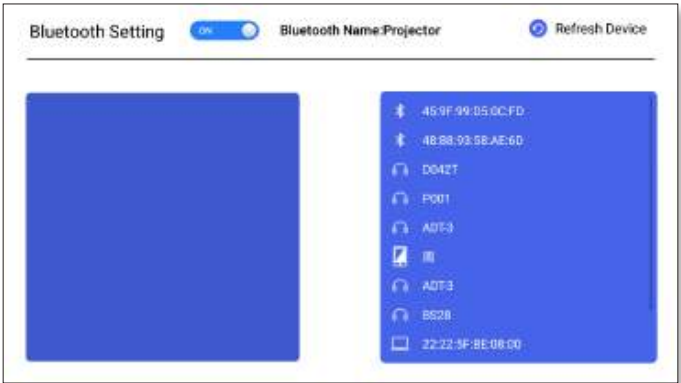
Connect Bluetooth Speakers
- Turn on your Bluetooth Speaker.
- Turn on the [ Bluetooth Settings] of your projector
- Select your Bluetooth speaker to connect.
- Succeed.
Signal Line
WiMiUS Q2 projector has 3 interfaces, HDMI ports/USB ports/3.5mm headphone output. Please select the correct connecting port to connect your device (PC, Phone, DVD Player, Sound bar, USB, PS4, etc.)
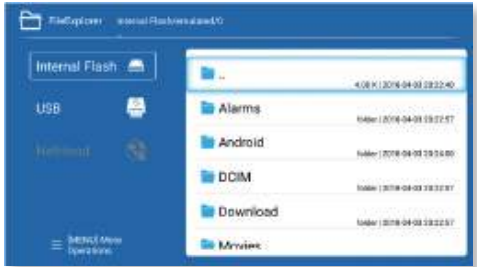
USB Multimedia Connecting
- For USB devices, no need to choose the signal source. The machine will detect them automatically.
- Select the icon at the top right corner of the home page.
Connecting with a Laptop
- Connect the projector to the PC by HDMI cable.
- Choose the media signal channel: “HDMI”.
MacBook or MacBook Air
- Use a Type-C to HDMI adapter to connect your MacBook, or a Mini Display to HDMI adapter to connect with your MacBook Air (adapter not included).
Connecting with the Sound bar
- Use the 3.5mm audio cable coming with the projector to connect with sound bar.
- Turn on the projector and the sound bar(choose AUX mode).
- For more details, please contact the seller at support01@wimius.com.
- Connecting with Fire TV Stick
- Plug the TV stick into the HDMI port of the projector.
- Choose the media signal channel: “HDMI”.
- Connecting with XBOX/PS4
- Choose the media signal channel: “HDMI”.
- Use an HDMI cable to connect to XBOX/PS4.

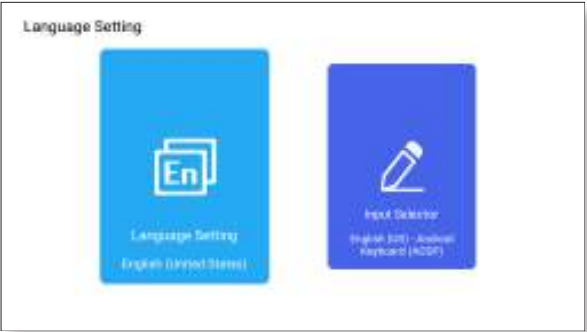
Language Setting
Choose Language
There are more than 50 languages to choose from, including English, French, German, Italian, Spanish, Japanese, etc.
Input Selector
- Choose the keyboard to install according to your own needs and habits.
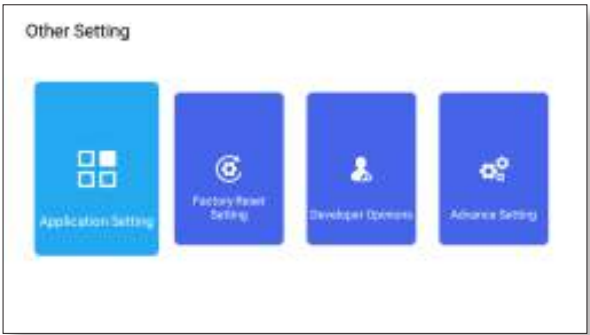
Others
Application Setting
- In the other settings menu, you can find the “Application Setting” option. Click it to view all installed applications and configure them.
Factory Reset Setting
- Reset and delete all data
Developer Opinions
- It is mainly provided for developers to use during software development and debugging of devices. Normally, it is turned off by default.
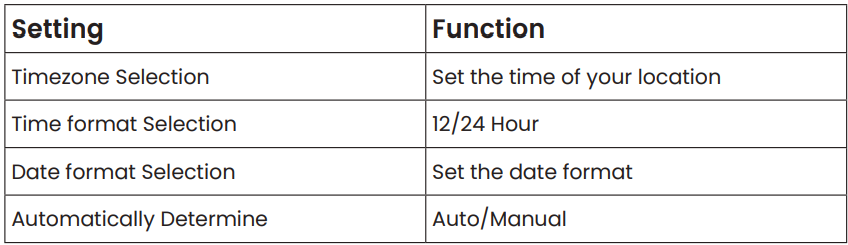
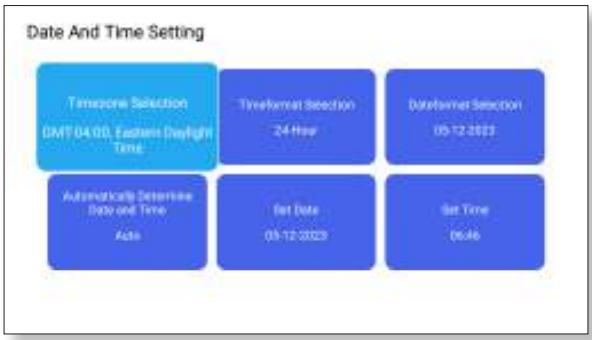
Date & Time
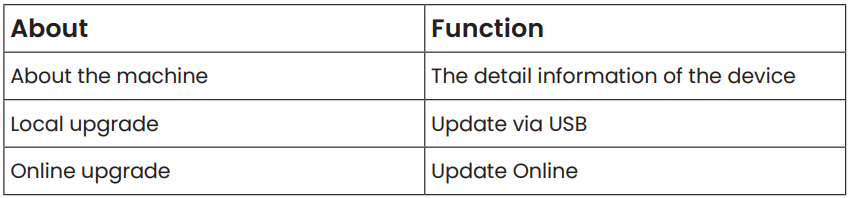
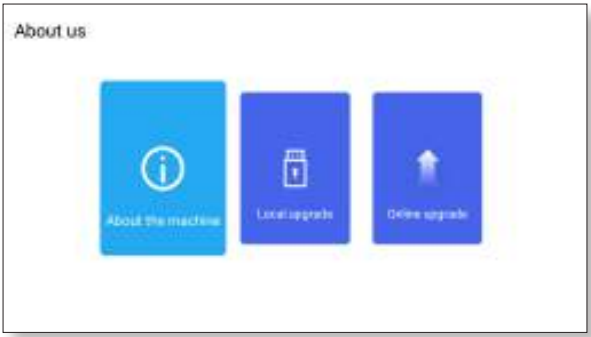
About Us
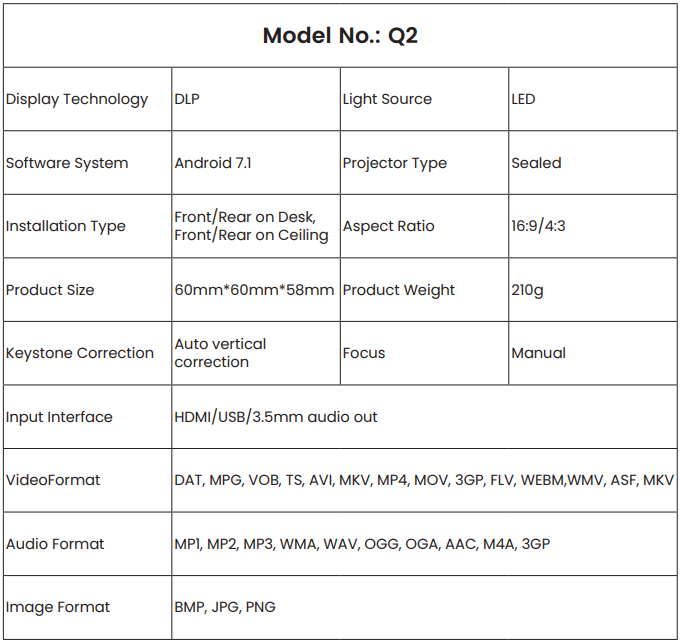
Specifications
FAQ’S
- No image on the screen.
- Is the channel set up correctly?
- Is there an input signal?
- Is the input cable plugged well?
- Under PC mode, is the refresh rate > 75KHz?
- Blue screen, no picture, and no sound. The input device doesn’t connect well with the projector.
- Picture right, no sound.
- The decoding system of the video is not supported by the projector.
- Is the WiFi connection not stable?
- Make the distance between the phone and the projector within 1 meter.
- Not compatible with your Bluetooth speaker?
- The projector may not be compatible with some kinds of Bluetooth speakers.
- Contact our after-sales email at support01@wimius.com immediately and tell us the brand and model of your Bluetooth speaker.
- Black spot on the picture. Contact our after-sales service support01@wimius.com immediately.
- Can’t play the movies.
- Is the format of the video right?
- Are files broken?
- Device broken?
Customer Support
- Website: https://store.wimius.com/
- Ph: +86-0755-21019580