
 Yaber T2 Plus 1080P Smart Portable Projector
Safety Instructions
- Do not look directly into the lens, as the intense projector light can cause serious eye injury.
- Ensure that the air inlet and outlet are not blocked.
- Proper airflow is essential for heat dissipation and preventing damage to internal electronics.
- Clean the lens using only clean air (e.g., compressed air).
- Do not use paper, cloth, or other cleaning tools to avoid scratching or damaging the lens surface.
- Keep all parts and accessories out of reach of children to prevent accidental ingestion or injury.
- Operate the device in a dry and ventilated area to prevent moisture and ensure optimal performance.
- Store and use the device within a temperature range of 0°C to 40°C.
- Extreme temperatures can shorten the lifespan of electronic components.
- Never place the device in equipment like dryers or microwave ovens, as this can cause severe damage.
- Avoid squeezing the device or placing heavy objects on it, as this can lead to structural damage.
- Do not attempt to disassemble or reassemble the device yourself.
Package List
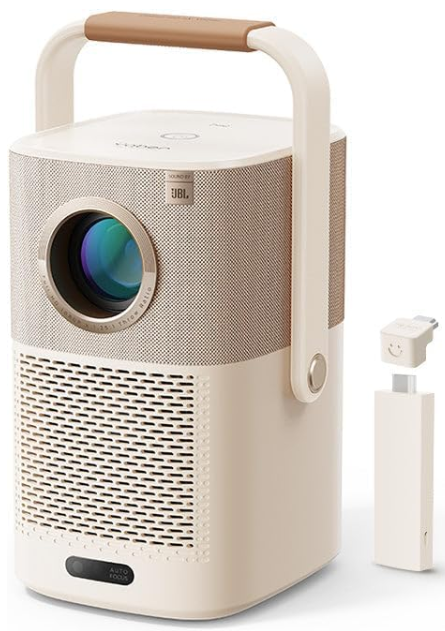
Projector
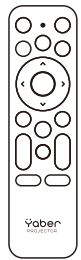
Remote Control
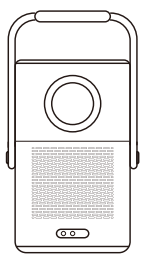
Lens Cover

QSG & FAQ

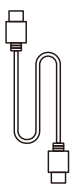
HDMI Cable
Power Cord
Cleaning Cloth

Warranty Card
Branding Card

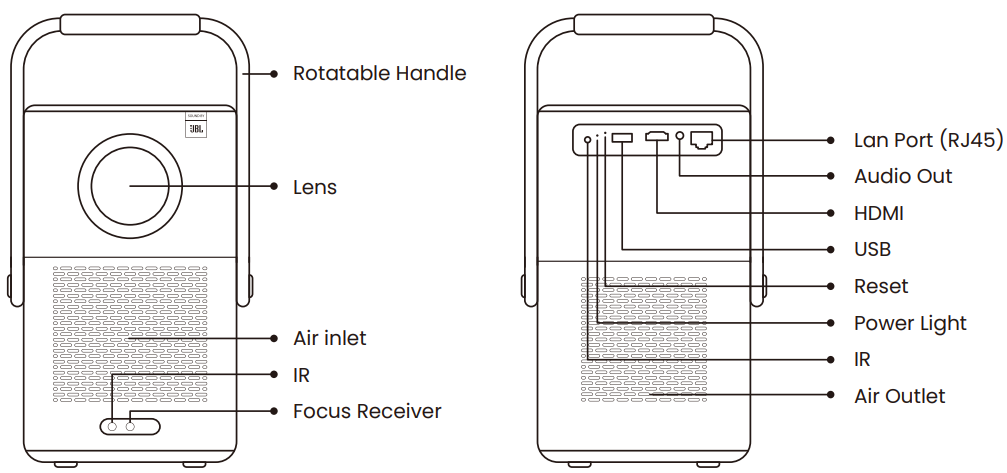
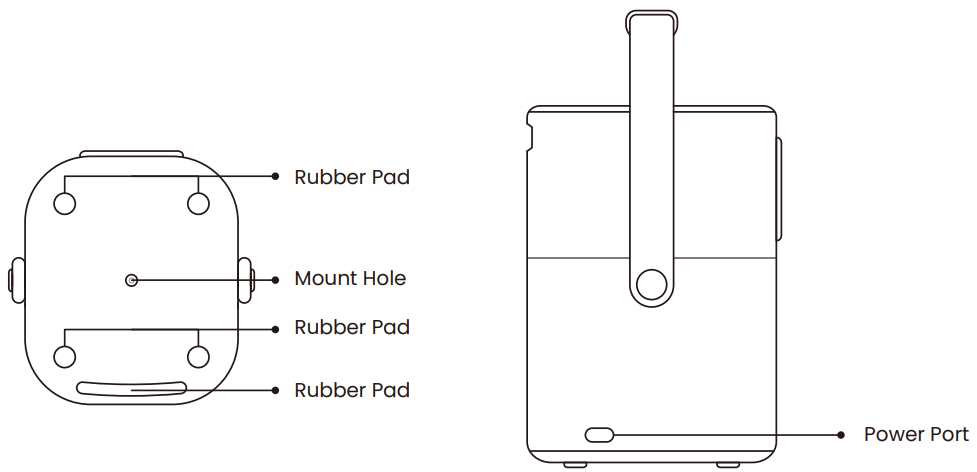
Overview
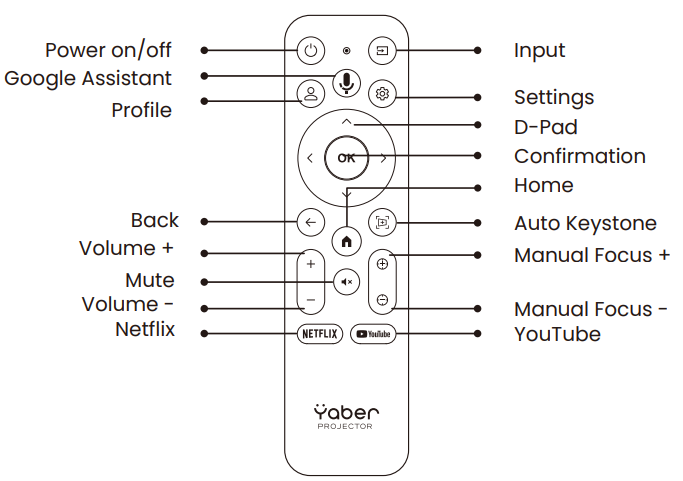
Remote Contol
Installation
Distance and Projection Size
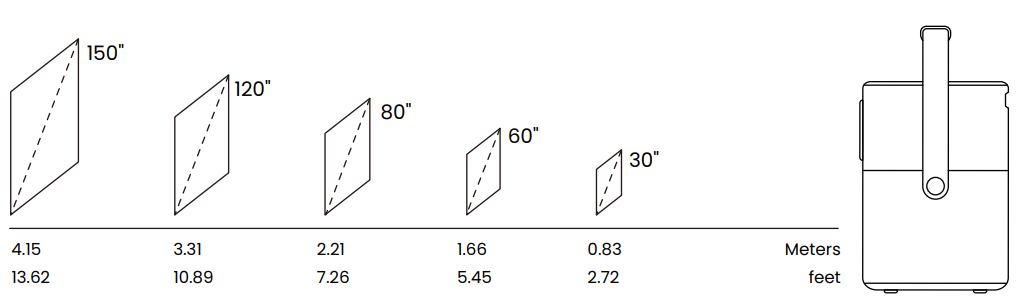
Actual projection size and distance may deviate slightly from laboratory data.
Angle Adjustment
For a better image, please try to place the projector on a stable, flat surface.
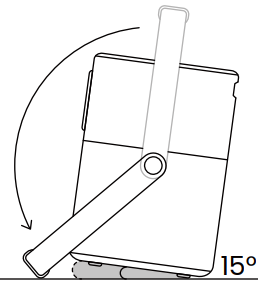
- If you need to adjust the screen at a larger angle, you can rotate the carrying handle to the bottom, and it will provide you with support at certain angles (15%).
- Please ensure that the area in front of the focus receiver is not blocked; the focus function will be affected. Press the power button 2s-5s to boot the projector.
- Please ensure that the area in front of the [Focus receiver] is not blocked; the focus function will be affected.
Ceiling Mounting
T2 Plus does not support four-corner mount installation.
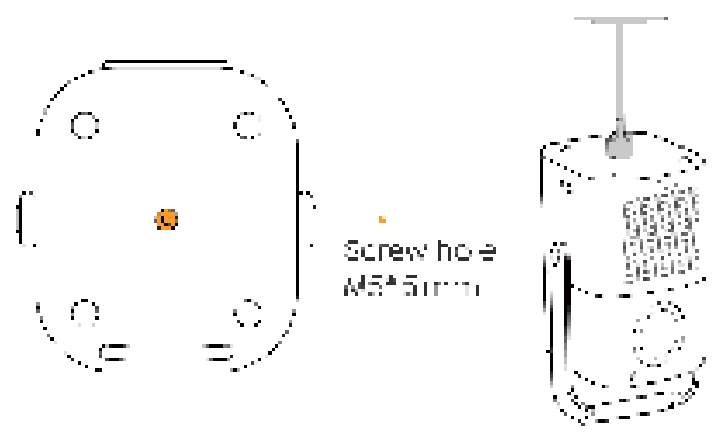
- Step 1: Make sure you have a universal mounting bracket that can fit the projector.
- Step 2: Use the stand with the M5*5mm screw to fix the projector on the bracket to complete the installation.
Connectivity
HDMI, USB, LAN Port

The T2 Plus has an HDMI 1.4 port and a USB 2.0 port. Before using these ports, make sure your external devices are compatible with this format.
USB
T2 Plus currently only supports reading FAT32 and NTFS USB flash drives, and currently does not support reading exFAT formatted USB flash drives.
HDMI
If you’re having some trouble while using HDMI, please try these solutions below:

- Method 1: Switch the HDMI EDID version to 1.4 in your external device settings.
- Method 2: Try changing the HDMI cable.
- Method 3: Try to replace other external devices with an HDMI function and check whether the HDMI interface of the external device is working.
Lan
The Lan interface of T2 Plus is an RJ45 interface. If you encounter lag when using the same screen with your phone, you can try to use this interface to connect to the network and use the same screen.
Operation
Starting Up the Projector
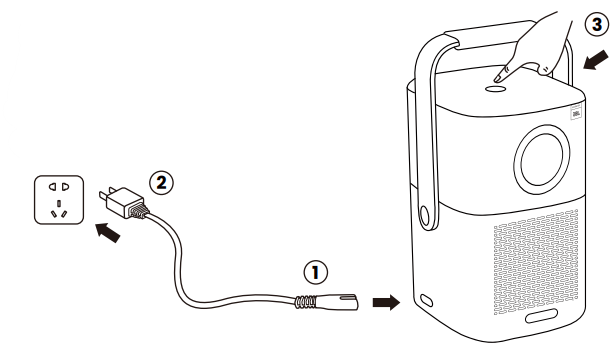
- Connect the Power Cord: Attach one end of the power cord to the power input port on the Yaber T2 Plus Projector.
- Plug into Power Source: Insert the other end of the power cord into acompatible power socket.
- Turn on the Device: Press the power button located on the top ofthe projector to turn it on.
Remote Control Pairing
For first-time use, please follow the guidelines provided and long-press the button on your remote control to pair your T2 Plus projector.
Connecting to Wi-Fi
- Select “Settings” on the home page and navigate to “Network& Internet.”
- Choose “Wi-Fi” and select your home’s Wi-Fi network from the list of available networks.
- Enter your Wi-Fi password and press “OK” to connect.
Auto Keystone Correction
As you move the machine, the T2 Plus automatically performs trapezoidal correction, depending on the target wall.
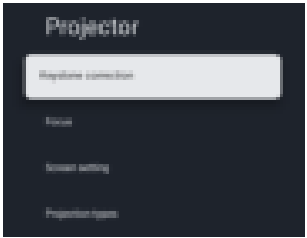
- You can find this function in [Settings]- [Projector]- [Keystone correction].
Auto Focus
Auto focus will be activated after each shift.
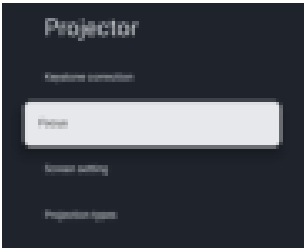
You can find this function in [Settings]- [Projector]- [Focus].
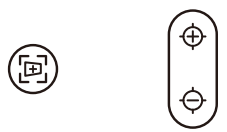
You can also adjust the focus by clicking on the buttons on the remote control to get your desired picture.
Auto Obstacle Avoidance
You can find this function in [Settings]- [Projector]- [Keystone correction]-[EasyView].
- When using the Auto Obstacle Avoidance functions, make sure the Auto Keystone and Auto Focus functions are turned on.
- Obstacle avoidance may not work when there are white or other light-colored objects in the target screen.
Auto Screen Alignment
You can find this function in [Settings]- [Projector]- [Keystone correction]-[EasyFit].
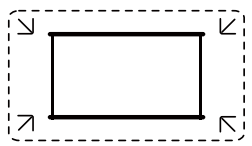
The backdrop should have a distinct black or other colored border, except for anti-light screens, which do not require a border.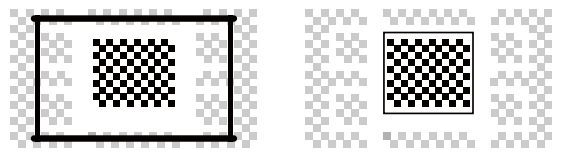
Please ensure the projection screen is larger than the screen area, and do not block the area within the central square frame of the screen.
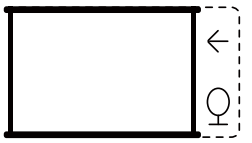
Manual Keystone Correction
If you need to adjust the screen further, you can adjust the screen by dragging the arrows.

You can find this function in [Settings]- [Projector]- [Keystone correction]-[Manual keystone correction].
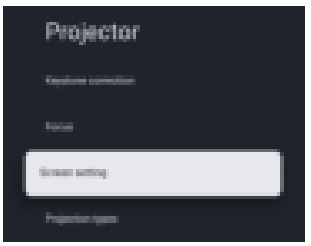
Projection Zoom
You can find this function in [Settings]- [Projector]- [Screen setting]-[Screen Zoom]
After auto-focusing, the zoom effect will be reset. If you want to save the zoom, please try to turn off the auto focus.
Picture Settings
You can set the [Picture Mode],[Brightness], [Contrast], [Sharpness], and [Saturation] of the screen in Picture settings.

- You can find this function in [Settings]- [Display & Sound]- [Picture].
Power Button Functions
Pressing the power button on the top of the projector once can turn it on. Attention! With the cable charger connected, press the power button again, and the projector will turn off the screen and enter standby mode. If you need to turn off the projector, you should long-press the power button at the top.
Wireless Connections
Screen Cast
Currently, Google TV does not support direct screen mirroring via Bluetooth. You can find third-party screen mirroring software in the app store to achieve this function, or you can use the built-in screen mirroring function in streaming media applications to project video content onto the screen.
Bluetooth Settings
You can connect your phone to the projector via Bluetooth and enter Bluetooth speaker mode anytime after confirmation. Please pair the device named [Yaber_T2_Plus Smart Projector].

You can find this function in [Settings]- [Remotes & Accessories]- [Pair accessory].
Bluetooth speaker mode
In Bluetooth Speaker mode, you can also turn off the screen and use the T2 Plus as an outdoor stereo.
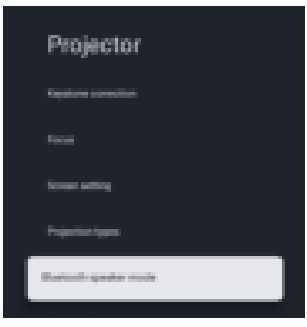
- You can find this function in [Settings]- [Projector]- [Bluetooth speaker mode].
Google TV
How to set up your Google TV account
- When you turn on the T2 Plus projector for the first time, the system will prompt you to log in to your Google email account.
- After logging into your Google account, it will take you about 15 to 20 minutes to set up your Google TV. Please follow the Google TV guidelines. This part includes the contents automatically set by the system, as well as some contents that need to be set manually by you, such as the members of the family account.
System Upgrade

You can check the system status of your device in [Settings]- [System]- [About]-[System updates]
About Battery
Battery Life
The Yaber T2 Plus is equipped with a battery that will give you 2.5 hours of use in battery mode(Brightness in 60).
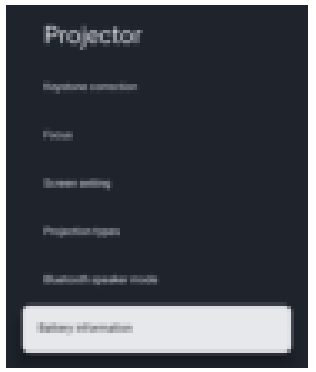
- You can check the Battery information of your device in [Settings]- [Projector]- [Battery information].
Charging Time
- Projector turned off: 3.5 Hours
- Projector turned on: 5.5 Hours
- When the machine is turned off, the charging time from 0 to 100 is 3.5 hours.
- When the machine is turned on, the charging time from 0 to 100 is 5.5 hours.
Charging Indicator Light
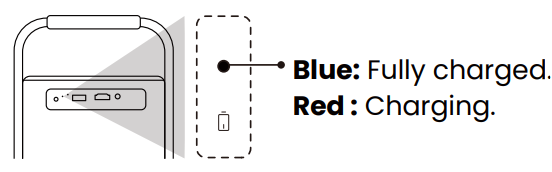
- When the Power light is Blue, it means the battery is completely charged.
- When the Power light is Red, the battery is charging.
Specification
| Model No. T2 Plus | |||
| Native Resolution | 1920*1080 | Light Source | LED |
| Battery Lifespan | Video Playtime 2.5h Music Playtime 18h | Aspect Ratio | 16:9/4:3 |
| Focus | Auto/Eletric | Keystone Correction | Auto/Eletric |
| Screen Alignment | Auto | Obstacle Avoidance | Auto |
| Interface | USB 2.0×1 HDMI 1.4×1 Audio Out×1 Lan×1 | Unit Dimension | 165×140×290 mm 6.4×5.5×11.4 inches |
| Projection Ratio | 1.25:1 | Projection Distance | Min1.1m~ Max3.3 m Min43.3~Max129.9 inches |
| Power Voltage | 100-240V~/50-60Hz | Power Consumption | 110W |
| Projector Weight | 2.5 kg 5.5 lbs | Projection Method | Front/Rear on Desk Front/Rear on Celling |
| Picture Format | JPG、PNG、BMP、JPEG | ||
| Audio Format | MP3, AAC, LPCM, APE, FLAC, OGG, AMR | ||
| Video Format | MP4、MKV、WMV、3GP 、MPG、VOB、TP、TS、DAT、MOV、FLV | ||
| USB Format | FAT 32, NTFS ⚠ Unsupported format: Exfat ⚠ Attention: If the projector cannot recognize the contents of the USB flash drive, please check whether your USB flash drive is formatted correctly. | ||
| WPS Documents | txt, pdf, docx, xlsx. pptx | ||
YABER Lifetime Professional Support
Dear valued customer!
Thank you for choosing the Yaber projector. This manual will help you navigate through all the features. We understand that there may be many questions and concerns that arise during the use of the projector. We are also eager to hear your feedback. However, leaving a review on the product page does not get the fastest solution. Many common problems, such as inability to l. auto focus or keystone, sound issues, WiFi or Bluetooth connection issues, can usually be resolved with appropriate settings adjustments.
Rest assured, our service team will offer the solution to youwithinh 24 hours. Your satisfaction is our top priority. If you encounter any issues, we sincerely hope you will allow us to make things right. We also encourage you to thoroughly explore the contents of this manual first. We wish you an outstanding experience with the projector. Yaber Consumer Service Team
FCC Warning
This device complies with Part 15 of the FCC Rules. Operation is subject to the following two conditions: This device may not cause harmful interference, and (2) this device must accept any interference
received, including interference that may cause undesired operation.
- Reorient or relocate the receiving antenna.
- Increase the separation between the equipment and receiver.
- Connect the equipment to an outlet on a circuit different from that to which the receiver is connected.
- Consult the dealer or an experienced radio/TV technician for help.
IC Warning
This device complies with Industry Canada’s license-exempt RSSs. The operation is subject to the following two conditions: This device may not cause interference, and this device must accept any interference, including interference that may cause undesired operation of the device.”
Customer Service
- Website: https://www.yaber.com/
- Timings: 9:00 am to 7:00