


Labnet AccuPlate Laboratory Stirrer Hot Plate
Safety Information
This instruction manual contains important operating and maintenance instructions that must be read, understood, and followed by the product user.
Failure to use this product according to this instruction manual may degrade or defeat the protection normally provided by this product. Read this instruction manual prior to product use and keep this instruction manual for future reference.
Product Voltages
Hot plates, stirrers, and stirring hot plates are available in different voltages. Before initial use, check that the unit you received is the correct voltage for your location.
Safety Instructions
- Always wear safety glasses and other appropriate protective equipment when operating this product.
- This product must be connected to a grounded power outlet for safe functioning.
- Use only the power cord supplied with the product.
- Disconnect the power cord before moving or cleaning the unit.
- Keep the product dry and clean.
- Do not immerse the product for cleaning.
- The ceramic top may break if impacted.
- The maximum gross weight placed on the top surface must not exceed 25 lbs. (11 kg).
- These units are not explosion- or spark-proof.
- Do not heat or stir volatile or flammable materials.
- Do not operate this product near volatile or flammable materials.
- Do not use this product with a metal vessel.
- The temperature probe must always be inside the media to close the heating control loop and should not be operated unattended.
- Do not leave the product unattended while operating.
- Disconnect the unit when not in use.
Operating Conditions
- Product should be placed on a flat surface at least 12 in. (30.5 cm) from walls, 48 in. (122 cm) from ceilings, and 12 in. (30.5 cm) from other stirrers if using multiple units.
- Indoor use
- Pollution Degree 2
- Altitude up to 2,000 meters
- Ambient temperatures of 5°C to 40°C
- Ambient humidity of ≤80% at 31°C, decreasing linearly to 50% relative humidity at 40°C
- Installation Category II
- Protection Class IP21
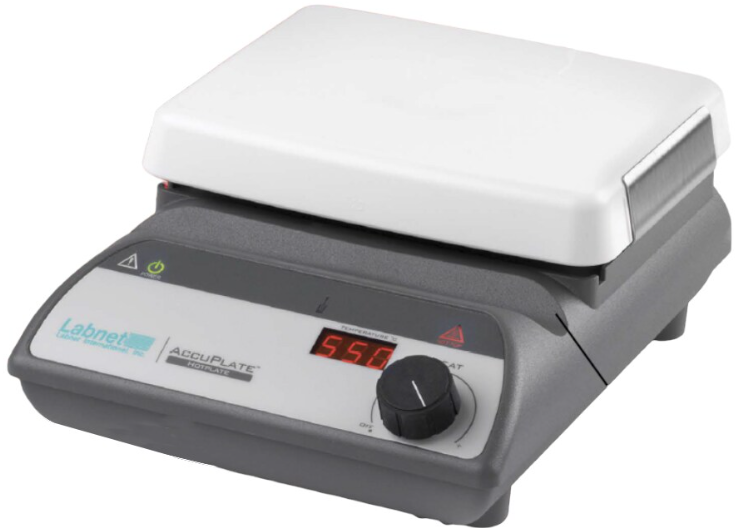
Product Controls and Indicators
Power Indicator
- Illuminates at all times when the product is properly connected to input power.
Stir Control Knob
- Turn the knob all the way counterclockwise to the Off position to turn off the stirring function. Turn the knob clockwise to set the desired stirring speed.
Stirring Speed Display
- Shows the speed set for stirring.
Heat Control Knob
- Turn the knob all the way counterclockwise to the Off position to turn off the heating function. Turn the knob clockwise to set the desired heating temperature.
Heating Temperature Display
- Shows the temperature set for heating.
Hot Top Indicator
- Illuminates when the temperature of the top is too hot to touch (greater than approx. 60°C).
Temperature Probe In-Use Indicator
- Illuminates when the external temperature probe is connected to the unit.
Product Connections
- Power Cord Input: Connect the supplied power cord into this connector.
- External Temperature Controller Input: Connect the optional External Temperature Controller (Cat. No. D0462) into this connector.

- To Connect/Disconnect the External Temperature Controller
- Turn the Stir Control Knob and Heat Control Knob to the Off position.
- Disconnect the power cord.
- Insert/remove the external temperature controller connector/from the input connector.
- Reconnect the power cord.
- The product is now ready for use.
Stirring Instructions
Models D0410 and D0420
- Fill the vessel with the solution to be stirred.
- Place the stir bar into the vessel.
- Place the vessel in the center of the top surface.
- Turn the Stir Control Knob until the Stirring Speed Display shows the desired speed. The speed setting can be adjusted according to the table below.
Operating Range (rpm) Adjustable Increment (rpm
| 60 – 100 | 5 |
| 100 – 200 | 10 |
| 200 – 400 | 20 |
| 400 – 1,150 |
- When desired stirring is complete, turn the Stir Control Knob to the Off position. Allow the stir bar to cease rotation before removing the vessel from the unit.
- Heating and stirring can be performed simultaneously with the D0420 models, which offer heating and stirring functions.
Heating Instructions
Models D0400 and D0420 (Without the External Temperature Controller)
- Fill the vessel with the solution to be heated.
- If using a D0420 model and the stirring function, place the stir bar into the vessel.
- Place the vessel in the center of the top surface.
- Turn the Heat Control Knob until the Heating Temperature Display shows the desired temperature. The temperature setting can be adjusted in 5°C increments.
Flashing Display
- The number shown on the Heating Temperature Display will flash when the actual heating temperature is not at the set temperature.
Constant Display
- The number shown on the Heating Temperature Display will remain constantly on when the actual heating temperature is at the set temperature.
Hot Top Indicator
- The Hot Top Indicator will be on at all times when the temperature of the top surface is too hot to touch (greater than approx. 60°C).
- The Hot Top Indicator will flash when the Heat Control Knob is turned off, but the top surface is still too hot to touch.
- The Hot Top Indicator will be off when the temperature of the top is less than approximately. 60°C.
Models D0400 and D0420 (With the External Temperature Controller (Cat. No. D0462))
- Connect the External Temperature Controller to the connector on the back of the unit.
- Temperature Probe in Use Indicator: This will illuminate when the External Temperature Controller is properly connected.
- Fill the vessel with the solution to be heated.
- If using a D0420 model and the stirring function, place the stir bar into the vessel.
- Place the vessel in the center of the top surface.
- Insert the tip of the External Temperature Probe into the solution (see Section 10.0 diagram for proper usage).
- The tip should be located in the center of the vessel and at approximately one-half of the depth of the solution.
- Secure the position of the External Temperature Controller by using a ring stand/support rod and clamp.
- Ensure the cable of the External Temperature Controller does not come into contact with the heating surface.
- Turn the Heat Control Knob until the Heating Temperature Display shows the desired heating temperature.
- Flashing Display: The number shown on the Heating Temperature Display will flash when the actual heating temperature is not
at the set temperature. - Constant Display: The number shown on the Heating Temperature Display will remain constantly on when the actual heating temperature is at the set temperature.
- Hot Top Indicator: The Hot Top Indicator will be on at all times when the temperature of the top surface is too hot to touch
(greater than approx. 60°C). - The Hot Top Indicator will flash when the Heat Control Knob is turned off, but the top surface is still too hot to touch.
- The Hot Top Indicator will be off when the temperature of the top is less than approximately. 60°C.
Heating Operation Principles
Display (°C) Actual Top Surface Temp. (°C)
| 50 | 45 |
| 100 | 85 |
| 150 | 125 |
| 200 | 165 |
| 250 | 205 |
| 300 | 245 |
| 350 | 285 |
| 400 | 325 |
| 450 | 365 |
| 500 | 405 |
| 550 | 440 |
- The heating element and a temperature sensor are located just beneath the ceramic top surface of the product. The microprocessor-controlled heat, generated by the heating element, is based on the sensor temperature and the value set on the heater.ng
- Temperature Display. When the sensor temperature is not within the range of the value set on the display, the display will flash. When the sensor temperature is within range, the value displayed will remain constantly on.
- The Heating Temperature Display does not indicate the actual temperature of materials placed on top of the product or the actual temperature of the ceramic top surface. The following table shows a typical difference between the temperature set on the Heating.
- Temperature Display and the actual temperature measurement of the ceramic top surface. This information was taken using a D0420 with no top load in 20°C ambient conditions.
- To directly control the temperature of liquid in a vessel on the top surface, place the External Temperature Controller into the liquid and connect the Controller to the product.
- The Heating Temperature Display shows the temperature of the liquid and can be used to adjust the temperature of the liquid.
Maintenance
Power
Disconnect the power to the product by unplugging the power cord before performing any maintenance or
inspection procedures.
- Inspect the power cord regularly and replace it if damaged. Use only replacement power cords available from Corning or Corning authorized product distributors.
Repair
- There are no direct user serviceable components inside this series of products. Please contact Corning Customer Service for repair or maintenance issues
Ceramic Top Plate
- These products are supplied with a Pyroceram™ top that is easy to clean and highly resistant to scratches, corrosion, and chemical attack.
- The ceramic top may break during use if not properly maintained.
- Keep the ceramic top clean. A nonabrasive cleaner may be used to clean the ceramic top.
- Inspect the ceramic top for damage during cleaning.
- Discontinue product use if the ceramic top is chipped, etched, or shows excessive scratching.
- Contact Corning Customer Service for a top replacement.
General
- It is important to keep this product dry and clean.
- Remove minor exterior liquid spills promptly.
- Clean exterior surfaces with a non-abrasive cleaner. Do not reconnect the product to the power input until all cleaned surfaces have dried.
- If liquid or wet solid material gets inside the product, immediately disconnect the power to the product and discontinue use. Contact Corning Customer Service for additional instructions regarding interior spills.
Accessories
- D0461
Labnet Stirrer/Hot Plate Accessory Kit includes an External temperature controller (Cat. No. D0462), vertical support rod (Cat. No. D0466a), and stir bar retriever. - D0462
External temperature controller for digital display hot plates and stirring hot plates. Use with D0400 and D0420 models. - D0463
PTFE (polytetrafluoroethylene)-coated magnetic stir bar, 0.39 x 1 in. (1 x 2.5 cm) - D0464
Boss head clamp, aluminum. Use for connecting the holding rod (Cat. No. D0465) at a 90° angle to the support rod (Cat. No. D0466). - D0465
Holding rod, aluminum. Use for holding the external temperature controller (Cat. No. D0462) in position. - D0466
Vertical support rod, stainless steel. Supplied as two 9 in. (22.86 cm) rods which can be screwed together.
Technical Specifications
| Model No. | 120V/60Hz | 230V/50Hz | Temp. Range1 | Stir Range (rpm) | Weight |
| D0400 | 665W/5.5A | 635W/2.7A | 5°C-550°C (41°F-1,022°F) | — | 5.5 lbs. (2.5 kg) |
| D0410 | 15W/0.625A | 15W/0.625A | — | 60-1,150 | 6.2 lbs. (2.8 kg) |
| D0420 | 675W/5.6A | 645W/2.8A | 5°C-550°C (41°F-1,022°F) | 60-1,150 | 6.2 lbs. (2.8 kg) |
Limited Warranty
Corning Incorporated (Corning) warrants that this product will be free from defects in material and workmanship for a period of two (2) years from the date of purchase. Corning’s sole obligation shall be to repair or replace, at its option, any product or part thereof that proves defective in material or workmanship within the warranty period, provided the purchaser notifies Corning of any such defect. Corning is not liable for any incidental or consequential damages, commercial loss, or any other damages from the use of this product.
Corning’s Customer Service team will help arrange local service where available or coordinate a return authorization number and shipping instructions. Products received without proper authorization will be returned. All items returned for service should be sent postage Labnet AccuPlate Laboratory Stirrer Hot Plate prepaid in the original packaging or other suitable carton, padded to avoid damage.
Corning will not be responsible for damage incurred by improper packaging. Corning may elect for on-site service for larger equipment. Some states do not allow limitations on the length of implied warranties or the exclusion or limitation of incidental or consequential damages. This warranty gives you specific legal rights. You may have other rights that vary from state to state. No individual may accept for, or on behalf of Corning, any other obligation of liability, or extend the period of this warranty.
Warranty/Disclaimer
Unless otherwise specified, all products are for research use or general laboratory use only.* Not intended for use in diagnostic or therapeutic procedures. Not for use in humans. These products are not intended to mitigate the presence of microorganisms on surfaces or in the environment, where such organisms can be deleterious to humans or the environment. Corning Labnet AccuPlate Laboratory Stirrer Hot Plate Life Sciences makes no claims regarding the performance of these products for clinical or diagnostic applications.
For a listing of US medical devices, regulatory classifications,s or specific information on claims, visit www.corning.com/resources. Corning’s products are not specifically designed and tested for diagnostic testing. Many Corning products, though not specific for diagnostic testing, can be used in the workflow and preparation of the test at the discretion. Customers may Labnet AccuPlate Laboratory Stirrer Hot Plate use these products to support their claims. We cannot make any claims or statements that our products are approved for diagnostic testing, either directly or indirectly. The customer is responsible for any testing, validation, and/or regulatory submissions that may be required Labnet AccuPlate Laboratory Stirrer Hot Plate to support the safety and efficacy of their intended application.
Equipment Disposal
According to Directive 2012/19/EU of the European Parliament and of the Council of 4 July 2012 on waste electrical and electronic equipment (WEEE), this product is marked with the crossed-out wheeled bin and must not be disposed of with domestic waste. Consequently, the buyer shall follow the instructions for the reuse and recycling of waste electronic and electrical equipment (WEEE) provided with the products and available.le
Customer Service
- Website: www.labnetlink.com.
- Visit: www.corning.com/lifesciencs
- Visit: www.corning.com/resources
- USA/Canada: 1.800.492.1110
- Others: +1.978.442.2200
- North America: 978.442.2200
- Australia/New Zealand: 61 427286832
FAQs
What are the main functions of the Labnet AccuPlate stirrer hot plate?
The AccuPlate is perfect for mixing and heating liquids concurrently in analytical, biological, and chemical labs because it combines precision magnetic stirring and adjustable heating into one device.
What is the maximum temperature the hot plate can reach?
The hot plate is appropriate for a variety of laboratory heating applications because it can reach temperatures of up to 550°C.
How do I control the stirring speed and temperature?
Depending on the model, the unit’s independent stirring speed and heating temperature controls enable users to accurately regulate each parameter using either separate knobs or digital controls.
What types and sizes of stir bars are compatible with the AccuPlate?
Magnetic stir bars that are oval or cylindrical and between 10 and 40 mm in length are ideal for the AccuPlate. Depending on the volume and viscosity of your solution, choose the right size.
Is the hot plate surface resistant to chemicals and scratches?
Indeed, the surface is usually composed of ceramic or aluminium and coated with a chemical-resistant material that is intended to endure common lab solvents and prevent scratches for long-term use.
Can the AccuPlate stir and heat simultaneously?
Of course. For processes that need continuous agitation at high temperatures, the system’s ability to simultaneously stir and heat is crucial.
Can I use the AccuPlate with glassware other than beakers?
Yes, as long as the flasks or bottles have a flat bottom that keeps them in touch with the hot plate surface for uniform heating, you can use other lab glassware.