
JANUS LTC-SM-FL Lobby Intercom
Pre-Testing
- Remove the intercom system from the shipping box. The intercom will have wiring between the elevator unit and the lobby unit.
- Plug the AC power supply into an AC outlet and connect the 9-volt battery to its battery snap.
- Take the elevator unit into an adjoining room and close the door.
- The person at the lobby panel should press and hold the push-button.
- There should be a way conversation between the two units, and the LED on the front of the lobby panel should turn on.
- Check each elevator unit in the same manner.
Installation
- The intercom requires one pair of wires for each elevator from the lobby panel to the elevator unit.
- The intercom system requires 110 volts to trickle charge the battery.
- The wiring from the AC wall plug can be extended as needed to get to the nearest outlet or to go to the Machine Room. Connectors are provided.
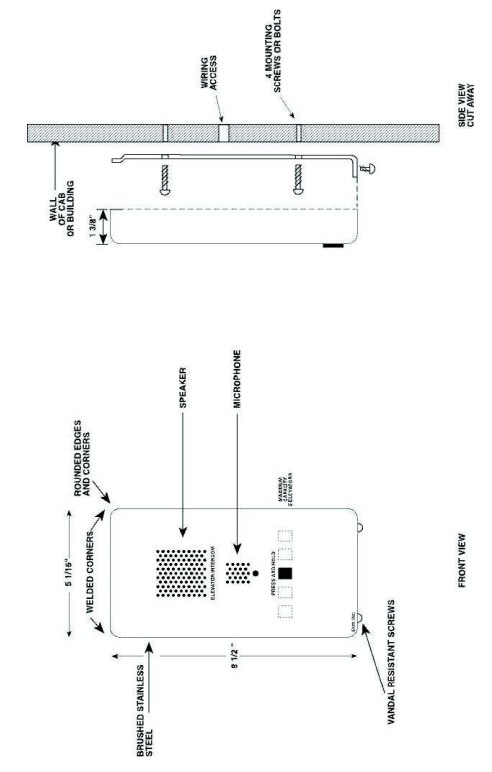
- Install the elevator unit on the ceiling using the mounting holes provided in the galvanized box.
- The elevator unit can be mounted behind a speaker grill in the car return (3.5-inch minimum speaker pattern required). The galvanized box will need to be removed from the elevator intercom.
- Install the lobby unit using the bracket if needed.
- Connect the AC power to the lobby unit.
- On Simplex installations, connect one pair of wires between the TELCO connector of the lobby unit and the TELCO connector of the elevator unit.
- This connection is polarity sensitive, so be sure to connect the No. 1 connections and the No. 2 connections.
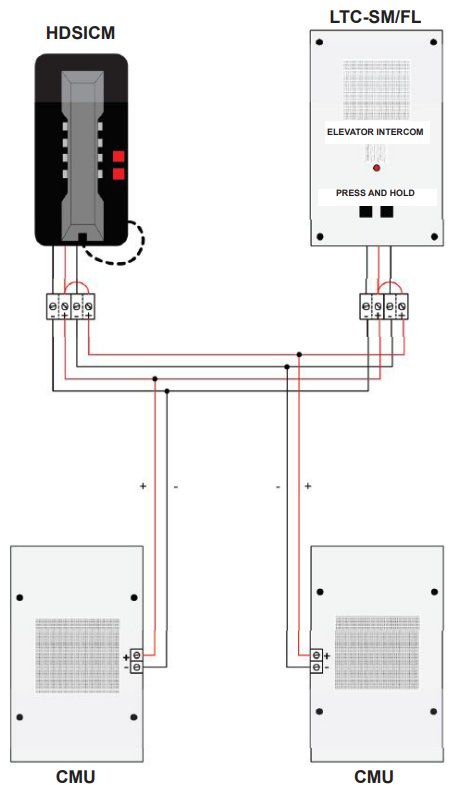
Duplex System Sample Diagram
Troubleshooting
- WITH THE PUSH BUTTON PRESSED, there should be positive voltage on the male side of the connector and negative voltage on the female side. If the polarity is not correct, reverse the wires coming from the wall transformer.
- Check to see if power is getting to the 9-volt battery by unplugging the battery and measuring the voltage on the battery snap labelled “Connect to battery”. WITH THE PUSH BUTTON PRESSED, there should be approximately 9-13 volts DC with positive voltage on the female connector and negative voltage on the male connector. If the polarity is not correct, reverse the wires coming from the wall transformer.
- WITH THE PUSH BUTTON press, D, there should be approximately 9-13 volts DC on the TELCO connector on both the lobby and the elevator units. Ensure the polarity is correct-positive voltage on the no. 2 and negative on the no. 1 connector. The CMU intercom in the elevator cab does not require a 9-volt battery.
- If you are experiencing broken communication, try adjusting the R14A potentiometer (microphone sensitivity potentiometer) between 1 to 3 oʼclock positions while speaking to the other unit. Do not adjust this pot all the way in either direction.
- If the sound output of the speaker is low on the unit, try adjusting the R13 (VOL.) potentiometercounter-clockwiseo
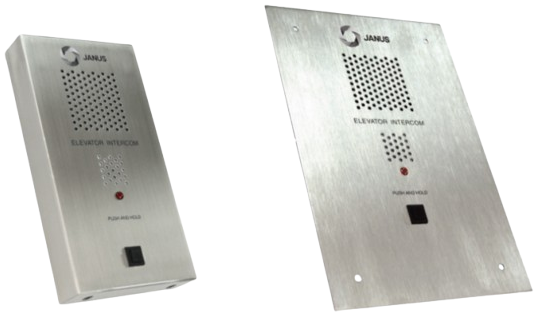
Surface Mount Lobby Intercom
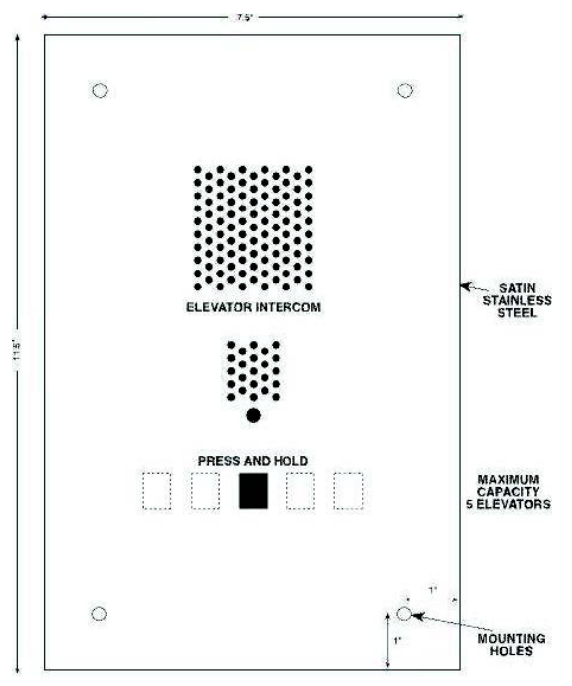
Flush Mount Lobby Intercom
Customer Support
- Address: Janus Henderson 801 Pennsylvania JANUS Pana40Plus 2D-3D Detector Controller Ave, Suite 219109 Kansas City, MO 64105-1307
- Website: https://www.janushenderson.com/
- Tel: 800-525-3713.
- Tomings: Weekdays, 9 a.m. – 6 p.m.
FAQs
Q: What is the JANUS LTC-SM-FL Lobby Intercom?
The LTC-SM-FL is a wall-mounted intercom system intended for offices, lobbies, and entrances. It offers a simple connection with building access management and permits safe two-way communication between guests and employees.
Q: How do I power on the intercom?
According to the handbook, a dedicated DC power supply powers the intercom. The device turns on automatically and is operational once connected.
Q: How do I answer a call from the internal station?
Press the answer button on the internal station or pick up the phone. When the line is active, the system permits complete two-way communication.
Q: Can the intercom unlock doors remotely?
Indeed. Pressing the door release button at the internal station will unlock the door if it is integrated with an electronic lock or door strike that is compatible. As directed by the handbook, make sure the wiring and setup are correct.
Q: How do I adjust the volume?
The internal station settings or the intercom equipment itself provide volume adjustments. To guarantee distortion-free, clear communication, adjust the speaker and microphone levels.
Q: Is the intercom weather-resistant for outdoor installation?
The LTC-SM-FL is intended for use in indoor lobby spaces. To prevent water or moisture damage, make sure the installation is in a covered area if it is close to weather-exposed entrances.
Q: How many internal stations can I connect?
The configuration of the system determines the number of internal stations. For best results, the handbook offers maximum extension suggestions and wiring schematics.