



FIFISH PRO OPSS Onshore Power Supply System
Safety and Regulations
- Unauthorized disassembly may cause a leakage problem and damages on OPSS.
- Such a type of safety issue is not addressed to QYSEA’s legal liability.
- In addition, the warranty will not be valid for unauthorized disassembled products.
- ROV shall be OFF before plug in power outlet.
- Check the tether, connecters and seals after every dive.
- All connectors shall be clean and dry at all times to avoid shortages and corrosion.
- All seals and O-rings shall be contact and clean at all times; otherwise, replace them ASAP.
- Keep the OPSS-PM OFF when deploying and retrieving.
- It is NOT recommended to use OPSS when a diver is operating underwater.
- Do NOT touch OPSS’s tether and E-Tank underwater.
- Monitoring the status indicator LED, the error color code index on page 16
- No heavy objects left on OPSS-PM. Do NOT put OPSS-PM inside water or wet floors, and avoid wave splashes
Content Package
- Top Cap
- Travel Lock Button
- Handle
Inside Box
- OPSS Spool (200 meters or 656 feet)
- OPSS Power Management (OPSS-PM)
- AC Input Cable for OPSS-PM
- E-Tank Mount on ROV
- Electric Power Tank (E-Tank)
OPSS Spool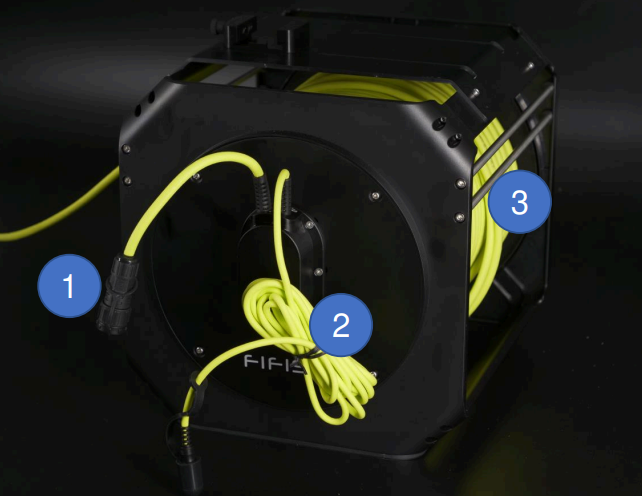
- AC Input Plug (to OPSS-PM’s AC input socket)
- AC Power input socket (190~265 V in AC)
- Tether (200 meters or 656 feet
OPSS-PM OPSS Power Management (OPSS-PM)
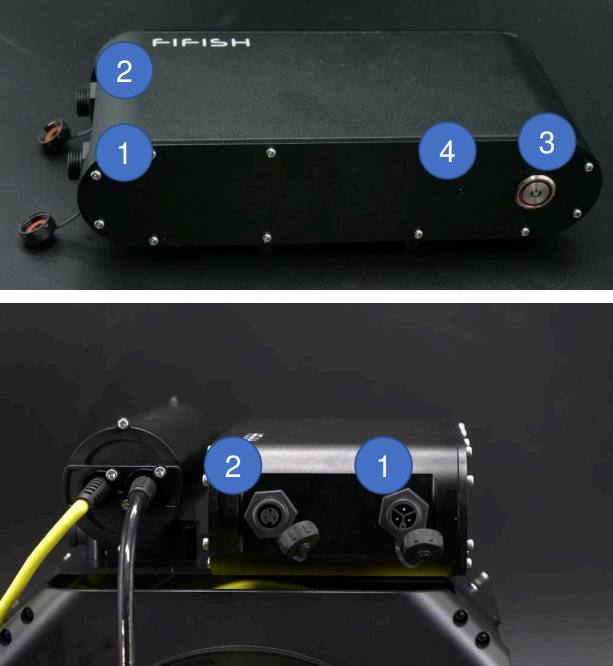
- AC Input socket (190~265 V in AC)
- AC Output socket
- ON/OFF
- Status Indicator LED (Green: ready to charge, Red: charging battery).
- Other colors,s please check the LED color index on OPSS-PM on page 16
E-Tank
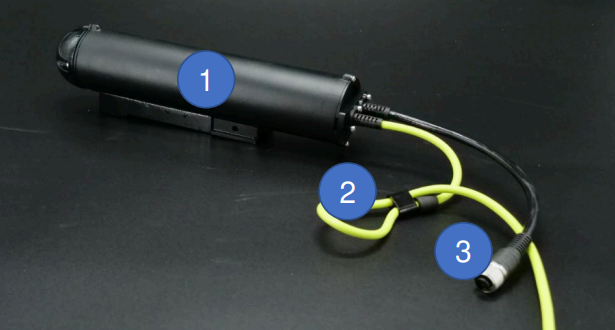
Electric Power Tank (E-Tank)
- E-Tank
- Securing Loop
- ROV Plug
Preparation and Set-up
Preparation Check List
- Check and count all parts of OPSS
- Check that the connectors, socket, and plug are dry and clean, and not damaged.
- Check the outdoor power bank or the fuel level of the generator
- Check the remote controller and ROV
- Check the cell phone, tablet, and laptop’s battery
Set-up (OPSS set-up overview)
For example, an outdoor power bank and FIFISH PRO V6 PLUS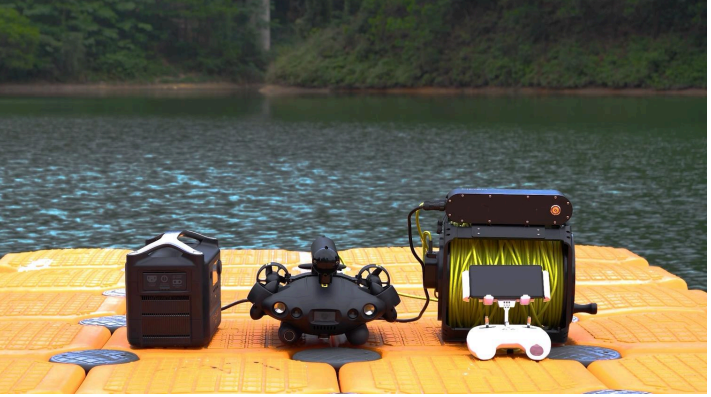
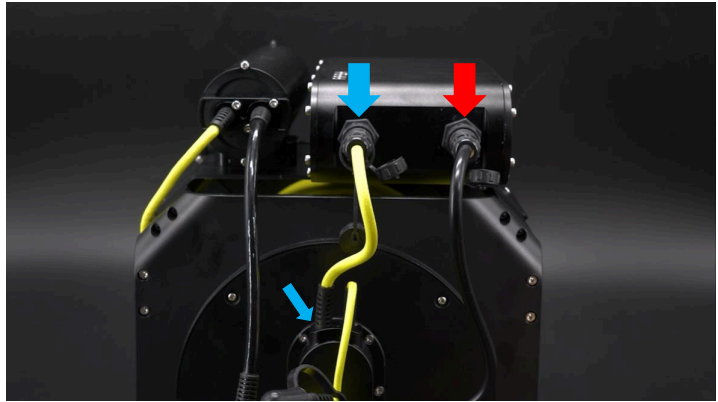
- Cable connection on OPSS-PM Plug AC output on OPSS-PM (another end to the spool’s reel)

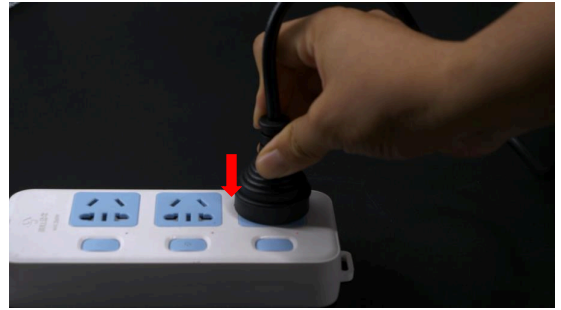
- Plug the AC input on OPSS-PM (the other end to the AC Socket)

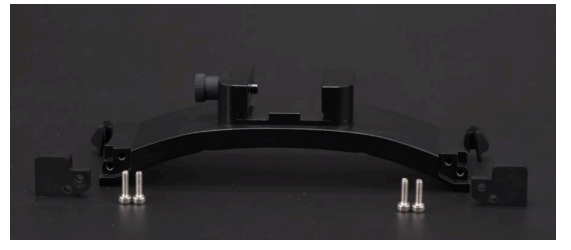
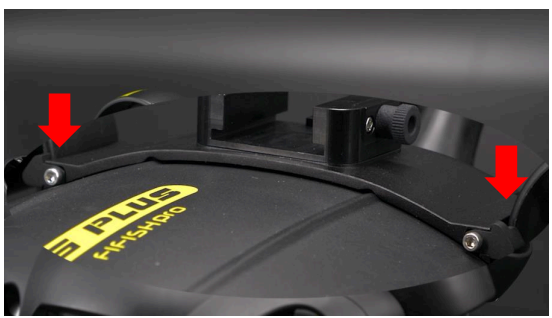
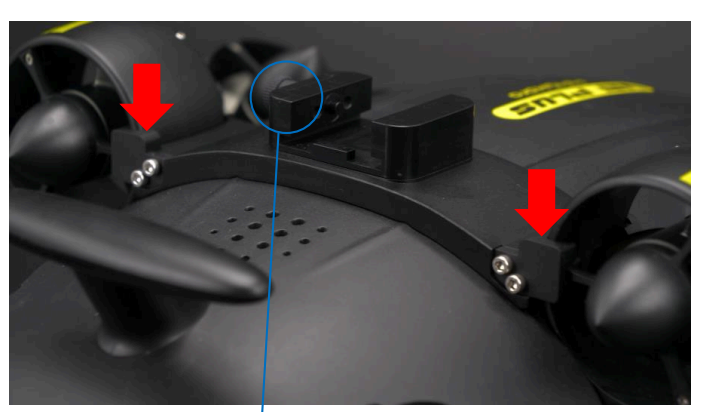
- Secure the E-Tank Mount on the ROV. Unfasten and take off just one side of the fixing screws.
- The stern side has 4 screws, and the 2 screws in bow side. Unfastening either side will work similarly.


- Secure the E-Tank Mount on the ROV

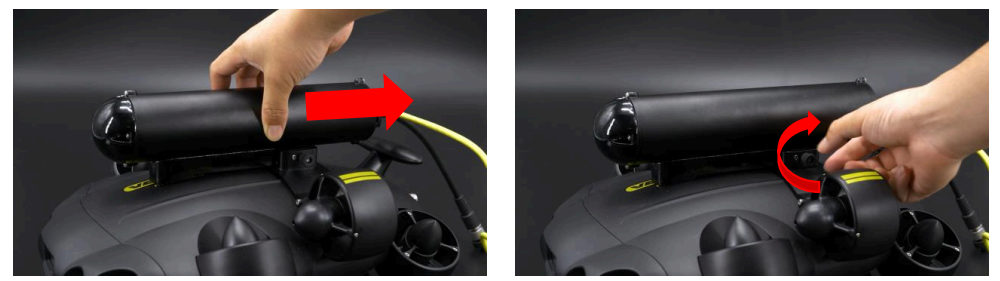
- Lock the E-Tank on the E-Tank Mount

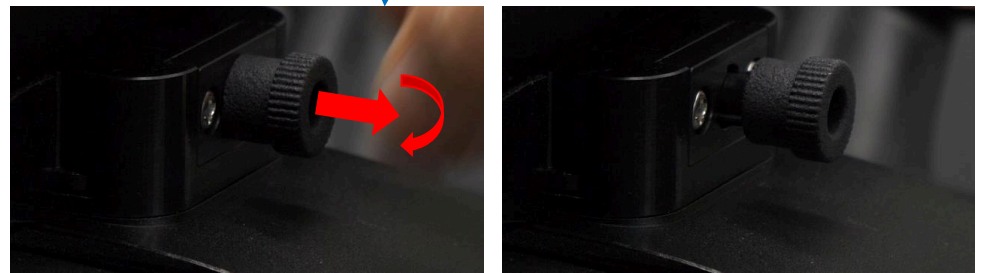
- PULL out, and ROTATE 45° the Dowel Pin on E-Tank Mount
Set-up
- Lock the E-Tank on the E-Tank Mount

- Lock the E-Tank on the E-Tank Mount
- SLID the E-Tank on E-Tank Mount, then rotate Dowel Pin to lock E-Tank on Mount
Securing the loop and ROV Plug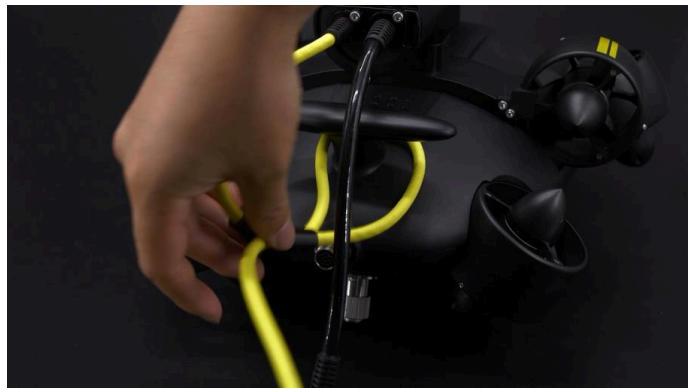
Knot the Securing Loop on ROV’s rear wing
Securing the loop and ROV Plug
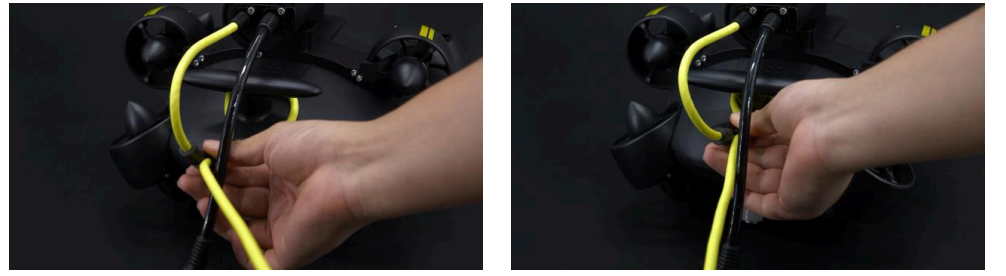
PLUG the ROV plug (Black color) in ROV tether connector and FASTEN the cap on the ROV plug.
Connect to RC
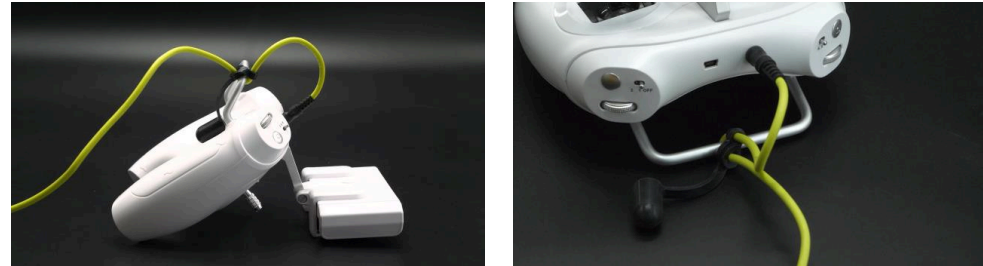
Plug into the AC socket (outdoor power bank or generator)
Power ON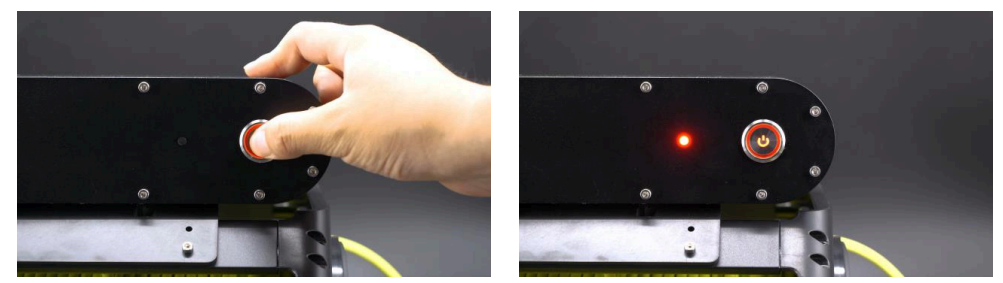
Packing After Dive
- Power OFF steps,
- OPSS-PM OFF
- Unplug from the AC power socket
- RC Power OFF
- Disconnect the connectors and fasten the protective caps.
- Wipe out the water residues if necessary.
- Unlock the E-tank from the mount.
- Organize and put all parts back to protective box.*
Maintenance
- Check each connector and plug, and get rid of the water or dust.
- Fasten the protective cap for the next dive.
- Check the seals and O-rings, replacing them if they have worn or been damaged.
- Check the tether surface, and make sure the tether jacket is in good condition.
- Rinse and soak the E-Tank in fresh water after a dive, especially after a seawater operation.
- Check the ON/OFF button on OPSS-PM, and get rid of the dust or sand if necessary
LED color index on OPSS-PM
- Green: Fully charged or no charging
- Red: Normal charging
- Blue: Leakage alarm
- Yellow: Overheat alarm
- Purple: Overloading alarm
- White: Overvoltage or undervoltage alarm
FIFISH App download and Installations
- Option 1. Scan the above QR code to download the IFISH App.
- Option 2. Search the FIFISH on App Store (iOS) or Google Play (Android).
- Option 3. Go to QYSEA’s website at https://www.qysea.com/support/app-download/
Disclaimer
We provide customers with after-sales services, excluding the following circumstances-
- Damage caused by unauthorized modification, disassembly, or shell opening not in accordance with
official instructions or manuals. - Damage caused by improper installation, incorrect use, or operation not in accordance with official instructions or manuals.
- Damage caused by a non-authorized service provider.
- Damage caused by unauthorized modification of circuits, mismatch, or misuse of the battery and
charger. - Damis’ age is caused by those who do not follow instructions and manual recommendations.
- Damage caused by operation in bad water conditions (i.e, strong currents, huge waves, etc.)
- Damage caused by operating the product in an environment with electromagnetic interference (i.,e. in mining areas or close to radio transmission towers, caves, mudconditionsiradiationions, tunnels, etc.).
- Damage caused by operating the unit with a low-charged or defective battery.
- Uninterrupted or error-free operation of a product.
- Loss of, or damage to, your data by a product.
- Damage caused by operating the ROV in the sensitive zone (military, natural resource protection zoning, marine conservation, ocean conservation, etc.)
- Damage caused by unpredictable factors (current, cave collapse, swallow ban by an animal, etc.)
- Products or parts with an altered identification label or from which the identification label has been removed.
Customer Service
- Website: https://www.qysea.com/
- Ph: +86-755-2266-2313