
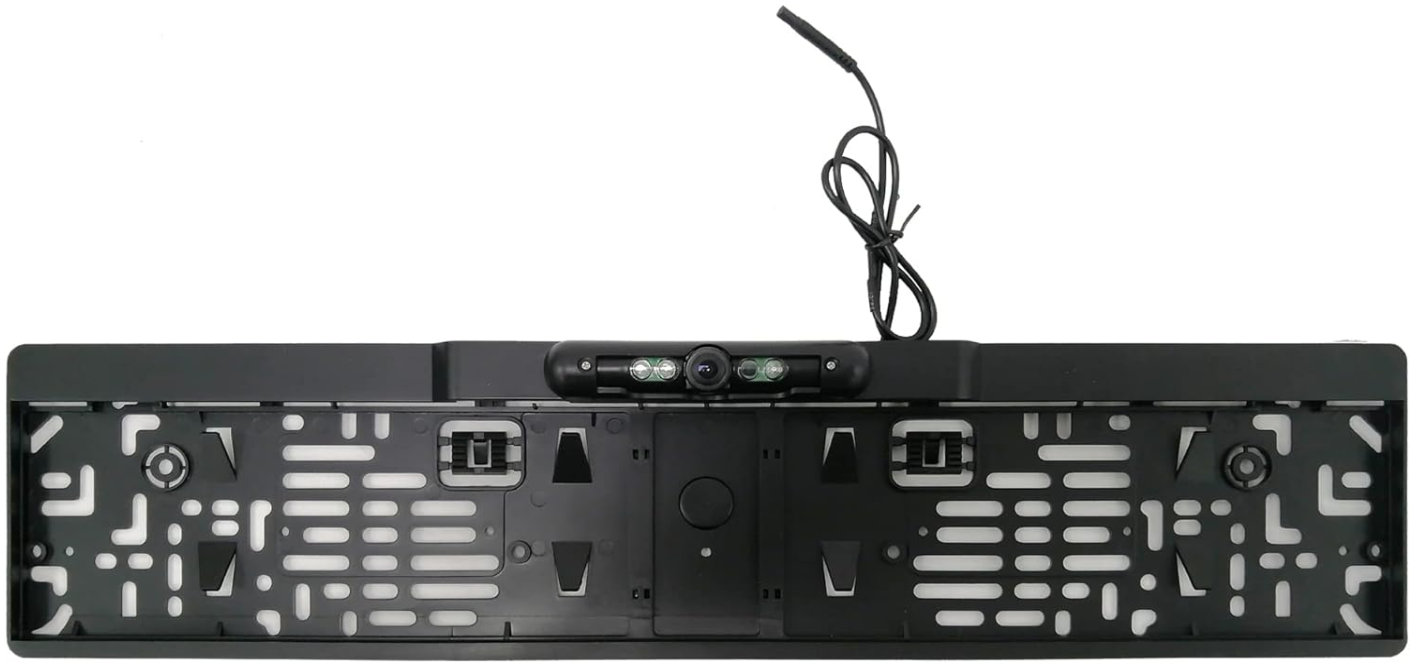
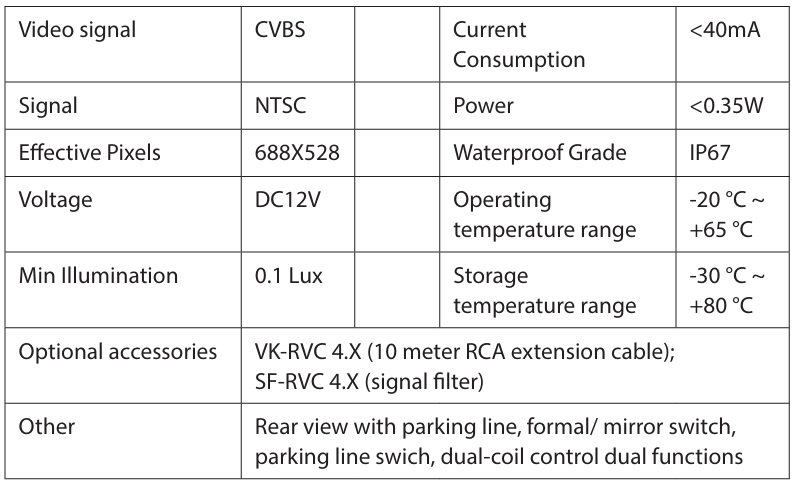
BLAUPUNKT RVC 4.1 KH Rear View Camera
Safety Instructions
- Do not modify or tamper with the device. There are no user-serviceable parts inside.
- Observe the performance limits of the device. Have repairs and, if necessary, installation done by a professional.
- Install the device only if you have experience installing such devices and are familiar with the vehicle’s electrical system. Observe the information marked on the unit connections.
- Ensure that all wires transfer the correct signals or voltages.
- The installation of the radio must not interfere with or prevent the activation of airbags and other safety devices and/or controls.
- Disconnect the vehicle battery (negative terminal, ground) before installing the device, as doing otherwise may cause malfunctions or damage to the device or the vehicle electronics. Observe the vehicle manufacturer’s safety instructions (airbag, alarm system, on-board computer, immobiliser, etc.).
- To keep the camera/monitor working properly, please clean the camera/ monitor regularly to free it from dirt, water drops, snowdrops, etc.
- Keep the cables of the camera/monitor away from high-temperature objects such as the engine or exhaust.
- If the camera model you have comes without built-in LED lights, please turn on your license plate light for better vision at night or in dark areas.
- The specifications of the camera/monitor are subject to change without prior notice.
Installation
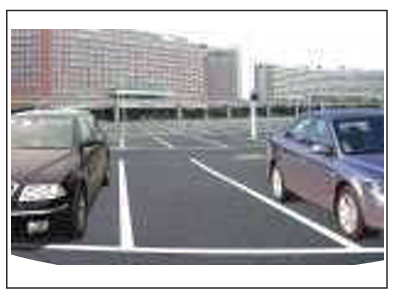
 Universal type installation location
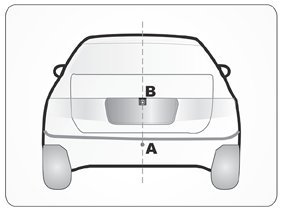 Universal type installation location
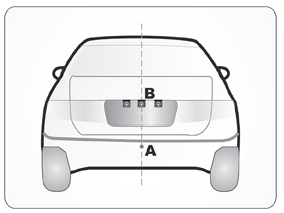
- Special type installation location
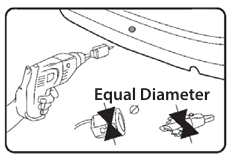
Flush-Mount Camera
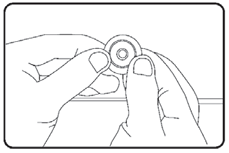
- Check to be sure the hole saw used has with diameter equal to that of the camera.
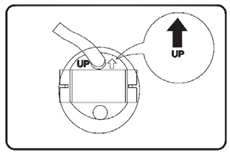
- Adjust the camera to turn the UP arrow mark straight upwards.
- Put the harness through the hole made in the bumper to re-fix the camera.
- Put the camera into the hole and use your two thumbs to press it evenly for a tight, flat mount

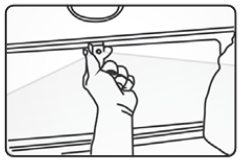
Bracket-Mount Camera
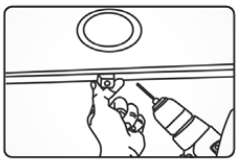
- Choose a flat position near the license plate light and make a small hole for the first screw with a drill.
- Use a screwdriver to fix the first screw (but not tightly)
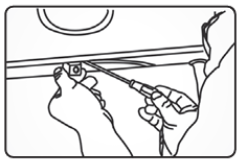
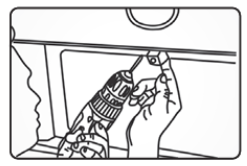
- Get the power/video cables connected, and then adjust the camera properly to find the best position for the other screw according to the camera image in the monitor.
- Mark the position found for the second screw and drill a hole with a drill. Remarks:
- Fix the second screw with a screwdriver
- Select a suitable flat position near the license plate light and mark it.
- Drill a hole according to the bolt diameter.
- Put the bolt vertically (against the ground) into the hole and fix the bolt with the screw supplied from inside.
- Some models come with an up/down image switch option, and can be mounted with its bolt horizontal (against the ground) and its lens downward.
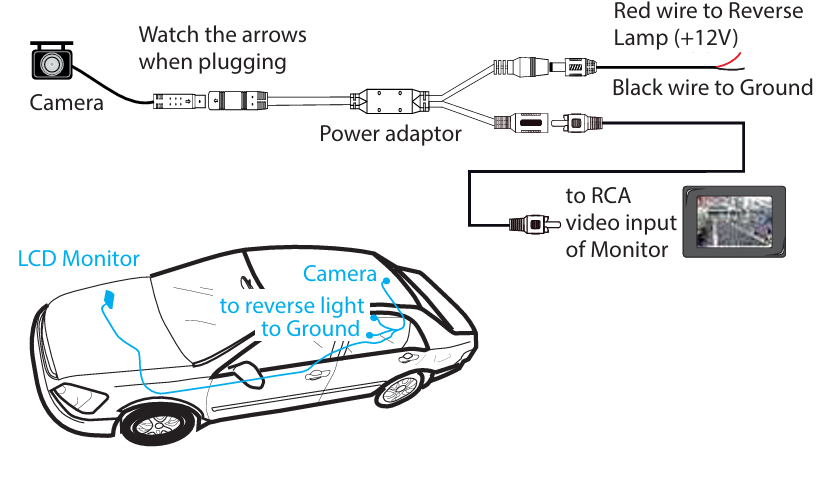
- The wiring diagram applies to most (but not all) camera models, and when making the connections, please also refer to the labels or marks on the wires
- Camera .Image w/o parkingguidelinee
- camera image with parking guidelines
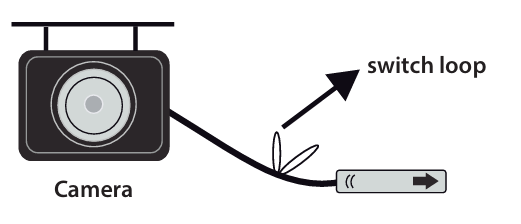
- Parking Guide Line: Available on partial models, refer to the image above. The option can be realized by following the Switch Loop Instructions.
- Mirror/right image switch: Available on partial models. The option can be optionalized by following the Switch Loop Instructions.
- Up/down image switch: Available on partial BLAUPUNKT RVC 4.1 KH Rear View Camera bolt mount type models. The option can be personalized by following the Switch Loop Instructions.
- Switch Loop Instructions: Blue loop: Cut to switch to front view. Purple or white loop. Cut to turn off the parking line.
One Year Warranty
1 Year Warranty. If you have any issues with your product, please contact our Authorized Customer Care team. Blaupunkt Authorized Service Center: Envent World Wide Pvt Ltd. Khasra. No- 15/15(4-16), Village Samalkha, Tehsil Vasant Vihar, New Delhi- 110037 Email- wecare@blaupunktaudio.in Whatsapp Chat Support: 8860 022 600 Please submit the following information while claiming product warranty:
- Serial Number
- Date of purchase
- A copy of proof of purchase in case of warranty
Disposal
- Do not dispose of your old unit in the household trash.
- Use the return and collection systems available to dispose of the old device.
- This manual may be updated from time to time without notice.
Disclaimer
- Blaupunkt is not liable for any loss or damage caused or resulting from unauthorized disassembly or modification to the product.
- No warranty, whether express or implied, is provided in the U.S. and Canada.
Customer Service
- Tel: 1800 252 878 658
- Visit: http://www.blaupunkt.com
- Scan:

FAQs
Q:. What vehicles is the RVC 4.1 KH compatible with?
Ans: The majority of automobiles, SUVs, and trucks that have infotainment systems or aftermarket display units that accept composite video (RCA) input can use the BLAUPUNKT RVC 4.1 KH. It is made to fit all people.
Q: Does this rear-view camera support night vision?
Ans: Indeed. The RVC 4.1 KH has infrared (IR) LEDs for night vision and low light levels, which enable safe reversing even in low light.
Q: Is the camera waterproof?
Ans: Indeed. With an IP67 waterproof rating, the camera can withstand rain, dust, and car washes, making it appropriate for extended outdoor use.
Q: Does the camera display parking guidelines?
Ans: Indeed. To assist you in estimating distance when reversing, the RVC 4.1 KH has fixed parking assist guidelines on the video stream. It is not possible to change or eliminate these lines.
Q: How is the camera powered?
Ans: This guarantees that the camera will only turn on when the car is in reverse.
Q: What kind of display does the camera connect to?
Ans: It is compatible with the majority of contemporary aftermarket infotainment systems.
Q: Is the camera wireless?
Ans: No, compared to wireless options, the RVC 4.1 KH’s wired camera system offers a more reliable and delay-free video transmission.
Q: Can I install the camera myself?
Ans: Yes, if you have access to the back of your car and are familiar with basic wiring.