


![]()
Bose ShowTime SK12 Surface Mount Loudspeaker
Safety Instructions
- Do not block any ventilation openings. Install in accordance with the manufacturer’s instructions.
- Do not install near any heat sources such as radiators, heat registers, stoves, or other apparatus (including amplifiers) that produce heat.
- Only use attachments/accessories specified by the manufacturer.
- Keep the product away from fire and heat sources.
- Do not place naked flame sources, such as lighted candles, on or near the product.
- Do not make unauthorised alterations to this product.
- Clean speakers using only a dry cloth. Do not expose the loudspeaker to soap, detergent, mineral oil, alcohol, or other cleaning agents or chemicals.
- All Bose Professional products must be installed in accordance with local, state, federal, and industry regulations.
- Unsafe mounting or overhead suspension of any heavy load can result in serious injury or death, and property damage.
- Do not mount on surfaces that are not sturdy or that have hazards concealed behind them, such as electrical wiring or plumbing.
Package Contents
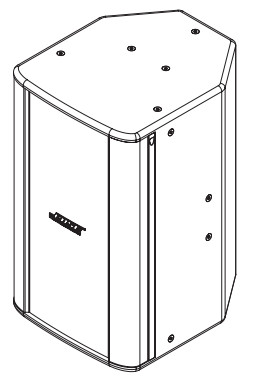
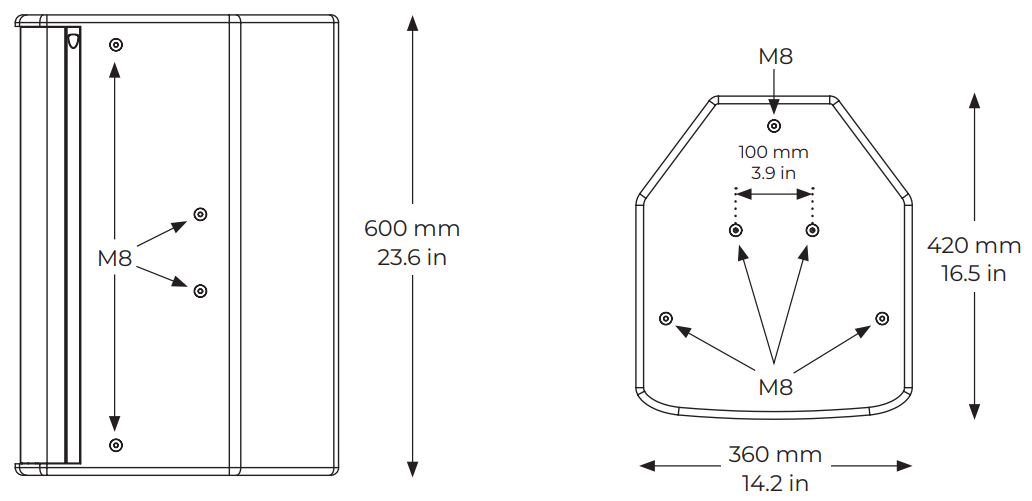
Product Dimensions
Installation Accessories
- M8 Threaded Eye Bolts

- AMUPOLEAT Pole Adapter

- RMUBRKT1 & WBPWR-50 Pan-and-tilt Brackets

- Miscellaneous Mounting Options

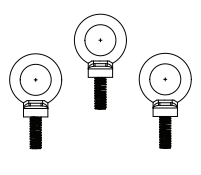

Threaded Eye Bolts
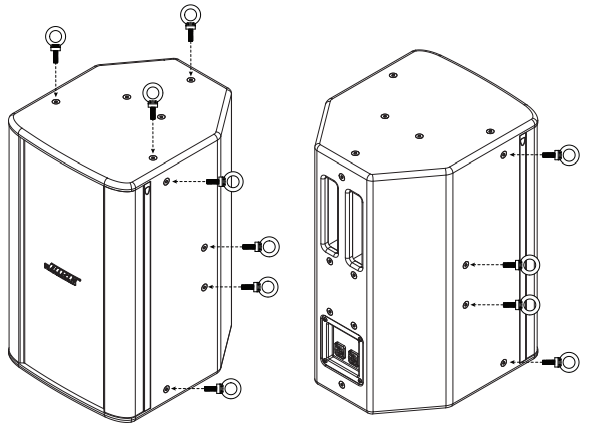
- To suspend the loudspeaker with eye bolts, attach M8 threaded eye bolts to the M8 threaded attachment points on the top or either side panel of the loudspeaker, depending on your desired mounting position.
- Use only load-rated eye bolts intended for lifting.
- Hang the loudspeaker in your desired mounting location.
- RMUBRKT1 & WBPWR-50 Pan-and-tilt Brackets
- Miscellaneous Mounting Options
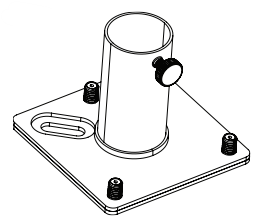
Pole Adapter
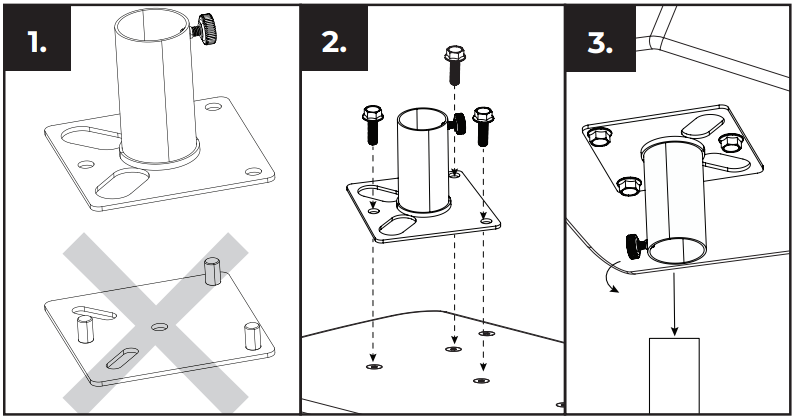
- Separate the base of the Pole Adapter from the top of the bracket.
- Attach the top of the Pole Adapter to the loudspeaker using the included M8 bolts.
- Tighten all bolts with a 13-millimetre socket tool using a torque not to exceed 13.6 to 20.3 newton meters (10 to 15 pound feet).
- To mount the loudspeaker to a pole, attach the thumbscrew to the Pole Adapter and place the adapter over the pole. Tighten the thumbscrew to secure.
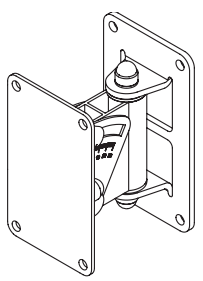
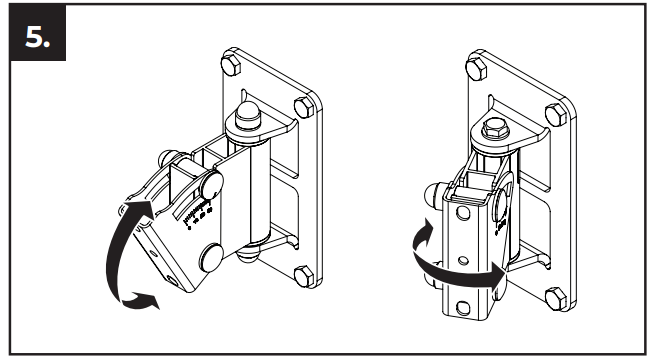
Pan-and-Tilt Bracket
When choosing an installation location, at least two of the mounting bracket’s attachment points must be
secured to a support structure. Attachment points not secured to a support structure must be secured using appropriate hardware for the installation. Choose fasteners that are consistent with all local building codes and requirements.
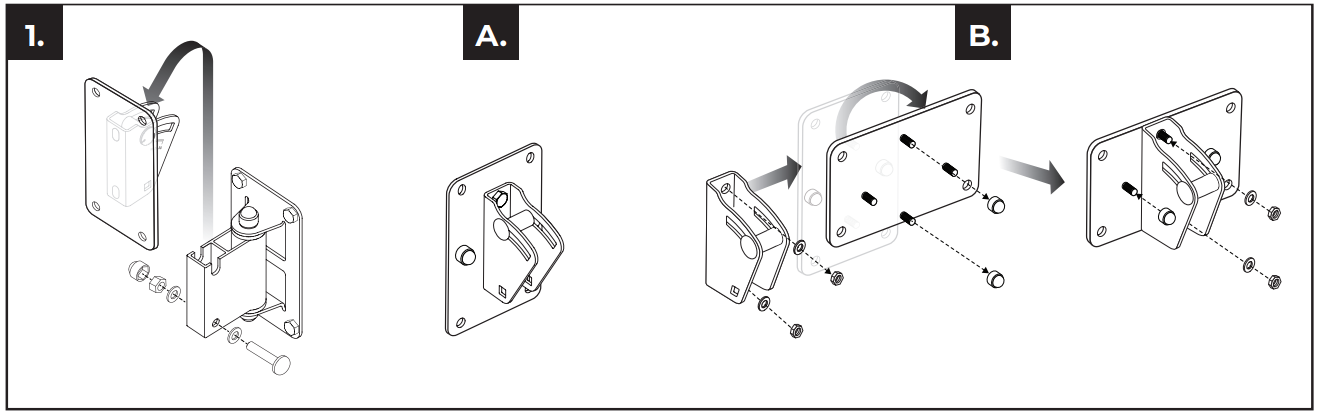
- Unscrew the bolt that secures the loudspeaker holder to the bracket and remove the loudspeaker holder. Use orientation A for vertical installation and orientation B for horizontal installations.

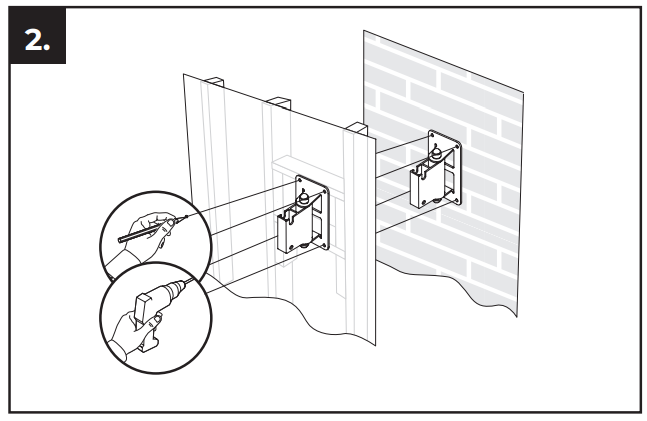
- Mark four drill holes and drill four holes into the wall. Secure the bracket to the wall using four screws (use M8 or 5/16-inch sized screws).

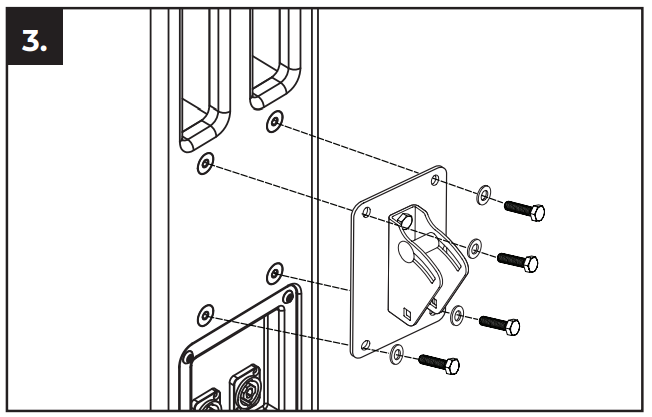
- Attach the mounting plate to the loudspeaker using four M8 × 45mm screws (included with the bracket).

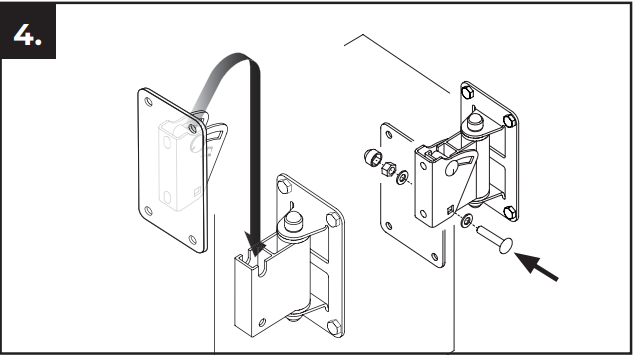
- Attach the loudspeaker holder to the bracket and screw the bolt through the holder to secure the holder to the bracket.

- Adjust the tilt of the loudspeaker by loosening the tilt bolts and adjusting the loudspeaker. Adjust the pan of the loudspeaker by loosening the pan bolts and adjusting the loudspeaker.
Mounting Options
The centre two M8 mounting holes on the top of the loudspeaker enclosure are designed for additional mounting options to support a wide variety of applications, as determined by the installer.
- Choose appropriate fasteners to support the weight of the loudspeaker. At least one of the attachment points must be secured to a support structure. Attachment points not secured to a support structure must be secured using appropriate hardware for the installation. Choose fasteners that are consistent with all local building codes and requirements.
Recommended Power Amplifiers
| Nominal Impedance | Required Channels | Amp Power Rating |
| 8 Ω | 1 | 600 – 2400 Watts |
Selecting the proper amplifier size for a given loudspeaker requires analysis of the transducer’s long-term (or RMS) power rating, dynamic range of the input-source material (crest factor), desired sound pressure levels, and other factors. As a general guideline, the following table provides recommended power amplifier ranges for the ShowTime SK12 loudspeaker.
Rotating the High-frequency Waveguide
The high-frequency waveguide in the ShowTime SK12 loudspeaker can be rotated to accommodate horizontal or vertical loudspeaker mounting. The SK12 is assembled in the factory for vertical mounting. To rotate the waveguide for horizontal mounting, do the following.
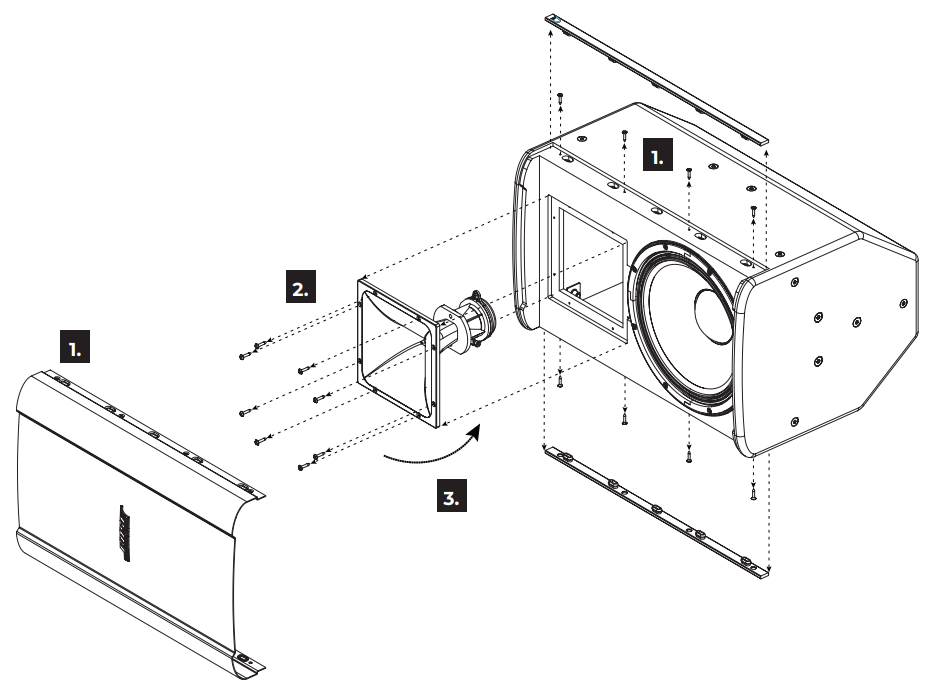
- Remove the screws from around the loudspeaker grille and remove the grille from the enclosure.
- Remove the waveguide screws.
- Pull the waveguide forward, rotate it 90°, and place it back into the enclosure.
- Secure the waveguide using the screws removed in Step 2.
- Reattach the grille using the screws removed in Step 1.
Loudspeaker Orientation
SK12 loudspeakers can be mounted horizontally or vertically. Choose the loudspeaker orientation best suited for your installation. You can rotate the Bose Professional logo to align with your loudspeaker orientation by pulling gently on the logo, turning it to your desired position, and pushing the logo back into place.
Technical Specifications
| Physical | ||||||||||
| Net Weight | 23.1 kg | 50.9 lb | ||||||||
| Shipping Weight | 27.7 kg | 61.1 lb | ||||||||
| Connectors | NL4 Wiring:
|
|||||||||
Regulatory Compliance
- This product conforms to all applicable EU directive requirements.
- Proper disposal and recycling help protect natural resources, human health, a nd the environment.
- For more information on the disposal and recycling of this product, contact your local municipality, disposal service, or the shop where you bought this product.
Warranty
- This product is covered by a limited warranty.
- For warranty details, visit BoseProfessional.com/warranty
Customer Support
- Tel: 1-800-278-1083
- Website: https://support.bose.com/
MA 01748 USA Bose is a trademark of Bose Corporation. ArenaMatch is a trademark of Transom Post OpCo LLC. ©2024 Transom Post OpCo LLC.
2 Comments
Pingback: PROTECH 400N-BT 500N-BT Portable Speaker | Setup & Guide
Pingback: Bose AMU108 ArenaMatch Utility Loudspeakers User Manual