
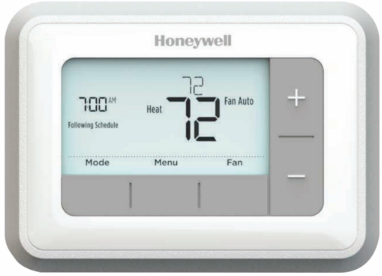
Honeywell RTH7500 Series Programmable Thermostat
Safty Instruction
Removing your old thermostat
- Turn power OFF. To protect yourself and your equipment, turn off the power at the breaker box or switch that controls your heating/cooling system.
- Check that your system is off. Change the temperature on your old thermostat. If you don’t hear the system turn on within 5 minutes, the power is off.
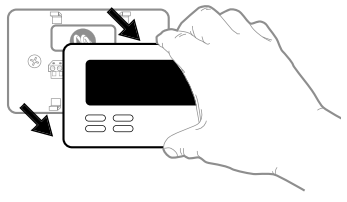
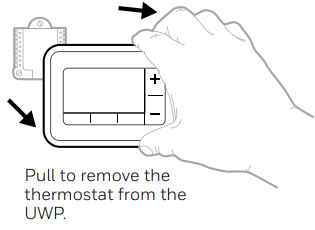
- Remove the old thermostat’s faceplate. On most thermostats, you can take off the faceplate by grasping and gently pulling. Some thermostats may have screws, buttons, or clasps. Do not remove any wires from your thermostat at this time!
Make sure there are no 120 V/240 V wires.
If you’re installing other programmable models, check our Honeywell RTH2410 Series Thermostat User Guide.
Quick Installation Guide
Included in your box
Tools you will need
- Phillips screwdriver
- Small flat-head screwdriver
- Pencil
- Level


Tools you may need
- Wire stripper
- Needle-nose pliers


Drill and drill bit (See step 11)Set date and time

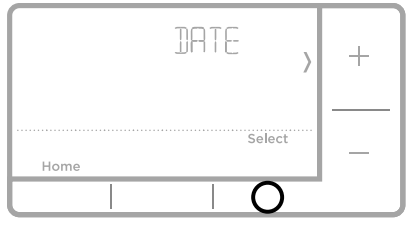
- Set the date. Press + or – to adjust the year. Press Select. Press + or – to adjust the month. Press Select. Press + or – to adjust the day. Press Select.
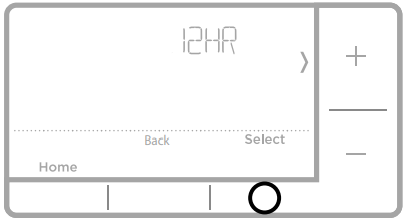
- Choose a clock format. Press + or – to set the clock format: 12-hour (standard for North America) or 24-hour. Press Select.
- Set the time. Press + or – to adjust the hour. Press Select. Press + or – to adjust the minutes. Press Select.

System Setup
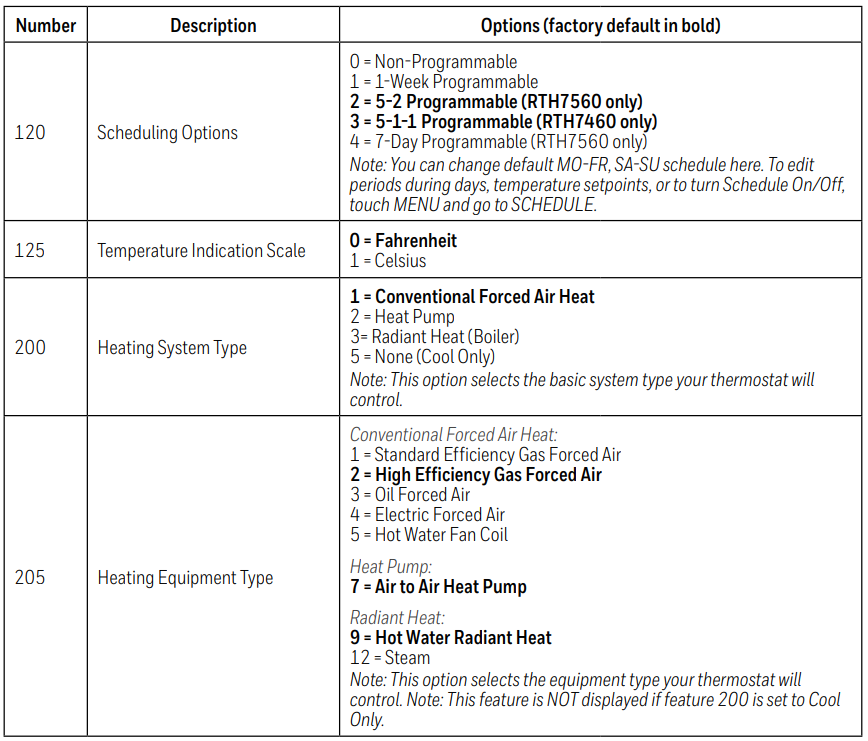
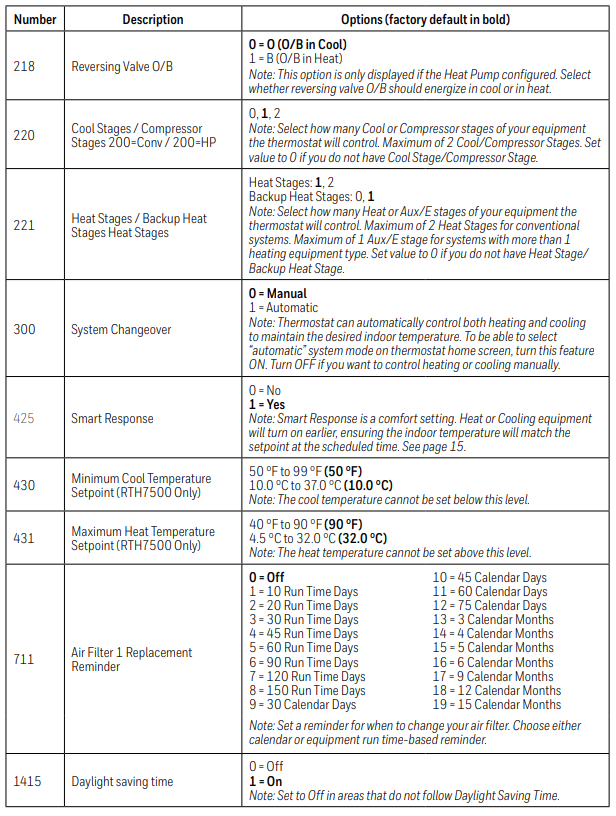
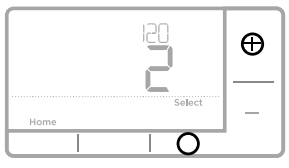
- Select System Setup options. Press + or – to change values or select from available options. Then press Select to save changes and advance to the next System Setup number. See “System Setup options” below for a full list of System Setup numbers and options. Repeat until all of the System Setup options have been set. The thermostat will automatically save and exit to the Home screen.
- Continue to “System operation settings” on page 10.
System Setup options
For advanced configuration, you may also see the Honeywell RTH8500 Series Thermostat Guide.
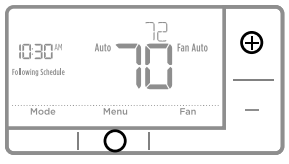
System Operation Settings
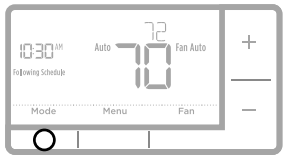
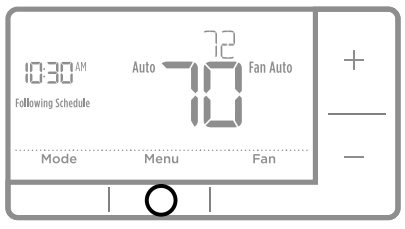
- Press the Mode button to cycle to the next available System mode.
- Cycle through the modes until the required System mode is displayed and leave it to activate.
System modes
- Auto: Thermostat selects heating or cooling as needed.
- Heat: Thermostat controls only the heating system.
- Cool: The Thermostat controls only the cooling system.
- Em Heat (only for heat pumps with auxiliary heat): Thermostat controls Auxiliary Heat.The compressor is not used.
- Off: The Heating and cooling system is off. The fan will still operate if the fan is set to On or Circulate.
Fan operation settings
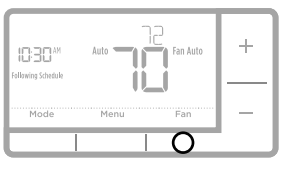
- Press the Fan button to cycle to the next available Fan mode.
- Cycle through the modes until the required Fan mode is displayed and leave it to activate.
Fan modes:
- Auto: Fan runs only when the heating or cooling system is on.
- On: Fan is always on.
- Circ (RTH7500 Only): Fan circulates randomly about 33% of the time.
Program Schedule
You can program four time periods each day, with different settings for weekdays and weekends. We recommend the preset settings (shown in the table below), since they can reduce your heating/cooling expenses.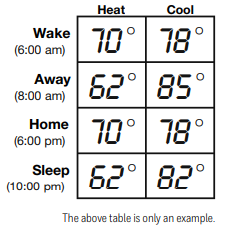
- Wake– Set to the time you wake up and the temperature you want during the morning, until you leave for the day.
- Away – Set to the time you leave home and the temperature you want while you are away (usually an energy-saving level).
- Home – Set to the time you return home and the temperature you want during the evening, until bedtime.
- Sleep – Set to the time you go to bed and the temperature you want overnight (usually an energy-saving level).
To adjust program schedules
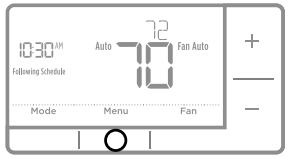
- Press Menu on your thermostat.
- PROG is displayed. Press Select. Then ON is displayed. Press Select.
- Press + or – to select a day or a set of days to edit. Press Select.
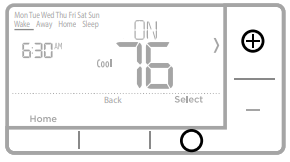
- Press + or – to select a schedule period to edit (Wake, Away, Home, and Sleep). Press Select.
- ON is displayed. Press Select to keep the schedule period on. Or press + and then select to turn off the schedule period.
- Time starts blinking. Press + or – to adjust the schedule period start time. Press Select.
- The temperature starts blinking. Press + or – to adjust the “Heat” setpoint temperature. Press Select. Press + or – to adjust the “Cool” temperature setpoint. Press Select.
- Repeat steps 4 through 7 Honeywell RTH7500 Series Programmable Thermostat for the remaining schedule periods.
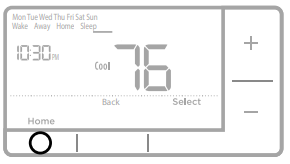
- Press Home when you’re finished to save program settings and return to the home screen.
Program schedule override (temporary)
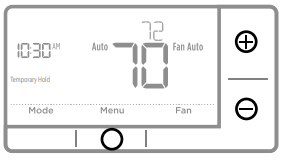
- Press + or – to adjust the temperature.
- Once at the desired setpoint temperature, no further action is needed. The new setpoint temperature will be held until the next scheduled period begins. For more information on schedule periods, see “Program Schedule” on page 11.
- To cancel the Temporary Hold, Press + or – and then press Cancel.
Program schedule override (permanent)
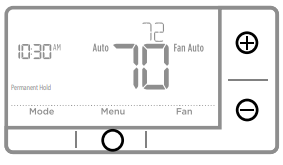
- Press + or – to adjust the temperature.
- TEMPORARY HOLD is displayed, and the setpoint temperature flashes. While it’s flashing, press the Hold (Mode) button to change to Permanent Hold.
- To cancel the Permanent Hold, press + or – and then press Cancel.
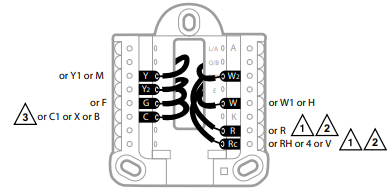
Wiring Conventional Systems
Alternate wiring (conventional systems)
If labels do not match terminals, connect wires as shown below (see notes below).
Notes
- If you must connect both R and Rc wires, set the R Slider Tab to the down position (2 wires).
- If your old thermostat had both R and RH wires, set the R Slider Tab to the down position (2 wires). Then connect the R wire to the Rc terminal, and the RH wire to the R terminal.
- If your old thermostat had only 1 C or C1 wire, connect it to the C terminal. If your old thermostat had 2 C or C1 wires, wrap each separately with electrical tape and do not connect them
Wiring Heat Pump
Connect wires: heat pump
- Match each labeled wire with the same letter on the new thermostat.
- Insert the wires into the matching terminal.
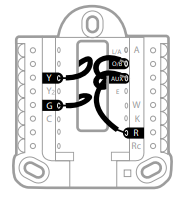
Alternate wiring (for heat pumps only)
Notes The Slider Tab is in the up position (1 wire).
- If your old thermostat had both V and VR wires, stop now and contact a qualified contractor for help.
- If your old thermostat had separate O and B wires, attach the B wire to the C terminal.
- If your old thermostat had Y1, W1, and W2 wires, stop now and contact a qualified contractor for help.
- C does not power the thermostat display or operations; batteries are always required.

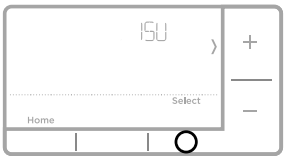
Advanced menu
- Press and hold the Menu and + buttons for approximately 5 seconds to enter the advanced menu.
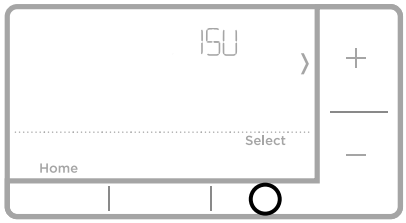
- Press Select to enter the System Setup (ISU) menu.
- Press Select to cycle through System Setup numbers.
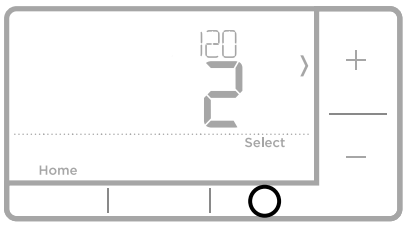
- Press + or – to change values or select from available options
- Press Select to save changes and advance to the next System Setup number.
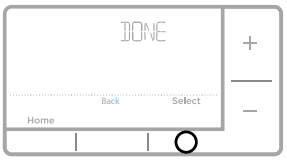
- Once you have cycled through all of the System Setup numbers, “Done” is displayed. Press Select to save and exit. To save and exit early, press Home to return to the Home screen.
Setting degrees Fahrenheit (F) or Celsius (C)
- Press Menu to enter the device menu. You will see PROG. Press + or – to choose F/C.
- Press Select.
- You will see F or C displayed.
- Press + or – to adjust to the desired setting. F for Fahrenheit and C for Celsius. Press Select to save and exit.
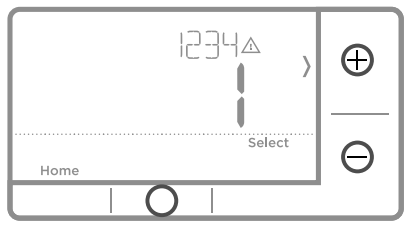
Alert screen
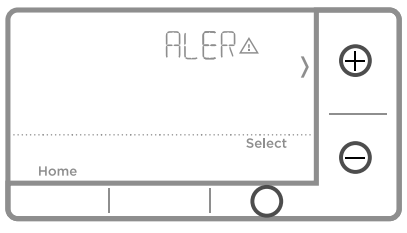
- You will see the alert icon on the home screen. You can access alerts in the Menu to view the error/alert code. Once viewed, the home screen will maintain the alert symbol until it is cleared.
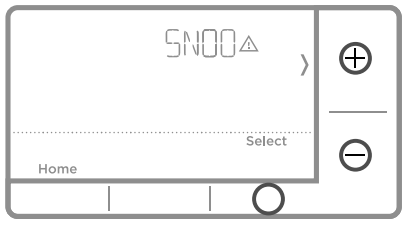
- Snoozed alerts will appear 7 days after dismissing them in the alerts menu screen.
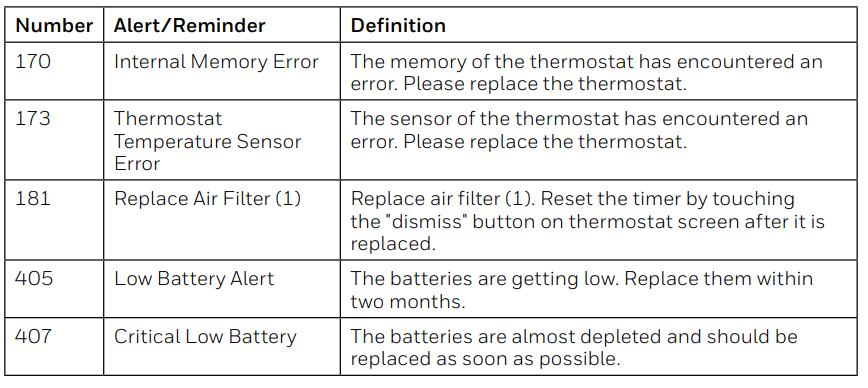
- When the alert icon appears, check the error code with the table below to determine the problem.
- Snooze the alert.
- Dismiss the alert.

Alerts codes
Troubleshooting
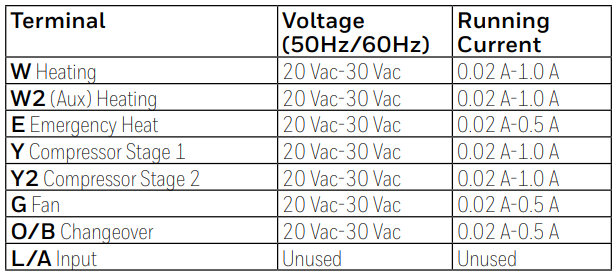
Electrical Ratings
Input: 2 x AA Batteries (1.5 V each)limited warranty
 limited warranty
Resideo warrants this product, excluding battery, to be free from defects in workmanship or materials, under normal use and service, for one Honeywell RTH7500 Series Programmable Thermostat (1) year from the date of first purchase by the original purchaser. If at any time during the warranty period the product is determined to be defective due to workmanship or materials, Resideo shall repair or replace
it (at Resideo’s option). If the product is defective,
- return it, with a bill of sale or other dated proof of purchase, to the place from which you purchased it, or
- call Resideo Customer Care at 1-800-468-1502.
Customer Support
- For assistance with this product, please visit resideo.com.
- Or call Resideo Customer Care toll-free at 1-800-468-1502
FAQs
Q: How do I install the Honeywell RTH7500 thermostat?
Before you begin, turn off the electricity to your heating and cooling system at the breaker. After removing your previous thermostat, connect the wires to the appropriate terminals on the RTH7500 base and label them with the terminal letters. After that, reattach the faceplate and turn on the power.
Q: Does the RTH7500 work with all HVAC systems?
The majority of 24-volt heating and cooling systems, such as central air conditioners, gas, oil, and electric furnaces, and heat pumps (with or without auxiliary heat), are compatible with the RTH7500.
It is incompatible with 120/240V electric baseboard heating systems and millivolt systems, such as floor furnaces.
Q: How do I program the thermostat?
Set temperature schedules for the Wake, Leave, Return, and Sleep times after selecting the day and time by pressing the “Set” button. For every day of the week, you can program up to four time slots.
Q: Can I use the thermostat without programming it?
Indeed. By setting a manual temperature and selecting “Hold,” you can prevent automated schedules from starting until you decide to resume them.
Q: How do I change between heating and cooling modes?
To switch between the available modes—Heat, Cool, Auto, and Off—press the System button. The thermostat automatically alternates between heating and cooling while it is in Auto mode.
Q: How do I set different programs for weekdays and weekends?
You can select one schedule for Monday through Friday and another for Saturday through Sunday because the RTH7500 supports 5-2 day programming.
1 Comment
Pingback: Honeywell RTH8500 Series Programmable Thermostat Guide