
Insignia NS-CLOPP2 Digital AM/FM Clock
Safety Instructions
- Keep these instructions. Heed all warnings.
- Do not use this apparatus near water. Clean only with a dry cloth.
- Do not block any ventilation openings. Install in accordance with the manufacturer’s instructions.
- Do not install near any heat sources such as radiators, heat registers, stoves, or other apparatus (including amplifiers) that produce heat.
- Do not defeat the safety purpose of the polarised or grounding plug.
- A polarised plug has two blades with one wider than the other.
- A grounding plug has two blades and a third grounding prong.
- The wide blade or the third prong is provided for your safety.
- If the plug does not fit into your outlet, consult an electrician for replacement of the obsolete outlet.
- Protect the power adapter from being walked on or pinched, particularly at the plugs, convenience receptacles, and at the point where they exit from the apparatus.
Package Content
Your clock radio includes the following items
- Clock radio
- AC adapter
- AA batteries (2)
- User Guide
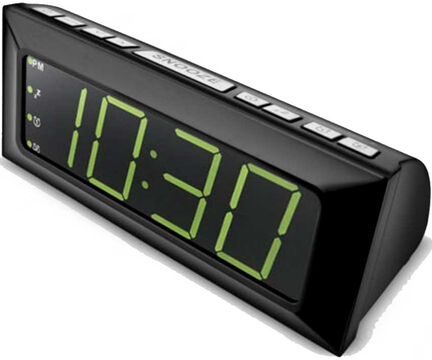
Features
LED display


Top Panel


Back Panel
- Battery compartment
Insert two AA batteries into this compartment for battery backup. - FM antenna wire
Improves FM radio reception. - AC power adapter
Plug the AC power adapter into a wall plug to power your clock radio.
Settings
Install the backup batteries
The clock radio uses a backup battery system to provide continuous alarm operation and clock settings in the event of a power failure.
If the backup batteries have been installed and a power failure occurs or the AC power adapter is accidentally disconnected, the display will not remain lit, but the current time and alarm time settings will be temporarily maintained. Otherwise, you must reset the time and alarm settings.
Make sure that the AC power adapter is plugged in; otherwise, all settings may be lost during battery installation.
- Turn your clock radio around to the back, then open the battery compartment cover located on the right side of your clock radio.

- Insert two “AA” batteries into the battery compartment.
- Make sure that the + and – symbols on the batteries align with the + and – symbols inside the battery compartment.
- Close the battery compartment.

When to Replace the Batteries
- To check the condition of the batteries, unplug the AC power adapter from the wall outlet and plug it in again after a few minutes. If the displayed time is incorrect, replace the batteries with new ones.
Connect the AC Adapter
Make sure that the AC power outlet matches the AC adapter’s power specifications (120 V ~ 60 Hz) before plugging in the adapter.
- Plug the AC power adapter into an AC power outlet.

- Plug in the AC power adapter. The hour digits will blink on the display.
- Press TUNE / repeatedly to set the correct hour, then press /MEM/PRESET to confirm the setting.
- The minute digits will blink.
- Press TUNE / repeatedly to set the correct minutes, then press /MEM/PRESET to confirm the setting.

Use your Clock Radio
Before using your clock radio, make sure the AC power adapter is securely connected.
Turn your clock radio on and off
- Press (power). Your clock radio turns on.
- Press SNOOZE/DIMMER to control the brightness of the LED.
- Press (power) again to switch your clock radio to standby mode.
Set and Use the Alarm
- Press VOL –/ or VOL +/ (depending upon the alarm you want to set). The or indicator lights up.
- Press and hold VOL –/ (or VOL +/ ). The hour digits will blink on the display.
- Press TUNE / repeatedly to set the correct hour, then press VOL –/ (or VOL +/ ) to confirm the setting. The minute digits will blink.
- Press TUNE / repeatedly to set the correct minutes, then press VOL –/ (or VOL +/ ) to confirm the setting.
- Press TUNE / to select the alarm sound source (either buzzer or radio).
- The alarm mode name will be shown on the display (Buzzer=Bu or Radio=rAd). Press VOL –/ (or VOL +/ ) to confirm.
- If you select the radio, tune to the station you want, and set the volume.
- Press TUNE / to set the volume of the alarm.
- The alarm will turn on at the time you have set and will turn off automatically after 59 minutes.
- Repeat these steps to set the alarm to a different time.
Mute, turn off, or cancel the alarm
- Press SNOOZE/DIMMER to mute the alarm for nine minutes.
- The alarm can be muted as many times as you want within 59 minutes of the preset alarm time
- Press any button except SNOOZE/DIMMER to turn the alarm off for 24 hours.
- To cancel the preset alarm, press VOL –/ (or VOL +/ ). The ALARM1 or ALARM2 indicator turns off.
Play the Radio
- Press (power) to turn on your clock radio, then press AM/FM repeatedly to select the radio band you want to listen to.
- If you select the FM band, stretch out the FM antenna on the back of your clock radio and move it around to improve FM reception.
- If you select the AM band, adjust the position of your clock radio for the best reception.
- Press TUNE / repeatedly to tune the radio to a lower or higher frequency.
- Press and hold TUNE / to search for the next available lower or higher station.
- Press VOL –/ or VOL +/ to decrease or increase the volume. Adjust the volume to a comfortable level.
- Press (power) to turn off your clock radio.
Use radio Station Presets
Your clock radio can store 20 station presets for AM and FM.
- Press (power) to turn on your clock radio, then press AM/FM repeatedly to select the radio band you want to listen to.
- Press TUNE / to tune your clock radio to the station you want to save.
- Press and hold /MEM/PRESET. The preset number blinks.
- Press TUNE / repeatedly to select the preset number you want.
- Press /MEM/PRESET again to store the station as a preset. The preset number stops blinking.
- Repeat steps 1 through 4 to save additional stations as presets.
Recall radio station presets
- Press (power) to turn on your clock radio, then press the AM/FM button repeatedly to select the radio band you want to listen to.
- Press /MEM/PRESET repeatedly to select the preset station you want.
Use the Sleep Timer
- When listening to the radio, press the (sleep) button repeatedly to set the sleep timer. Settings include 90 min, 60 min, 45 min, 30 min, 15 min, or OFF. The radio automatically turns off after the specified amount of time.
- After the sleep timer is activated, press (sleep) to view the time remaining. You can change the sleep timer duration when the remaining time is displayed by pressing (sleep) again.
- To stop listening at any time, press (power).
Clean your Clock Radio
- Use a soft, dry, clean cloth to clean the exterior of your clock radio.
- Do not let liquid drip into the inside Insignia NS-CLOPP2 Digital AM/FM Clock of your clock radio.
- For stubborn stains, use a soft cloth dampened with a weak solution of mild detergent and water.
- Dry your clock radio immediately afterwards with a clean cloth.
- Do not use abrasive clothes, thinners, alcohol, or other chemical solvents, because they may damage the finish or remove the panel lettering.
Specifications
Specifications are subject to change without notice.
- Power requirement: AC 120 V 60 Hz
- Power consumption: 6W
- Dimensions: 7.9 x 3.2 x 3.2 in. (20 x 8.1 x 8.1 cm)
- Tuner Band: FM and AM
- Range: FM – 87.5~107.9 MHz AM – 520~1710 KHz
- Presets: 20 for AM and FM
Troubleshooting


Legal Notices
FCC Information
This device complies with Part 15 of the FCC Rules. Operation is subject to the following two conditions:
- This device may not cause harmful interference and
- This device must accept any interference received, including interference that may cause undesired operation.
FCC Statements
Changes or modifications not expressly approved by the party responsible for compliance could void the user’s authority to operate this equipment.
This equipment generates, uses, and can radiate radio frequency energy and, if not installed and used in accordance with the instructions, may cause harmful interference to radio communications. However, there is no guarantee that interference will not occur in a particular installation.
If this equipment does cause harmful interference to radio or television reception, which can be determined by turning the equipment off and on, the user is encouraged to try to correct the interference by one or more of the following measures:
- Reorient or relocate the receiving antenna.
- Increase the separation between the equipment and receiver.
- Connect the equipment to an outlet on a circuit different from that to which the receiver is connected.
- Consult the dealer or an experienced radio/TV technician for help.
One Year Warranty
Definitions
The Distributor* of Insignia-branded products warrants to you, the original purchaser of this new Insignia-branded product (“Product”), that the Product shall be free of defects in the original manufacturer of the material or workmanship for one (1) year from the date of your purchase of the Product (“Warranty Period”).
How to obtain warranty service?
If you purchased the Product at a Best Buy retail store location or from a Best Buy online website, please take your original receipt and the Product to any Best Buy store. Make sure that you place the Product in its original packaging or packaging that provides the same amount of protection as the original packaging. To obtain warranty service, in the United States and Canada, call 1-877-467-4289. Call agents may diagnose and correct the issue over the phone.
Where is the warranty valid?
This warranty is valid only in the United States and Canada at Best Buy branded retail stores or websites to the original purchaser of the product in the country where the original purchase was made.
Customer Service
- Call: 877-467-4289 (U.S. and Canada) or 01-800-926-3000 (Mexico)
- Website: www.insigniaproducts.com
INSIGNIA is a trademark of Best Buy and its affiliated companies. Distributed by Best Buy Purchasing, LLC 7601 Penn Ave South, Richfield, MN 55423 U.S.A. ©2020 Best Buy. All rights reserved.
FAQs
Q: What features does the NS-CLOPP2 Clock Radio include?
The Insignia NS-CLOPP2 has a large digital display with brightness control, two alarms, sleep and snooze features, and a digital AM/FM tuner. It can use your preferred radio station or a buzzer to wake you up.
Q: Can I set two alarms at once?
Indeed. The NS-CLOPP2 is ideal for couples or weekday/weekend schedules because it has twin alarm settings that allow for two distinct wake-up times.
Q: How do I switch between AM and FM radio?
You may switch between AM and FM by pressing the Band button. The display will show the current band.
Q: How do I tune in to a station?
To manually locate a station, use the Tuning + / – buttons. To automatically search for the next available frequency with a strong signal, hold down either button for two seconds.
Q: How do I adjust the display brightness?
To switch between the available brightness levels, which are usually High, Medium, Low, and Off, press the Dimmer button repeatedly. Select the one that works well for the lighting in your space.
Q: What does the “Sleep” function do?
The Sleep mode is ideal for falling asleep to music or talk radio because it lets the radio play for a predetermined amount of time (15, 30, 45, 60, or 90 minutes) before shutting off automatically.
Q: How do I use the Snooze feature?
Press the Snooze button to momentarily turn off the alarm when it sounds. After roughly nine minutes, the alarm will go off once more.
Q: Can I use a battery backup?
Indeed. To preserve clock and alarm settings in the event of a power loss, place two AAA batteries into the battery compartment. Battery power alone won’t run the radio and display.