
Insignia NS-IMK20WH7 Ice Maker Kit
Introduction
Congratulations on your purchase of a high-quality Insignia product. This model features a dry-erase front door panel, allowing you to mark notes and other information with the provided erasable markers.
Safety Instructions
- Do not use this appliance near water.
- Clean only with a damp cloth.
- Do not block any ventilation openings. Install according to the manufacturer’s instructions.
- Do not install near any heat sources such as radiators, heat registers, stoves, or other apparatus (including amplifiers) that produce heat.
- Do not defeat the safety purpose of the polarized or grounding-type plug.
- A polarized plug has two blades with one wider than the other.
- A grounding type plug has two blades and a third grounding prong.
- The wide blade or the third prong is provided for your safety.
- Do not attempt to modify or extend the power cord of this appliance.
- Make sure that the available AC power matches the voltage requirements of this appliance.
- Do not handle the plug with wet hands. This could result in an electric shock.
- Unplug the power cord by holding the plug, never by pulling the cord.
Electric Shock Hazard
- Keep ventilation openings in the appliance enclosure or built-in structure clear of obstruction.
- Do not touch the interior of the chiller compartment with wet hands. This could result in frostbite.
- Do not use mechanical devices or other means to accelerate the defrosting process, other than those recommended by the manufacturer.
- Do not damage the refrigerant circuit when handling, moving, or using the refrigerator.
- Do not use electrical appliances inside the food storage compartment of the refrigerator, unless they are of the type recommended by the manufacturer.
Grounding requirement
- This refrigerator must be grounded.
- This refrigerator is equipped with a cord having a grounding wire with a grounding plug.
- The plug must be inserted into an outlet that is properly installed and grounded.
- Improper use of the grounding plug can result in a risk of electric shock.
Features
- Produces up to three pounds of ice a day, depending on the size of your refrigerator.
- 18 cu.ft or larger = 2.8 lbs
- 21 cu.ft or larger = 3.0 lbs.
- Stores up to six pounds of ice
- Prevents overflow by automatically detecting when the storage bin is full
- Works with these Insignia refrigerators: NS-RTM18WH7, NS-RTM18SS7, and NS-RTM21SS7
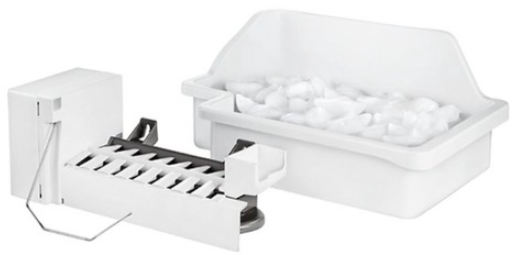
Package contents
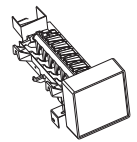
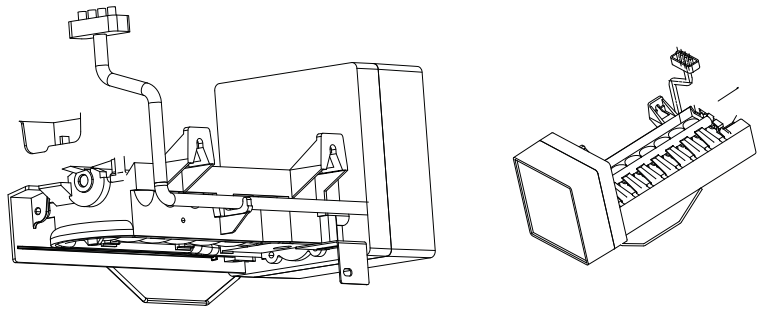
- Ice maker unit

- Ice storage bin
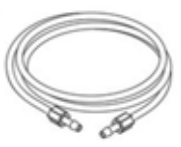
- Plastic water supply tubing
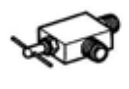
- Water valve
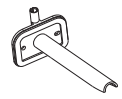
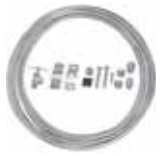
- Water inlet tube (1 long and 1 short)
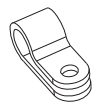
- Tube clamp
- Instruction manual
- Screw with chrome-head and washer attached (5)
- Ice maker mounting screw with white head (2)
- Leveling bracket bolt
- Plastic clip (2)


Tools and materials needed
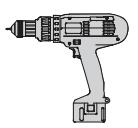
- Electric drill with a 1/4″ drill bit
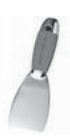
- Putty knife (optional)
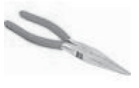
- Needle-nose pliers or nut driver
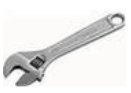
- Adjustable wrench
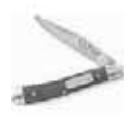
- Knife
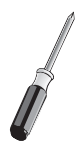
- Flat blade screwdriver
- Shut off valve (non-self-piercing)
- Phillips screwdriver
- Water line kit #5303917950
You’ll also need
- A freezer shelf to hold the ice storage bin. If your model does not have one, contact your dealer to order one.
- Access to a household cold water line with water pressure between 20 and 120 psi (137.9 and 827.4 kPa).
The water line kit (including copper tubing and shut-off valve) is available in a kit (#5303917950) from your local hardware or plumbing supply store.
Installing the ice maker
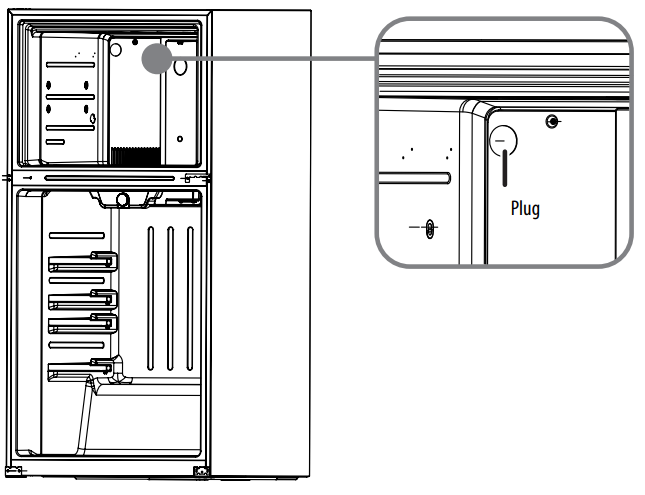
- Remove the plug from the inside of the freezer compartment with a putty knife or flat blade screwdriver.
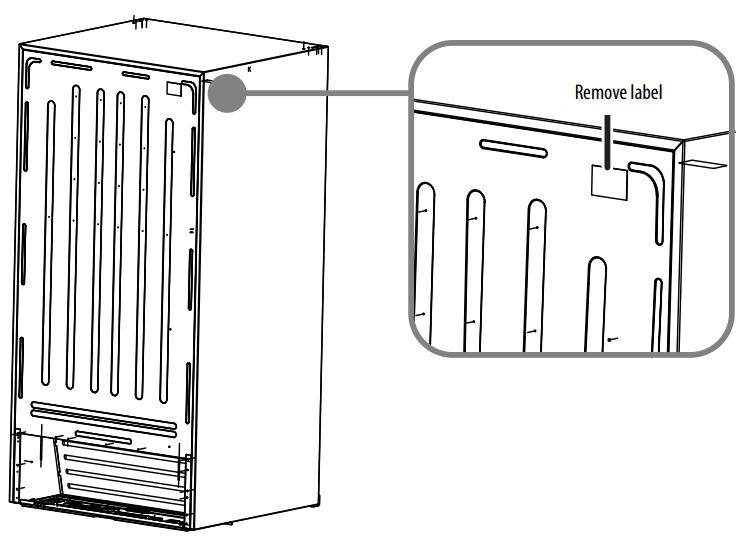
- Peel off the label covering the ice maker hole on the back of the refrigerator, then remove the foam from the hole with the needle-nose pliers.
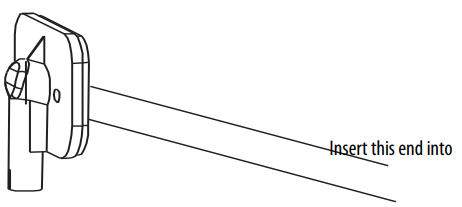
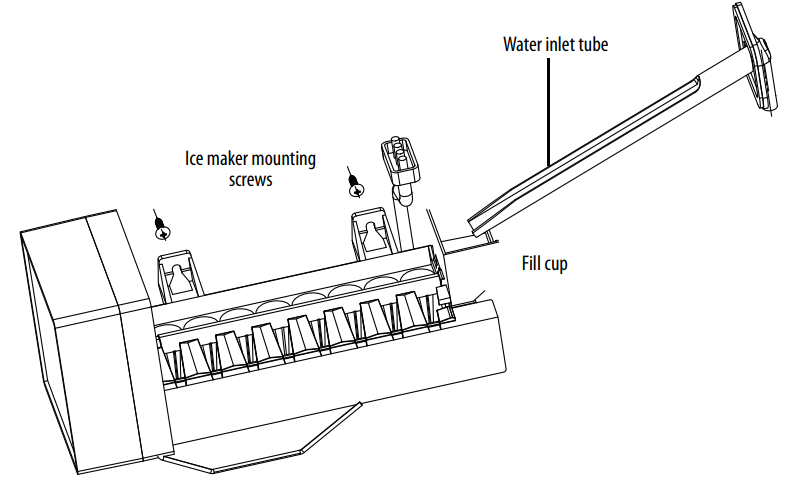
- Push the water inlet tube into the small hole on the back of the refrigerator. Rotate while inserting the tube until the flat surface of the inlet tube is tight against the back of the refrigerator.
- Secure the water inlet tube to the back of the refrigerator with two of the provided chrome head screws with washers.
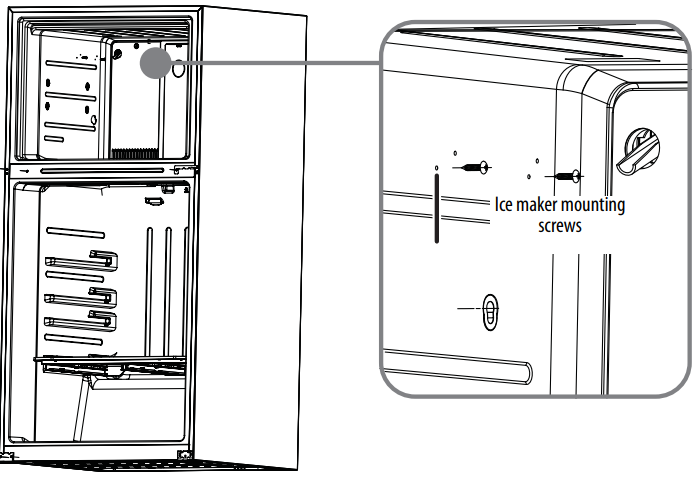
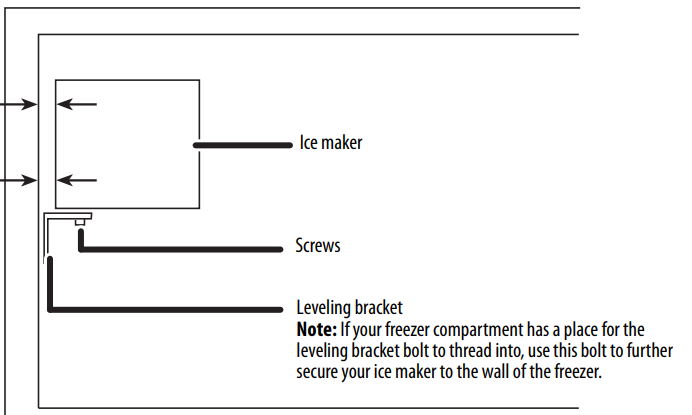
- Insert the two ice maker mounting screws (the screws with white heads) into the holes in the freezer wall. Turn each screw clockwise five times. Do not tighten the screws completely.
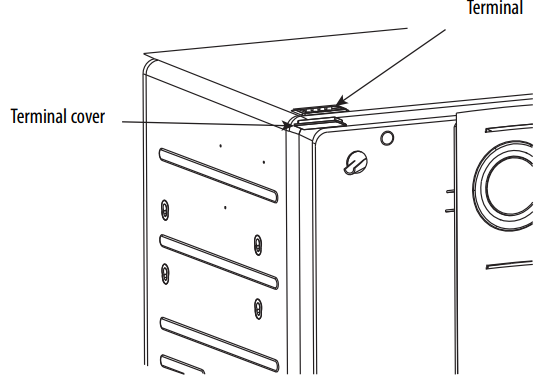
- Use needle-nose pliers or a flat-blade screwdriver to remove the terminal cover located at the top of the freezer by first pulling down one side of the cover, then pulling down the other side.
- With the ice maker in one hand, plug the wiring harness connector into the terminal located at the top of the freezer panel. The connector only fits one way.
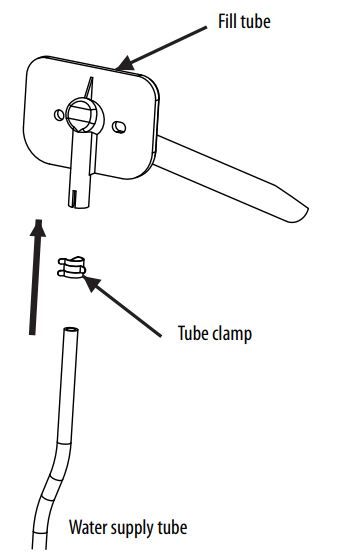
- Make sure that the water inlet tube is sitting inside the fill cup, then tighten the screws.
- The ice maker is level when the gap between the freezer wall and the ice maker is the same at the top and bottom.
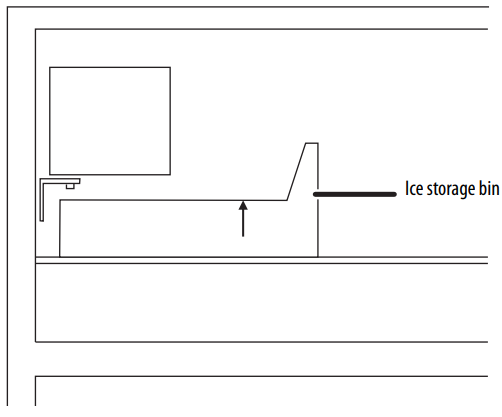
- Reinstall the freezer shelf and set the ice storage bin on the shelf.
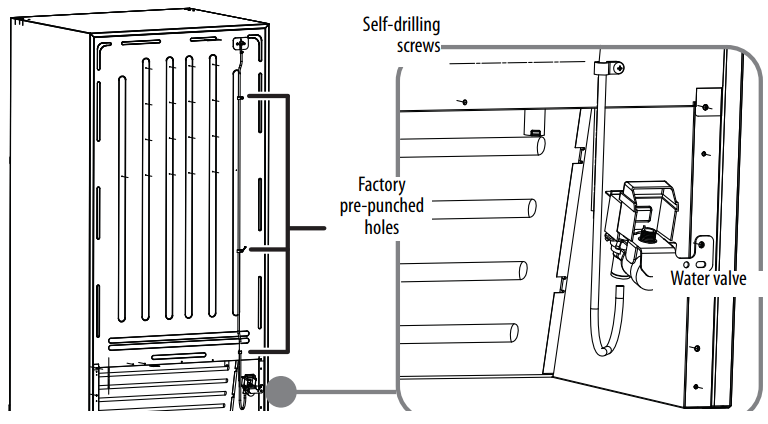
- Locate the pre-punched holes at the bottom right corner of the back panel of the refrigerator.
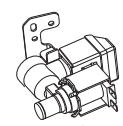
- Connect the wiring harness to the water valve, making sure that the connection is tight.
- Grasp the other end of the plastic tube and push it firmly into the quick-connection on the valve until it bottoms out.
- Clean the back of the cabinet with a commercial household cleaner, ammonia, or alcohol before applying the clamps.


Connecting the Ice Maker to the Water Supply
- Disconnect the refrigerator from the electric wall outlet.
- Remove the parts in the water line kit that you purchased for this purpose.
- Connect the end of the water supply line to the household cold water line behind the refrigerator. Choose a location for the valve that is easy to access.
- We recommend that you connect it to the side of a vertical water pipe.
- Remove any burrs resulting from drilling the hole.
- Take care not to allow water to drain into the drill. Failure to drill a ¼” hole may result in reduced ice production or smaller cubes.
- Fasten the shutoff valve to the cold water pipe with the pipe clamp, then tighten the pipe clamp screws until the sealing washer begins to swell.
- Do not over-tighten, or you may crush the tubing.
- Make sure the tubing is fully inserted into the valve.
- Unscrew the plastic cap from the water inlet valve and discard it.
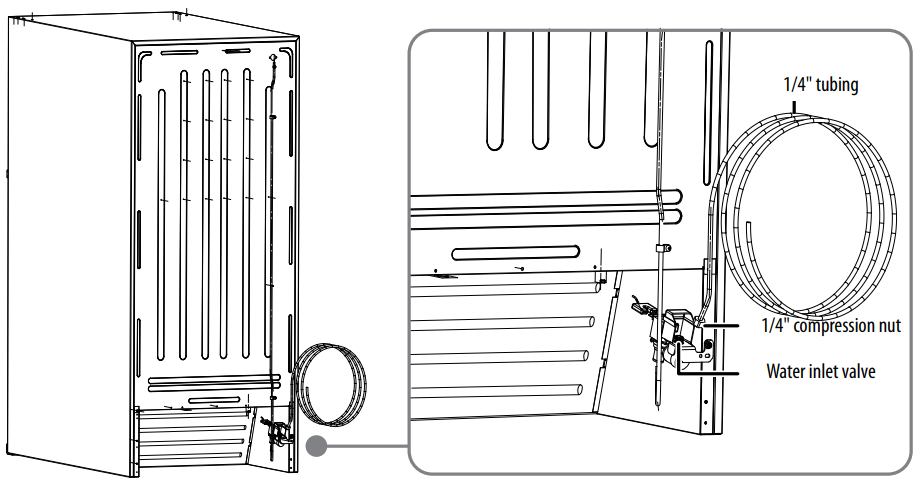
- Slide a brass compression nut, then a ferrule (sleeve), onto the water supply line.
- Push the end of the tubing into the water inlet Insignia NS-IMK20WH7 Ice Maker Kit valve as far as it will go, or ¼-inch, then secure the water supply line to the back panel of your refrigerator with a steel clamp and screw at the location shown on the illustration.
- Coil the excess water supply line (about 2-½ turns) behind the refrigerator and arrange the coils so they do not vibrate or wear against any other surface.
- Turn on the water supply at the shutoff valve and tighten any connections that leak.
- Reconnect the refrigerator to the electric wall outlet.
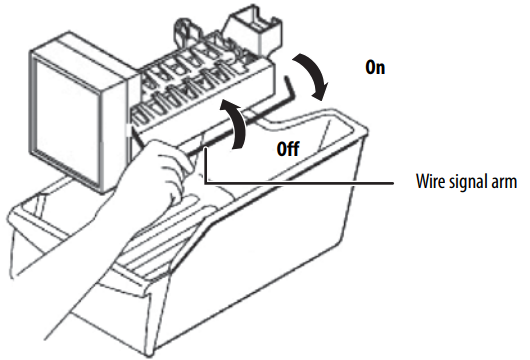
- To turn on the ice maker, lower the wire signal arm.
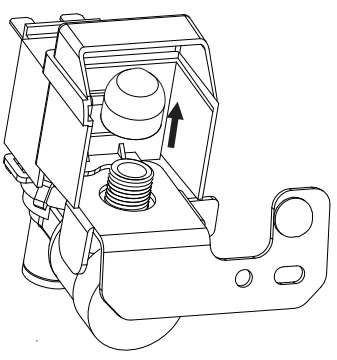
- Slide the ferrule (sleeve) into the valve inlet and finger-tighten the compression nut onto the valve.
Using your Automatic Ice Maker
- Remember that water quality determines the quality of ice.
- The ice maker should not be connected to softened water. If the water softener has problems, chemical substances can damage the ice maker.
- To turn off the ice maker, raise the wire signal arm until it locks in the “up” off position.
- When the ice storage bin is full, the wire signal arm will hit the ice cubes, and the ice maker will automatically shut down.
- If you store ice cubes for too long, they may produce a peculiar smell.
- To eliminate the smell, empty the ice storage bin, wash it out, then replace it.
- The ice maker will produce more ice cubes. Shake the ice storage bin from time to time to ensure that the ice cubes separate from each other.
Maintaining your ice maker
Use mild detergent in warm water to clean the ice storage box, then rinse and dry it. Turn off the ice maker when you clean your refrigerator or plan to be away for a short period. If you are going away for an extended period, turn off the water supply valve.
Specifications
- Dimensions: 5.5 H x 4.8 W x 11.7D in (14 x 12.2 x 29.6 cm)
- Ice Storage Bin Dimensions: 3.2 H x 9.1 W x 14.3 D in (8.1 x 23.1 x 36.3 cm)
- Weight: 4.6 lbs (2.1 kg)
- Power requirements: 115 V~60 Hz
- Current: 1.6 A
Troubleshooting
| PROBLEM | POSSIBLE CAUSE | POSSIBLE SOLUTION |
| The ice maker makes no ice | The freezer temperature is too high. | Make sure that the freezer temperature is low enough to make ice. |
| The ice maker is not working. | The ice maker is not plugged in correctly. | Make sure that the ice maker connector plug is fully inserted into the socket. |
| The ice tray is not filling | The fill tube is not correctly seated in the fill cup. | Make sure that the fill tube is correctly inserted into the fill cup opening. |
| The ice maker buzzes. | Normal | The ice maker water valve buzzes when the ice maker fills with water. |
| The ice maker makes too much ice or will not shut off | The wire signal arm is jammed in the wrong position. | Make sure that the ice maker wire signal arm is not jammed and free it if it is. |
| The shutoff switch is broken. | Call an appliance technician and have the switch tested. | |
| PROBLEM | POSSIBLE CAUSE | POSSIBLE SOLUTION |
| The ice smells funny or tastes bad | The ice storage bin or freezer needs cleaning. | Empty and wash the ice storage bin and discard the old ice cubes. Wash the interior of the freezer. Remove any old food. |
| The water inlet filter (if you are using one) needs to be replaced. | Replace the water inlet filter. | |
One-Year Warranty
Definitions
The Distributor* of Insignia-branded products warrants to you, the original purchaser of this new Insignia-branded product (“Product”), that the Product shall be free of defects in the original manufacturer of the material or workmanship for one (1) year from the date of your purchase of the Product (“Warranty Period”).
How to obtain warranty service?
If you purchased the Product at a Best Buy retail store location or from a Best Buy online website, please take your original receipt and the Product to any Best Buy store. Make sure that you place the Product in its original packaging or packaging that provides the same amount of protection as the original packaging. To obtain warranty service, in the United States and Canada, call 1-877-467-4289. Call agents may diagnose and correct the issue over the phone.
Where is the warranty valid?
This warranty is valid only in the United States and Canada at Best Buy branded retail stores or websites to the original purchaser of the product in the country where the original purchase was made.
Customer Service
- Tel: 1-877-467-4289
- Visit: http://www.insigniaproducts.com
INSIGNIA is a trademark of Best Buy and its affiliated companies. Registered in some countries. Distributed by Best Buy Purchasing, LLC 7601 Penn Ave South, Richfield, MN 55423 U.S.A.
©2021 Best Buy. All rights reserved.
FAQs
Q: Is this kit compatible with any refrigerator?
Ans: No. Only a few Insignia top-freezer refrigerators that are ice maker-ready—that is, already equipped with ports and brackets—are compatible with the NS-IMK20WH7. To verify compatibility, see the user manual or the model number of your refrigerator.
Q: Does this ice maker need a water hookup?
Ans: Indeed. You could want a longer water line or expert installation if your refrigerator is not close to a water supply.
Q: How much ice does the kit produce daily?
Ans: Depending on usage and freezer temperature, the NS-IMK20WH7 can generate up to 3 to 4 pounds (1.3 to 1.8 kg) of crescent-shaped ice every day.
Where does the ice go after it’s made?
Ans: Underneath the freezer’s ice maker, the ice falls straight into the attached ice bin.
Can I use this kit with a bottom-freezer or side-by-side fridge?
Ans: No. Unless otherwise noted, this kit is incompatible with side-by-side or bottom-freezer versions.
Do I need a separate water filter?
Ans: A water filter is not included in the kit. Installing an inline water filter is advised if your home has sediment problems or hard water in order to extend the life of the ice maker and enhance the quality of the ice.