
![]()
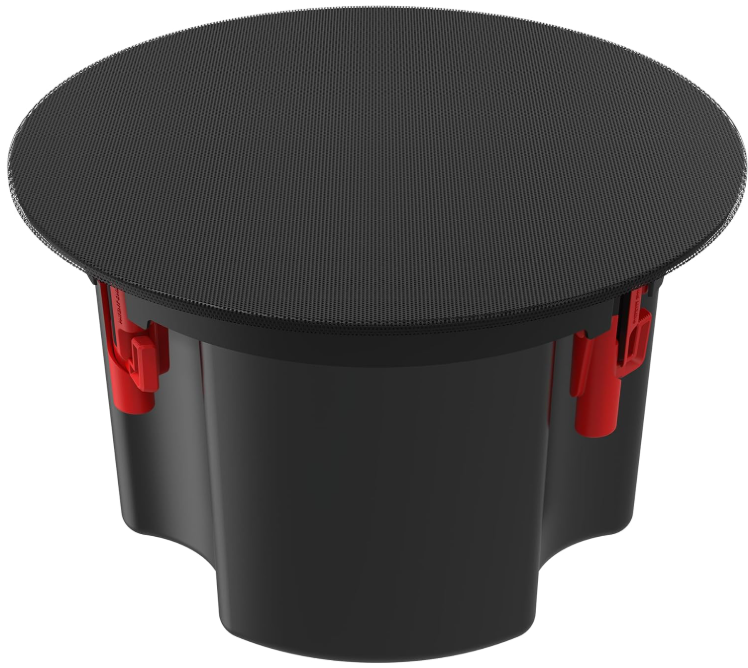
Klipsch PIC-450-T In-Ceiling Loud Speakers
Safety Instructions
- CLEAN ONLY with a dry cloth or lightly damped cloth.
- DO NOT block any ventilation openings. Install in accordance with the manufacturer’s instructions.
- DO NOT install near any heat sources such as radiators, heat registers, stoves, or other apparatus (including amplifiers) that produce heat.
- ONLY USE attachments/accessories specifically designed for this application.
- USE only with the bracket specifically designed for this application, or sold with the apparatus.
- DO NOT modify or alter in any way.
- SWITCH OFF the amplifier before connecting speakers.
- DO NOT hang or suspend any items from this apparatus.
Package Content
- X2 Speaker Modules
- X2 Black Round Grilles
- x2 White Round Grilles
- x2 Tilebridge Reinforcement Rings
- x4 Rails
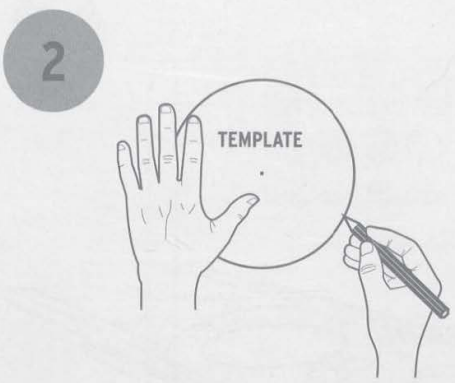
- x2 Cardboard Cutout Template
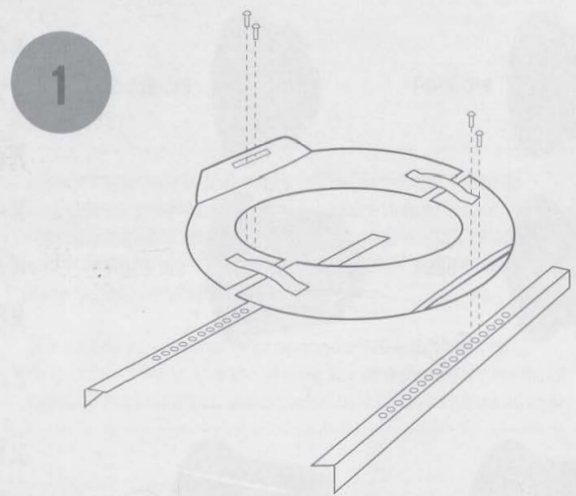
- x8 Screws (Attach Rails to Reinforcement Ring)
- x2 3/4″ Conduit fittings
- xl Speaker Module X2 Rails
- xl Black Round Grille xl Cardboard Cutout Template
- xl White Round Grille x 4 Screws (Attach Rails to Reinforcement Ring)
- xl Tilebridge Reinforcement Ring xl 3/4″ Conduit fitting
Installation
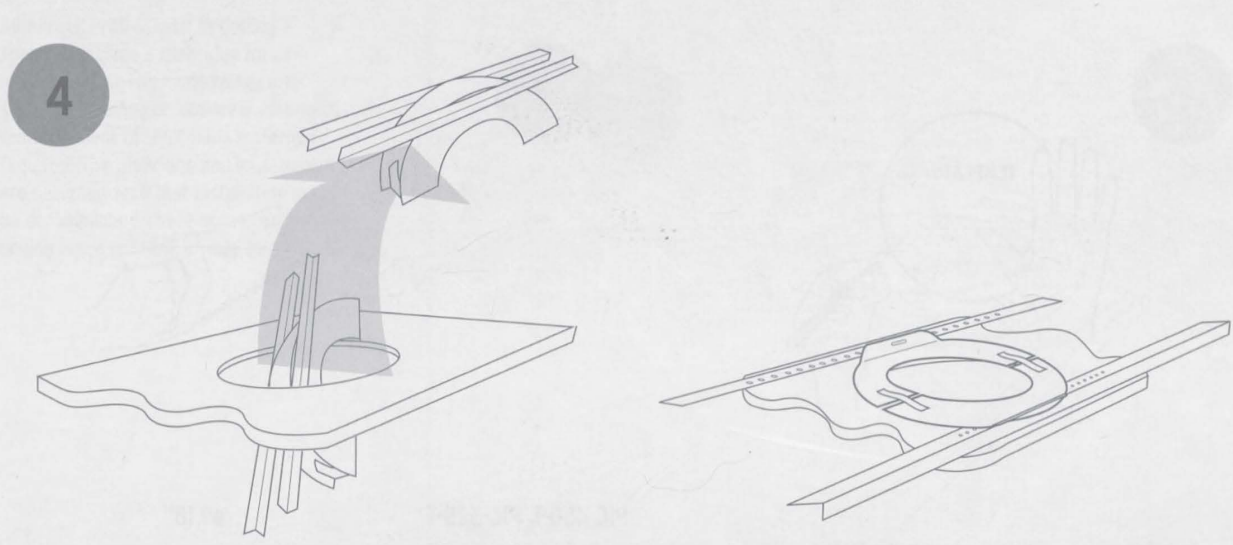
- The bridge is composed of three parts: a reinforcement ring and two rails.

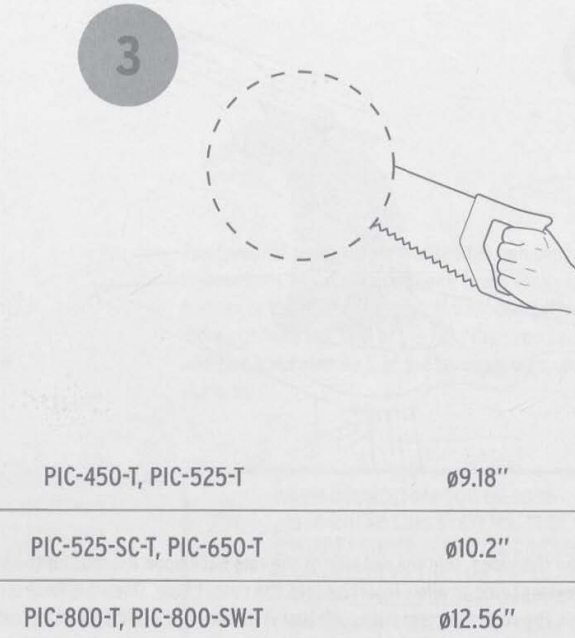
- To install your sp, easpearspeaker, cut a hole in the ceiling using either the cardboard cutout template provided with your speakers or consult the measurements shown. The wiring through the ugh hole.
- To install the tilebridge, fold the rail side of the ring back upon itself using the spring tensioner on the reinforcement ring to allow insertion into the cutout hole.
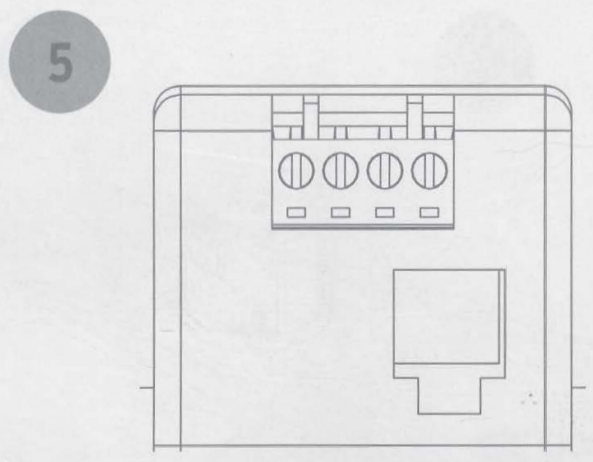
- The wiring compartment is intended as a termination point for the audio circuit.
- If your conduit/wire feeds easily into the bottom of the cover.
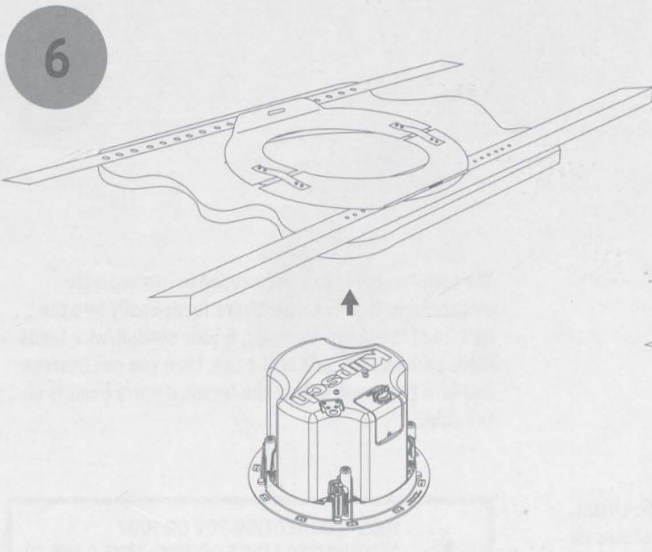
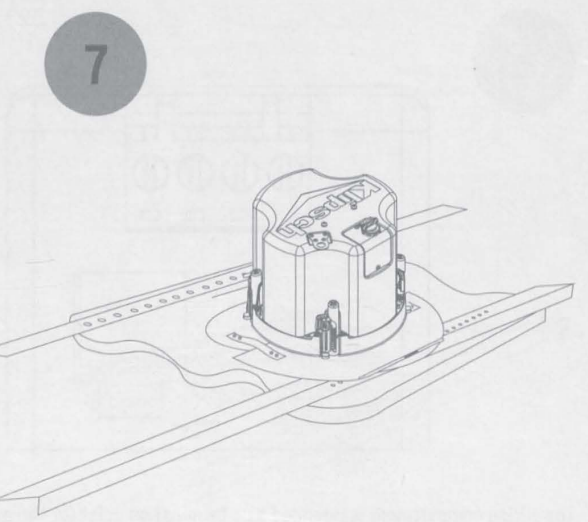
- Insert the speaker into the cutout hole.
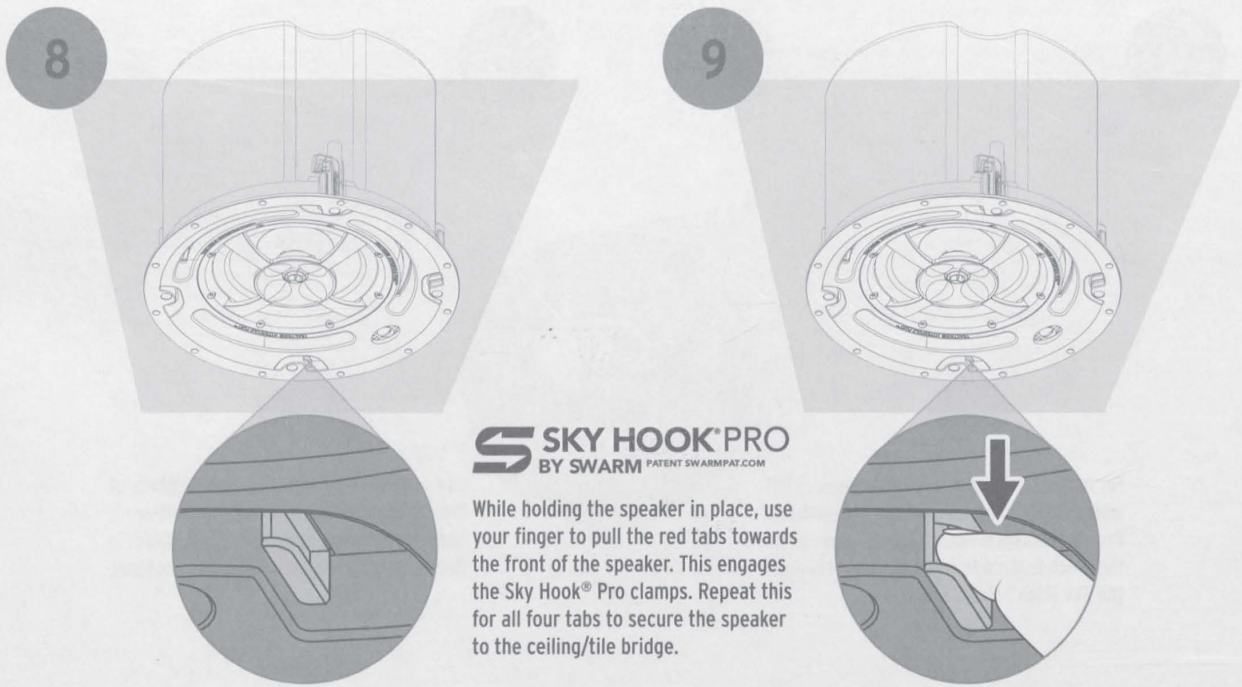
- While holding the speaker in place, use your finger to pull the red tabs towards the front of the speaker.
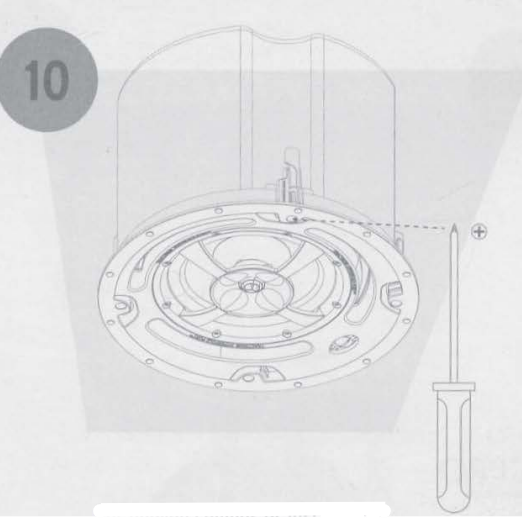
- For uneven ceilings or installations where the holding force of the SkyHook Pro mechanism is not sufficient, use the cinch feature to manually tighten the SkyHook Pro clamps.
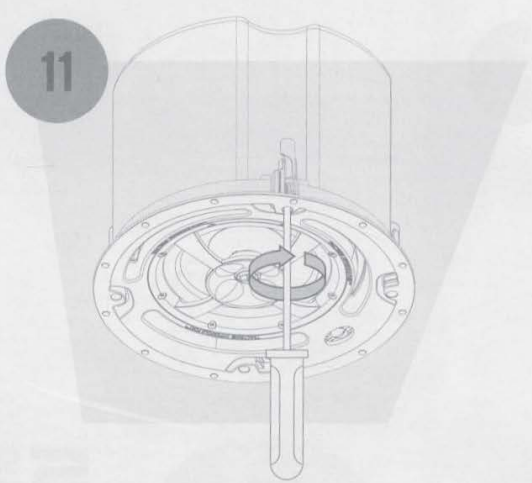
- Use a Philips screwdriver inserted into the center of the Sky Hook® Pro clamp, and turn until you feel mild resistance. Repeat this step for each clamp.
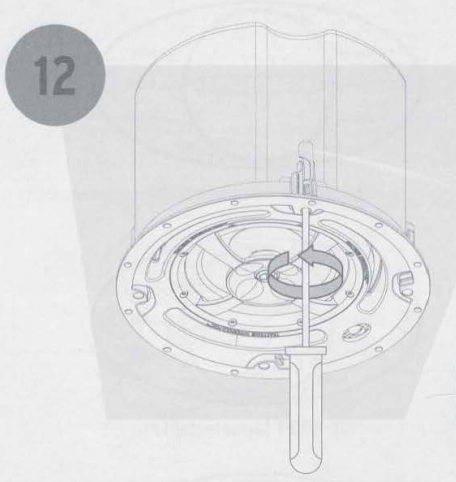
- Uninstall all the speakers, usea Phillipsps screwdriver inserted into the center of the Sky Hook® Pro clamp, and turn counter-clockwise to loosen the clamp.
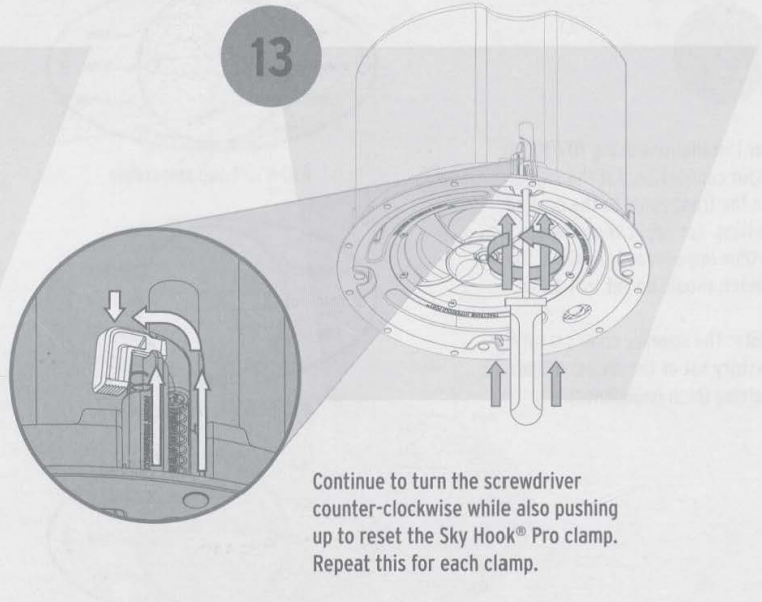
- Continue to turn the screwdriver counter-clockwise while also pushing up to reset the Sky Hook® Pro clamp. Repeat this for each clamp.
- For installations using 7OV/1OOV input connection, set the switch on the front panel to the desired setting.
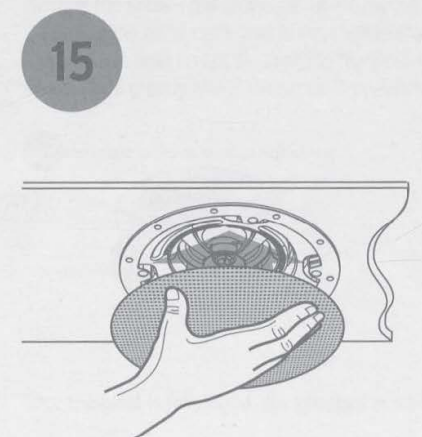
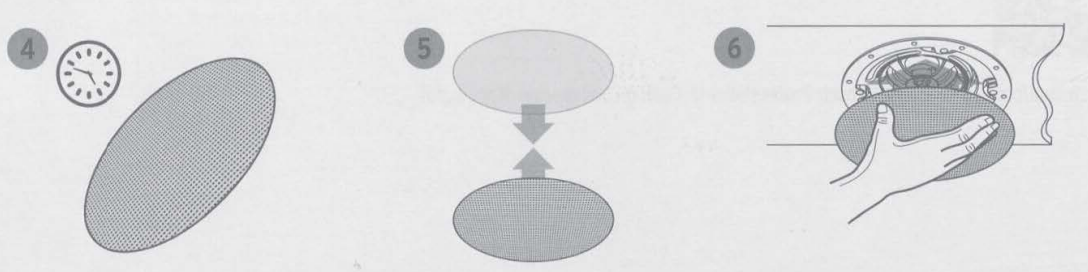
- Using the flat of your hand, attach the magnetic grille beneath the speaker frame, making sure it is centered and flush.
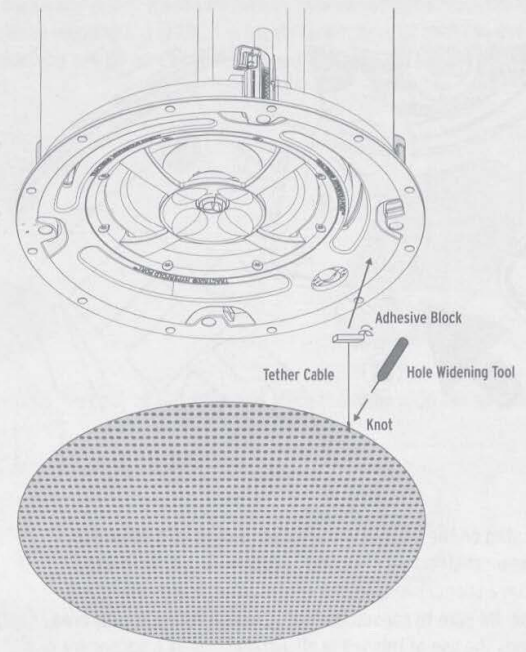
- Included with the grille is a tether that can be threaded through the grille and attached to the speaker.
Seimic Tab
 Seimic Tab
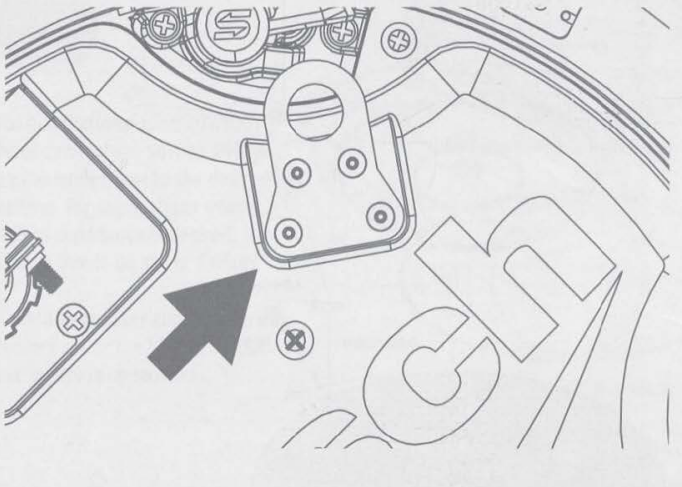
Some construction codes may require its use. To utilize the seismic tab, run a support wire from a secure point in the ceiling and attach it to the tab. Be sure to consult the construction codes in your area. Klipsch recommends the use of this tab in all installations as a secondary means of support.
Grille Painting
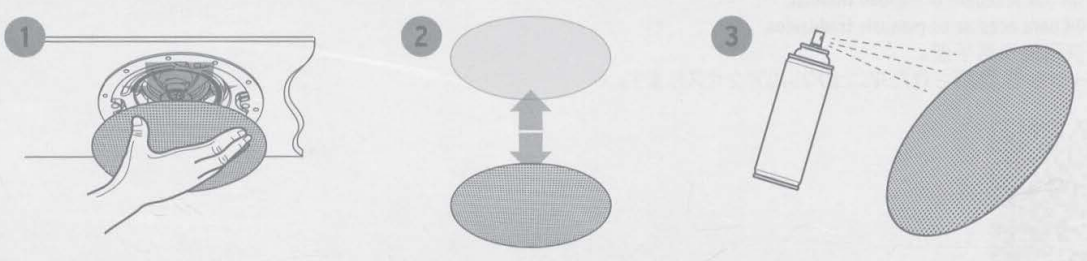
- Painting the Grille – the grilles for all PIC models can be painted to match any decor.
- When painting the grille, it is highly recommended that you use a spray paint with multiple light layers.
- Once the paint is fully dried, you can then place the grille cloth back onto the back of the grille and place the grille onto the speaker.
Translations
- Scan the OR code to access translated manuals.

Customer Service
- Website: Klipsch.com
- Ph: 1-800-554-7724
FAQs
Q: Do these speakers support 70V/100V commercial audio systems?
Indeed. An inbuilt multi-tap transformer makes it simple to connect the PIC-450-T to 70V or 100V constant-voltage systems. Bypassing the transformer allows it to function in 8-ohm low-impedance mode.
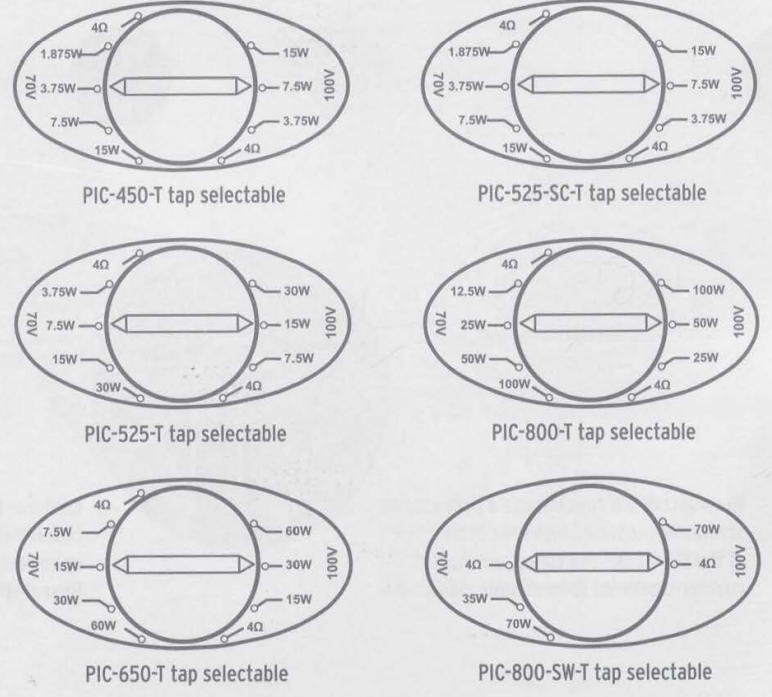
Q: How do I choose the correct transformer tap setting?
To select a wattage appropriate for your installation, use the tap selection located on the back of the speaker (e.g., 5W, 10W, 20W, 40W). Lower wattage saves amplifier power for larger systems, but higher wattage produces louder output.
Q: What cutout size is required for installation?
The ceiling cutout diameter that the speakers need is usually specified in the handbook or on the back of the speaker. Before making any cuts to the ceiling, always measure and confirm.
Q: Do I need a backcan or tile bridge for installation?
These add-ons enhance install stability, bass response, and safety.
Q: How do I secure the speaker to the ceiling?
Make sure the ceiling can support the weight and thickness of the speaker.
Q: Are these speakers safe for damp or humid areas?
Steer clear of direct moisture or steam exposure unless you are utilising authorised accessories.
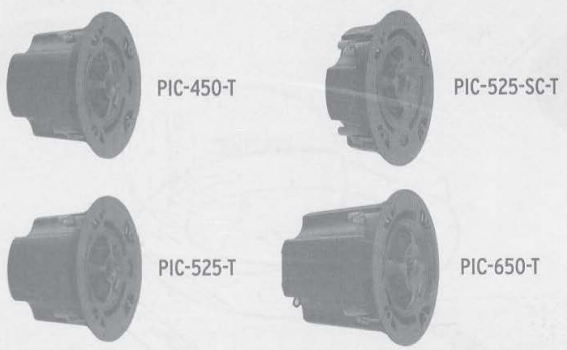
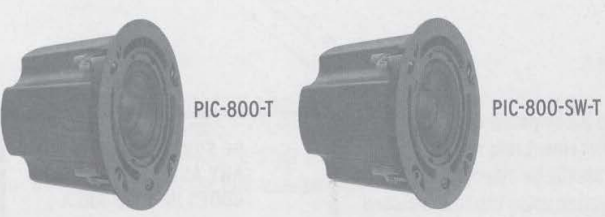
Q: Are there alternative speaker types for different room setups?
Yes. For users needing a surface-mount or multipurpose audio solution, the Bose Forum FC108 Loudspeaker manual offers guidance on a different style of loudspeaker installation.
1 Comment
Your point of view caught my eye and was very interesting. Thanks. I have a question for you. https://accounts.binance.info/cs/register-person?ref=OMM3XK51