
Labnet H5500 Mini LabRoller Rotator
Introduction
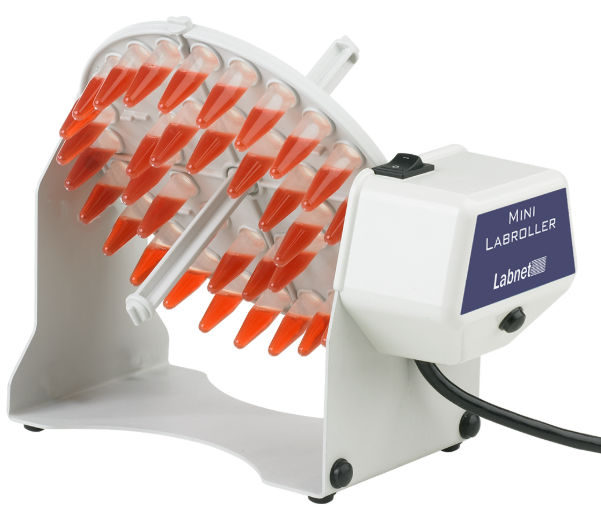
The Labnet Mini LabRoller™ Rotator is an end-over-end tube rotator, designed for mixing samples in both a horizontal and vertical plane.
Symbols and Conventions
- The electrical warning indicates that the presence of a potential hazard could result in electrical shock.
- This symbol identifies a Protective Earth (PE) terminal, which is provided for connection of the supply system’s protective earth (green or green/yellow) conductor.
Safety Information
- Do not use the rotator near water sources. Be sure that water does not get on the device, especially during cleaning procedures.
- Do not expose the rotator to aggressive solvents.
- Do not mix flammable or explosive samples.
Package Contents
- Labnet Mini LabRoller™ Rotator
- Rotisserie for 36 x 1.5/2.0 mL microcentrifuge tubes (Cat. No. H5500-02)
- Power supply
- Instruction manual
Unpacking
Before starting the installation, carefully examine the rotator.
- Open the box and carefully remove the padding.
- Keep the packing material until you are sure the rotator works properly.
- Carefully lift the unit from the box.
- Check that the power cord has the correct configuration that matches the outlet according to your local standards.
Installation
Place the rotator on a stable, flat surface. Connect the plug into the grounded wall socket. Use the On/Off switch to control the rotator.
- Be careful when you plug the cord into the grounded wall socket.
- Do not touch the plug with wet hands.
- Do not pull the plug by the cord.
Loading the Rotisserie
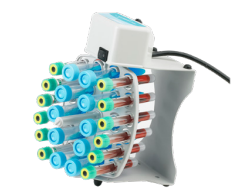
There are two other rotisseries available separately for different-sized tubes. Each rotisserie consists of a rotisserie plate with bar keys for placement into the apparatus and a two-piece rotisserie rod with bar keys on either end. Install the rotisserie rod by screwing the two elements together through the hole in the center of the rotisserie plate.
Insert the tubes into the tube holders. Mount the rotisserie in the apparatus in either the vertical position using the rotisserie rod or the horizontal position using the bar keys on the plate. The side opposite to the driving mechanism is flexible to allow inserting the rotisserie without tools. Insert the bar key on the rotisserie rod or plate into the drive mechanism. Be sure to distribute tubes evenly across the rotisserie carrier to achieve a smooth rotating motion.
Tumbling
To create a tumbling motion, load the tubes and mount the rotisserie so the tubes are held in a vertical position. Then, rest the unit on its end, making sure that it is supported by the black rubber side legs. The unit can be rested on either end. Setting the unit on the end Labnet H5500 Mini LabRoller Rotatorwith the power switch will create a more vigorous tumbling motion than when it is rested on the opposite end.
Mixing Plates
 Any of the rotisseries can be used for mixing in microplates. Remove the rotisserie rod if it is installed. Seal the microplates completely to avoid leakage. Make sure the microplate lines up with the locking dimples. Fasten the plate (or plates) with rubber bands or small bungee cords (not supplied with the unit). A maximum of two deep-well plates can be mixed at a time. For all other types of motion, two plates should be placed on the rotisserie for proper balance.
Cleaning and Maintenance
Keeping the rotator clean will help to maintain it in proper operating condition. Before cleaning the rotator, always unplug the power cord. Do not use any aggressive or abrasive cleaners (acetone, nitro, polish, etc.). This may permanently damage the rotator finish.
Technical Specifications
| Accessories Included | Rotisserie for 36 x 1.5/2.0 mL microcentrifuge tubes (Cat. No. H5500-02) |
| Speed H5500 H5500-230V | 24 rpm 20 rpm |
| Dimensions (W x D x H) | 8.4 x 4 x 5 in. (21.3 x 10.2 x 12.6 cm) |
| Weight | 1.8 lbs. (0.8 kg) |
| Electrical H5500 H5500-230V | 120V~, 60 Hz, 0.03A, 3.6W 230V~, 50/60 Hz, 0.017A, 4W |
| Temperature Range | 5°C to 40°C (up to 80% RH at 31°C, decreasing linearly to 50% RH at 40°C) |
| Protection Class | IP21 |
- Indoor use only
- Altitude up to 2,000 meters
- Pollution degree 2
Changes or modifications not expressly approved by the party responsible for compliance could void the user’s authority to operate the equipment.
Troubleshooting Guide
Be sure to disconnect the rotator from the main power source immediately in case of any signs of malfunction.
| Problem | Solution |
| Rotator does not start | Check the power connection. Check if the rotisserie is properly inserted into the drive mechanism. Call for service. |
Do not send in a unit for service without first calling to obtain a repair authorization number. Any damage resulting from improper packaging shall be the responsibility of the user.
Accessories
Cat. No./Description
| H5500-02 | Rotisserie for 36 x 1.5/2.0 mL microcentrifuge tubes |
| H5500-15 | Rotisserie for 10 x 15 mL tubes or 12 x 5/7 mL tubes |
| H5500-50 | Rotisserie for 6 x 50 mL tubes |
Limited Warranty
Corning Incorporated (Corning) warrants that this product will be free from defects in material and workmanship for a period of one (1) year from the date of purchase. Corning’s sole obligation shall be to repair or replace, at its option, any product or part thereof that Labnet H5500 Mini LabRoller Rotator proves defective in material or workmanship within the warranty period, provided the purchaser notifies Corning of any such defect. Corning is not liable for any incidental or consequential damages, commercial loss, or any other damages from the use of this product.
Corning’s Customer Service team will help arrange local service where available or coordinate a return authorization number and shipping instructions. Corning may elect for on-site service for larger equipment. Some states do not alllimitationsion on the length of implied warranties or the exclusion or limitation of incidental or consequential damages. This warranty gives you specific legal rights. You may have other rights that vary from state to state. No individual may accept for, or on behalf of Corning, any other obligation of liability, or extend the period of this warranty
Warranty/Disclaimer
Unless otherwise specified, all products are for research use or general laboratory use only.* Not intended for use in diagnostic or therapeutic procedures. Not for use in humans. Corning Life Sciences makes no claims regarding the performance of these products for clinical or diagnostic applications. *For a listing of US medical devices, regulatory classifications, or specific information on claims, visit www.corning.com/resources.
Equipment Disposal
According to Directive 2012/19/EU of the European Parliament and of the Council of 4 July 2012 on waste electrical and electronic equipment (WEEE), this product Labnet H5500 Mini LabRoller Rotator is marked with the crossed-out wheeled bin and must not be disposed of with domestic waste. Consequently, the buyer shall follow the instructions for reuse and recycling of waste electronic and electrical equipment (WEEE) provided with the products and available at www.corning.com/weee.
Customer Service
- Website: www.labnetlink.com.
- Visit: www.corning.com/lifesciencs
- Visit: www.corning.com/resources
- USA/Canada: 1.800.492.1110
- Others: +1.978.442.2200
- North America: 978.442.2200
- Australia/New Zealand: 61 427286832
FAQs
What types of tubes and containers can be used with this rotator?
With the right roller attachments, the device can handle a large variety of tube diameters, ranging from 50 mL conical tubes to 1.5 mL microcentrifuge tubes.
Can I adjust the angle of rotation?
The Mini LabRoller does not have variable angle adjustment; instead, it rolls horizontally.
Can the LabRoller operate continuously?
Yes, it can operate continuously around-the-clock, which makes it perfect for lengthy procedures like incubations or overnight hybridisations.
How much weight can the unit support?
The platform can securely support up to 2 kg of equally distributed weight and is meant for light to moderate weights.
How do I secure tubes during rotation?
To keep tubes from slipping while in motion, the unit has foam rollers and holders that softly grip them.