
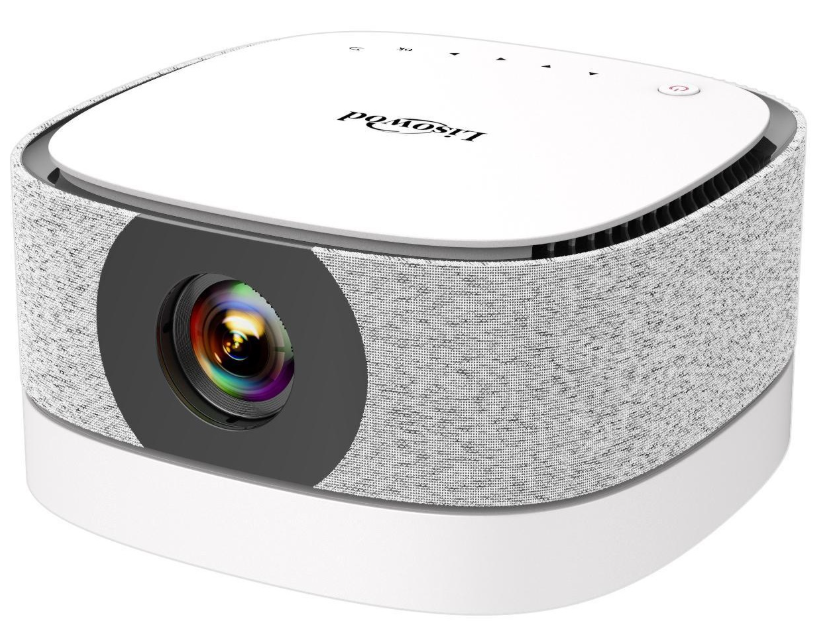
 Lisowod An1 Quality Video Projector
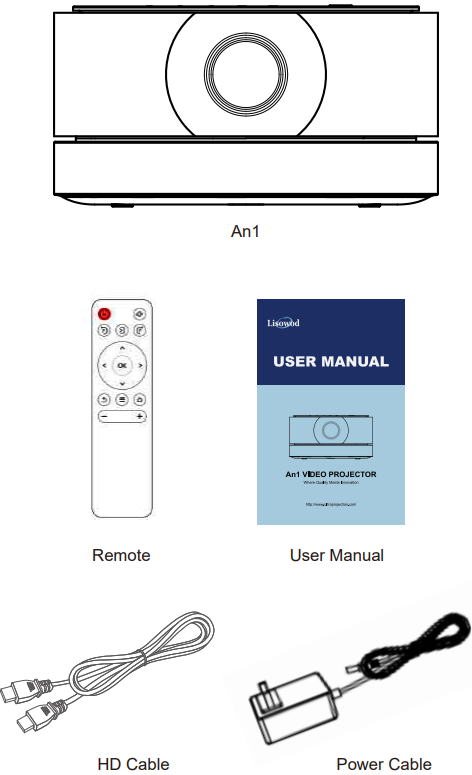
Packing List
Overview
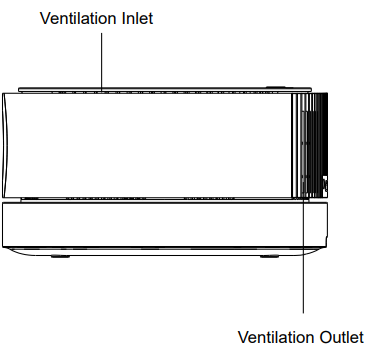
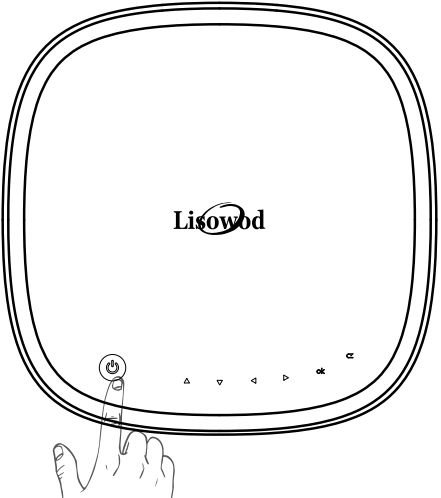
Top View
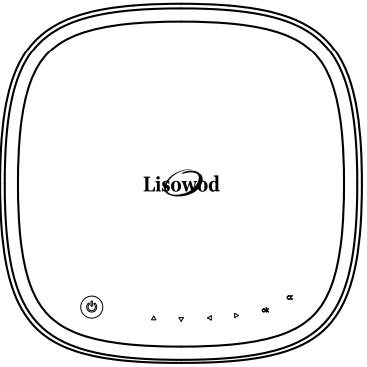
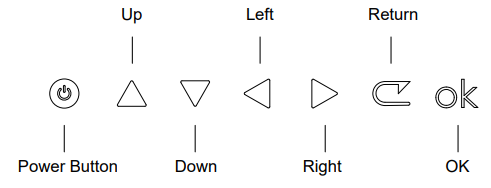
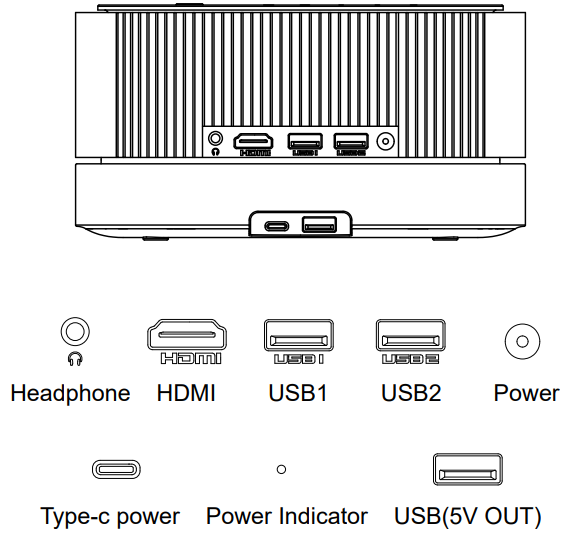
Control Panel
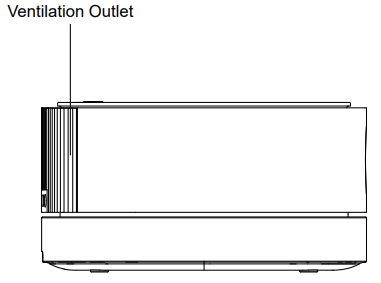
Side View
- Left side
- Right side
Rear View
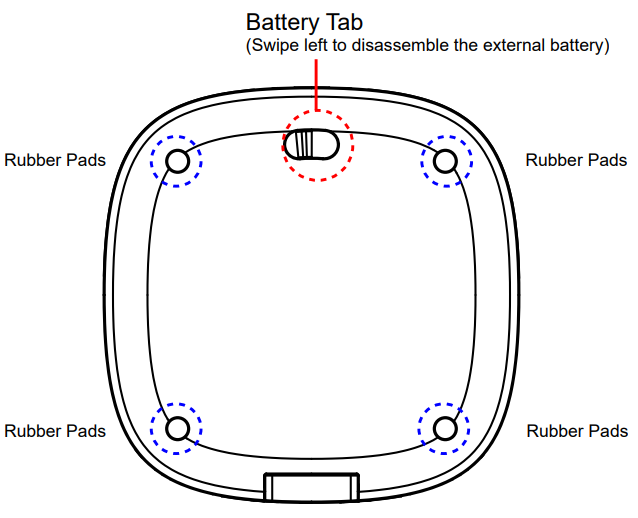
Bottom View
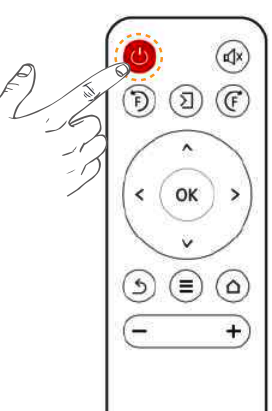
Remote Control
 Remote Control
Installation of the Remote Control
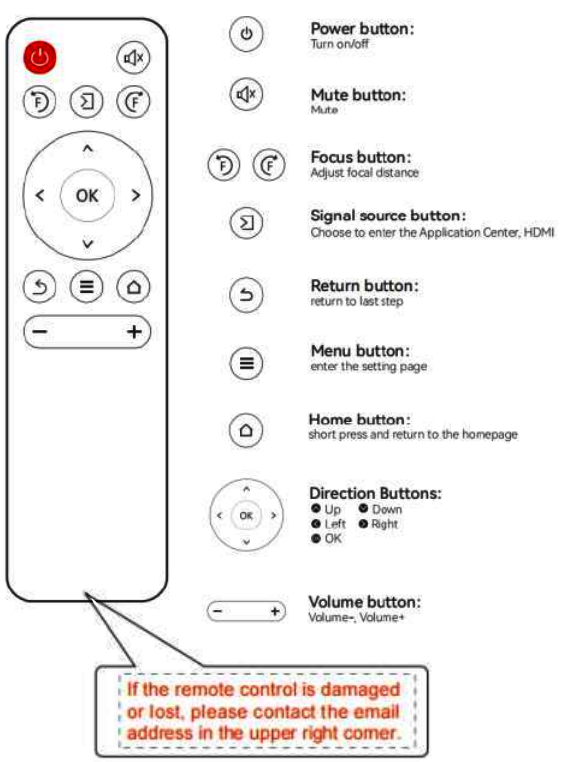
- Install 2 AAA batteries into the remote before using it. Do not combine new batteries with old ones in a remote controller, which can cause operation failure due to insufficient power supply.
- When using the remote controller, please make sure that the signal transmitter of the remote controller aims at the infrared signal receiver of the projector.
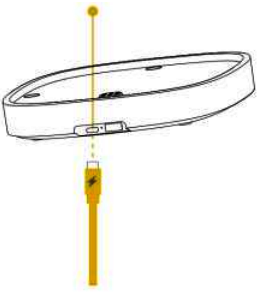
Connection
The An1 projector consists of two parts: the projector body and the external battery base. The battery base can be used alone as a battery. It can also be combined with the projector body to make it a battery-powered projector.
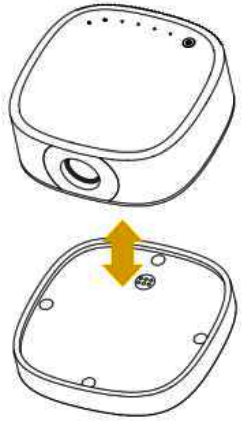
Combined Use
- Use the Type-C port to charge the battery. When the battery is being charged, the indicator light stays on in red. When the battery is fully charged, the indicator light turns off.
- The battery can be combined with the projector body. Place the projector body on the battery base and press gently. Make sure the body is tightly linked to the base from all sides.
- When combined, the battery can power the projector so that you can use the projector without a power cable.
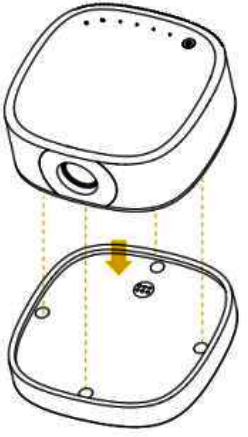
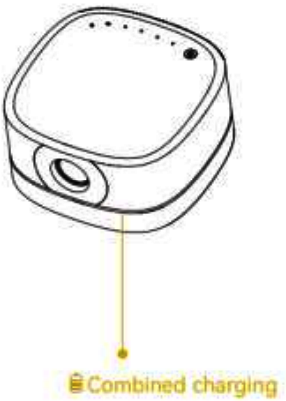
Please note that the brightness of the projector would decrease in this mode to ensure the projector can work for a longer time. (You can still use the power cable under the combined mode. The brightness would go back to the normal range.)
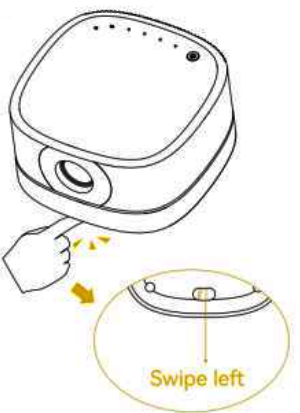
Take it Apart and Use
- Swipe the battery tab at the bottom of the base to disassemble the external battery.
- The projector body and the battery base can be taken apart and used separately.
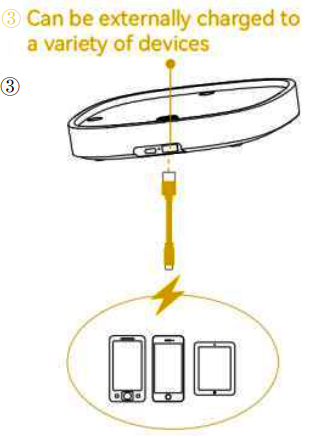
- The battery can charge a variety of devices via the USB port.
Quick Start
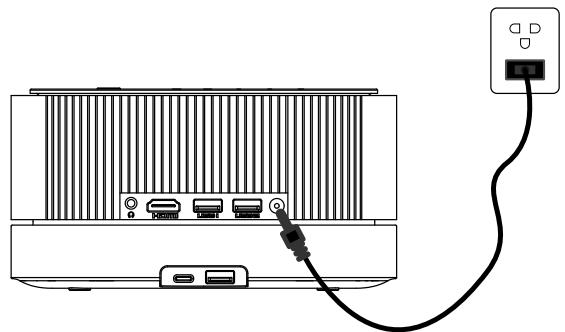
- Plug the power cord into an outlet.
- Press the power button to turn on the projector.
- Press the “ ” “ ” button on the remote to get the best image performance.
- Press the power button twice to turn off the projector.

Miracast and DLNA
- The fluency of screen mirroring with wireless connection will be affected by the network environment. A bandwidth of 100 Mbps or more is recommended when using screen mirroring.
- Make sure your mobile device is close to the projector when using a wireless connection. A distance of within 1 meter is recommended.
- Some mobile devices may not support screen mirroring due to compatibility issues.
PC Miracast
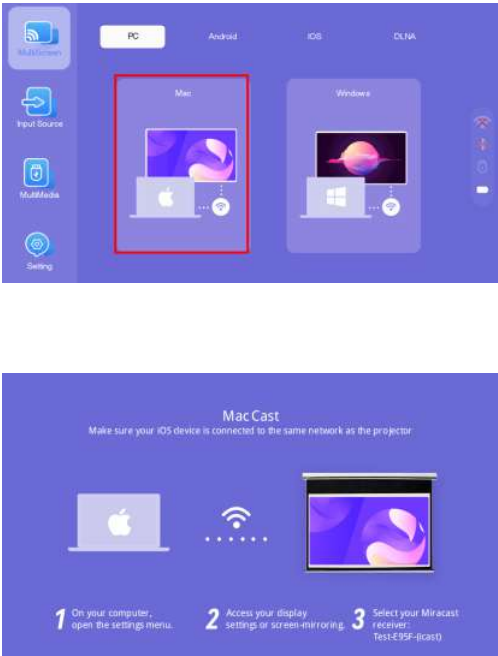
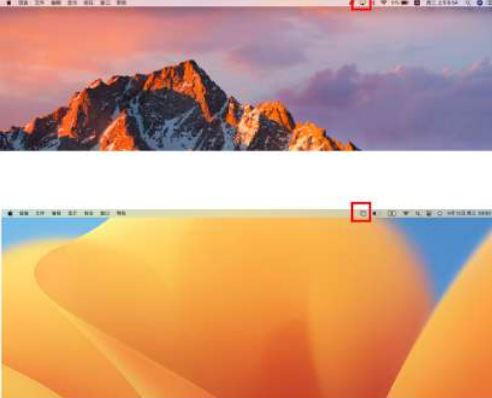
For MacBook
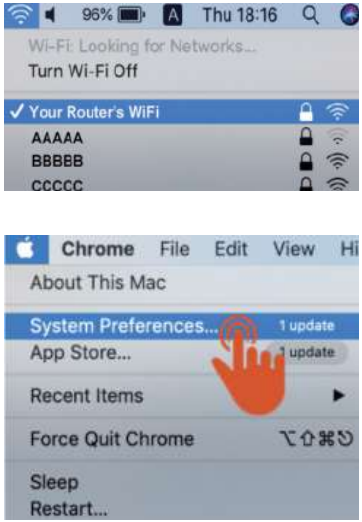
- Connect your laptop to the Router’s wifi
- Click the Apple logo on the top left, choose [System Preferences]
- Click [Sharing] on the appearing page
- Check the box [Screen Sharing]. Close the page.
- Click on the AirPlay Display on the top right, choose [AN1-XXXX] to connect.
The casting identification varies among different software versions.
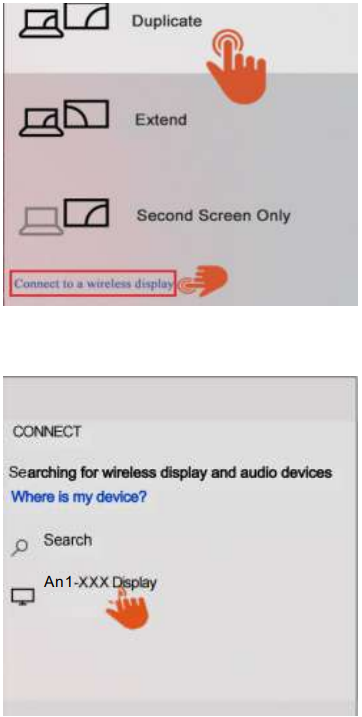
For Windows Laptop
- Connect your laptop to the Router’s wifi
- Click [Win+P] or [Win+K] on the PC to enter the projection settings
- Choose the [Duplicate] Mode
- Click [Connect to a wireless display]
- Among the available devices, choose [An1-XXXX] to connect.
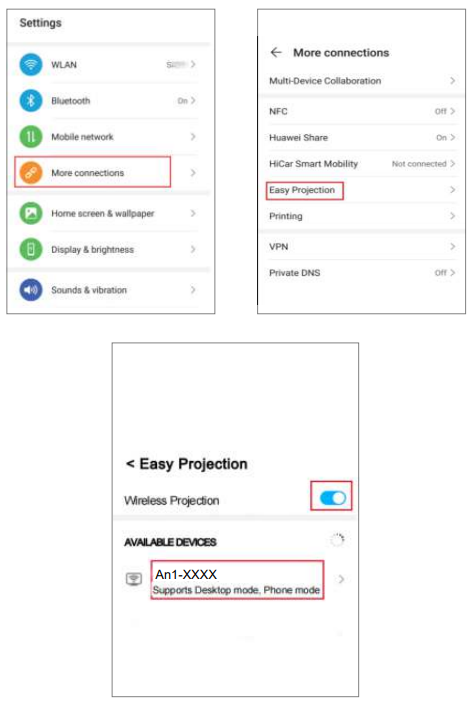
Android Miracast
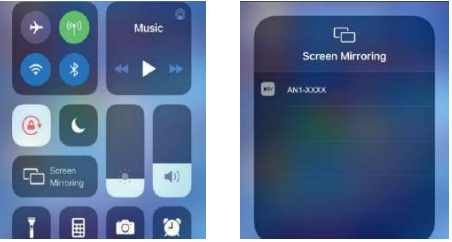
IOS Miracast
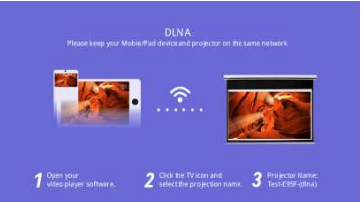
DLNA
- Connect your mobile/Pad device and projector to the same Router’s wifi
- Open your video player app
- Click the TV icon and select the projection name
- Among the available devices, choose [An1-XXXX] to connect
Input Source
On the home page, press the “ ” on the remote to open the HDMI connection page.

HDMI Connection

- Connect one end of the HDMI cable to the HDMI output port on the device you want to connect, and insert the other end into the HDMI input port on the projector.
- Clicking HDMI on the homepage screen, you can play video through HDMI.
Multimedia
USB Connection
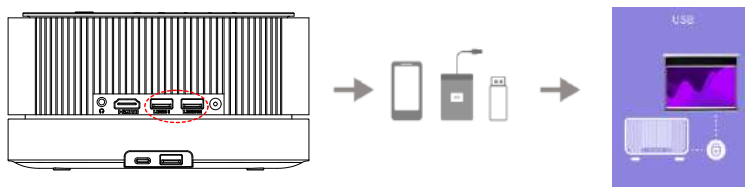
- Insert the USB memory into the projector. If the connection is successful, the USB indicator light on the top right of the homepage will light up.
- By selecting “Text,” “Movie,” “Music,” or “Photo” on the homepage screen, you can play files from the USB.
Speaker Connection
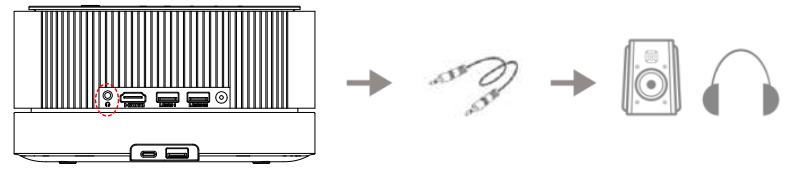
- Connect the speakers/headphones to the projector via a 3.5 mm audio cable.
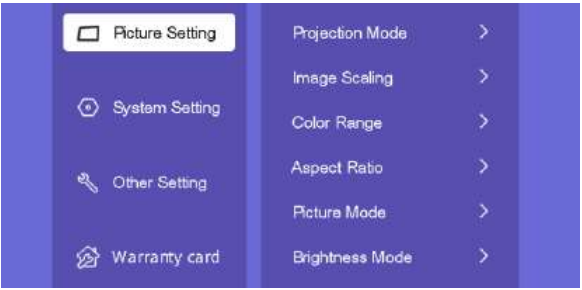
Settings
On the home page, press the“ ”on the remote to open the settings page.
Picture Setting
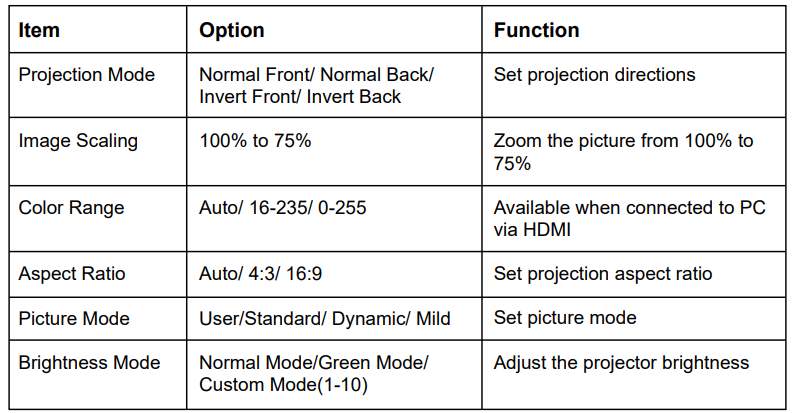
Brightness Mode
- Normal Mode
Highest Brightness. The default mode of the projector. Equal to the custom mode 10 brightness.
- Green Mode
Lowest Brightness. Equal to the customer mode 0 brightness.
- Custom Mode
Adjust the projector brightness from 0-10
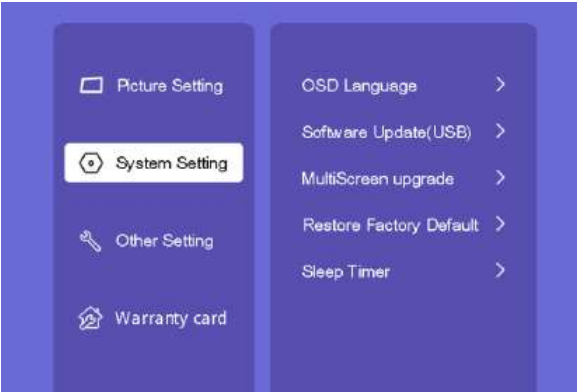
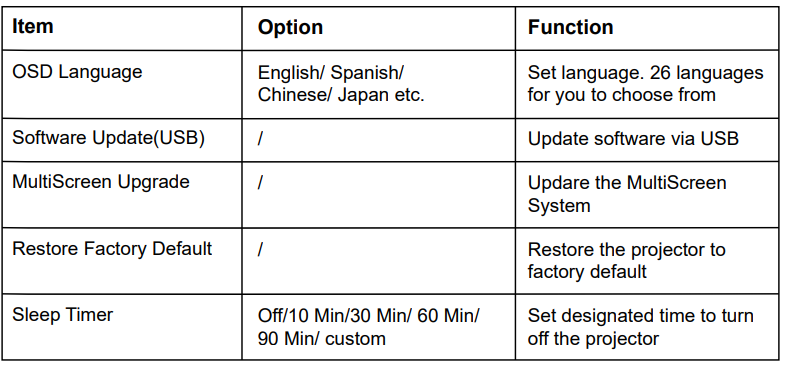
System Setting
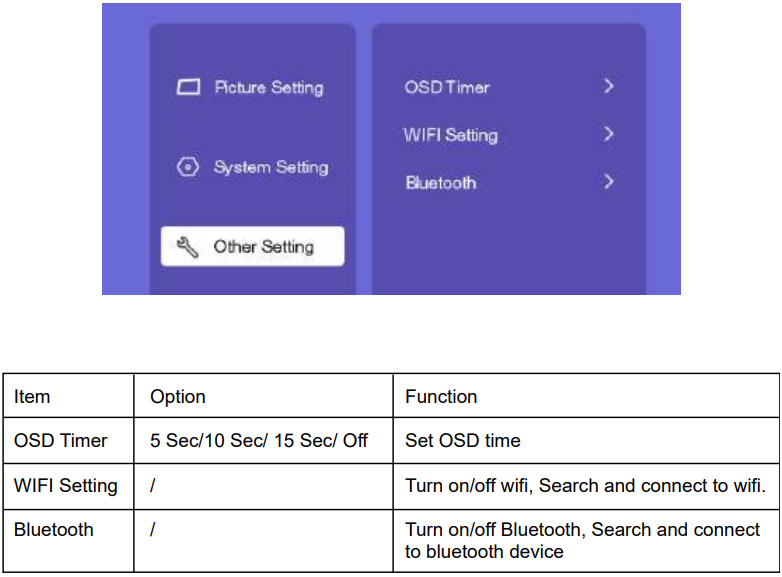
Other Setting
Warranty Card
 Warranty Card
Contact the manufacturer to activate your 3-year warranty
Bluetooth Connection
Bluetooth Mode
Connect to external speakers
- Step 1
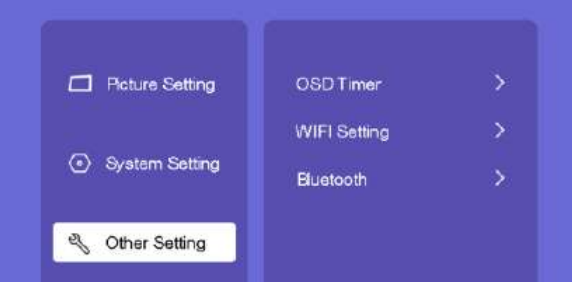
On the home page, go to [Settings]—[Other Settings]—[Bluetooth]. Press the [OK] button to enter.
- Step 2
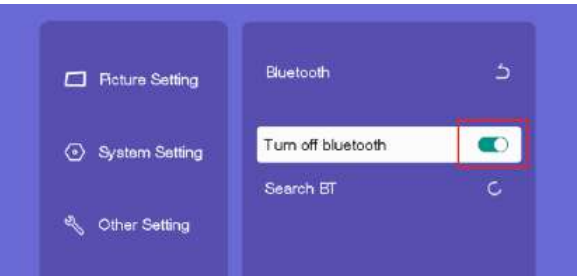
On the Bluetooth page, press the right button to turn Bluetooth on. Click [Search BT] to search for available devices to connect. When it shows [Connected], the speaker was connected to the projector successfully.
Speaker Mode
The projector works as a speaker and plays music from your mobile devices.
- Step 1
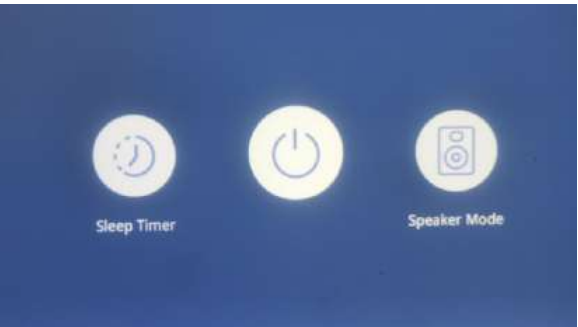
Long-press the Power button for 3 seconds. Choose the “Speaker Mode” on the right.
- Step 2
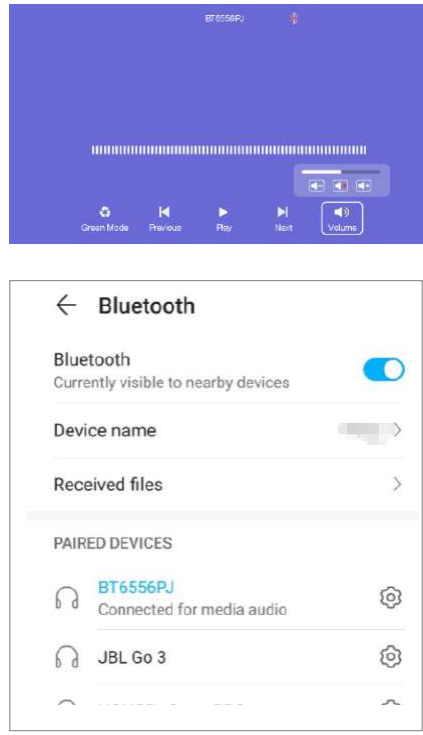
Stay on the Bluetooth speaker page. Open the Bluetooth function on your mobile phone, search for available devices, and choose “BT6556PJ” to connect.
- Step 3
Open the music apps on your phone. Now the projector can work as a speaker and play music.
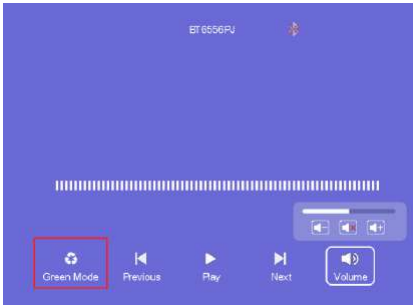
When the projector works as a speaker, you can choose the “Green Mode” on the bottom left, under which the projector will turn off the light to save power.
Projection Distance and Size
Please follow the data in the chart below to adjust the image size and the distance.
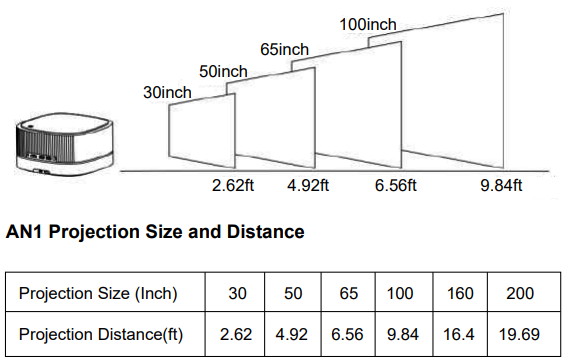
Please note that the best image quality would be achieved with a projection distance of 6.5-9.8ft. A larger screen size would affect the image quality to a certain degree.
Installation Method
The projector supports front and rear projection, and it can be table-mounted and ceiling-mounted. In the home page, go to [Setting]—[PictureSetting]—[Projection Mode]. Choose your desired projection mode.
- There are four modes here: Front Table/Rear Table/ Front Ceiling/Rear Ceiling.
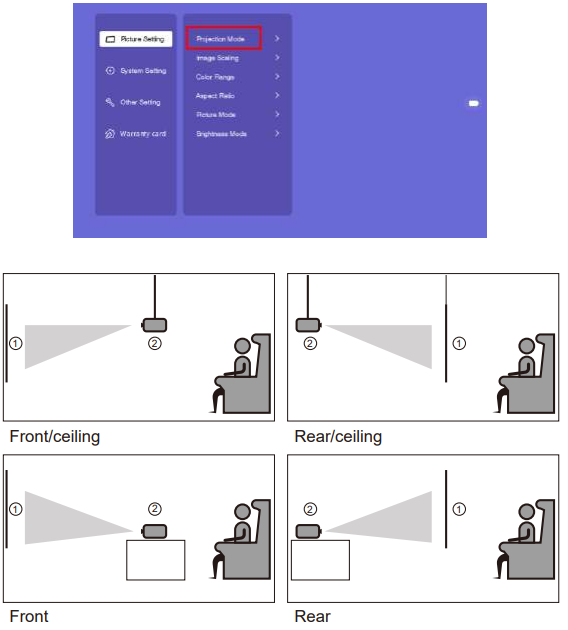
Please keep the projector at a height where its lens is axially symmetry to the screen.
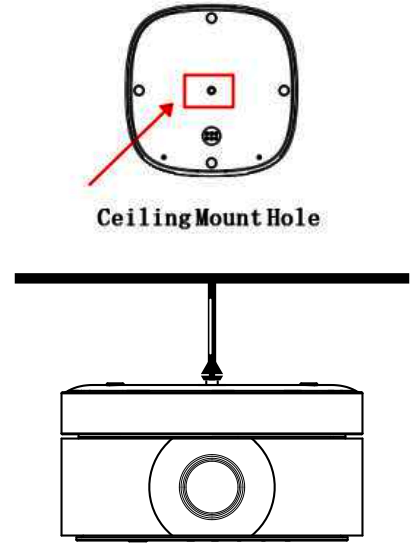
Mount Ceiling Method
Please note that our projector only supports the one-hole ceiling mount
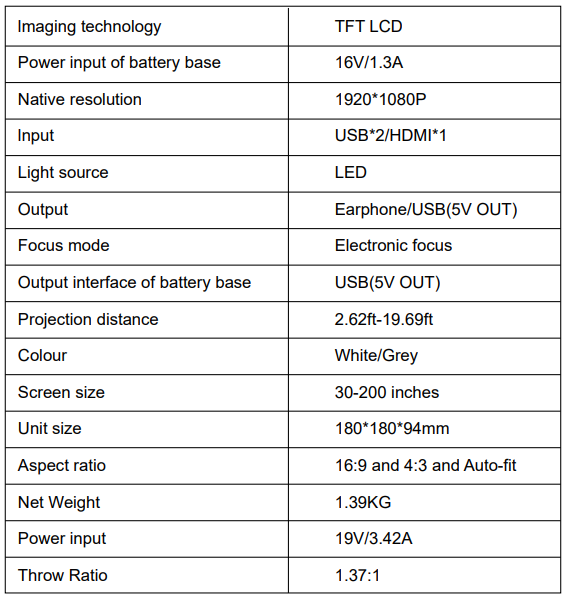
Specifications
Troubleshooting
Q1: Where can I find the instructional videos on how to set up the projector?
We have prepared detailed operation videos on YouTube, which contain almost every step of operating the projector, like WiFi connection, wired connection, and so on. Just search “Lisowod” on YouTube and you will find them.
Q2: I can’t play a Netflix video on the projector. Why?
There are quite a few video platforms, like Netflix, Disney+, and Hulu are under HDCP copyright protection and thus do not support being displayed on a projector; this is the same situation for all projectors. You would need a Roku/TV stick to enjoy these video platforms.
Q3: The projector is not that bright when using it. How should I do?
- Use rechargeable mode as much as possible
In order to obtain the best brightness and projection effect, it is recommended that users use the rechargeable mode as much as possible when using the projector. Using the battery mode may cause a decrease in brightness and a deterioration in the projection effect.
- Ensure the battery is fully charged
Before using the projector, please ensure that the battery is fully charged. Using an uncharged battery may affect the brightness and projection effect.
- Avoid over-discharging
Please avoid over-discharging the battery. When the battery level is below a certain preset value, the projector may automatically shut down to protect the battery. Over-discharging the battery may damage the battery and affect its life and performance.
FCC Statement
This device complies with Part 15 of the FCC Rules. Operation is subject to the following two conditions.
- This device may not cause harmful interference, and
- This device must accept any interference received, including interference that may cause undesired operation.
Changes or modifications not expressly approved by the party responsible for compliance could void the user’s authority to operate the equipment. This equipment has been tested and found to comply with the limits for a Class B digital device, pursuant to Part 15 of the FCC Rules.
These limits are designed to provide reasonable protection against harmful interference in a residential installation. This equipment generates uses and can radiate radio frequency energy and, if not installed and used in accordance with the instructions, may cause harmful interference to radio communications.
However, there is no guarantee that interference will not occur in a particular installation. If this equipment does cause harmful interference to radio or television reception, which can be determined by turning the equipment off and on, the user is encouraged to try to correct the interference by one or more of the following measures:
- Reorient or relocate the receiving antenna.
- Increase the separation between the equipment and receiver.
- Consult the dealer or an experienced radio/TV technician for help.
FCC Radiation Exposure Statement
This equipment complies with FCC radiation exposure limits set forth for an uncontrolled environment. This equipment should be installed and operated with a minimum distance of 20cm between the radiator & your body.
Customer Support
- Visit: http://www.ultraprojection.com
- US
- Email: Support_us@Lisowod.com
- JP
- Email: Support_jp@Lisowod.com
- Scan the QR code below, and start chatting with us.

FAQs
Q: What resolutions does the AN1 support?
1080p Full HD is the native resolution. Up to 4K input resolutions are supported. For the best display quality, the projector resizes video to its original 1080p resolution.
Q: What connectivity options does the AN1 offer?
Bluetooth and Wi-Fi: For wireless audio connections and streaming AV & Audio Out: Attach older devices or external speakers.
Q: How do I set up the projector for first use?
After plugging in the power adapter, switch the projector on. Using the buttons on the projector or remote, change the focus and keystone. Use wireless streaming, USB, or HDMI to connect your input device.
Q: How do I adjust focus and keystone?
Focus: To get a sharp image, turn the focus ring or use the on-device adjustment knob. Keystone correction: To fix trapezoidal distortion, make adjustments using the remote control or projector menu.
Q: Can I use the AN1 in a bright room?
Dark or dim environments yield the best results. Bright spaces can lessen image clarity and contrast.
Q: How do I connect the projector to Wi-Fi?
On the projector, select Settings Network. After choosing your Wi-Fi network, type in the password. Verify the connection and try firmware updates or streaming.
Q: How do I mirror my smartphone or tablet?
Make use of the supported casting techniques (Google Cast, Miracast, and AirPlay). To pair, adhere to the projector’s on-screen directions.