
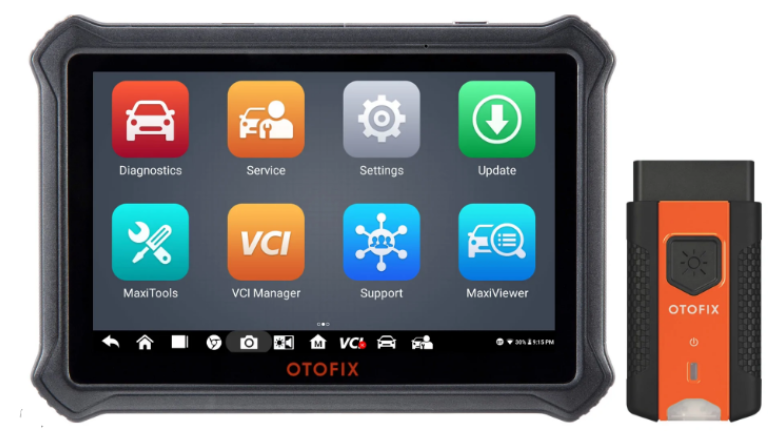
OTOFIX D1 Plus Diagnostics Tool Car Scanner
Introduction
The OTOFIX D1 Plus is a diagnostic tool. This tool is manufactured to a high standard and will provide years of trouble-free performance when used in accordance with these instructions and properly maintained.
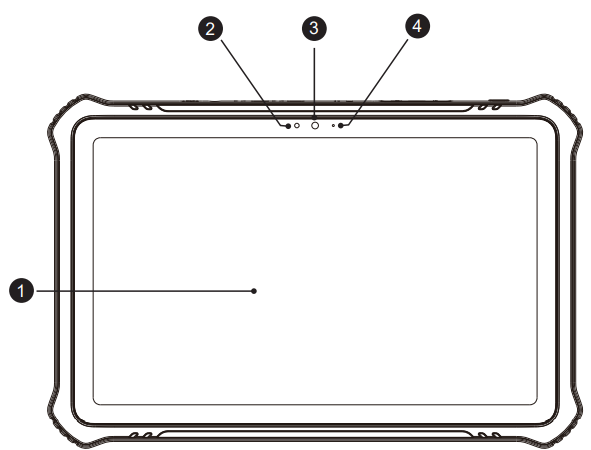
Description
- 10.4-inch Touchscreen
- Ambient Light Sensor – detects ambient brightness
- Front Camera
- Power LED

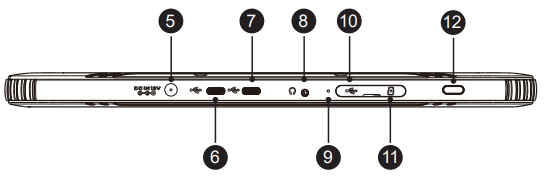
- DC Power Supply Input Port
- USB Port
- USB Port
- Headphone Jack
- Microphone
- Mini USB Port
- SD Card Slot
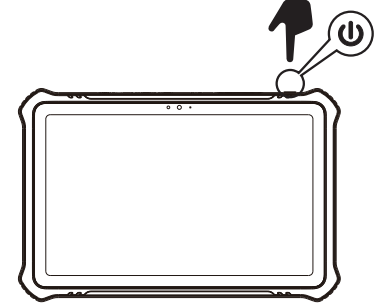
- Lock/Power Button – turns the device on & off with a long press, or locks the screen with a short press.
- Speaker
- Rear Camera
- Camera Flash

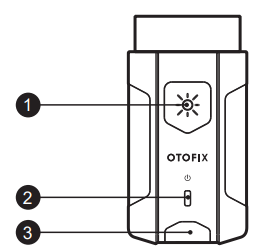
OTOFIX V1
- Flashlight Button
- Power LED
- Vehicle/Connection LED
- Vehicle Data Connector (16-pin)
- USB Port


OTOFIX V1 Description
| LED | Color | Description |
| Power LED | Yellow | VCI is powered on and performing self-check. |
| Green | VCI is ready for use. | |
| Flashing Red | Firmware is updating. | |
| Vehicle/Connection LED | Green | • Solid Green: VCI is connected via USB cable. • Flashing Green: VCI is communicating via USB cable. |
| Blue | • Solid Blue: VCI is connected via Bluetooth. • Flashing Blue: VCI is communicating via Bluetooth. |
Getting Started
Before operating or maintaining this unit, please read the Quick Reference Guide and User Manual carefully, paying extra attention to the safety warnings and precautions. Failure to use this unit correctly may cause damage and/or personal injury and will void the product warranty.
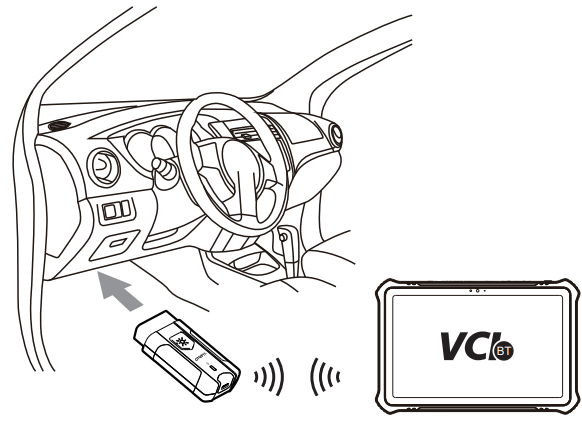
- Insert the V1 into the OBDII port, which is generally located under the vehicle dashboard.
- Long-press the Lock/Power button to power up the diagnostic tablet. Ensure the tablet has a charged battery or is connected to the DC power supply.
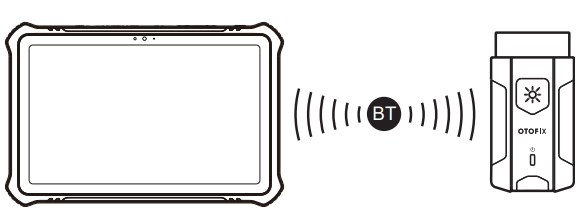
- Pair up the diagnostic tablet with the V1 via OTOFIX D1 Plus Diagnostics Tool Car Scanner Bluetooth to establish a communication link.
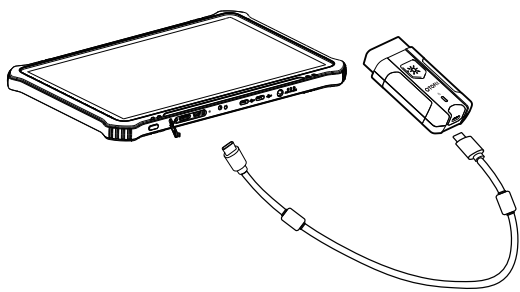
- Pair up the diagnostic tablet with the V1 via USB to establish a communication link.
- When the V1 is properly connected to the vehicle and the diagnostic tablet, the VCI status button at the bottom bar on the screen displays a green badge. This indicates your diagnostic tablet is ready to start vehicle diagnosis.

Customer Service
- Website: www.otofixtech.com
- Ph: +86-755-21612590
- Scan the QR code

FAQs
What types of vehicles does it support?
More than 80 car companies, including those from the US, Europe, and Asia, are partners of the D1 Plus.
What is bi-directional control, and does this tool support it?
Indeed. For component testing and diagnostics, bi-directional control allows the tool to instruct modules to carry out particular tasks (such as cycling the A/C clutch or activating the EGR valve). The D1 Plus provides extensive coverage in both directions.
Does it support ECU coding and module adaptation?
Indeed. On compatible vehicles, the D1 Plus enables module adaptation, personalisation, and ECU coding. This is perfect for setting up new components or activating hidden functions (such as lighting preferences or seat memory).
Can I use the D1 Plus with electric or hybrid vehicles?
Indeed. Depending on the manufacturer, the D1 Plus may perform diagnostics on a variety of EVs and hybrid cars, including checks on high-voltage systems, battery health, electric motors, and inverter modules.
How do I perform a full system scan?
Utilise the Auto Scan function, which displays fault codes and real-time data while automatically detecting the VIN and scanning all car modules (ECM, TCM, ABS, SRS, BCM, etc.).
Is the D1 Plus suitable for professional workshops?
Of course. The D1 Plus is perfect for auto repair businesses, mobile mechanics, and dealership personnel because of its comprehensive coding features, wireless VCI, wide vehicle coverage, and industrial-grade durability.