
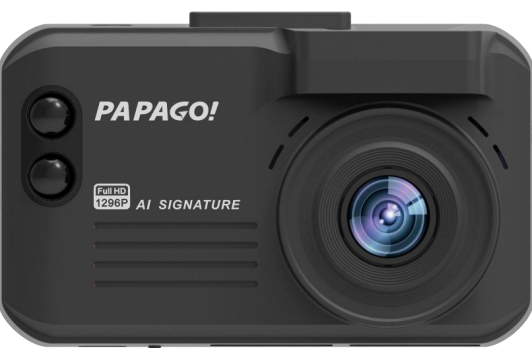
Papago VP668 Multifunctional Dash Cam
Safety Instructions
- Do not install or operate the Papago VP668 Multifunctional Dash Cam with wet hands.
- Do not store the main body or auxiliary engine in a closed vehicle under high temperatures.
- Do not exceed its rated voltage.
- Only the original connecting line and power cable can be used.
- Our company shall not be liable for any damage incurred by the use of other cables.
- Do not use sharp items such as hammers to pierce through the main body and accessories.
- Do not disassemble the main body, auxiliary engine, wires, and accessories without authorization.
- Keep out of reach of children during working and installation.
- Do not extrude the camera lens forcefully.
- Do not immediately remove the memory card during shutdown to avoid any file damage.
- It is significant to format the memory card before your first use to ensure its stable reading.
- The product function and content of this manual are subject to change without notice.
- In case of any foreign body on the camera of the main body or auxiliary engine, do not directly touch its surface with your fingers to avoid affecting its shooting effect.;
Packing Content

The packing content is subject to change without prior notice. The actual packing content shall prevail!
Overview
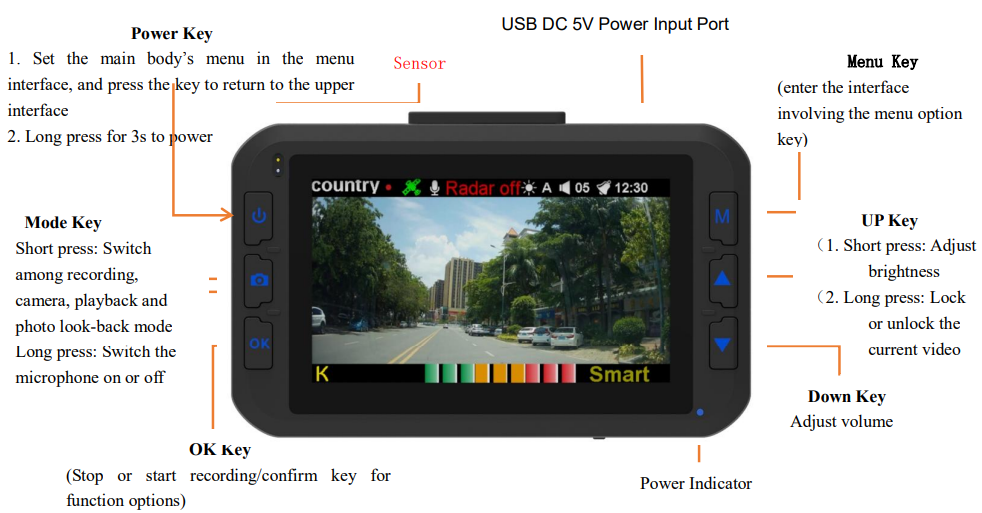
- Under the recording mode, press OK to enter the camera mode, and press again to take a screenshot (save as a picture)
- Under the recording mode, press OK once to enter the camera mode, press twice to enter the playback interface, press three times to enter the photo look-back interface, and press four times to return to the main interface.
If you are looking for other Papago dash cam models, you might also find the Papago N291S 2K Driving Recorder Camera useful for high-quality video recording with advanced features.
Installation Guides
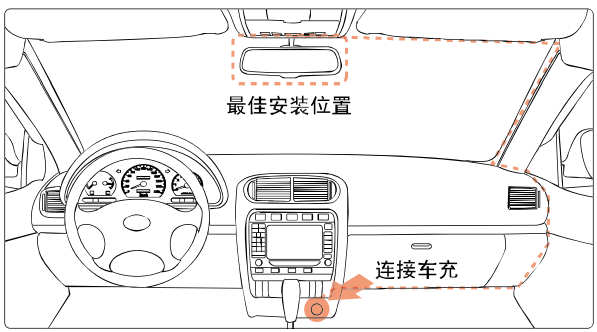
- Do not install the Papago VP668 Multifunctional Dash Cam in an area that may block the driver’s line of sight and endanger life.
- Try to install the dash cam near the inside rearview mirror to ensure the best image visibility.;
- Install the dash cam within the wiper’s cleaning range to ensure a clear recording on a rainy day.;
- Do not install the dash cam within the airbag movement range.
- Do not install the dash cam on the car’s insulation paper to avoid any damage.
- Install the dash cam in a proper position that can avoid the effect of car insulation paper, and avoid installing it near interfering electronic products.
- Avoid installing the dash cam within the working range of airbags or their covers. The company shall not be liable for any damage or death incurred by vehicle collision or airbags.
Methods of Installation
Align the magnetic transfer slide buckle with the mount buckle on the main engine.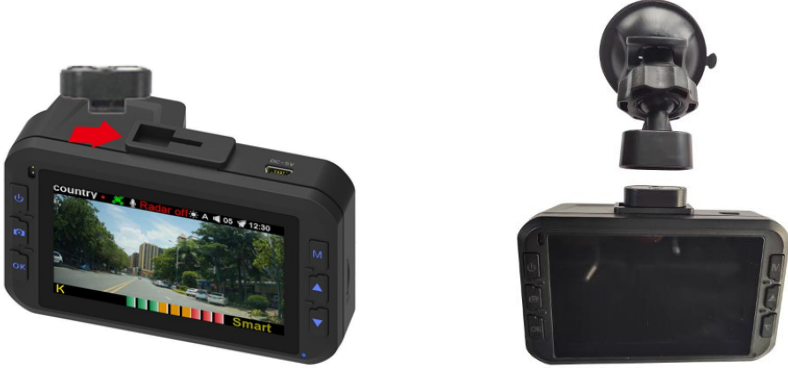
- Hold the main body and mount with your hands, and aim the mount at the buckle on the main engine.
- Select a proper position (such as the right rear side or center of the rearview mirror), attach the suction mount to the windshield, and rotate the mount clockwise to lock.
- Adjust the recording angle (it is the best angle that the car head shows in the middle of the display).
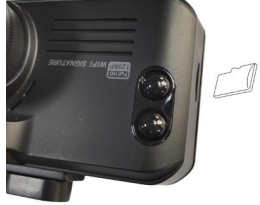
- Install the Memory Card. Keep the metal side down, and insert it into the slot.
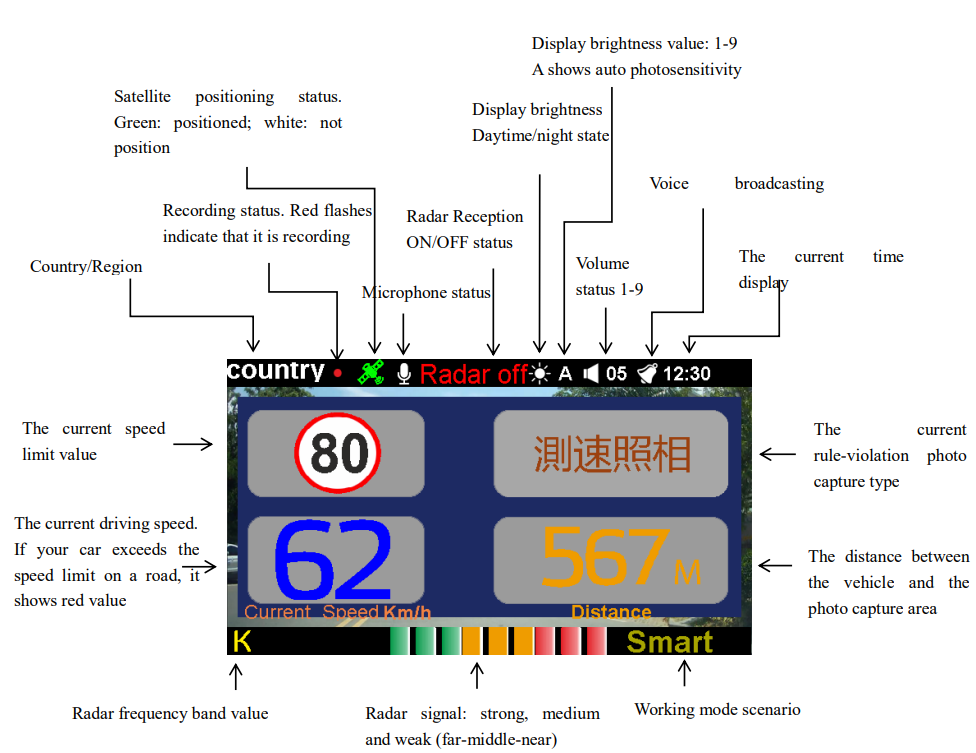
Introduction to the Main Interface and Icons
ON/OFF Instructions
Auto Boot
- Insert the memory card into the slot, and connect the car charger to the Mini USB port of the main engine and the automobile cigarette lighter to start the car, and the main engine will automatically power on.
Manual Boot
- Please ensure that the main engine has been connected to the power, then long-press the key (power switch) on the main engine to manually power on.
Auto Shutdown
- Please ensure that the main engine has been powered on. At this time, the main engine will automatically power off after the car stalls or you remove the car charger.
Manual Shutdown
- Please ensure that the main engine has been powered on. At this time, long-press the key (power switch) for 3s to power the main engine off.
Detailed Menu Instructions
| Press to enter the “velometer settings” | Press to switch menus | Press to enter settings | Press to switch menus | Explanation | ||
| Road Condition Mode | Smart mode (switch according to speed) (the default option) | Mute | v v v v | þ GPS fixed point ¨ MTR ¨ K frequency ¨ X frequency ¨ Ka frequency ¨ Laser ¨ Signature Radar Broadcast at 300 meters in advance Driving speed> 25 km/h≦ 50 km/h (Driving speed> 10km/h ≦ , 25 km/h broadcast at 100 meters in advance) | ||
| v v | GPS fixed point MTR K frequency ¨ X frequency ¨ Ka frequency ¨ Laser þ Signature radar Broadcast at 500 meters in advance | |||||
| v | Driving speed> 50 km/h, ≦80 km/h | |||||
| High Speed | v | GPS fixed point MTR K frequency ¨ X frequency ¨ Ka frequency | ||||
Recording Mode
| Press to enter the “recording mode” | Press to switch menus | Press to enter settings | Press , to switch menus | Explanation | |
| Recording Mode | 1296P | v | 1296P videos are saved | ||
| 1080P | v | 1080P videos are saved | |||
| 720P | v | 720P videos are saved | |||
| VGA | v | VGA videos are saved | |||
| Recording Time | v v | Save videos (in recording time) Selection Range: 1 minute, 2 minutes, 3 minutes, and 5 minutes | |||
| Motion Detection | v | Standby Mode: The camera’s front side detects item movement, then it automatically enters the recording mode. | |||
| v | The Selection Range of Detection Sensitivity: High/medium/low/off | ||||
| Recording Time of Motion Detection | v | Motion detection recording files are longer to save | |||
| v Selection Range: 5 seconds/10 seconds/ 30 seconds/1 minute | |||||
| Sound Settings | v Sound settings during recording v Selection Method: On/off | ||||
| MIC Sensitivity | v MIC sensitivity during recording v Selection Method: Standard/low | ||||
| Recording Scene Selection | v Scene selection during recording v Selection Method: Auto/sports/portrait/scenery/snow/beach/firework | ||||
| Exposure Adjustment | v Exposure adjustment during recording v Selection Range: -2/-1.7/-1.3/-1/-0.7/-0.3/0/0.3/0.7/1/1.3/1.7/2 | ||||
| Color Adjustment | v Color adjustment during recording v Selection Range: Natural/bright/grey | ||||
| Press to enter “playback” | Press to switch menus | Press to enter settings | Press, to switch menus | Explanation | |
| Playback Volume | v v | Select playback volume Selection Range: 1 — 9 |
Image Mode
| Press to enter the “image mode” | Press to switch menus | Press to enter settings | Press to switch menus | Explanation |
| Image Size | v Save image size v Selection Range: 3M/2M/1.2M/VGA | |||
| Image Scene Selection | v Scene Selection v Selection Range: Auto/sports/portrait/scenery/snow/beach/firework | |||
| Exposure Adjustment | v Adjust recording exposure. Users can adjust according to actual need (suggest adjusting 1 gear) v Selection Range: -2/-1.7/-1.3/-1/-0.7/-0.3/0/0.3/0.7/1/1.3/1.7/2 | |||
| Color Adjustment | v Recording Color Adjustment v Selection Range: Natural/bright/grey |
Playback
| File Deletion | v v | Delete files saved on the memory card Selection Method: delete one/all images | ||
| File Protection | v v | Lock or unlock files saved on the memory card. Selection Method: Lock one file/lock all files/unlock one file/unlock all files | ||
| Image Type | v v | Image Storage Type Selection Method: General/lock |
Media Tools
| Press to enter the “media tools” | Press to switch menus | Press to enter settings | Press, to switch menus | Explanation | |
| Format the memory card. | v | Format the memory card (take it with caution because all files will be deleted after formatting) | |||
| Memory card information | v | Show the storage information and available space |
System Settings
| Press to enter the “system settings” | Press to switch menus | Press to enter settings | Press to switch menus | Explanation | |
| Voice Selection | v v | Operating Language Display Selection Range: Only 2 languages are available due to different regions. | |||
| Flash Frequency | v | Selection Range: 50Hz / 60Hz | |||
| Display Rotation | v v | Show the display by 180 degrees Selection Method: On/off | |||
| Auto Screen Off | v | The display will be off after the preset working time, and other functions will work normally. | |||
| v | Selection Method: Be off for 1 minute/3 minutes | ||||
| G-senser Sensitivity | v | Selection Range: Off/high/medium/low | |||
| GPS Satellite Status | v | GPS satellite reception status | |||
| Time Zone Selection | v | Users can select different time zones according to countries. | |||
| Factory Data Reset | v | Restore factory settings | |||
| WIFI Preview Recording (Optional Function) | v | The product is connected to WIFI network, and remote video playback can be realized after mobile binding.g | |||
| Firmware Version | v | Product Version |
Product Specifications
The Papago VP668 Multifunctional Dash Cam comes with advanced hardware and features to ensure high-quality video recording, GPS tracking, and reliable performance.
| Master Control Chip | MSC8336 |
| HD Camera Chip Sensor | OV4689 |
| Display | IPS Full View Angle 3.0 Inch LCD Display |
| Memory Card | Connect to the memory card (up to 128 GB). Its capacity can’t be lower than 8g (recommended) and the reading speed should be higher than C6 |
| Prime Lens Angle | Horizontal: 110°/Vertical: 90°/Field of View: 140 degrees |
| Lens Aperture | F#1.8 |
| G-sensor | Automatically save videos during collisions to avoid any loss |
| Loop Record | Avoid file loss and save files without any seam |
| Video | 2304*1296 (30fps) ,1920*1080(30fps) , 1920*720(30fps) 1920*720(60fps) VGA:640*480(30fps) |
| Video Storage Format | MOV |
| Video Compression Format | H.264 |
| Peripheral Interface | Mini USB Port |
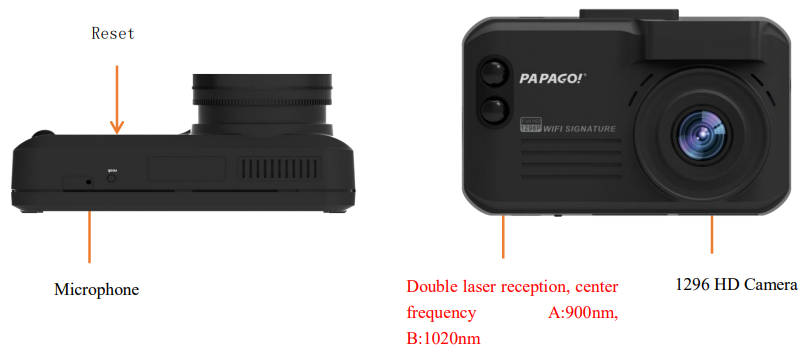
| Detectable Signal Frequency of Radar | Refer to VIII Practical Technical Information |
| GPS Data Broadcast Type | In terms of the fixed shooting position, we continuously collect and update new ways according to all conditions that add or delete shooting positions offered by users. Users need termly download the updated data regularly to gain a better warning effect. |
| Rated Voltage | DC5.2V—5.5V |
| Rated Current | 500mA |
| Working Temperature | -0℃ —- 55℃ |
| Saving Temperature | -20℃ —-70℃ |
| Image Format | JPG |
| Video Output | AV-IN |
| Language | Chinese/Russian/English/Japanese (Customizable) |
| Supercapacitor | 1.5 F |
| Microphone | Built-in speaker to record with high definition. Turn off the available record in the menu |
| Driving Tracking Playback | Track driving path. Support GPS positioning. After a successful GPS positioning, |
The camera will adjust the time according to GPS. It also records and keeps the driving coordinates and speed. The WMGPS player on the PC can show GPS information while playing videos, and meanwhile, connect to Google Maps to show your driving path.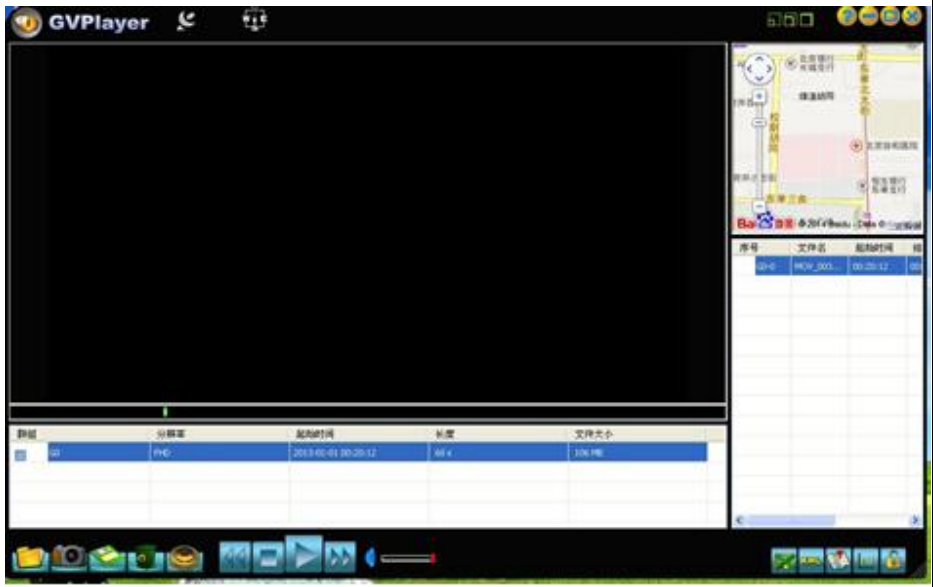 |
Termly Update GPS Data Points
Download the corresponding data software from the specified website, and copy it to the memory card. Insert the memory card into the main engine. After it is electrified, it will automatically copy all data to the storage space of the main engine. In terms of the specified website, please contact the seller.
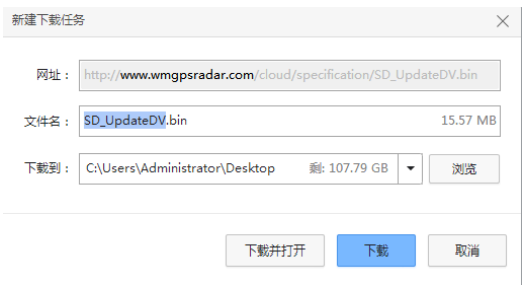
Data Download Instructions
- Connect the TF card (or the memory card of the dash cam) to the computer via a reader – enter the website (http://www.wmgpsradar.com/cloud/specification/SD_UpdateDV.bin), then an interface pops up – click to browse the menu and directly save it on the TF card – click download.
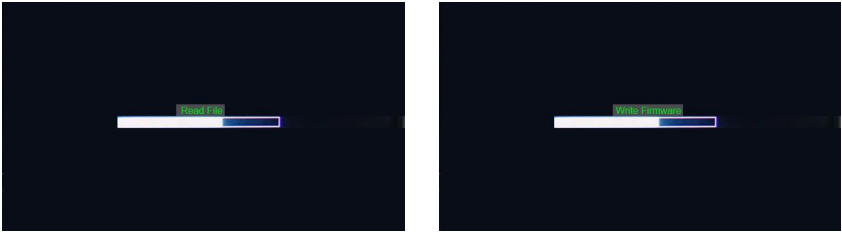
- Insert the TF card with the data package into the dash cam when it is powered off, then connect it to the power. At this time, the dash cam will show the following images. Power off again after it completes, and try to restart.
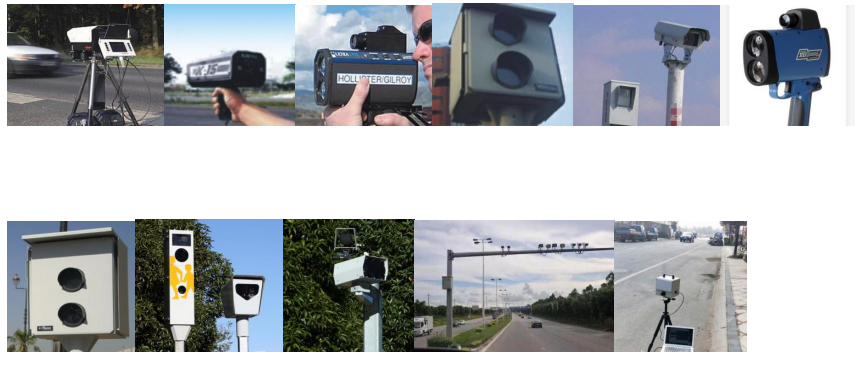
The Most Common Speed Measurement Devices
Troubleshooting
If you experience issues with your Papago VP668 Multifunctional Dash Cam, follow these steps to identify and fix common problems:
- Check whether the main engine is normally electrified.
- Remove the power USB cable, then reboot the main engine.
- Press the reset key on the bottom of the main engine once, then insert it into the DC5V power supply again.
- Check whether the screen display function is turned off under the recording mode. Press the power key to turn it on.
- Check whether screen protection is set. Change such a setting in the “auto screen off” in menu settings.
- Check whether you have changed images or file names saved on the memory card.
- Check whether images or files have been processed by your computer, or if they weren’t recorded by the main engine.
- The memory card is damaged.
- Contact our customer service personnel if the above-mentioned information isn’t helpful.
FCC Rules
This device complies with Part 15 of the FCC Rules. Operation is subject to the following two conditions: (1) this device may not cause harmful interference, and (2) this device must accept any interference received, including interference that may cause undesired operation.
- Reorient or relocate the receiving antenna.
- Increase the separation between the equipment and receiver.
- Connect the equipment to an outlet on a circuit different from that to which the receiver is connected.
- Consult the dealer or an experienced radio/TV technician for help.
Radiation exposure statement: This equipment complies with FCC radiation exposure limits set forth for an uncontrolled environment. This equipment should be installed and operated and operated with a minimum distance of 20cm between the radiator and your body
Customer Service
- Email Support: papago.store@hotmail.com
- Phone Support: +02-2659-3008
FAQs
Q: What is the Papago VP668 Dash Cam used for?
The VP668 is a multipurpose dash camera that can record high-quality video while driving, help with navigation, monitor parking, and be used as proof in an accident.
Q: What video resolution does the VP668 support?
It can record in Full HD 1080p, giving you crisp, vivid video of your driving surroundings.
Q: Does it record audio?
Indeed, the dash cam has an integrated microphone that makes it possible to record audio inside the car.
Q: How is the dash cam powered?
Using the provided automobile adaptor, it is powered by the vehicle’s 12V power outlet. Additionally, some models may operate in short-term parking mode using an internal battery.
Q: What memory cards are compatible?
A microSD card (Class 10 or higher) that can hold up to 128GB is used by the VP668. Before using the camera for the first time, always format the card.
Q: Does the VP668 have loop recording?
Yes, the dash cam has loop recording, which ensures continuous recording by automatically replacing the oldest recordings when the memory card is full.
Q: What is Parking Mode, and how does it work?
When motion or impacts are detected while your car is parked, Parking Mode turns on the camera. After that, the dash cam records footage to document any possible events.
Q: Does it have a G-sensor?
Indeed, the G-sensor immediately locks the pertinent video to stop it from being overwritten when it detects abrupt impacts or collisions.