
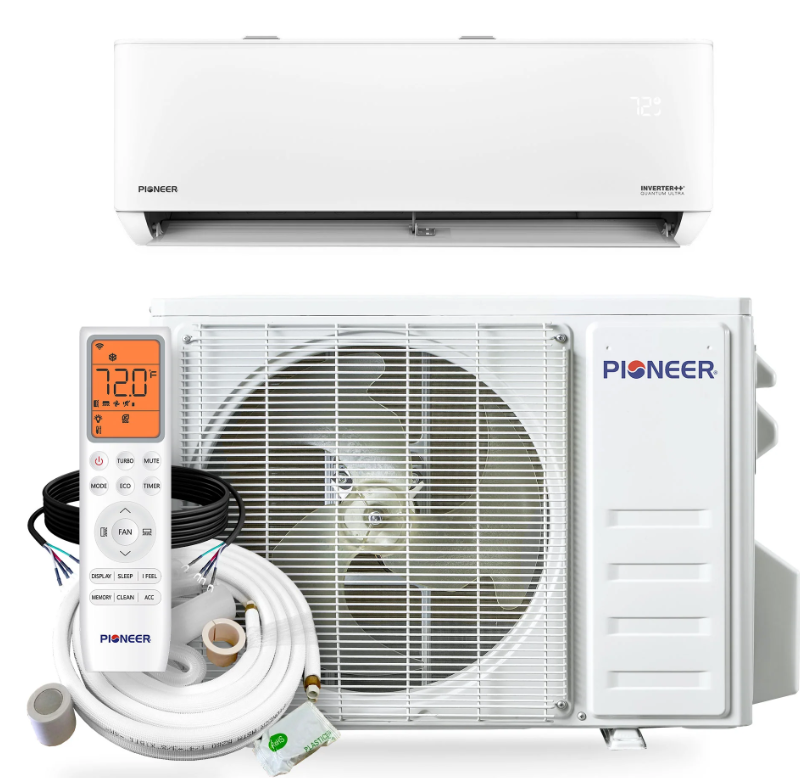
Pioneer WYT009ALSI24RL Inverter Air Conditioner
IDU Disassembly
Indoor Unit Model Numbers
WT009ALSI24HLG | WT012ALSI24HLG | WT009GLSI24HLG | WT012GLSI24HLG | WT018GLSI24HLG | WT024GLSI24HLG
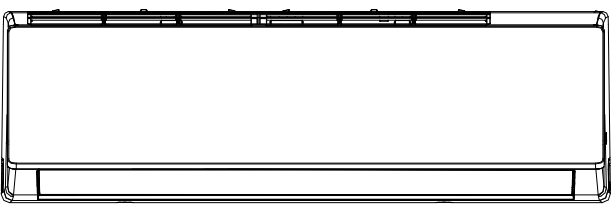
- Before disassembly. The original status.
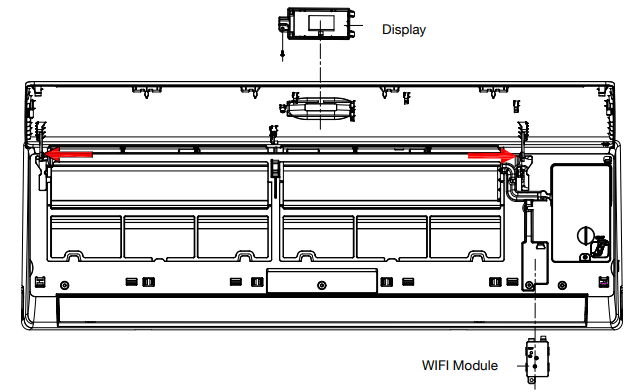
- Disassemble the front panel, display board, and the Wi-Fi module.
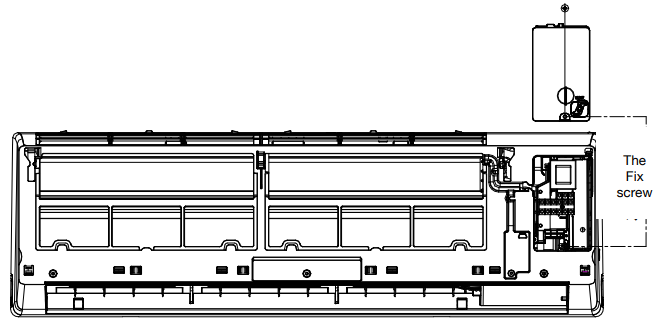
- Open the front panel. Remove one screw and take the display box out of the panel.
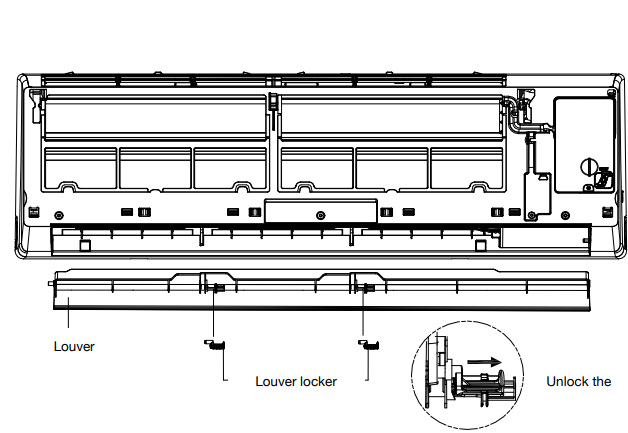
- Remove the louver. Unlock the louver lockers (clip), bend the louver slightly by hand, and remove it from the iddle frame and the stepping motor.
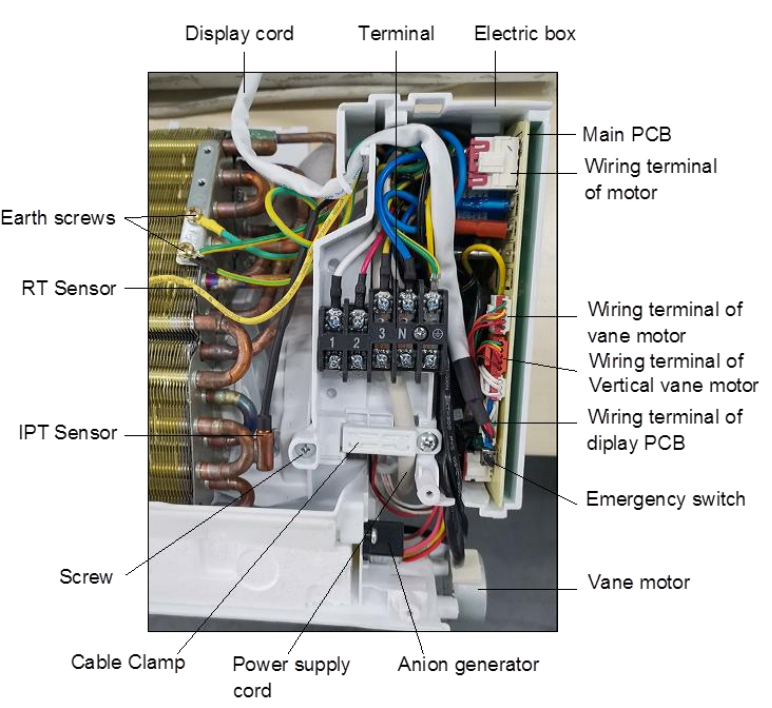
- Remove the electric control box cover. Unfix one screw on the cover of the electric box, and remove the cover.
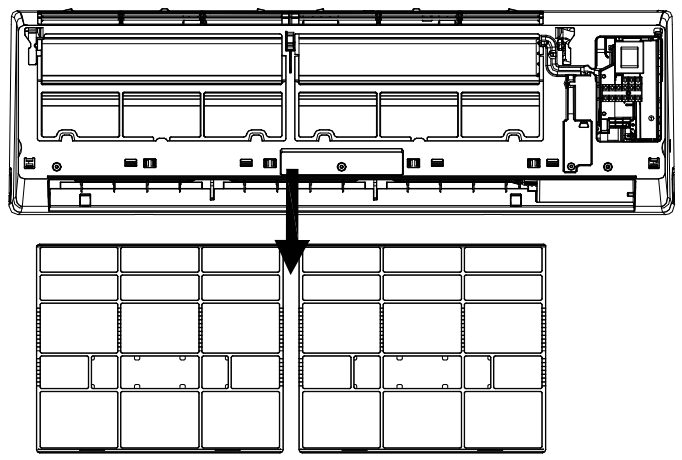
- Remove the filter.r Push the filter upwards a little; you can take it out of the unit.
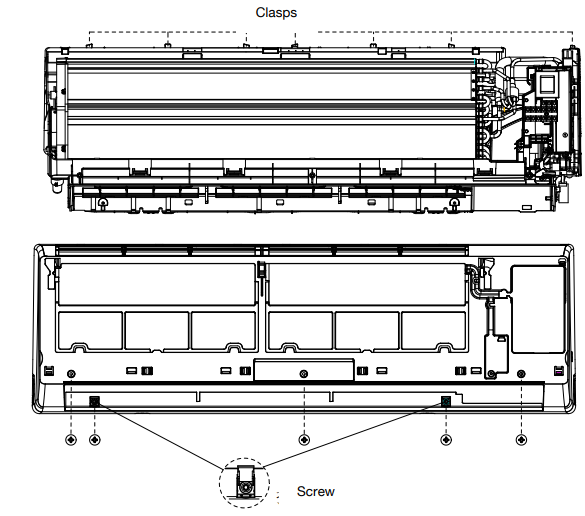
- Disassemble the middle frame. Open the screw cover, and unfix scthe rew with a cross screwdriver.
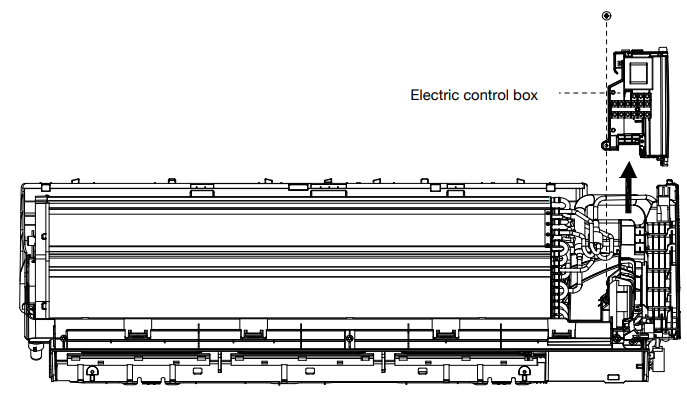
- Disassemble the electric control box. Remove the RT & IPT orom ethe vaporator; Unscrew all the earth ground wires on the evaporator.
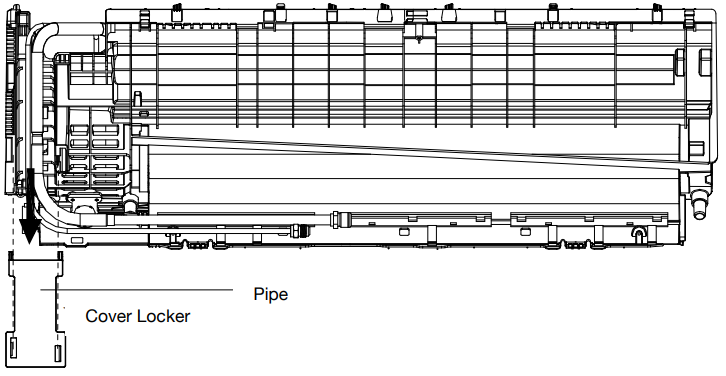
- Remove the PIPE COVER, loosening the lower edge of the PIPE COVER from the BASE FRAME, and take the COVER out of the unit.
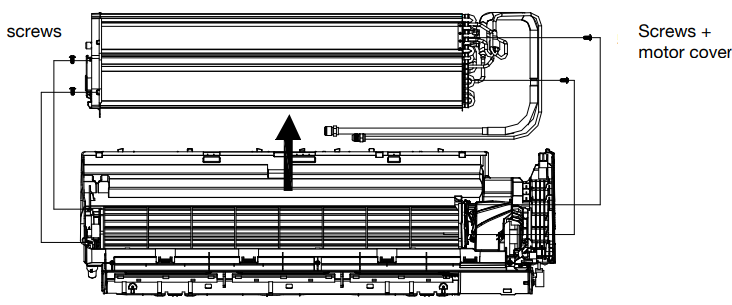
- Disassemble the evaporator. Unix 2the screws on the left side, a s the picture.
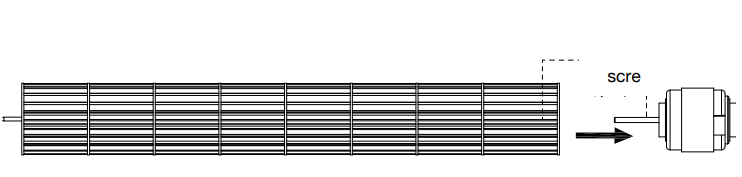
- Remove the MOTORCOVER. Unfix 4 screws on the motor covewithhetheh the base frame.
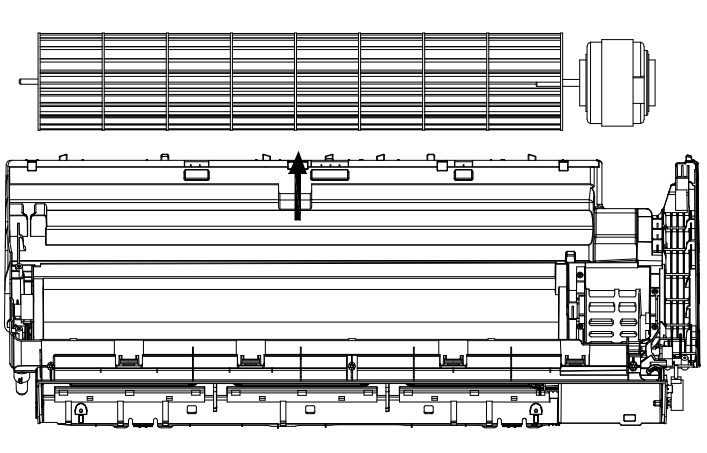
- Disassemble the motor and the blade. Uplift the fan blade and fan motor, and take the base frame out.

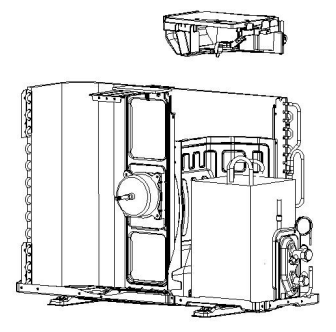
ODU Disassembly
Outdoor Unit Model Numbers
YN009ALSI24RPG | YN012ALSI24RPG | YN009GLSI24RPG | YN012GLSI24RPG | YN018GLSI24RPG | YN024GLSI24RPG. Before disassembly.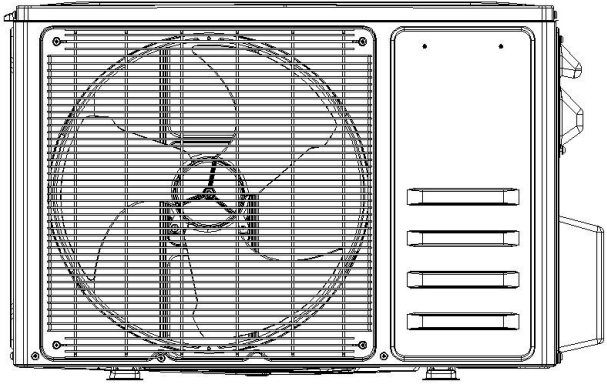
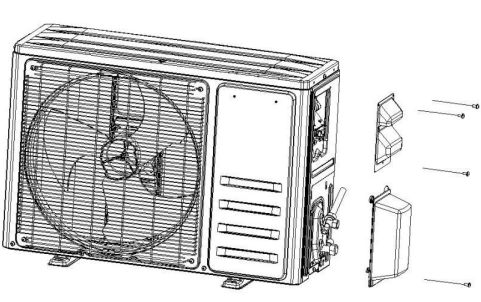
- Remove the PCB Cover, valve Cover, and top cover. Unfix one screw on the PCB cover, and you can take the cover out of the unit. Unfix one Pioneer WYT009ALSI24RL Inverter Air Conditioner screw on the valve cover, and you can take it out easily.
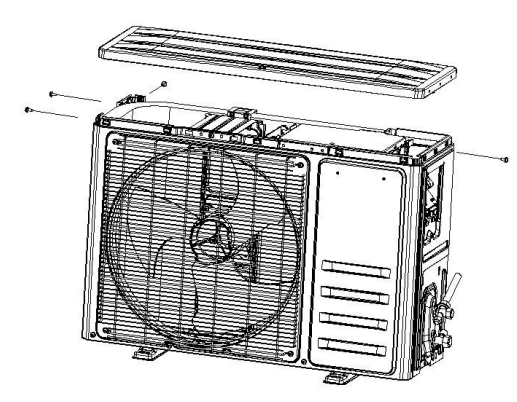
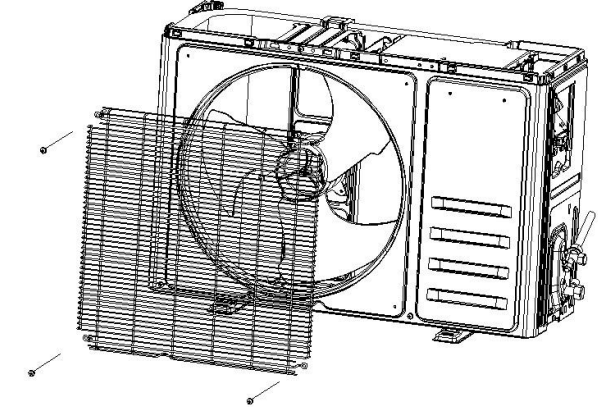
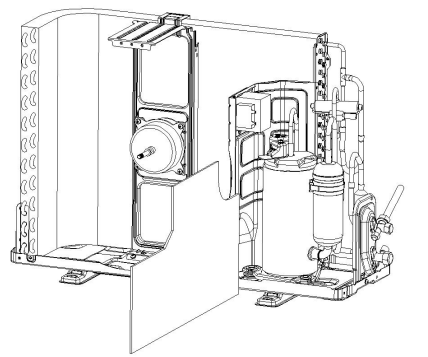
- Disassemble the Fan Guard and Front Panel. A. Remove the screwsthat assembleg the grille to the front panel and remove the grille. Upfront panel, you can take it out of the unit.
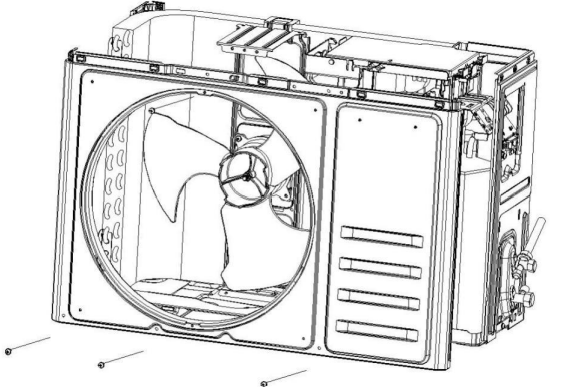
- Disassemble the Left and Right plates. A Unfix screws the Right Plate and the Electric Box assembly, Valve Plate, Base Plate, then you can take the Right plate out.
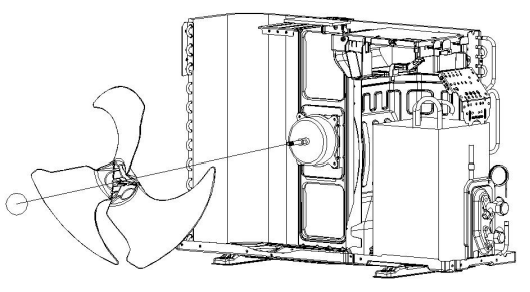
- Disassemble the Axis Fan Blade. A. Unscrew the fan blade nut, and take the blade out.
- Disassemble the electric boiler. Unfit the screw btw the Electric Box and the motor support, etc.
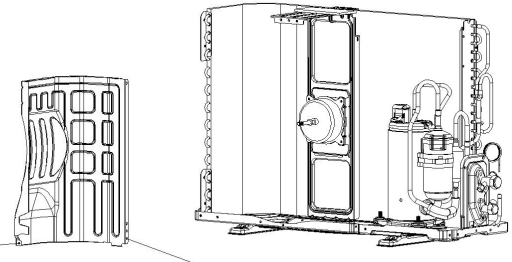
- Take out the noise cotton. As shown picture to take the cotton out.
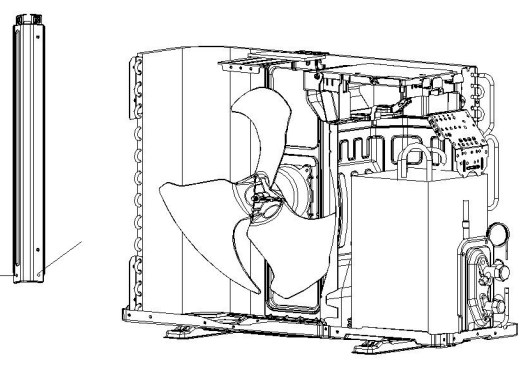
- Disassemble the separate plate. Unfix the screw, separate the plate and the unit, and take it out
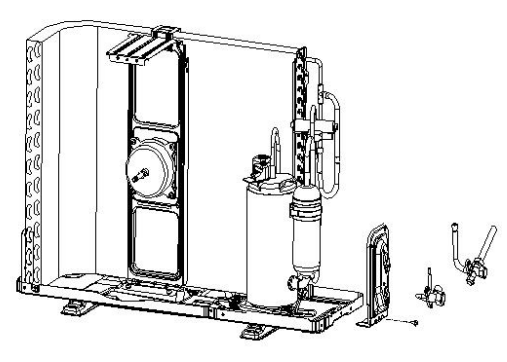
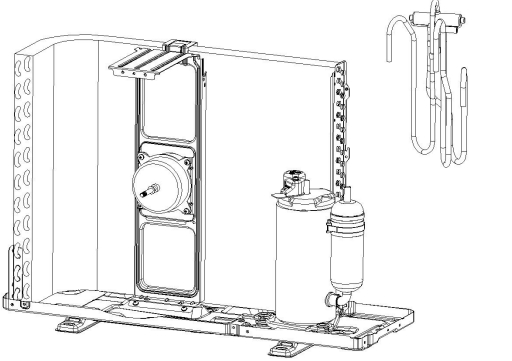
- Disassemble the 2 and 3-way valve. Unfix the crew btw the Valve plate and base; you can take the 2-way and 3-way valve out by welding
- Disassemble the 4-way valve assembly. Take the 4-way valve out of the system by welding.
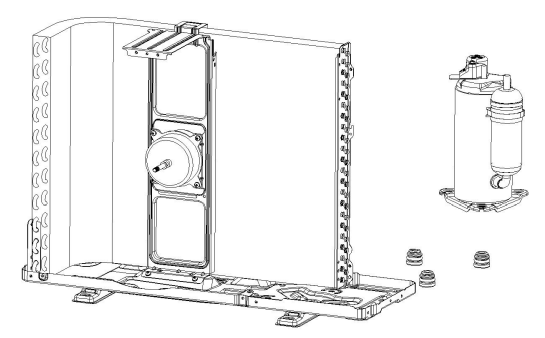
- Disassemble the compressor. Unscrew the nuts and take the compressor out.
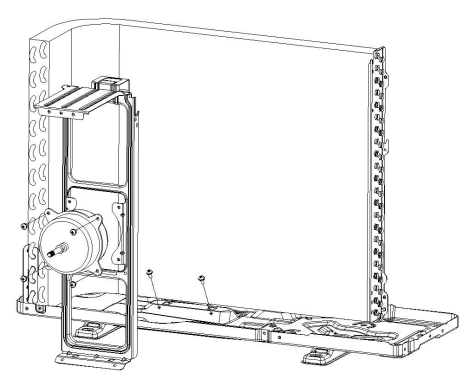
- Remove the fan motor and fan supporter. Unfix the screws btw the motor wand with the supporter, and the supporter and the base plate.

Customer Support
- Address: Parker Davis HVAC International 7290 NW 77 Court, Miami, FL 33166 – USA
- Tel : (305) 513-4488
- Fax : (305) 513-4499
- E-mail: @pdhvac.com
- Website: www.pdhvac.com
- Pioneer product line, parts, and supplies are available online for convenient ordering at: www.highseer.com www.pioneerminisplit.com
- Scan the code below to visit our support page, where you can find more installation materials:

FAQs
Q: What type of air conditioner is the Pioneer WYT009ALSI24RL?
Ans: With variable-speed compressor technology for accurate temperature control and energy savings, this model is a high-efficiency ductless mini-split inverter air conditioner that can be used for both heating and cooling.
Q: What does “inverter” mean in this model?
Ans: Compared to conventional fixed-speed systems, inverter technology enables the compressor to change its speed in response to cooling or heating demand, resulting in quieter operation, lower energy usage, and more stable indoor temperatures.
Q: How do I operate the unit using the remote control?
Ans: Set the temperature, change the fan speed, turn on extra features like Sleep Mode or Turbo Cooling, and choose between the following modes with the remote control: Cool, Heat, Dry, Fan, and Auto. For a breakdown of button functionality, consult the handbook.
Q: How do I clean the air filters?
Ans: Lift the indoor unit’s front panel after turning it off. Rinse with lukewarm water after removing the air filters. Before putting them back in, let them dry completely. For best results, cleaning should be done every two to four weeks.
Q: How often should I service the unit?
Ans: Professional maintenance should be performed once a year, particularly prior to the onset of the summer or winter season. This covers electrical inspections, coil cleaning, and refrigerant checks.
Q: Can I install this unit myself?
Ans: For safety, effectiveness, and warranty validity, professional installation is necessary. A fault or a warranty void may result from improper installation.