
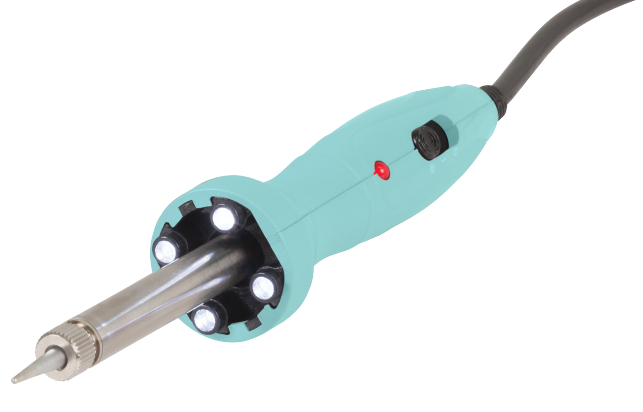
PROTECH TS1470 40W LEDs Soldering Iron
Safety Instructions
Before using, ensure the PROTECH TS1470 40W LEDs Soldering Iron is placed on a safe, stable surface.
- Verify that the voltage specified on the appliance’s rating plate matches the local electrical network’s voltage before connecting it to the main power supply.
- Adult supervision is recommended for children aged under 8.
- Do not use the appliance if it has a damaged plug or cord, has malfunctioned, or has been dropped or damaged in any manner.
- Always place the soldering iron on its stand when not in use.
- Maintain adequate space and ventilation around the appliance to facilitate the dissipation of heat and/or fumes.
- Avoid contact with any metal parts close to the soldering tip/nozzle.
- Never leave the soldering iron unattended when it is powered on.
- Confirm that the power switch is turned off and disconnect the appliance from the power source when not in use.
- Prior to storing, make sure the appliance is switched off and allow it to cool down to room temperature.
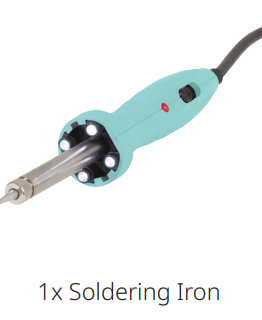
Box Content
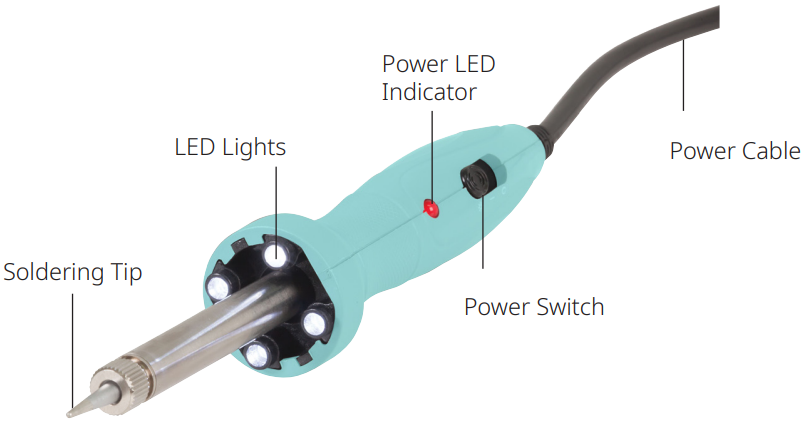
Product Diagram
Before First use
Using a soldering iron for the first time requires careful preparation to ensure safety and effectiveness. If you’re looking for a higher wattage or more advanced model, you can also check out the PROTECH TS1564 48W Soldering Station for more professional applications. Here are the steps to follow before you begin:
Preparation
- Inspect the Soldering Iron: Check for any visible damage to the cord, handle, or tip.
- Assemble the Stand: Set up the soldering iron stand to safely hold the iron when not in use.
- Attach the Tip: Ensure the soldering tip is securely attached to the iron.
Initial Setup
- Heat the Iron: Plug in the soldering iron and let it reach its operating temperature.
- Apply Solder: Once done, apply a small amount of solder to the tip, covering it entirely with a thin layer.
- Wipe Excess Solder: Use a damp sponge to wipe off excess solder, leaving a shiny, tinned tip.
Testing
- Test the Iron: Practice on a scrap piece of metal or wire to get a feel for the soldering iron and ensure it is working correctly.
Features
High-Performance LED Soldering Iron Featuring four long-life LEDs for superior soldering accuracy and enhanced illumination.
The operation method is as follows
- When powered on, the red LED indicator will illuminate.
- To activate the soldering iron, press the switch on the handle to the first gear.
- To activate the four LED lights, press the switch on the handle to the second gear.
Operation Instructions
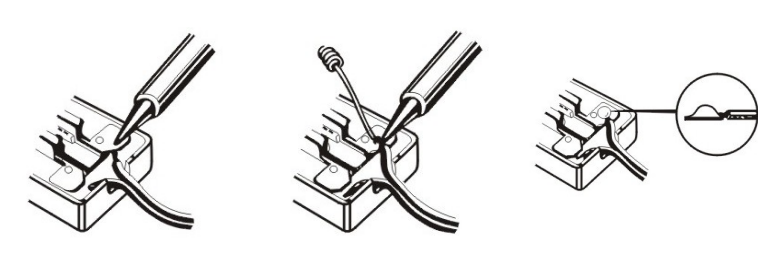
- Remove any dirt, rust, or paint from the part you intend to solder.
- Then, heat the part using the soldering iron.
- Apply rosin-based solder to the part and melt it with the soldering iron.
- Allow the solder to cool and harden before handling the soldered part.
Soldering steps to protect the tip from oxidation
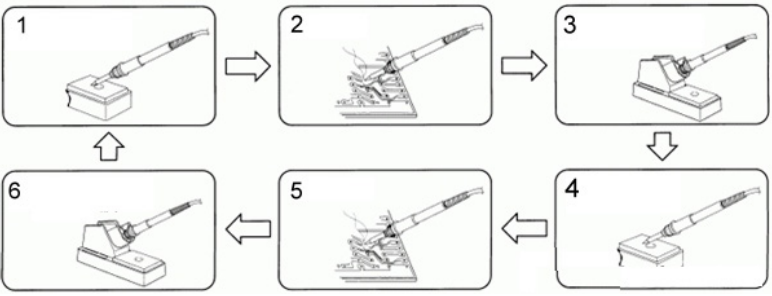
- Before soldering, clean the tip using a sponge, and then apply tin to the tip.
- Begin your soldering work.
- When not in use, please place the soldering iron in the holder.
- Clean the tip and apply tin to it.
- Proceed with the soldering.
- Repeat steps 1 to 5 as needed.
- When your soldering work is finished, either adjust the temperature to 270°C or switch off the power.
- Afterward, clean the tip and apply tin for protection.
Maintenance
- Clean the Tip: Clean the tip with a damp sponge during use to remove oxidation and solder residue.
- Unplug After Use: Always unplug the soldering iron when finished and let it cool down before storing it.
Cleaning, Care & Storage
- Always ensure that the tips of the PROTECH TS1470 40W LEDs Soldering Iron are coated with tin to prolong their service life.
- Avoid leaving the PROTECH TS1470 40W LEDs Soldering Iron at high temperatures for an extended duration.
- Never clean the tip with abrasive materials.
- Do not quench the tip in water.
- Refrain from using fluxes that contain chloride or acid; opt for rosin or activated resin fluxes only.
- Avoid using any compounds or anti-seize materials.
- Ensure the soldering tip is correctly fitted and the locking screw is tightened securely.
Soldering Iron Maintenance
This tool should be placed on its stand when not in use. If the supply cord is damaged, it should be replaced by the manufacturer, its service agent, or a similarly qualified person to avoid any hazards. Do not attempt to file the specially-plated tip.
Specifications
- Heating Element 40W
- Temperature Range 420-450ºC
- Input Voltage 240VAC @ 50/60Hz
- Weight 195g
- Dimensions 215(H) x 35(Dia.)mm
- Cable Length 1m
Working Temperature
Soldering at the correct temperature is crucial to ensuring a perfect solder connection. If the temperature is too low, the solder will not flow correctly and may result in cold solder joints. Conversely, if the temperature is too high, it can lead to the burning of the flux, preventing the solder from flowing properly. High temperatures can also cause damage to the PCB (Printed Circuit Board) and other sensitive components.
The most common solder wire contains a composition of 60% tin and 40% lead (60/40). A typical working temperature for 60/40 solder is as follows:
- Melting point…………………………………………………………………………………419ºF (215ºC)
- Normal operation…………………………………………………..419ºF-572ºF (215ºC – 300ºC)
- Production line operation ……………………………………..608ºF-716ºF (320ºC – 380ºC)
- Desoldering operation for small joint…………………………………………..599ºF (315ºC)
- Desoldering operation for larger joint…………………………………………752ºF (400ºC)
- Temperature range………………………………………………..300ºF-790ºF (150ºC – 420ºC)
Replacement
Tip replacement or cleaning should be performed only when the iron is at room temperature or below. To change or replace the tip, unscrew the knurled nut barrel assembly. Ensure that the station is switched off and allowed to cool both before and during this operation, as leaving the system on without the tip inserted could lead to damage. After removing the tip, clean any oxide dust that may have formed in the tip-retaining area of the barrel.
Be cautious to prevent dust from getting into your eyes. To replace the tip, screw the retaining knurled nut barrel assembly using only PROTECH TS1470 40W LEDs Soldering Iron hand pressure to tighten. Pliers should be used only if the nut needs tightening when the iron is hot, to avoid burns on your fingers. Be careful not to overtighten, as this could damage the heating element.
You can clean the outer case of the iron or PROTECH TS1470 40W LEDs Soldering Iron station with a damp cloth and a small amount of liquid detergent. Do not submerge the unit in liquid or allow any liquid to enter the case of the station. Never use a solvent to clean the case.
One-Year Limited Warranty
Should your PROTECH product prove defective within one year from the date of purchase, contact PROTECH’s Customer Support Team with the serial number and proof of purchase to make a warranty claim. Under this warranty, PROTECH will repair or replace any parts found defective with new or remanufactured parts or exchange the defective product with a new, refurbished, or remanufactured product at our discretion.
This warranty is not transferable. After the expiration of the warranty, the cost of labor and parts will be the responsibility of the original owner. Please package the product carefully in its original packaging to avoid damage in transit. PROTECH is not responsible for damage resulting from shipper mishandling or improper packaging. Please retain the original box and packaging materials.
Warranty Does Not Cover
- Acts of God, such as fire, flood, hurricanes, earthquakes, and tornadoes.
- Damage, accidental or otherwise, to the product while in the possession of a consumer, not caused by a defect in material or workmanship.
- Damage caused by consumer misuse, tampering, lack of maintenance, or failure to follow the care and
special handling provisions in the instructions. - Damage to the finish of the case or other appearance parts caused by wear.
- Damage caused by repairs or alterations to the product by anyone other than authorized by the
manufacturer. - Removal, Replacement, Packaging, Freight, and Insurance costs for the warranty service.
- Products sold AS IS or from an unauthorized reseller.
- Products that have had their serial numbers removed or defaced.
Customer Support
- Email: support@whynter.com
- Website: WWW.WHYNTER.COM
- Tel: 800-443-6153
Product contents and specifications may change without notice. Copyright © 2024
FAQs
Q: What is the PROTECH TS1470 soldering iron?
For accurate soldering, the TS1470 is a 40-watt electric soldering iron with LED lighting. It works well for small-scale soldering jobs, hobby projects, electronics, and do-it-yourself repairs.
Q: How does the LED light help?
By illuminating your work area right at the soldering tip, the inbuilt LED light reduces shadows and enables more precise soldering on small components. The same cord that powers the iron also powers it.
Q: How long does it take to heat up?
Usually two to five minutes, depending on the tip’s condition and the surrounding temperature. The LED’s consistent glow could aid in signalling preparedness.
Q: Can I use the iron for soldering large components or wires?
Circuit boards, cables up to ~1-2 mm², and tiny to medium components can all benefit from the 40W power. A higher wattage iron (60–100W) could be required for heavy-duty tasks.
Q: Can this iron be used for jewelry or hobby metalwork?
Yes, for small electronics and light metalwork, but not for heavy metal soldering (thick copper, brass, or huge aluminium parts). For certain tasks, use an iron with a higher power.
Q: What is the warranty on the TS1470?
A one-year limited guarantee against manufacturing faults is typically offered by PROTECH. Wear and tear, abuse, and tip replacement are not covered by this.
4 Comments
Pingback: PROTECH QC1902 CRO Probe Cable Instruction Manual
Pingback: PROTECH TH1069 2000W Adjustable Heat Gun | Safety Guide
Pingback: PROTECH TS1564 48W Soldering Station | Features & Guide
Pingback: PROTECH TS1610 Compact Soldering Iron Instruction Manual - onyxguides.com