
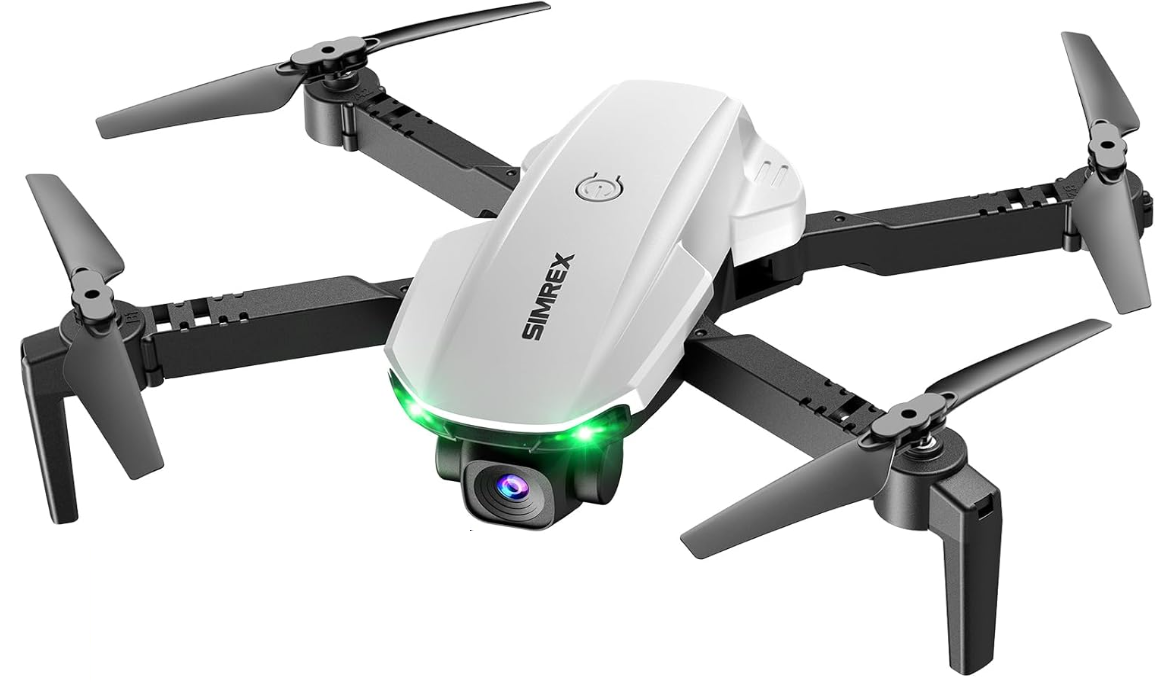
SIMREX X500 RC Quadcopter 1080P HD Camera Drone
Safety Instructions
- If the battery has just been used, please allow it to cool to room temperature before charging.
- Charging can only be done by adults and only use the charger that comes with this product.
- Connect the battery to the USB charging cable.
- Connect the USB charging cable to the USB charging device.
- When charging, the red LED on the battery lights up and goes out when the battery is fully charged.
- It takes about 60-90 minutes to fully charge the battery.
- Do not continue to charge the battery after the red LED is off.
- Lithium polymer batteries cannot be used forever.
- If your battery is damaged in the collision or cannot be charged properly, please replace it immediately.
- In order to extend your battery life, it is always best to keep a little charge in your battery to be charged.
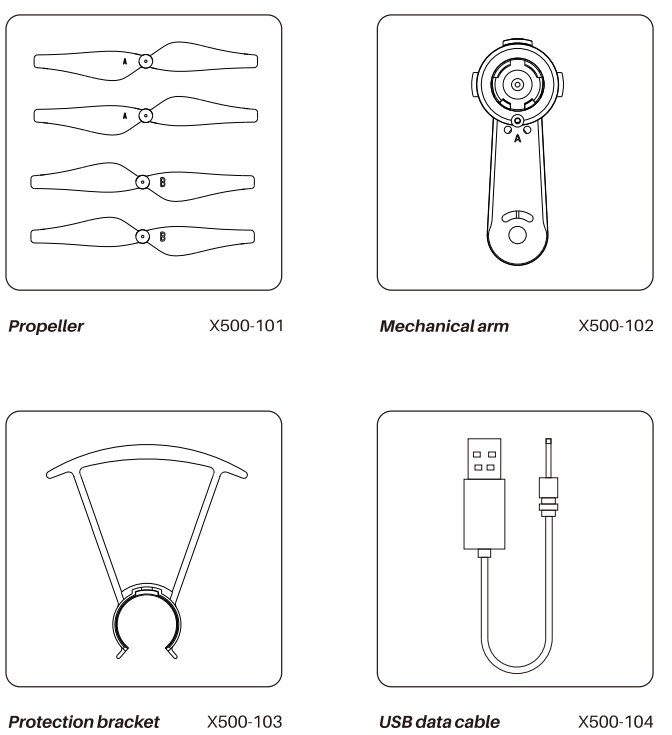
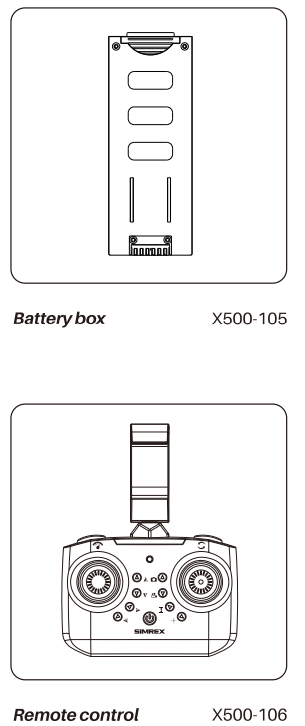
Components
Settings
Installing the controller batteries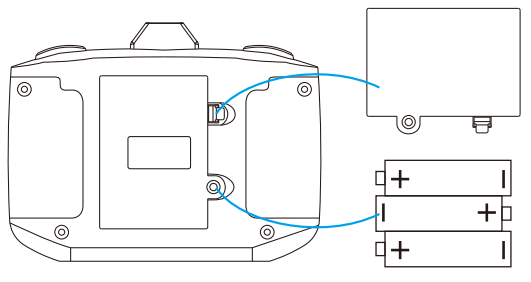
- Unscrew the battery cover, and insert three AAA batteries, making sure you insert them following the correct polarity as shown.
- Close the battery cover.
Folding the arms
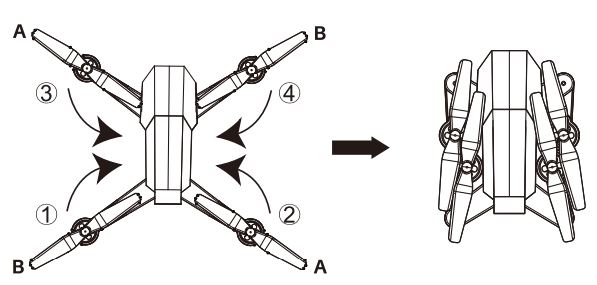
Fold arms in the order shown in the picture. A
Charging
Battery
If used improperly, the lithium polymer battery may expand, burst, or catch fire, causing property damage and/or personal injury. You must fully comply with all instructions and safety warnings attached. Manufacturers, distributors, and retailers are not responsible for failure to complywiththesesafetyinstructions and warnings.
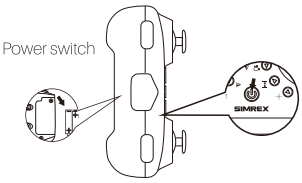
Step 1: Insert the battery into the battery housing. (see first picture). Turn on the power switch (press for 2 seconds) of the aircraft – the LEDs on your aircraft will start to flash. Place the aircraft down on a flat surface, making sure the aircraft is facing away from you.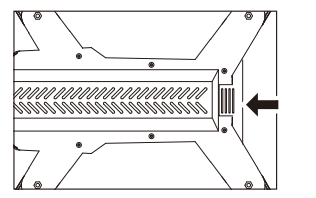
Step 2: Press down the controller Power Switch to turn on the power. The controller will make one short BEEP sound, and the red LED will flash.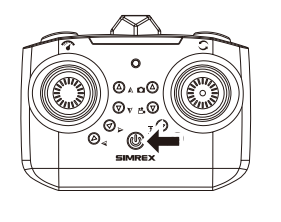
Step 3: Push the left operating stick of the remote controller to the highest point and then pull to the lowest point after the remote controller sends a”beep” sound. The frequency matching is finished, and the drone LED light becomes steady.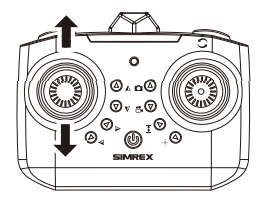
Step 4: Always turn off the Power Switch after the flight. Note: Long-press to turn on/off.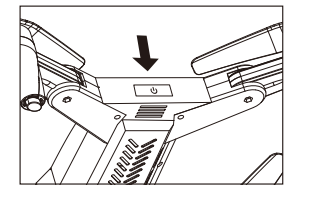
Step 5: Always turn the controller off after flight, and remove all batteries if not used for a long period of time.
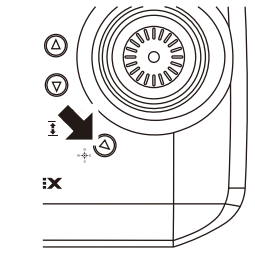
Power SwitchFirst Flight
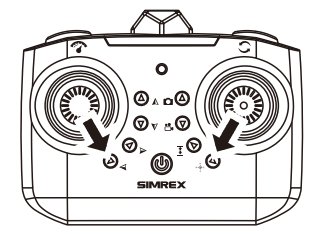
Push both levers to the position shown in the figure and hold for a few seconds. When the propeller on the plane starts to turn indicates that it has been turned on.
Auto-Hover
Press the “take-off /Land “button (1) once, the aircraft automatically goes up tothe air band and stays at a height of around 1.5 meters. After that, push the left stick to keep the drone at any height youwants. Press the “take-off /Land “button again, the drone will slowly go down to the floor, and finally, the motors stop spinning.
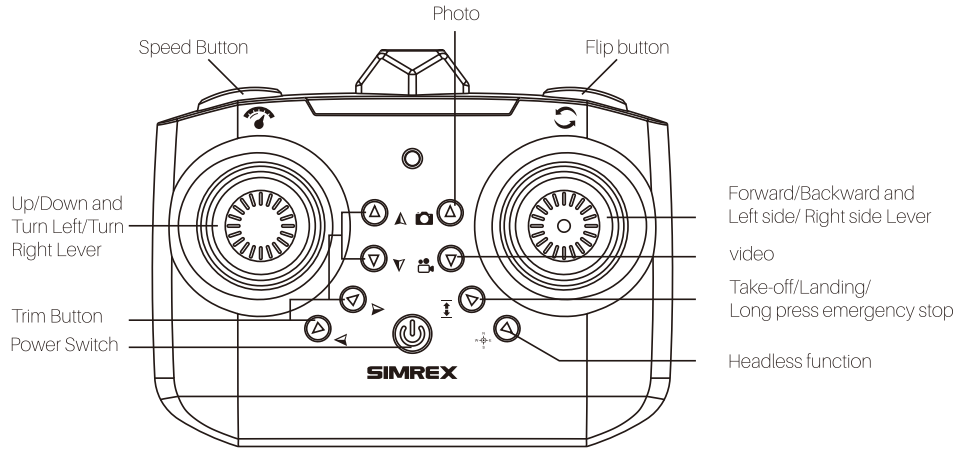
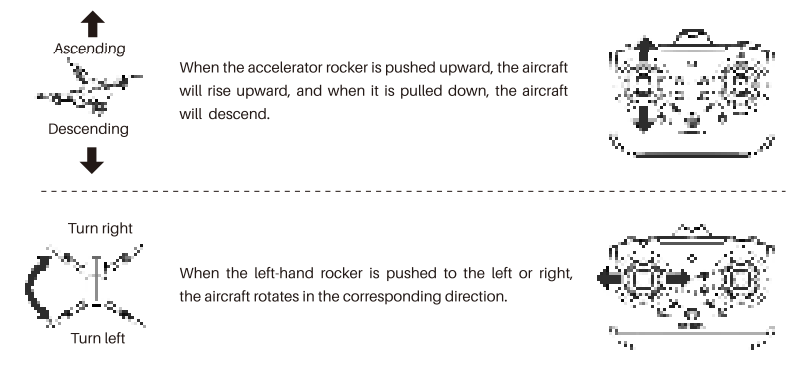
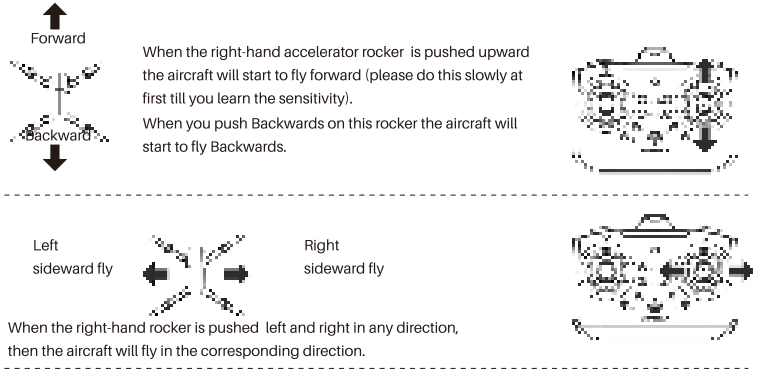
Flight Control
Please use the controller to practice simulated flights before you actually take the drone in the air for the first time. Place the Simrex X500 on a flat surface, make sure the camera is facing you, and keep the distance.
Adjustment
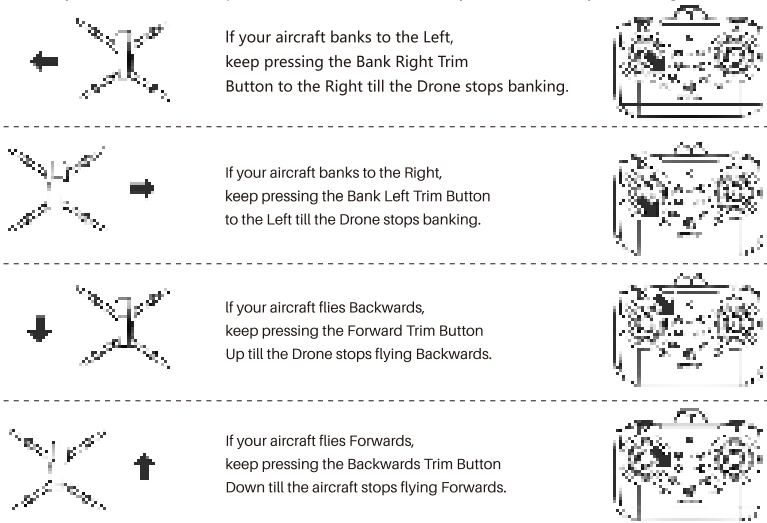
When you lift your aircraft into the air, don’t use any other direction lever; your aircraft should simply hover in one spot without moving in any other direction. If it doesn’t, you can follow the instructions below to TRIM your aircraft back to a perfect hover. TRIMMING is always needed before your first flight
How To Use
- Make sure the aircraft is flying at least 3 meters above the floor, or 3 meters below the ceiling.
- Press the Flip button on the controller. The controller will make\ a”Beep” sound.
- When the right-hand rocker is pushed to the right and released, the aircraft will roll to the right.
- When you want itto rolls to the left, push the rocker to the left.
- You may need to push the Up/Down Lever upward after the flip, if your battery is low on power, to keep the aircraft altitude in the air after the flip.
Features
SPEED CONTROL: Simrex-X500 has two speed control modes. When you first turn on your aircraft, it is set to low speed. When you press the SPEED BUTTON, you will hear TWO beeps and thehigh-sthe high-speedll be switched. Pressing again will bring you back to low speed, and you will hear ONE beep. High and low speed mode allows you to better control the flight speed. 12.0 HEADLESS MODE
Headless Mode
Press and release the button in, indicating that headless mode is activated and the aircraft will switch on. After take-off, no matter in which direction, as long as you push the front rocker, the head ofthe drone will fly in the take-off direction, not according to the camera’s shooting direction.
Replacing Blades & Fixing Issues
BLADE REPLACEMENT: The propeller of your aircraft is very strong, but sometimes it may be damaged in a severe impact. There is a spare propeller box in the package. Always replace with the propeller in the corresponding position.
- The most common reason is that the plane can’t lift or fly correctly in the direction you choose because there are hairs and debris around your blades.
- This can be solved simply by removing the blade.
- Remove the debris and put the blade back in place.
- The batteries in either the aircraft or the controller may need to be charged or replaced.
- You may have knocked your Trim Button settings out of sync.
- Follow the instructions earlier in this booklet to reset them back to the factory settings, and then re-trim as desired.
Safe Flight Environment
- Make sure the surrounding area is free of all people, pets,s or other obstacles before you start to fly.
- Do not use this aircraft in a strong wind environment.
- KEEP 1.5 meters away between you and the aircraft at all times.

Please keep away from crowds, trees, wires, tall buildings, airports, and signal towers when using. Radio transmission towers, high-voltage lines, substation,s and large pieces of metal with magnetic properties may interferwith e remote control signals and compasses, threatening flight safety. 
Do not touch the propeller in working rotation, otherwise it may be seriously damaged to persons and property.
It’s important to understand basic flight guidelines for the safety of both you and those around you. Don’t forget to read the Safety Guidelines before the light.
Configuration
FCC Statements
This device complies with part 15 of the FCC Rules. Operation is subject to the following two conditions: (1) This device may not cause harmful interference, and (2) this device must accept any interference received, including interference that may cause undesired operation.
Any Changes or modifications not expressly approved by the party responsible for compliance could void the user’s authority to operate the equipment. We implement a variety of security measures to maintain the safety of your personal information when you place an order or enter, submit, or access your personal information.
Warranty
30-Day Money-Back Guarantee for Any Reason
SIMREX provides a 30-day money-back guarantee for any reason. For 30 days after the date of purchase, return your undamaged SIMREX product and receive a full refund for any reason. Once the returned item arrives back in SIMREX’s warehouse for inspection, the refund process will begin. You must return all accessories, including original packaging.
How do I return an item?
- Please contact our customer service support team first.
- State the reason for the return and provide an invoice or screenshot to confirm the order number.
- Then our customer service support team will share the corresponding return address with you.
At last, please send a return notification to SIMREX with the following information:
- Name of the courier
- Tracking number
How long does it take to get a refund?
Refunds will be issued once we receive your returned product and confirm that there is no problem. The refund will be credited back using the same method as when your initial order was made. This process takes about 3-5 days.
Customer Support
- Website: https://simrexstore.com/