
![]()
Wimius k1 8000 Lumen Video Projector
Safety Precautions
- Clean the projector when it’s clean. Please pull out the power cable. Use a wet cloth to clean; don’t use any detergent that may damage the unit.
- Accessory: Please use our recommended accessory. Or it will damage the projector.
- Correct environment: Do not place the projector in a wet environment, like a damp basement or near the swimming pool, etc.
- Ventilation: The ventilation is equipped for the projector to work stably. Do not put anything around the vents. Or it will cause the projector to heat up. To ensure the stability of heat dissipation, please open the height bracket at the bottom of the projector before starting.
- Power: Please make sure the power is within the required power range.
- Thunder for thunder day, please unplug the power cable from the projector.
- Repair: Due to high voltage inside, please do not open or try to repair the projector by yourself. Please ask a professional technician to repair the projector.
- Keep away from heat devices. Please make sure the projector is far away from any heat devices, which can damage the projector.
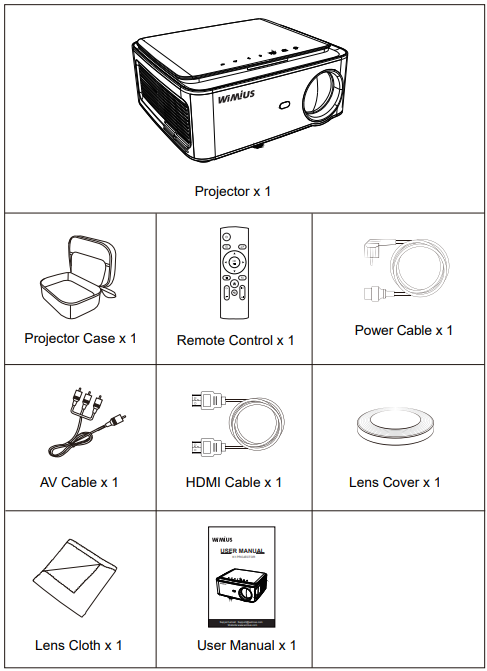
Accessories
Product Overview
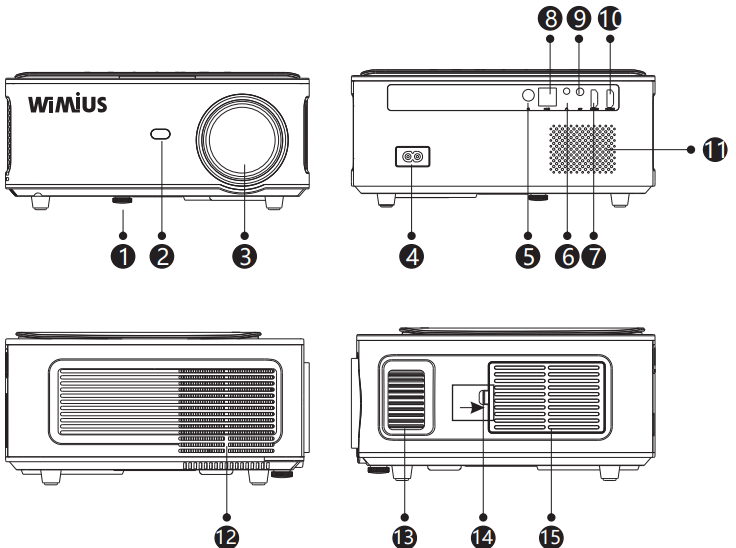
- Level-Stand Adjustment
- IR receiver
- Focus Lens
- Power port
- IR for remote control
- 3.5mm audio output
- HDMI 1 port
- USB port
- AV port
- HDMI 2-port
- Keystrokes(picture 1)
- Rating label
- Projector mount holes
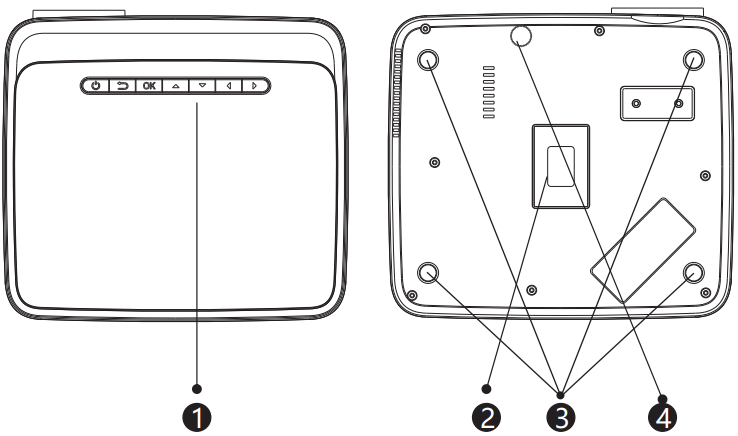
- Level-stand adjustment
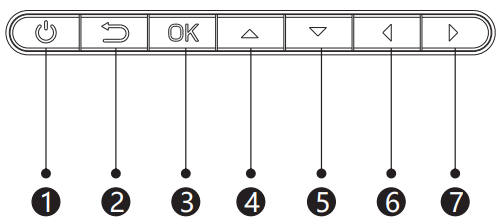
- Power Key
- Exit
- OK Key
- Up Key
- Down Key
- Left Key
- Right Key
Remote Control
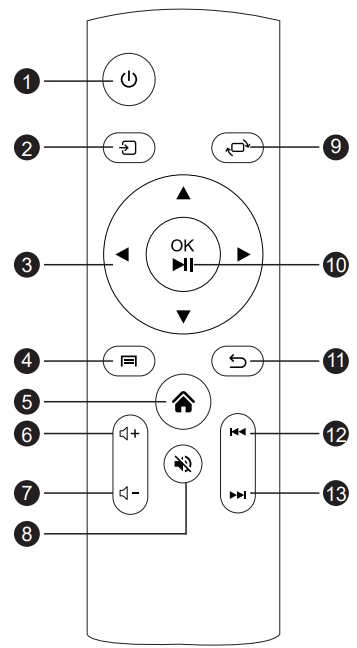
- Power
- Source
- Arrow keys
- Menu
- Homepape
- Volume +
- Volume –
- Mute
- Picture flip
- Confirmation key (Play and Pause)
- Return
- Previous (Video)
- Next (Video)
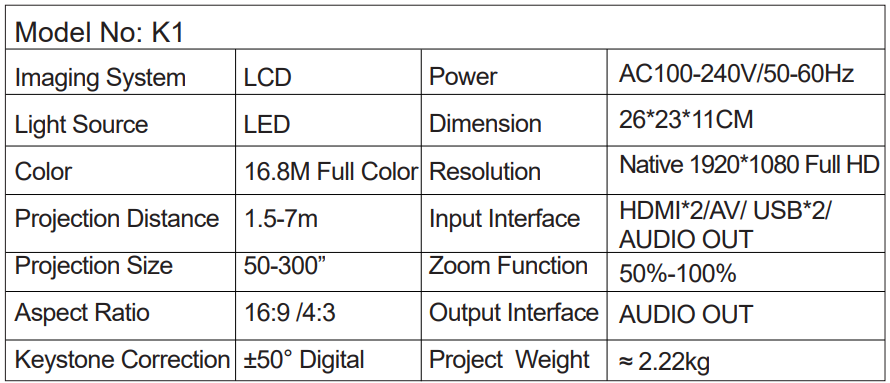
Specifications
Projection Size Chart
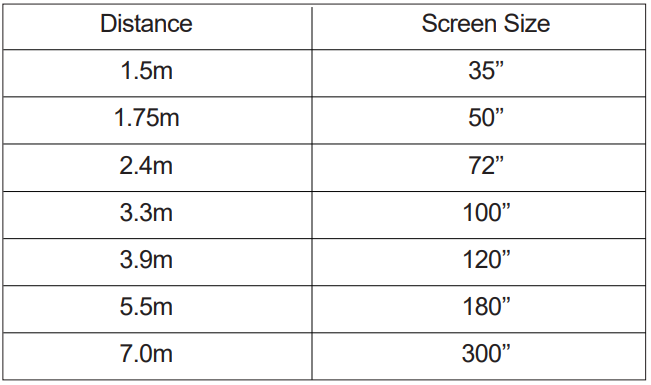
Please allow ± 3% to the image sizes in the table above. If the distance is less than min data and more than max data, the image could be blurry.
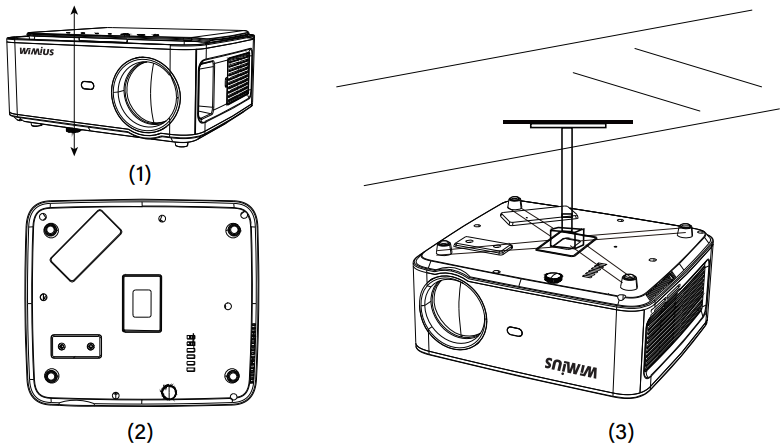
Projector Installation
- We provide a screw in the packaging. There is a screw hole at the bottom of the projector. You can install it to lift the base of the projector on the plate to get a better projection angle. See below(1).
- For the ceiling mount, there are 4 holes at the bottom of the projector(M5*16mm). Please slowly rotate it out first. See below(2)(3).
Operating Instructions
- To get a better watching experience, please use it in a dark or semi-dark room.
- Please use the projector carefully; dropping or crashing it may damage parts or result in blurred images and abnormal display.
Getting Started
- Remove the lens cap, connect the projector to the power through the power supply cable, and it will start working.
- Then the boot screen appears, like the picture.
Adjust the keystone correction first.
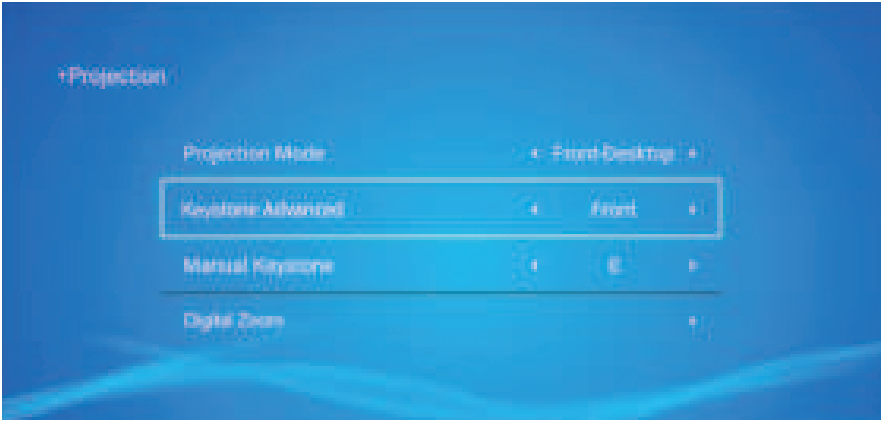
How to Use Projection Settings: Select the settings icon in the upper right corner of the main interface, and then press the “OK” key on the remote control to enter the settings interface and select “Projection Image Setting”. After entering the interface, select the mode you want in the projection settings, then adjust the keystone as you want.
Vertical Keystone
When you choose “Keystone Advanced: Front”, you can adjust Manual Keystone (Vertical )between ±50°, just press the button to set the value.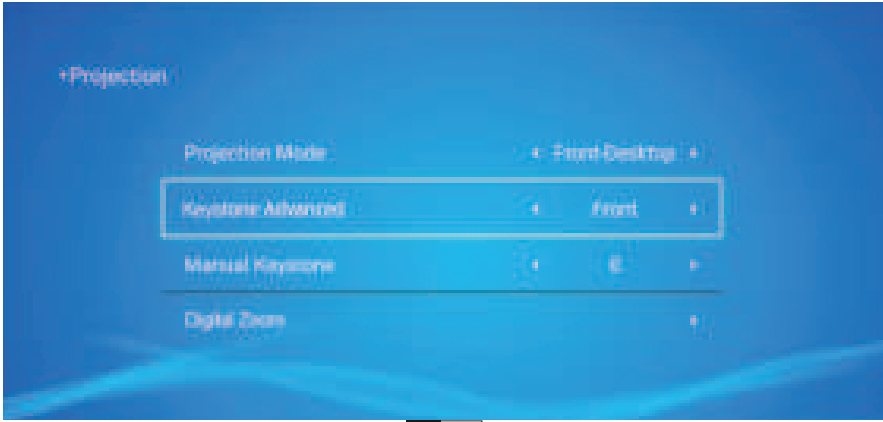
Horizontal Keystone
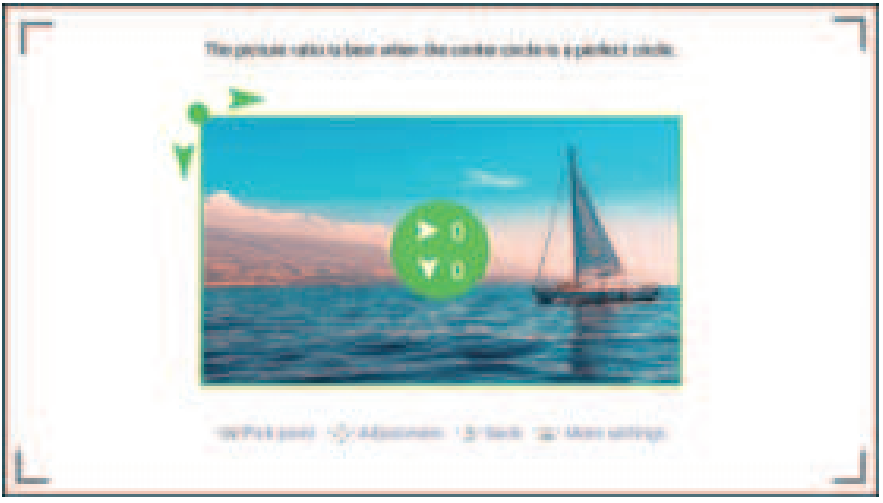
When you choose “Keystone Advanced Side”, you can set “4-point Keystone” as your need: Horizontal Value ±64, Vertical Value from±36. Just click the “OK” button to pick the point you want to adjust at first, and then press the” ” button or “▼ ” to set the value needed as shown below.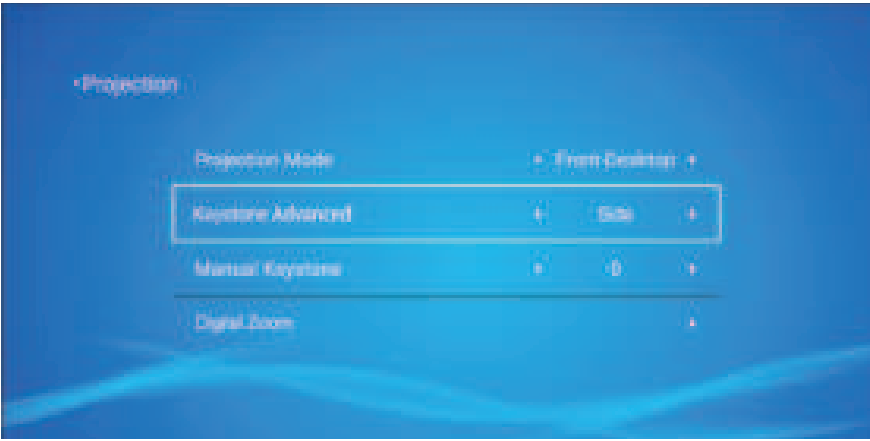
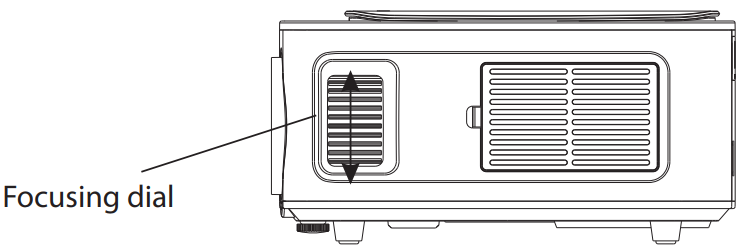
Focus Adjustment
Horizontal Keystone When you choose “Keystone Advanced Side”, you can set “4-point Keystone” as your need: Horizontal Value ±64, Vertical Value from±36. Just click the “OK” button to pick the point you want to adjust at first, and then press the” ” button or “▼ ” to set the value needed as shown below. Turn the trackwheel clockwise to bring the trackwheel to the end, then slowly rotate the trackwheel counterclockwise. At the same time, carefully observe the pixels on the screen. When the image particles are the clearest (Subject to the middle of the image), the pixels on the screen are the best focus of the lens.
Just operate through the remote control: Press “ ” and then press ” ” or ” ▲ ▼ ” to choose the corresponding signal input channel, then press “OK’’ to confirm.
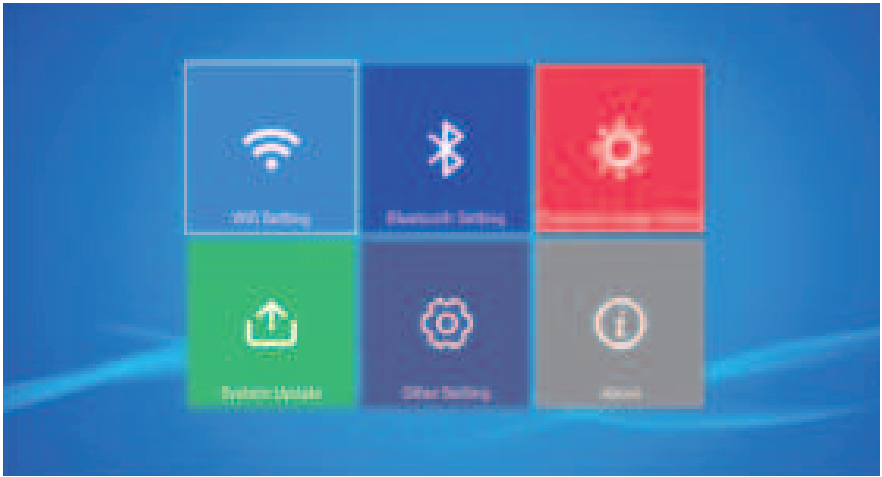
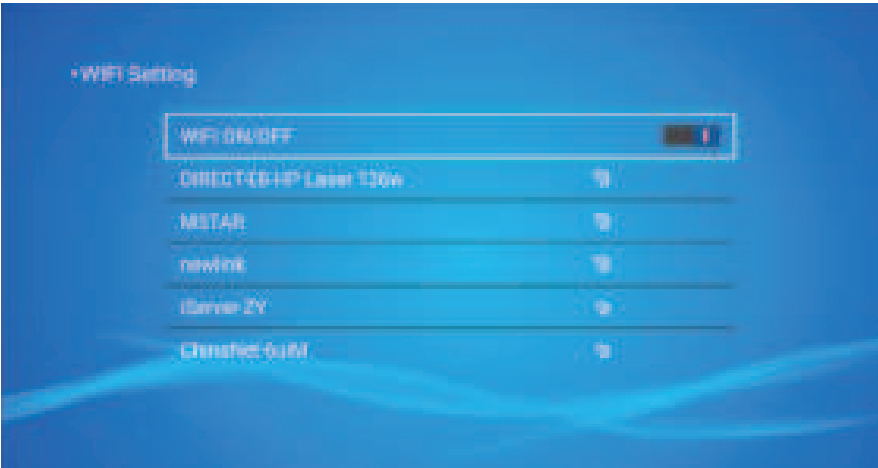
How to Use WiFi Settings
Select the settings icon in the upper right corner of the main interface, and then press the “OK” key on the remote control to enter the settings interface and select “WiFi Setting”.
- Turn on the WiFi settings of the projector.
- Choose your Home WiFi to connect and enter the right password, then click “Done” to connect. Please wait 3-5 seconds to establish the connection. Once connected, it will remember the password of the connected WiFi.
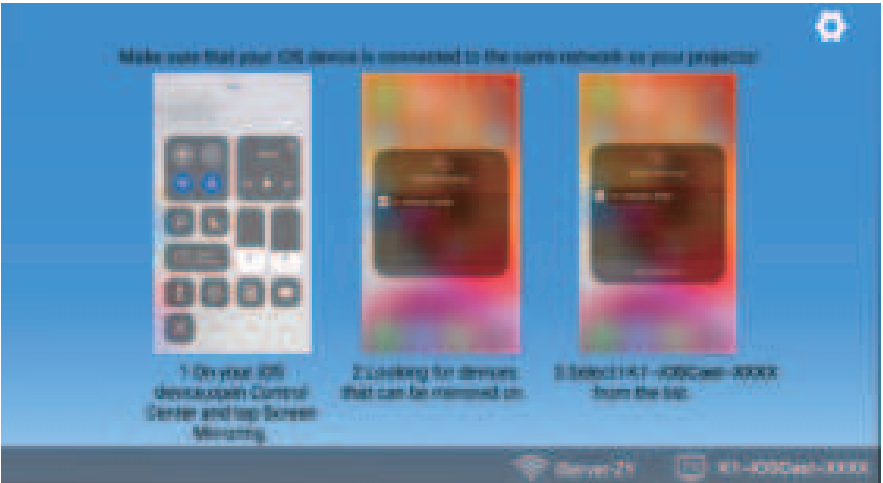
- Turn on the WiFi setting of your IOS mobile device, then connect it to the same Home WiFi as the projector.
- Then click“IOS Cast” as the Input Source of your projector.
- Swipe up the screen of your iOS mobile device and tap “Screen Mirroring” to search for the projector, then select“WiMiUS-K1Projector” from the search results to connect.
- Succeed.
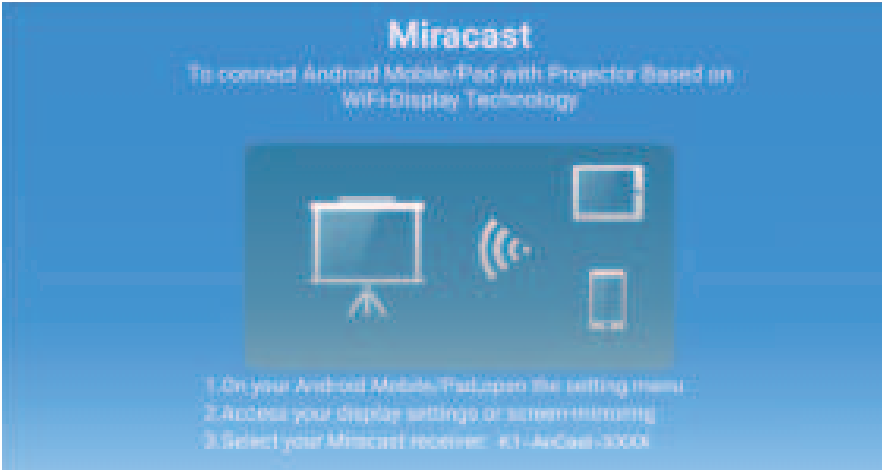
For Android System
To activate this function, your Android device must support Multi-Screen/Wireless Display. The name of “Multi Screen” may vary depending on various brands of Android devices.
Setting with mobile internet
- Turn on the projector, select “Miracast” as the Input Source.
- Turn on the “Multi-Screen/Wireless Display” of your Android device.
- Select “WiMiUS-K1Projector” from the search results to connect.
- Succeed.
Setting with Home Wi-Fi
- Turn on the WiFi settings of your projector.
- Choose your Home WiFi to connect and enter the right password, then click “Done” to connect. Please wait 3-5 seconds to establish the connection. Once connected, it will remember the password of the connected WiFi.
- Turn on the WiFi setting of your Android mobile device, then connect to the same Home WiFi as the projector.
- Select “MiraCast” as the Input Source of your projector.
- Swipe up the screen of your Android mobile device and tap “Wireless Display” (or turn on it in your settings)to search for the projector, then select “WiMiUS-K1 Projector” from the search results to connect.
- Succeed.
Connecting with Bluetooth Speaker
- Turn on your Bluetooth Speaker.
- Turn on the Bluetooth settings of your projector.
- Select your Bluetooth speaker to connect.
- Succeed.
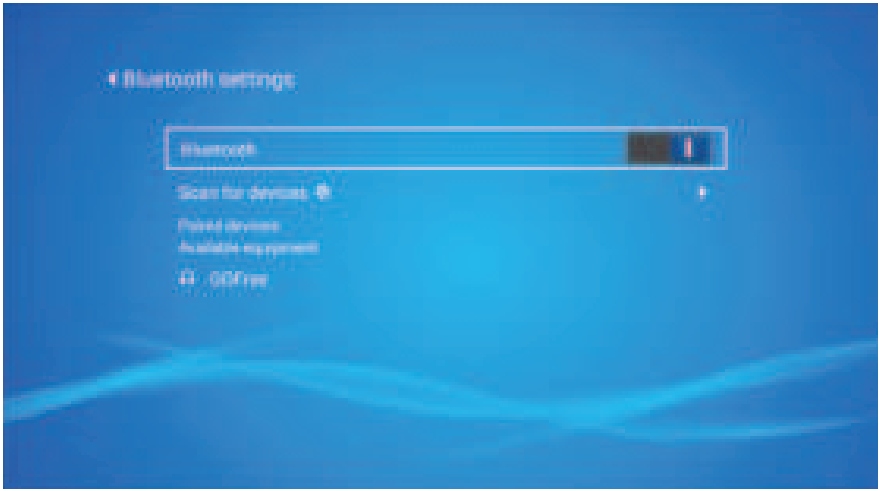
Compatible with Bluetooth speakers, Bluetooth Headphones, iPhone Airpods, Bluetooth Earbuds, Bluetooth Earphones.
Other connections
- Connect the projector to the PC with PC by HDMI cable.
- Choose the media signal channel: “HDMI.”
USB Multimedia Connecting
For the USB devices, no need to choose the signal source. The machine will detect them automatically.
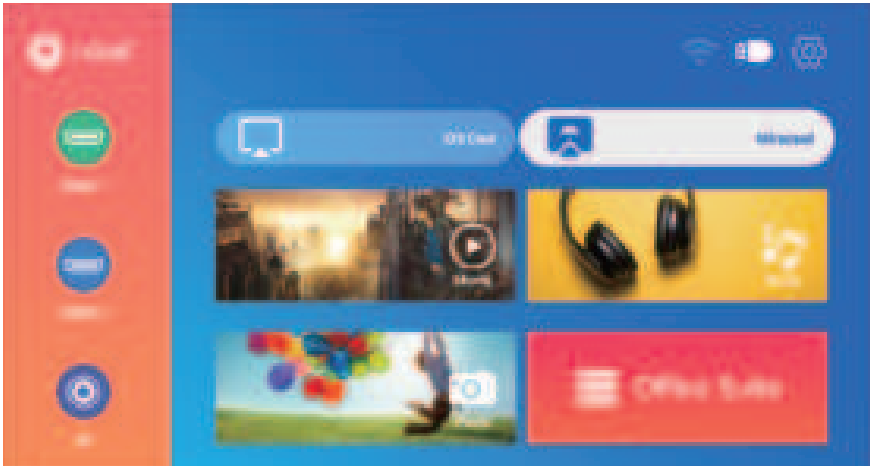
- Select the required category “movie”, “music”, “photo”, or “Office Suite” in the main interface, and press the “OK” key on the remote control to enter the corresponding category.
- According to the programs to choose “photos, “music, “movie,” or “Office Suite”.
- Choose the file you want to play, press the key “OK” to play or pause the file. (You cannot enter the required category without connecting a USB disk.)
Connecting with a MacBook or MacBook Air
- Choose the media signal channel: “HDMI.”
- Use a Type-C to HDMI adapter to connect your MacBook, or a Mini Display to HDMI adapter to connect with your MacBook Air (adapter not included).
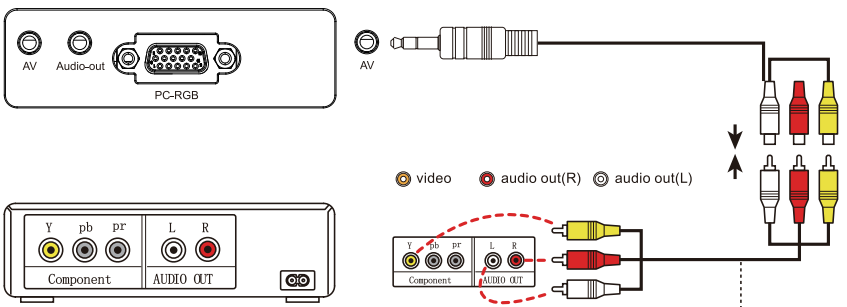
- Use the AV cable coming with the projector to connect to the sound bar.
- Turn on the projector and the sound bar.
- For more details, please contact the seller at support@wimius.com
- Use the AV cable coming with the projector to connect to the DVD.
- Turn on the projector and DVD player.
Connecting with the Amazon Fire TV Stick
- Plug the TV stick into the HDMI port of the projector.
- Choose the media signal channel: “HDMI..”
- Choose the media signal channel: “HDMI..”
- Use an HDMI cable to connect to XBOX/PS4
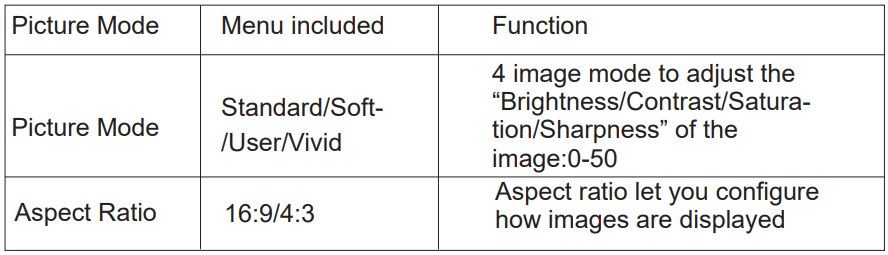
Main Menu Function
Press “ ” and then select the setting on the remote control to make some personal settings.

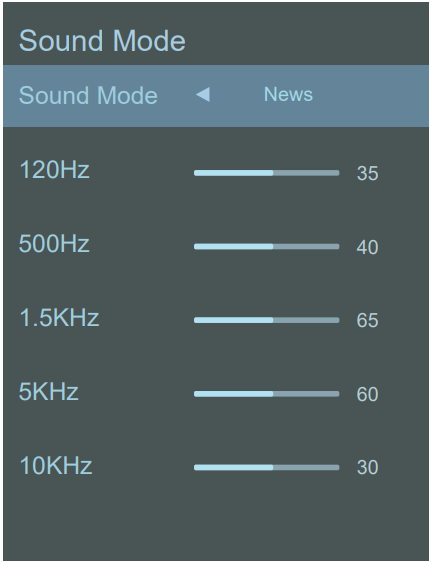
Sound Mode
Only when you play the video do you get the “Sound Mode”.
Projection Image Setting
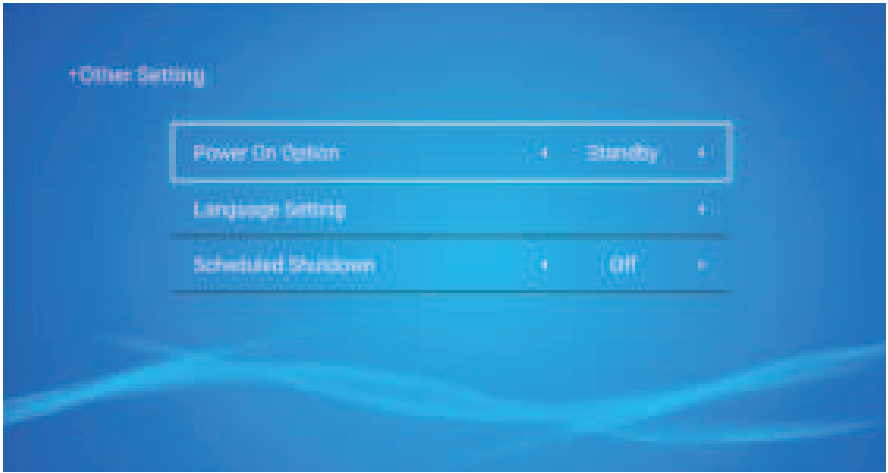
Other Setting
About the version of the system
Customer Service
-
- Website: www.soomfon.com
- Ph: +86-755-2357 1211