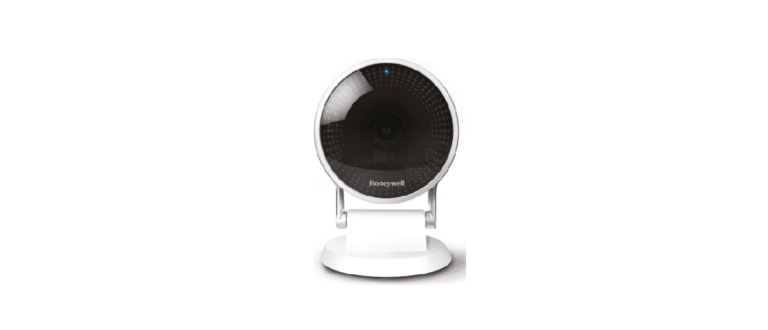
Honeywell RCHC4400WF1013 Wi-Fi Security Camera
Installation
- Make sure Bluetooth is enabled on your mobile device.
- Search for Honeywell Home in the App Store or Google Play.
- Download the Honeywell Home app.
Launch the Honeywell Home app
- Launch the Honeywell Home app.
- Create an account (if necessary) or sign in to your Honeywell Home account. Tap ADD DEVICE or the plus sign.
- Select the C2 Wi-Fi Camera to install, then follow the instructions in the Honeywell Home app to name the camera and its location.
Connect the power cord
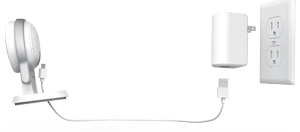
- Plug the power cord’s micro USB end into the camera.
- Plug the power cord’s USB end into the wall outlet adapter, and plug your camera into a power outlet.
- Wait until the LED on the camera blinks blue (about 1 minute), then tap NEXT.
Connect
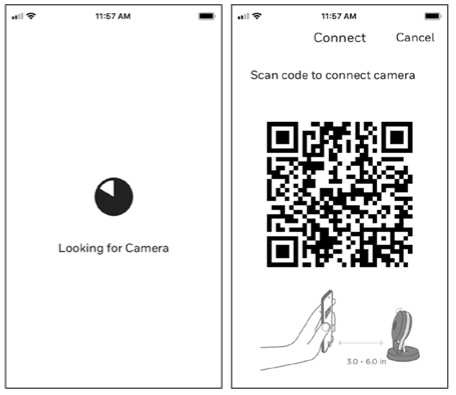
- Enable Bluetooth on your mobile device.
- The app will look for the camera.
- For one camera, it will connect automatically.
- For more than one camera, the app will prompt you to select one camera at a time.
- Each camera has a unique MAC ID printed on the back.
- Use that ID to select the camera you want to connect.
- A QR code will display in the app. To connect your camera to the app, hold the QR code approximately 3-6 inches (7-15 cm) from the camera lens.
- The camera LED turns purple and the camera beeps.
Wi-Fi
Be sure you are on the same Wi-Fi network you wish to connect your camera to.
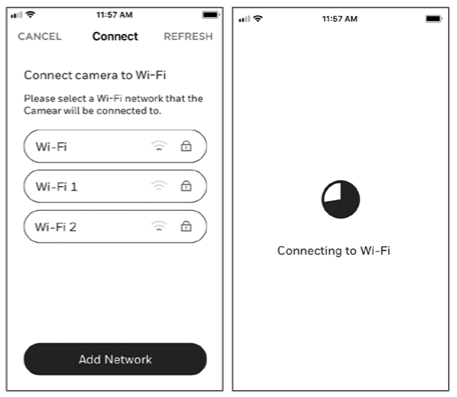
- Choose your Wi-Fi network from the list. Tap NEXT.
- Enter your Wi-Fi password, if necessary. Tap DONE.
Wi-Fi Connection LEDs
During Wi-Fi connection, the LED indicates the following.
| LED | Camera state |
| Blinking Green | Connecting to the Wi-Fi network. |
| Solid Green | Connected to Wi-Fi network. |
| Solid Red (for 2 seconds) | Connection failed. LED will then turn solid purple. |
| Solid Purple | QR Code scan complete. Go to “Connect to Wi-Fi” on page 3. |
| Blinking Blue | The camera has lost Bluetooth connection. Unplug the camera and plug it back in. See “Connect the power cord” on page 2 for instructions. |
Options
Choose your Geofencing and Honeywell Home Membership options (if you skip them, you can change them easily later).
Placement
With Stand
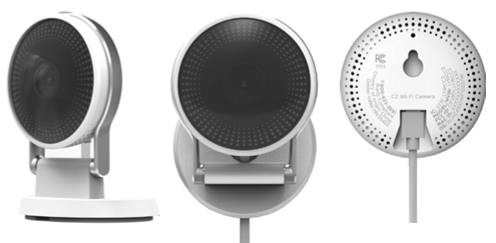
- Place the camera in a desired location for viewing and recording.
On the Wall
- You can also mount the camera directly to the wall without the stand.
Operation
When you launch the application, your Home screen is displayed. All of your devices (cameras, thermostats, water leak detectors, etc.) are displayed. Select a camera from the list to view live video from that camera.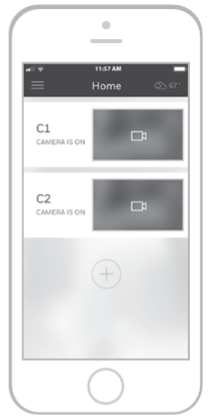
Testing smoke/CO alarm detection
- If your smoke or carbon monoxide alarm goes off and your camera is on, it will send you an alert that a smoke or CO alarm has been detected.
- To test this feature, press and hold the Test button on your smoke/CO detector for at least 5 seconds or 3 cycles of the detector’s alarm. A shorter test might not trigger a sound event.
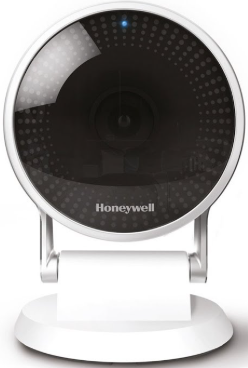
Camera Overview
Reset
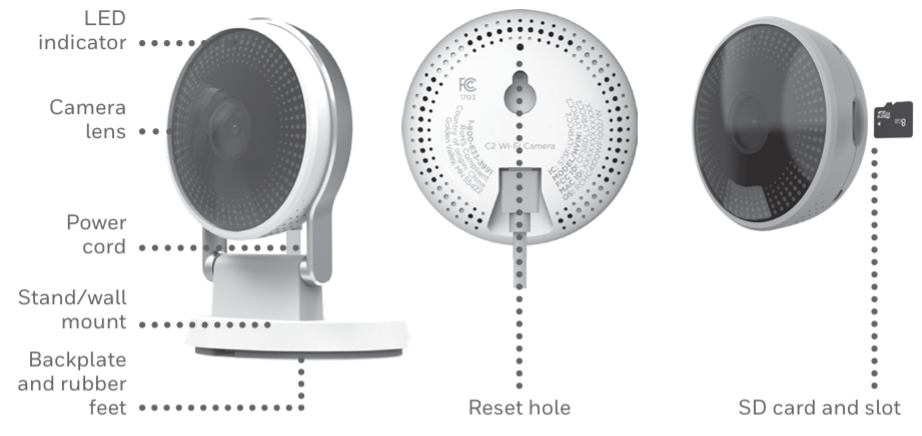
If your Wi-Fi connection fails or you need to connect to a different Wi-Fi network, insert one end of a paperclip into the reset hole. Press and hold it for 10 seconds until you hear a chirp.
SD card
- The camera comes with an encrypted 16GB SD card installed. It stores images if the camera’s connection to the cloud is lost. You can replace it with any compatible SD card.
Status LED
- The camera has an LED that gives the evice status.
| LED | Camera state |
| During installation | |
| Blinking Blue | Powered up. Ready to begin setup. |
| Solid Blue | Connected to the app. Ready to complete setup. |
| Solid Purple | QR Code scan complete. Go to the Connect to Wi-Fi process. |
| Blinking Green | Connecting to the Wi-Fi network. |
| Solid Green | Connected to the Wi-Fi network. |
| Solid Red | The setup timed out. Unplug the camera, plug it back in, and restart the process. |
| During operation | |
| Blinking Green | Connecting to the Wi-Fi network. |
| Solid Green | Connected to Wi-Fi and operating. |
| Blinking Red | Not connected to Wi-Fi. |
FCC Regulations
This device complies with part 15 of the FCC Rules. Operation is subject to the following two conditions:
- This device may not cause harmful interference.
- This device must accept any interference received, including interference that may cause undesired operation.
Changes or modifications not expressly approved by the party responsible for compliance could void the user‘s authority to operate the equipment.
This equipment has been tested and found to comply with the limits for a Class B digital device, pursuant to part 15 of the FCC Rules. These limits are designed to provide reasonable protection against harmful interference in a residential installation.
This equipment generates, uses, and can radiate radio frequency energy and, if not installed and used in accordance with the instructions, may cause harmful interference to radio communications. However, there is no guarantee that interference will not occur in a particular installation.
If this equipment does cause harmful interference to radio or television reception, which can be determined by turning the equipment off and on, the user is encouraged to try to correct the interference by one or more of the following measures:
- Reorient or relocate the receiving antenna.
- Increase the separation between the equipment and receiver.
- Connect the equipment into an outlet on a circuit Honeywell RCHC4400WF1013 Wi-Fi Security Camera different from that to which the receiver is connected.
- Consult the dealer or an experienced radio/TV technician for help.
For products available in the USA/Canada market, only channels 1–11 can be operated. Selection of other channels is not possible. This device is restricted to indoor use.
FCC Statement
- This equipment complies with FCC radiation exposure limits set forth for an uncontrolled environment.
- This equipment should be installed and operated with a minimum distance of 20cm between the radiator and your body.
- This device and its antenna(s) must not be co-located or operating in conjunction with any other antenna or transmitter.
IC Regulations
This device contains license-exempt transmitter(s)/receiver(s) that comply with Innovation, Science and Economic Development Canada’s license-exempt RSS(s). Operation is subject to the following two conditions:
- This device may not cause interference.
- This device must accept any interference, including interference that may cause undesired operation of the device.
- This device is restricted to indoor use.
IC Statement
- This device complies with IC radiation exposure limits set forth for an uncontrolled environment.
- This device should be installed and operated with a Honeywell RCHC4400WF1013 Wi-Fi Security Camera minimum distance of 20cm between the radiator and your body.
- This device and its antenna(s) must not be co-located or operating in conjunction with any other antenna or transmitter.
Customer Support
- Web: resideo.com
- Phone: 1-800-633-3991
- For a list of compatible alarms, see Resideo.com.
The operation of this equipment is subject to the following two conditions:
- This equipment or device may not cause harmful interference.
- This equipment or device must accept any interference, including interference that may cause undesired operation.
The product should not be disposed of with other household waste. Check for the nearest authorized collection centers or authorized recyclers. The correct disposal of end-of-life equipment will help prevent potential negative consequences for the environment and human health.
FAQs
What type of camera is the Honeywell RCHC4400WF1013?
This Wi-Fi-enabled indoor security camera has two-way audio, motion detection, and cloud/local storage choices for remote surveillance.
Can I access the camera remotely?
Indeed. You can use your smartphone or tablet to view live video from any location once you’re connected to Wi-Fi and the Honeywell Home app.
Does the camera support motion detection alerts?
Indeed. To get alerts whenever motion is detected within the camera’s field of vision, you can activate motion alerts in the app.
Can the camera see in the dark?
Indeed. Up to its designated range, the camera’s infrared night vision allows it to record video in low light.
Can I use multiple cameras on one app?
Indeed. You may add and control several cameras at once with different settings using the Honeywell Home app.
Can I communicate through the camera?
Indeed. You may speak and listen in real time through the app thanks to the camera’s two-way audio capabilities.
Can I schedule recording times?
Indeed. In order to conserve storage, the camera can only record during designated hours thanks to the app’s customisable recording schedules.
What is the warranty period?
For precise information, refer to the handbook or purchase paperwork. Honeywell usually provides a limited warranty of one to two years.


