


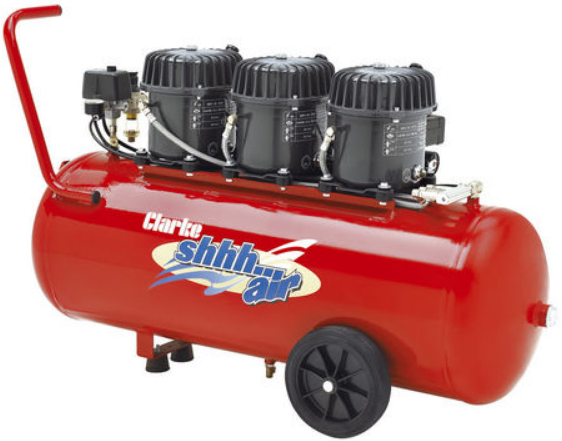
Clarke SHHH24/150 Low Noise Air Compressor
Introduction
Thank you for purchasing this CLARKE Air Compressor. Before attempting to operate the machine, it is essential that you read this manual thoroughly and carefully follow all instructions given. In doing so, you will ensure the safety of yourself and that of others around you, and you can also look forward to the product giving you long and satisfactory service.
Safety Instructions
- Keep the work area clean and well-lit. Floors should always be kept clear. Cluttered or dark areas invite accidents.
- Keep children and bystanders away while operating a power tool. Distractions can cause loss of control.
- ALWAYS stay alert, watch what you are doing and use common sense when operating the compressor. A moment of inattention can result in personal injury.
- ALWAYS protect yourself against electric shock. NEVER operate the compressor in wet locations.
- NEVER over-reach. Keep your proper footing and balance at all times to enable better control of the compressor in unexpected situations.
- NEVER attempt any complex repairs yourself. If you have a technical problem, contact your local dealer.
- ALWAYS store the compressor out of reach of children.
- ALWAYS protect your hearing. Ear protection should be worn when operating this compressor and its associated power tools.
- NEVER direct the air stream at people or animals, as injury may result. Compressed air can cause soft tissue damage and propel dirt and other particles at high speed.
- NEVER insert your fingers or other objects inside the motor housing. NEVER operate the compressor without the cover in place.
Use & Care
- Before use, all operators should become familiar with the instructions in this booklet, especially the ON/OFF switch for emergency stopping.
- ALWAYS maintain the compressor with care and keep it clean for the best / safest performance
- NEVER use this compressor if any part is damaged. Have it inspected and repaired by your dealer.
- NEVER attempt to modify the air compressor, tank, fittings or attachments in any way. Doing so will invalidate the guarantee and could result in personal injury.
- NEVER abuse the power cable. NEVER pull on the cable when removing the plug from the socket, or lift the compressor by the power cable.
- Try to AVOID using extension leads. Where possible, use a longer airline hose instead.
- If you have to use an extension lead. ONLY use one that is of an appropriate power rating and suitable for the work environment. Extension leads must have an earth connection. Inspect the extension lead regularly and replace it if damaged.
- ONLY USE RECOMMENDED PARTS: To avoid the risk of bursting, only hoses with a rated pressure of 10 bar or more should be used. NEVER attempt to repair damaged hoses.
- NEVER abuse the compressor by standing on it.
Electrical Connections
Before switching the product on, make sure that the voltage of your electricity supply is the same as that indicated on the rating plate. This product is designed to operate on 230VAC 50Hz. Connecting it to any other power source may cause damage.
- The Blue wire must be connected to the terminal marked N or coloured Black.
- The Brown wire must be connected to the terminal marked L or coloured Red.
- The Yellow and Green wires must be connected to the terminal marked R or coloured Green.

We strongly recommend that this machine be connected to the mains supply via a Residual Current Device (RCD). If in any doubt, consult a qualified electrician. DO NOT attempt any repairs yourself.
Overview

Description
- Drain Valve
- One-Way Check Valve
- Discharge Pipe
- Tank Pressure Gauge
- Outlet Pressure Gauge
- 2 x 1/4” BSP Airline Outlet Fixing Point With Tap
- Regulator
- On/Off Pressure Switch
- Air Filters
- Safety Valve
- Pump
- Air Tank
ON/OFF Pressure Switch
Switch on – Auto/Off. The compressor will automatically switch off when the tank pressure reaches the maximum preset pressure (0.8MPa, 8 Bar, 116psi) and will run automatically when the tank pressure reaches the minimum preset pressure (0.6MPa, 6 Bar, 87psi). In the ‘OFF’ position, the compressor will not operate. This switch should be in the ‘OFF’ position when connecting or disconnecting the power cord from the electrical outlet or when changing air tools.

Regulator
- The regulator adjusts the air pressure to fit an air-operated tool, spray gun, or sandblaster.
- To adjust the outlet air pressure, turn the regulator clockwise or counterclockwise to suit the type of tool you are using.
Safety Valve
- This valve will automatically release compressed air when the pressure in the tank exceeds the allowed pressure.
Discharge Pipe
- This pipe connects the pump head to the check valve. CAUTION: It is hot when the compressor is running.
Check Valve
- The check valve is a one-way valve that allows compressed air to enter the tank but prevents compressed air in the tank from back into the pump.
Drain Valve
- This valve, located at the bottom of the tank, is used to exhaust water from the tank.
- Make sure the pressure gauge of the tank is below 1 Bar to open it.
- Open the drain valve to exhaust water in the tank, closing it tightly.
Pressure Gauges
- There are 2 pressure gauges on this type of compressor, one shows the pressure in the tank and the other shows the outlet pressure after the regulator has been set.
Preparing For Use
- Unscrew the nut and two washers from the wheel axle.
- Pass the wheel axle through the axle hole in the wheel support frame, as shown, with a washer on either side of the hole.
- Replace and tighten the nut onto the axle.

- Unscrew the nut and washers from the rubber foot.
- Place the rubber foot bolt through the foot support mount on the underside of the air tank, as shown.
- Replace the washer and nut onto the bolt and tighten.

Fitting the Airfilter
- Remove the transit plugs from the air filter inlets.
- Screw the air filters into the inlets, as shown.

Operation
- Firstly, ensure the compressor is on level ground. DO NOT allow it to run if it is standing on an incline.
- Check that the mains voltage corresponds with that shown on the data label on the side of the compressor and the specification page (p18) of this manual.
- The ON/OFF switch is in the OFF position.

Starting the Comperessor
- Turn the regulator fully clockwise (+) to open the airflow, making sure the flow taps are in the closed position.
- Push the ON/OFF switch to the ‘OFF’ position and plug in the power cord.
- Pull the ON/OFF switch to the On (Auto) position and let the pump run.

- Turn the regulator fully counterclockwise. The compressor will build up to the maximum preset pressure and then shut off.
- Turn the regulator clockwise to bleed off the air. The compressor will restart at a preset pressure (about 6 bar).
- Turn the regulator counterclockwise to shut off the air and push the ON/OFF switch to the ‘OFF’ position.
- Attach the airline and tool to the airline outlet and turn the flow taps to the open position, and pull the ON/ OFF switch to the ON/AUTO position.
NOTE: When finished with the compressor, ALWAYS release any unused compressed air in the system.

Compressed Air
Moisture in the air will change to water when the air is compressed or the temperature drops. When humidity is high or when the compressor is in continuous use for Clarke SHHH24/150 Low Noise Air Compressor a long time, water will collect in the tank. If you use a paint spray or sandblast gun, moisture will be carried from the tank through the airline and mixed with the spray material.
This condensation will cause water spots in a paint job, especially when spraying other than water-based paints. If sandblasting, it will cause the sand to clog the gun, Clarke SHHH24/150 Low Noise Air Compressor rendering it ineffective. To reduce these effects, a dry filter in the airline (see page 23), located as near to the gun as possible, will help eliminate this moisture.
Safety Valve
The safety valve should be checked under pressure occasionally by unscrewing the knurled head of the valve and pulling it out. If there is air leakage after releasing the valve head or the valve is stuck and can’t be activated or closed, it MUST be replaced before using the compressor.
NOTE: ALWAYS remember to screw the valve head back in place once tested.

Other Products
1/4” Mini Air Filter – CAT152
- Max. Flow Rate: 6.2 Bar
- Max. Supply Pressure: 10 Bar
- Part No. 3120166

5 Piece Air Tool Kit – KIT1100
- Includes: Spray Gun, Wash Gun, Tyre Inflator, Blow Gun & 5m Recoil Hose
- Part No. 3110157

Sandblast Kit & Pick Up Hose – SB4
- Includes: 3m Suction Hose
- 80 -100 PSI Working Pressure
- Part No. 5091103

Retractable Air Hose Reel – CAR15MC
- 15m Rubber Air Hose
- Supplied With Wall/ Ceiling Mounting Bracket
- Part No. 3126100

3 Piece Air Brush Kit – CAB
- Includes: 2 x Glass Jars, 1 x Metal Jar, 1 x Lightweight Clarke SHHH24/150 Low Noise Air Compressor Air Hose With 1/4” Adaptor
- Part No. 3110320

Aluminium Oxide Abrasive Powder
- 60 – 80 Grit
- 20Kg
- Part No. 3052110

Maintainance
| Daily | Weekl y | Monthly | 3 Monthly | |
| Drain the condensation from the air receiver via the drain valve | X | |||
| Check for air leaks | X | |||
| Remove the air filter element and clean or replace it as required. | X | |||
| Inspect non-return valve (clean or replace as required). CAUTION: Ensure that the tank is empty of compressed air for this operation | X | |||
| Manually test the pressure safety valve by pulling the valve head out.t | X | |||
| Tighten cylinder head bolts. | X | |||
| Clean and check the valve assembly, replace gaskets/valves if damaged | X |
REPLACING THE AIR FILTERS
NOTE: The compressor must be completely depressurised before carrying out
this procedure.
- Unscrew the air filters from the pump head assembly.
- Unscrew the air filter cover and clean or replace Clarke SHHH24/150 Low Noise Air Compressor the air filter.
- Screw the air filter cover back together and screw it back onto the pump head assembly.
STORAGE
- When not in use, store the hose and compressor in a cool, dry place.
- Drain the tank of all compressed air and moisture/condensation.
- Disconnect the hose and hang it on top of the compressor to avoid damage.
Specifications
| Product | |
| Model | ShhhAir Max 24/150 |
| Operating Temperature Range | 0OC – 35OC |
| IP Rating | IP20 |
| Overload Protection Device | Automatic Thermal Protector |
| Protection Class | Class I |
| Duty Cycle | S3 50% 10mins Cycle Time |
| Dimensions Fully Assembled (D x W x H) | 580 x 300 x 580 mm |
| Weight | 22 kg |
| Motor | |
| Type | Induction – 1.5 HP |
| Power Supply | 230 V/ 50 Hz |
| Rated Input Wattage | 1000W |
| Rated Input Current | 5A |
| RPM @ 230V | 2850 rpm |
| Compressor Pump & Tank | |
| Receiver Tank Capacity | 24L |
| Tank Max. Design Pressure | 8.8 Bar/128 PSI |
| Outlet Size | 2 x 1/4” BSP |
| Bore | 63.7mm |
| Stroke | 11.2mm |
| Displacement | 200 l/min |
| Free Air @ 7 Bar/101psi | 65 l/min |
| Max. Operating Pressure | 8 Bar/116 PSI |
| Min. Operating Pressure | 6 Bar/87 PSI |
| Environmental | |
| Sound Pressure Level | 62 dBA |
| Sound Power Level | 82 dBA |
| Uncertainty Factor | 2.5 dBA |
Diagrams & Part List

Exploded Diagram

Part List
| NO | DESCRIPTION |
| 1 | Pump Assembly |
| 2 | Air Filter x 2 |
| 3 | Elbow Connector |
| 4 | Pump Pad M6 x 4 |
| 5 | Motor Side Cover x 2 |
| 6 | Capacitor Cover |
| 7 | Capacitor 25uF |
| 8 | Discharge Tube |
| 9 | Air Tank |
| 10 | Wheel x 2 |
| 11 | Release Tube |
| 12 | One-Way Check Valve |
| 13 | Drain Valve |
| 14 | Rubber Foot |
| 15 | Power Cord, 3G1.0 |
| 16 | Pressure Gauge 40psi |
| 17 | 3-Way Regulator |
| 18 | 2 x 1/4” BSP Air Hose Fixing Point with On/Off Tap |
| 19 | 1/4 Connector |
| 20 | Pressure Safety Valve |
| 21 | Pressure Switch |
| 22 | Pressure Gauge 50psi |
| 23 | Handle Grip |
Troubleshooting
| PROBLEM | PROBABLE CAUSE | REMEDY |
| The compressor does not start or restart. | 1.No electrical power, Wire connection loose. | 1. Make sure the machine is connected to power. Check wire connections. |
| 2. Fuse blown. | 2. Change the fuse. | |
| 3. Circuit break. | 3. Reset the circuit breaker, check for low voltage conditions. | |
| 4. Thermal overload switch open. | 4. Turn the air compressor off, wait until the motor is cool and the overload switch is closed, then try and restart. | |
| 5. The pressure switch is ineffective. | 5. Replace the pressure switch. | |
| Fuse blown/circuit breaker trips repeatedly. | 1. Incorrect fuse size, circuit overloaded. | 1. Check for the correct fuse (13A), or use a time delay fuse. Disconnect other electrical appliances from the circuit or operate the compressor on its branch circuit. |
| 2. Defective check valve or unloaded. | 2. Repair or replace valve. NEVER disassemble the check valve under pressure; release tank pressure first. |
Guarantee
This product is guaranteed against faulty manufacture for Clarke SHHH24/150 Low Noise Air Compressor 12 months from the date of purchase. Please keep your receipt as proof of purchase. This guarantee does not affect your statutory rights.
Environmental Recycling
By purchasing this product, the customer is taking on the obligation to comply with current WEEE regulations. This means that this product must not be disposed of with general household waste. It must be disposed of according to the laws governing Waste Electrical and Electronic Equipment (WEEE) at a recognised disposal facility. This product contains valuable raw materials.
Customer Service
- Tel: 0208 988 7400
- Website: parts@clarkeinternational.com
- Visit: service@clarkeinternational.com
FAQs
What makes the Clarke SHHH24/150 a “low noise” compressor?
It is perfect for interior use or noise-sensitive spaces like studios or workshops because it operates at about 60 to 65 dB.
What is the maximum pressure output of the SHHH24/150?
Spray guns, nailers, inflators, and other pneumatic equipment can all benefit from the compressor’s maximum pressure of 8 bar (116 PSI).
Can this compressor be used continuously for long tasks?
Allow the motor to cycle off periodically to avoid overheating, even if it can withstand prolonged operating times. Think about using a compressor with a larger duty cycle for continuous-duty jobs.
What type of oil does the SHHH24/150 require, and how often should I change it?
Use compressor oil that is SAE 30 or higher. After 20 hours of usage (the break-in phase), then every 100 hours or every six months, whichever comes first, change the oil.
Can I use this compressor with air tools?
Yes, it is compatible with the majority of low- to medium-demand air equipment, including light spray guns, brad nailers, staplers and tyre inflators. Verify the air consumption (CFM) of each tool to make sure it is compatible with the compressor’s output.
Is any special installation required for the SHHH24/150?
It doesn’t require any extra installation. Just set it down on a flat surface in a dry, well-ventilated area. Make sure the power source is steady (usually 230V), and if at all possible, stay away from extension cables.
Can I use the SHHH24/150 outdoors or in cold conditions?
Make sure the oil is appropriate for low temperatures and let the unit warm up before using it in an unheated area.