


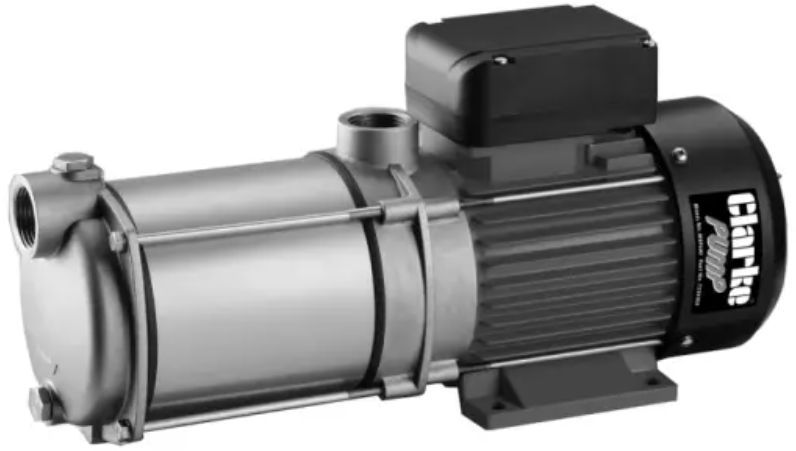
Clarke MSP490 Multi-Stage Booster Pumps
Introduction
Thank you for purchasing this CLARKE Booster Pump, which is suitable for a variety of applications involving the transfer of clean, cold water for domestic and gardening applications. Please read this manual thoroughly and ensure you are familiar with all aspects relating to your particular pump before its connection and use. This will ensure the safe and proper installation of the pump and assist it in providing a long, trouble-free performance. Please keep these instructions in a safe place for future reference.
Safety Instructions
- ALWAYS keep the working area clean and well-lit. Floors should always be kept clear. Cluttered or dark areas invite accidents.
- NEVER over-reach. Keep your proper footing Clarke MSP490 Multi-Stage Booster Pumps and balance at all times when installing or maintaining the pump.
- NEVER direct any water discharge towards electrical wiring or equipment.
- ALWAYS thoroughly familiarise yourself with this pump & its operation, and follow all instructions in this manual. NEVER allow persons unfamiliar with these instructions to install or operate the pump.
- ALWAYS maintain the pump with care and keep it clean for the best / safest performance.
- NEVER modify this pump in any way.
- NEVER use for pumping flammable liquids or corrosive chemicals.
- ALWAYS have the pump serviced by your local dealer, using only identical replacement parts.
- NEVER use this product if any part is damaged. Have it inspected and repaired by your local CLARKE dealer. ALWAYS turn the pump off before carrying out any maintenance.
- NEVER allow the pump to run dry.
Component Parts

Description
- Tie bolt (1)
- Screw (1)
- Suction mounting
- Self-priming cover
- Locking nut
- First bushing
- Impeller
- Diffuser
- Pump housing
- Washer
- Mechanical seal
- O-ring (1)
- Discharge mounting
- Shaft seal
- Ball bearing (1)
- Motor rotor
- O-ring (2)
- Stator
- Motor body
- Ball bearing (2)
- Spring washer
- Motor end cover
- Tie bolt (2)
- Seal (1)
- Fan
- Fan cover
- Screw (2)
- Power cable
- Terminal box screw
- Terminal box
- Terminal block
- Screw (3)
- Capacitor
- Seal (2)
- Screw (4)
- Terminal box cover
- Screw (5)
- Seal (3)
- Seal (4)
- Washer (2)
- End bushing
- Centre bushing
- Seal (5)
Accessories

Electrical Connection
Connect the mains lead to a standard, 230 Volt (50Hz) Clarke MSP490 Multi-Stage Booster Pumps electrical supply through an approved 13 amp BS 1363 plug or a suitably fused isolator switch. This product may be fitted with a non-rewireable plug.
Hee old plug must be discarded safely, as insertion into a power socket could cause an electrical hazard.
The colours of the wires in the power cable must agree with the markings on the plug.
- Connect the BLUE wire to the terminal marked N.
- Connect the BROWN wire to the terminal marked L.
- Connect the YELLOW AND GREEN wire to the terminal marked E.
Installation
These notes are for guidance on how to achieve a proper working system. If any part of the system is to be connected to the mains water supply, ensure that you comply with your local water authority regulations.
Installation Layout
The pump must always be installed and operated in a horizontal position using the fixing holes in the base to secure the pump firmly in its operating position. Ensure that there is adequate air circulation around the motor. Avoid situations where there is the risk of water coming into contact with the outside of the pump. Neither the motor nor the terminal box is designed to be waterproof.
Pipeline Fitting
Because of the variety of possible installations, no plumbing accessories are supplied. However, accessories designed specifically for this range of pumps are available from your CLARKE dealer. The performance of your pump will be affected by the diameter of the inlet pipe – any restriction will greatly reduce the flow. We recommend that you use a diameter which is as large as practicable, with a suitable reducer for connection to the 1” BSP inlet adapter.
Prepration
- Switch on the pump and check for leaks. Water should quickly start to flow through the system. If, depending upon the suction depth, water does not flow, check to ensure:
- The inlet pipe is secure and free from defects.
Care & Maintainance
Protect the pump and pipework from freezing, as the formation of ice may cause serious damage. The only maintenance required is a regular inspection to ensure that debris is not blocking the passage of water through the pump. Should sediment, chemical, or other contaminants come into contact with the pump, flush through with cold, clean water as soon as possible.
Always keep the pump in a clean condition, checking regularly for loose fastenings or a damaged power cable, le etc.
Specification
| Model | MSP490 | MSP590 | MSP690 |
| Maximum Delivery | 90 L/min | 90 L/min | 90 L/min |
| Maximum Head | 43 metres | 53 metres | 64 metres |
| Maximum water temperature | 65 degC | 65 degC | 65 degC |
| Operating Pressure | 4.3 Bar | 5.3 Bar | 6.4 Bar |
| Ingress Protection Rating | IPx5 | IPx5 | IPx5 |
| Supply | 230V~ 50Hz | 230V~ 50Hz | 230V~ 50Hz |
| Rated Input Power | 1100 W | 1350 W | 1650 W |
| Rated Output Power | 850 W | 1050 W | 1300 W |
| Input current @ Maximum Head | 3.06 A | 3.73 A | 4.38 A |
| Input current @ Maximum Flow | 4.61 A | 5.70 A | 6.82 A |
| Inlet/Outlet Thread Size | 1” BSP | 1” BSP | 1” BSP |
| Product weight | 11.8 kg | 13.1 kg | 14.8 kg |
| Overall dimensions (L x W x H) mm | 406x140x192 | 431x140x192 | 485x140x192 |
Troubleshooting
| Problem | Cause | Solution |
| The pump does not run. | Thermal protection has been activated. | If the motor has overheated, wait for it to cool down before trying again. |
| Faulty power connection | Insert the plug securely. | |
| No mains supply. | Check the fused power supply and replace the fuse if necessary (check fuse rating). Check the circuit breaker. | |
| Impeller seized/blocked. | Disconnect the pump from the power supply. Investigate the cause and clear the blockage. | |
| The pump fails to prime | Air leaks through the suction hose joints (damaged hose or damaged clamp). | Repair connections/
Replace the hose as necessary. |
| Blocked inlet hose. | Check the pipeline for blockage. Check that any inlet valve fitted is fully open. | |
| Pump runs but gives poor output | Congested material inside the pump | Clean out & backflush the pump. |
| Suction or delivery line obstructed. | Remove obstruction and ensure there are no kinks in the delivery line. | |
| Inlet pipe leakage. | Check the inlet pipe and connector for leaks.
Tighten as required. |
|
| Air leaks through the damaged seal. | Renew seal. | |
Guarantee
This product is guaranteed against faulty manufacture for a period of 12 months from the date of purchase. Please keep your receipt, which will be required as proof of purchase.
This guarantee is invalid if the product is found to Clarke MSP490 Multi-Stage Booster Pumps have been abused or tampered with in any way, or not used for the purpose for which it was intended. Faulty goods should be returned to their place of purchase; no product can be returned to us without prior permission. This guarantee does not affect your statutory rights.
Environmental Protection
Through the purchase of this product, the customer is taking on the obligation to deal with the WEEE in accordance with the WEEE regulations in relation to the treatment, recycling & recovery and environmentally sound disposal of the WEEE.
Customer Service
- Tel: 0208 988 7400
- Website: parts@clarkeinternational.com
- Visit: service@clarkeinternational.com
FAQs
How does a multi-stage booster pump differ from a single-stage pump?
A multi-stage pump is perfect for applications that need higher water pressure because it uses many impellers in series to provide more pressure and improved efficiency compared to single-stage pumps.
What type of fluids can the MSP490 pump handle?
It is intended for use with clear, non-corrosive water and comparable liquids that are free of particles and debris. Steer clear of pumping harsh chemicals or particle-containing fluids.
What are the typical applications for the MSP490?
Increasing water pressure in residential structures, business water supply setups, irrigation systems, and HVAC systems are common applications.
What is the maximum pressure and flow rate of the MSP490?
Although the MSP490 can normally produce pressures up to 4-6 bar (60-90 psi) with flow rates of approximately 490 litres per minute, depending on system design, consult the product specification page.
How do I install the booster pump correctly?
With the appropriate inlet and exit pipework, place the pump on a level, stable surface.
How do I prime the pump?
Before starting, remove air from the pump casing and suction line by filling them with water. For optimal results, adhere to the priming recommendations in the manual.