
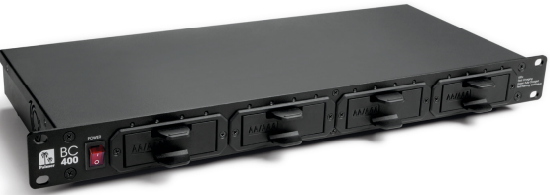
Palmer PBC400AA Rackmount Battery Charger
Introduction
A DI box is used to change an unbalanced, high-impedance signal to a balanced low low-impedance signal for connection to a microphone input. An unbalanced high-impedance cable routing is susceptible to hum and other noise. The cable length is limited because with longer cables, not only does the noise level rise, but due to cable capacitance, you can also expect a loss of highs.
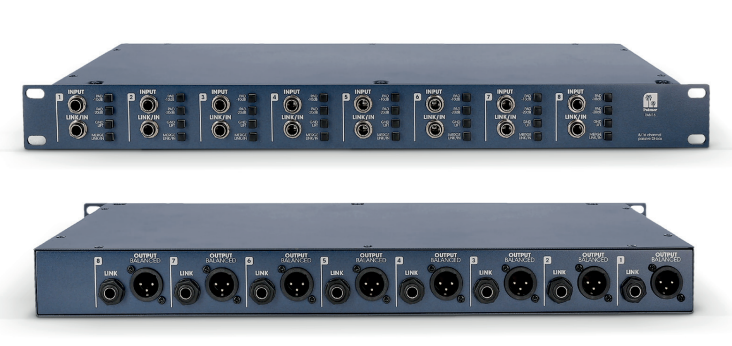
These problems are avoided with low impedance balanced signal routing. For this reason, this type of routing is used almost exclusively in professional studios and for live performances. The PAN16 is a passive DI box that contains 8 independent channels in the 19“ format.
Safety Instructions
- Please read these instructions carefully.
- Keep all information and instructions in a safe place.
- Follow the instructions.
- Use the device in the prescribed manner only.
- Do not open the device and do not perform any modifications.
- Observe all safety warnings. Never remove safety warnings or other information from the equipment.
- Use only sufficiently stable and compatible stands and/or mounts (for fixed installations).
- Make certain that wall mounts are properly installed and secured.
- Make certain that the equipment is installed securely and cannot fall.
- During installation, observe the applicable safety regulations for your country.
- Never install and operate the equipment near radiators, heat registers, ovens, or other sources of heat.
- Make certain that the equipment is always installed so that it’s cooled sufficiently and cannot overheat.
- Never place sources of ignition, e.g., burning candles, on the equipment.
- Do not expose this equipment to flammable materials, fluids, or gases.
- Make certain that dripping or splashed water cannot enter the equipment.
- Do not place containers filled with liquids, such as vases or drinking vessels, on the equipment.
- Make certain that objects cannot fall into the device.
- Use this equipment only with the accessories recommended and intended by the manufacturer.
- This equipment may only be repaired by authorized, qualified personnel.
- Clean the equipment using a dry cloth.
Packaging Content
Remove the product from the packaging and remove all packaging material. Please check the completeness
and integrity of the delivery, and notify your distribution partner immediately after purchase if the delivery is not complete or if it is damaged
- 1× PAN16 19“ DI-box, 8 channels, passive
- Usermanuala
Connections
The PAN16 has eight independent channels. The following description applies to each of the channels 1 – 8. Unbalanced instrument cables should not be longer than necessary. The low impedance balanced output signal is available on the rear panel XLR/m socket. The assignment of the socket is standard, with a hot PIN 2. The connection to a mixer input is performed with a balanced, shielded microphone cable. The cable length is not critical and may be 100 feet or more, without an audible deterioration of the signal.
The Merge Links / In Function
Alternatively, the PAN16 also offers the possibility for the stereo signal, such as that of a keyboard, to sum to a mono signal and to direct it as a balanced mono signal to the PA system. The mono summed looped signal is present on the rear panel LINK socket.
Pad Switch
The PAN16 can also be used to feed speaker signals into a mixer. To do this, connect the amplifier output with the “Input” socket and loop the signal to the speakers via the “LINK” socket. Both cables must be speaker cables with an appropriate cross-section. A total of three attenuation levels are available: -10 dB, -20 dB, -30 dB (both PAD switches pressed down). To avoid clipping, the amplifier power should not exceed 100 watts
Gnd Lift Switch
This leads to grounding for these devices, and as a result, it may cause the so-called ground loop hum. But since it is sufficient to connect the ground on one side only for shielding purposes, the “GND LIFT” switch on the PAN16 enables the separation of PIN 1 from the ground.
This prevents ground loops and associated humming noises. In practical use, by trial and error, choose the position of the switch that causes the least noise.
Packaging
- Packaging can be fed into the reusable material cycle using the usual disposal methods.
- Please separate the packaging in accordance with disposal laws and recycling regulations in your country.
Device
- This device is subject to the European Waste Electrical and Electronic Equipment Directive in the currently valid version.
- WEEE Waste Electrical and Electronic Equipment Directive. Old appliances do not belong in household waste.
- Please observe the applicable regulations in your country! Observe all disposal laws applicable in your country.
- As a private customer, you can obtain information on environmentally friendly disposal options from the seller of the product or the appropriate regional authorities.
Batteries
- Observe all disposal laws applicable in your country.
- As a private customer, you can obtain information on environmentally friendly disposal options from the seller of the product or through the relevant regional authorities.
Manufacturer’s Declarations
Herstellergarantie und Haftungsbeschränkung Manufacturer’s warranty & limitation of liability Adam Hall GmbH Adam-Hall-Str. 1 61627 Neu-Anspach, Germany.
CE Conformity
Adam Hall GmbH hereby confirms that this product, Palmer Pan16 19“ DI-bo,x meets the following guidelines (where applicable): Low-Voltage Directive (2014/35/EU), EMC Directive (2014/30/E/U), RoHS (2011/65/EU), RED (2014/53/EU)
FCC Statement
This device complies with Part 15 of the FCC Rules. Operation is subject to the following two conditions: (1) This device may not cause harmful interference, and (2) This device must accept any interference received, including interference that may cause undesired operation.
UKCA- Conformity
Hereby, Adam Hall Ltd. declares that this product, Palmer Pan16 19“ DI-bo,x meets the following guidelines (where applicable): Electrical Equipment (Safety) Regulations 2016, Electromagnetic Compatibility Regulations 2016 (SI 2016/1091). The Restriction of the Use of Certain Palmer Pan16 19“ DI-box Hazardous Substances in Electrical and Electronic Equipment Regulation 2012 (SI 2012/),32,) Radio Equipment Regulations 2017 (SI 2016/2015), Adam Hall Ltd. | The Seedbed Bus. Centre | SS3 9QY Essex | UK
Customer Support
- Email: Info@adamhall.com
- Website: www.adamhall.com/compliance
- Ph: +49 (0)6081 / 9419-0
FAQs
Q: What is the Palmer PBC400AA?
Typically used for audio equipment, PA systems, UPS sets, and other professional rack-mounted installations, the PBC400AA is a rack-mount battery charger made to charge 12V lead-acid batteries.
Q: How many batteries can the PBC400AA charge simultaneously?
Depending on the wire arrangement, it can charge up to four batteries at once while providing each cell with safe, controlled current.
Q: Can I leave batteries connected permanently?
Indeed. When connected for lengthy periods of time, the PBC400AA’s float charging feature safely preserves battery charge without overcharging.
Q: Can the charger overcharge the batteries?
No. To avoid overcharging and increase battery life, the PBC400AA has automated regulation and float charging.
Q: Can the charger be left unattended?
Yes, because of float charging and automatic control, but make sure you have enough ventilation and do regular inspections.
Q: Can the charger be used with a UPS or audio system simultaneously?
Indeed. As long as the overall load does not surpass battery limitations, batteries attached to the PBC400AA can power UPS systems, PA amplifiers, or other devices.