


TCL P204SDW Humidity Controlled Vertical Freezer
Safety information
In the interest of your safety and to ensure correct use, read this user manual carefully, including its hints and warnings, before installing and first using the appliance. To avoid unnecessary mistakes and accidents, it is important to ensu「e that all people using the appliance are thoroughly familiar with its operation and safety features.
- Do not put hot items on the plastic parts in the appliance.
- Do not place food products directly against the rear wall.
- Frozen food must not be refrozen once it has been thawed out.
- Store pre-packed frozen food in accordance with the frozen food manufacture·s instructions.
- Appliance·s manufactures storage recommendations should be strictly adhered to.
- Ice lollies can cause frostbite if consumed straight from the appliance.
- Before maintenance, switch off the appliance and disconnect the mains plug from the mains socket.
- Do not clean the appliance with metal objects.
- Do not use sharp objects to remove frost from the appliance. Use a plastic scraper.
- Regularly examine the drain in the refrigerator for defrosted water.
- If necessary, clean the drain. If the drain is blocked, water will collect at the bottom of the appliance.
Installation
Important! For electrical connection,n carefully follow the instructions given in specific paragraphs.
- Unpack the appliance and check if there are damages on it.
- Do not connect the appliance if it is damaged.
- Report possible damage immediately to the place where you bought it. In that case, retain packing.
- Adequate air circulation should be around the appliance; lacking this leads to overheating.
- To achieve sufficient ventilation, follow the instructions relevant to installation.
- The appliance must not be located close to radiators or cookers.
- Make sure that the mains plug is accessible after the installation of the appliance.
Energy saving
- Don’t put hot food in the appliance.
- Don’t pack food close together, as this prevents air from circulating.
- Make sure food doesn’t touch the back of the compartment(s);
- If electricity goes off, don’t open the door(s);
- Don’t open the door(s) frequently;
- Don’t keep the door(s) open for too long a time;
- Don’t set the thermostat to exceed cold temperatures.
- Some accessories, such as drawers, can be removed to get a larger storage volume and lower energy consumption.
Environment Protection
This appliance does not contain gaseswhich could damage the ozone layer, in either its refrigerant circuit or insulation materials. The appliance shall not be discarded together with the urban refuse and rubbish. The insulation foam contains flammable gases: the appliance shall be disposed of according to the appliance regulations obtainedfrom your local authorities. Avoid damaging the cooling unit, especially the heat exchanger. The materials used on this appliance marked by the symbol Cl are recyclable. ‘Q” The symbol on the product or on its packaging indicates that this il product may not be treated as household waste. Instead, it should be taken to the appropriate collection point for the recycling of electrical and electronic equipment. By ensuring this product is disposed of correctly,
you will help prevent potential negative consequences for the environment and human health, which could otherwise be caused by inappropriate waste handling of this product. For more detailed information about the recycling of this product, please contact your local council, your household waste disposal service or the shop where you purchased the product.
Overview
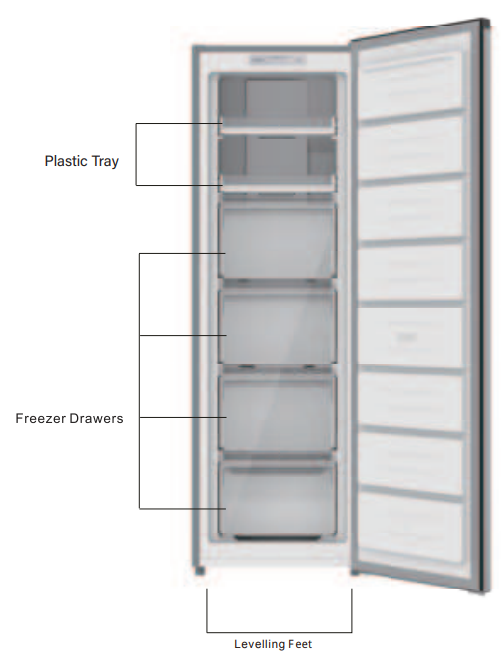
Space Requirement
- Select a location without direct exposure to sunlight.
- .elect a location with enough space for the refrigerator doors to open easily.
- Select a location with level (or nearly level) flooring;
- Allow sufficient space to install the refrigerator on a flat surface.
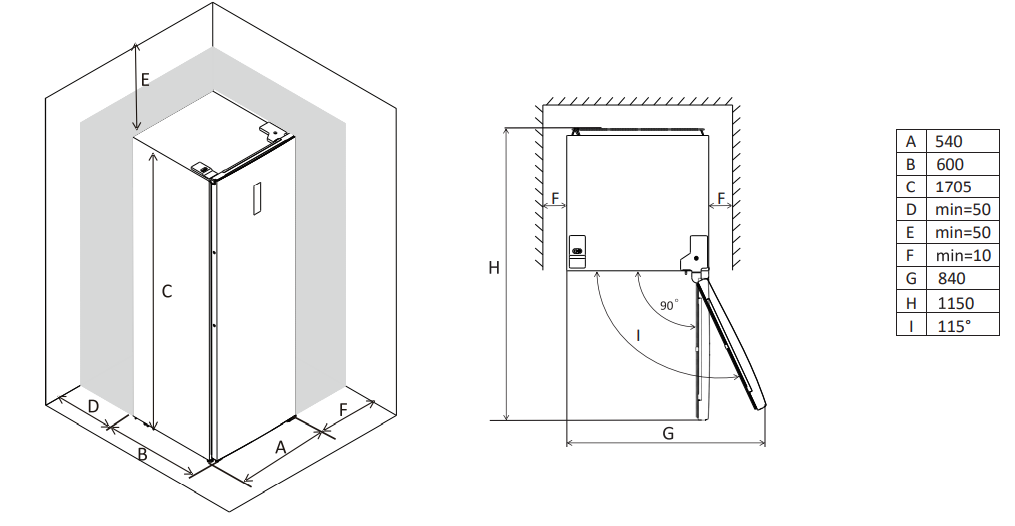
- Allow clearance to the right, left, back and top when installing.
- This will help reduce power consumption and keep your energy bills lower.
- It is advisable to keep at least a 10mm gap on both sides.
Positioning
Install this appliance at a location where the ambient temperature corresponds to the climate class indicated on the rating plate of the appliance, or refrigerating appliances with a climate class.
- Tropical: this refrigerating appliance is intended to be used at ambient temperatures ranging from 16 °C to 43 °C (T);
Installation Door Reversal
Tool required: Philips screwdriver, flat-bladed screwdriver, and hexagonal spanner.
- To take the door off, it is necessary to tilt the unit backwards.
- You should rest the unit on something solid so that it will not slip during the door reversing process.
- Do not lay the unit flat,t as this may damage the coolant system
- 2 people should handle the unit during assembly.
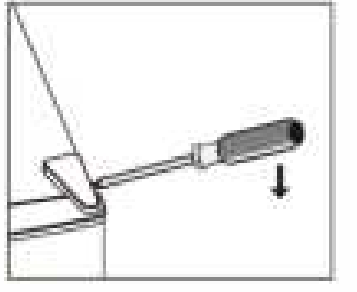
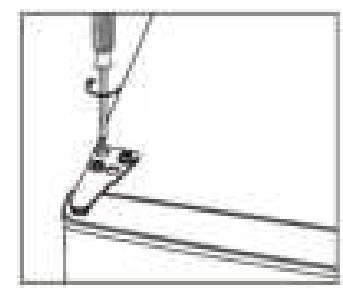
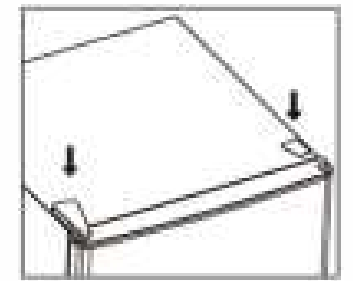
- Remove the top right hinge cover.

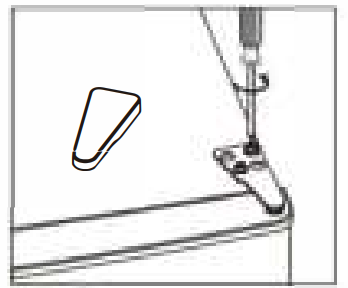
- Undo the scr ews. Then remove the hinge bracket.

- Remove the top left screw cover.

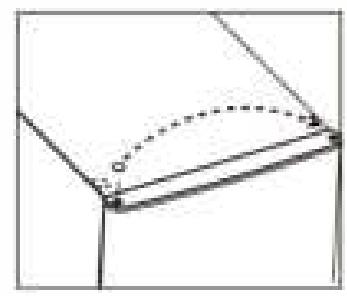
- Move the core cover from the left side to the right side. And then lift the upper door and place it on a padded surface to prevent it from scratching.

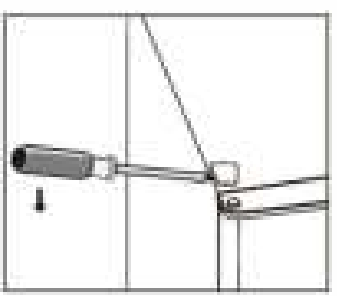
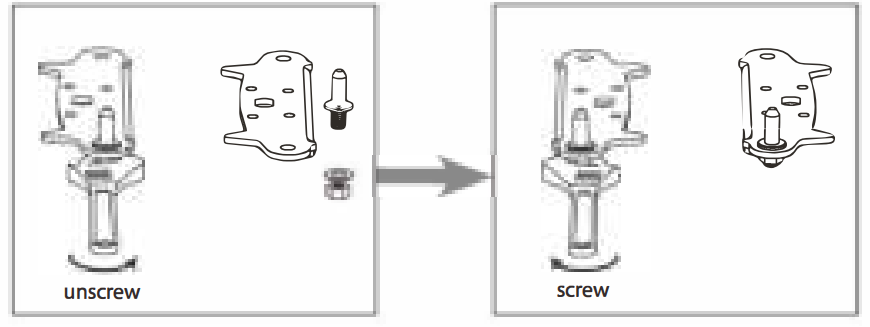
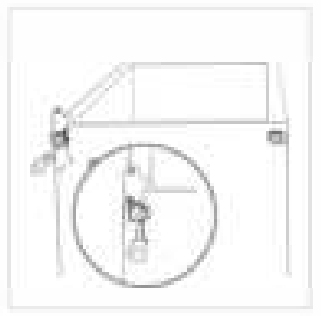
- Unscrew and remove the bottom hinge pin, turn the bracket over and replace it

- Refit the bracket, fitting the bottom hinge pin. Replace both adjustable feess.t

- Place the upper door back on.

- Insert the hinge bracket and screw it to the top of the unit.

- Use a spanner to tighten it if necessary.
- Put the hinge cover and the screw cover back.ck
- Re-adjust the levelling feet as needed.
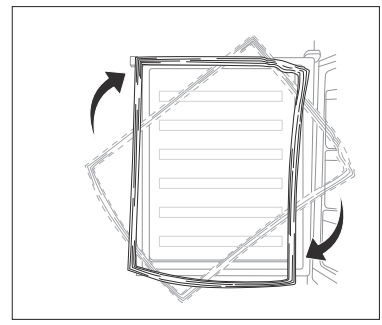
- Detach the and the Freezer door gaskets and then attach them after rotating.

Space Requirement
- Keep enough space to be able to open the door.
- It is advisable to keep at least a 10mm gap on each side.
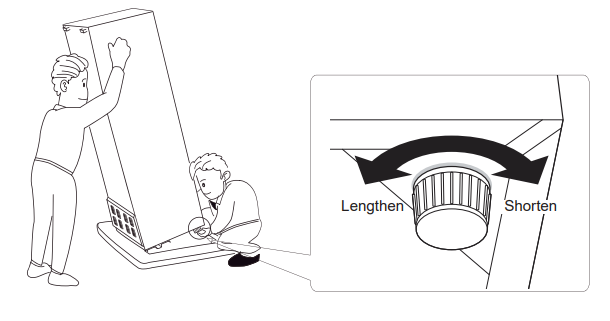
Levelling the Unit
To do this, adjust the two levelling feet at the front of the unit. If the unit is not level, the doors and magnetic seal alignments will not be covered properly.
Cleaning the interior
Before using the appliance for the first time, wash the interior and all internal accessories with lukewarm water and some neutral soap so as to remove the typical smell of a brand new product, then dry thoroughly. Do not use detergents or abrasive powders, as these will damage the finish.
Temperature and mode setting
- The temperature in the cabinet is controlled by the main control board, and the display board shows the current settings and mode. There are five settings to choose from.


- User self-setting mode: press the “SET” key. The LED status indicator will flash
- Each time you press this key, the temperature setting cycle will be -14 C, -16 C, -18 C, -20 C, and -22 C. After flashing for 5 seconds, it will be determined. Normally, -18 C is recommended.
- Super freezing mode: press and hold the “SET” key for 3S to enter the super freezing mode, and the “super” indicator light is on; Press the ” SET” key for 3S again to exit the super freezing mode, and the “super” indicator light goes out.
Freezing fresh food
- The freezer compartment is suitable for freezing fresh food and storing frozen and deep-frozen food for a long time.
Storing Frozen Food
When firststarting upp or after a period out of use, before putting the product in the compartment, let the appliance run at least 2 hours on the higher settings. Under recommended settings, the best storage time of the freezer is no more than 1 month.
Cleaning
Before clearing, switch the appliance off and remove the plug from the mains, or switch off or
offn out the circuit breaker or fuse. Never clean the appliance with a steam cleaner. Moisture could accumulate in electrical components, danger of electrical shock! Hot vapours can lead to damage to plastic parts.
- Do not allow such substances to come into contact with the appliance parts. Do not use any abrasive cleaners. Remove the food from the freezer. Store them in a cool place, well covered.
- Switch the appliance off and remove the plug from the mains, or switch off or turn off the circuit breaker or fuse. Clean the appliance and the interior accessories with a cloth and lukewarm water.
- After cleaning, wipe with fresh water and rub dry. Accumulation of dust at the condenser increases energy consumption.
Door open alarm
If the door is not closed for 90 seconds, an open door alarm will be triggered. 5 LEDs showing the settings will flash. The alarm can be cancelled by pressing the SET key or closing the door.
High temperature alarm
If a high internal temperature of the appliance is detected, a high temperature alarm will be triggered. 4 LEDs showing the settings will flash. The alarm can be cancelled by pressing the SET key.
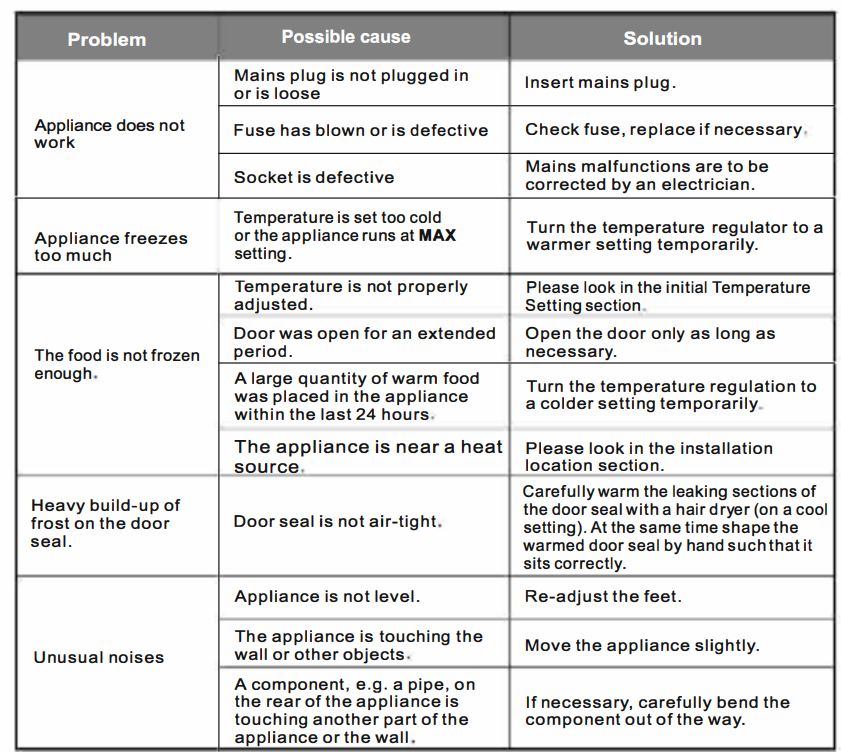
Troubleshooting
Customer Service
- Telephone: 1300 738 149
- Website: www.tcl.com