

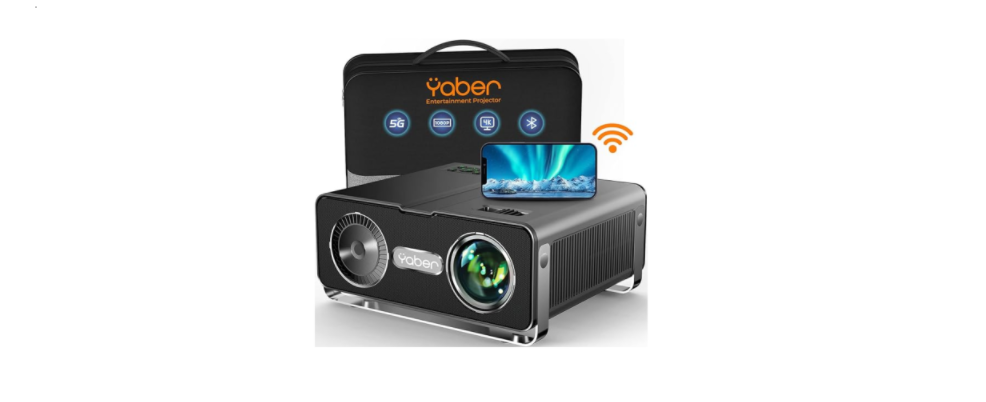
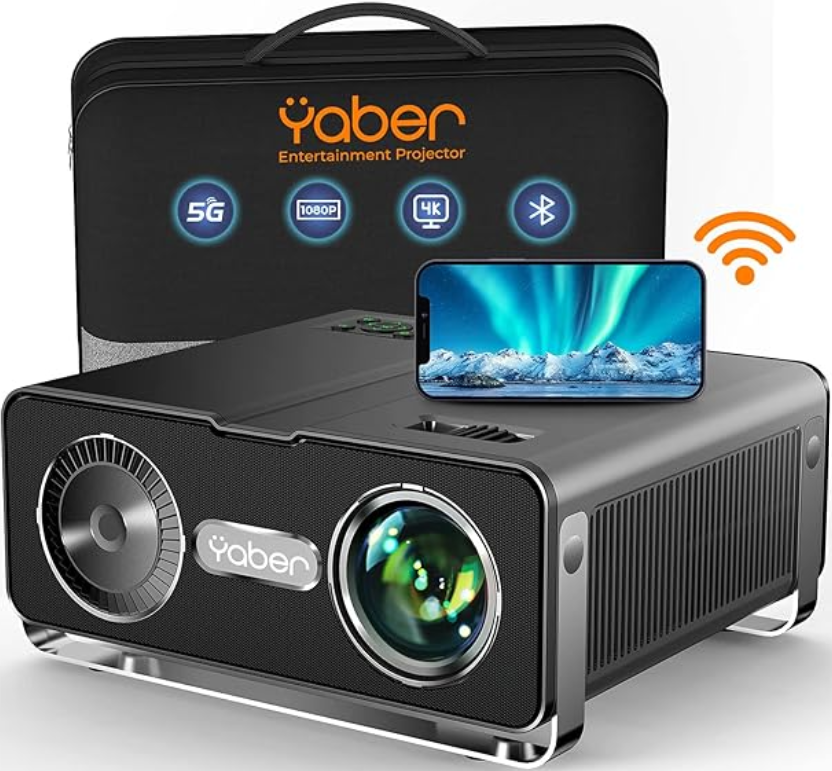
 YABER V10 5G WiFi Bluetooth Projector

Safety Instructions
- Do not place the projector in a too warm or too cold room, because high temperatures or low temperatures will shorten the lifespan of the device. The working environment would be 5°C~35°C better.
- If there are black spots on the projection screen, please don’t worry, Please contact Support@yabertech.com via email, and we can send you a video about how to remove the dust.
- The ventilation is equipped for the projector to work stably. Don’t cover the vent with a cloth, blanket, or other things. Don’t insert anything into the slit of the projector, or it may produce a short circuit or an electric shock to your device and cause damage.
- The projector shall be strictly protected from strong impact, extrusion, and vibration. Do not try to move, and on strong impact, extrusion, and vibration. Do not try to move, or the internal circuit faults.
- The lens, as the core component of the projector, is directly related to the picture definition and effect. The excessive dust thereon will affect image quality. The dirty lens shall be wiped with a soft cotton cloth for the glass lens surface. Hard cloth or abrasives shall not be used.
Package List
- V10 Projector*1
- Remote Control*1
- Power Cord*1
- HDMI Cable*1
- 3-in-1 AV Cable
- Cleaning kit*1
- Cleaning Cloth*1
- User Manual*1
Overview
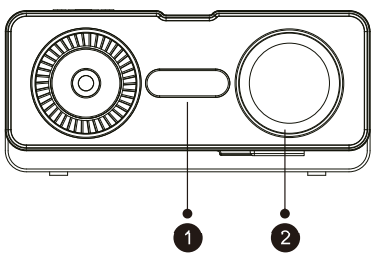
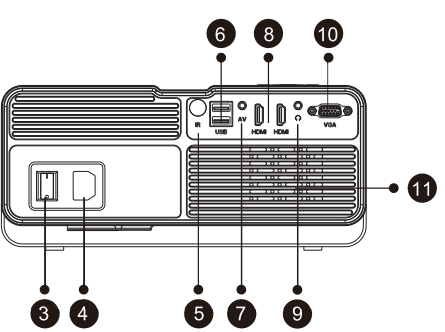
- Yaber logo: Yaber Nameplate
- Project lens: Optical-coated glass lens

- Power indicator: When the power is connected, the projector’s power indicator lights up red
- Power Cord Port: Power Cord Port
- IR window: Infrarot-Signalempfänger
- USB Port: USB port1/USB port2
- AV Port: Audio input
- HDMI Ports: HDMI 1 input / HDMI 2 input
- Audio output: 3.5mm audio output jack
- VGA input connector: VGA input connector

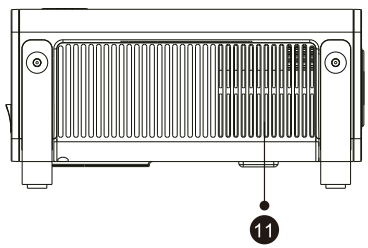
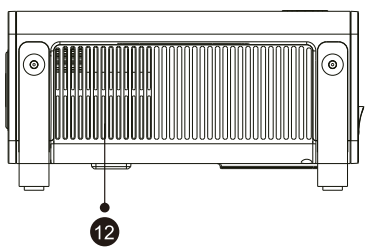
- Air Outlet: Prevent the projector from overheating

- Air Inlet: Circulate inside and outside air

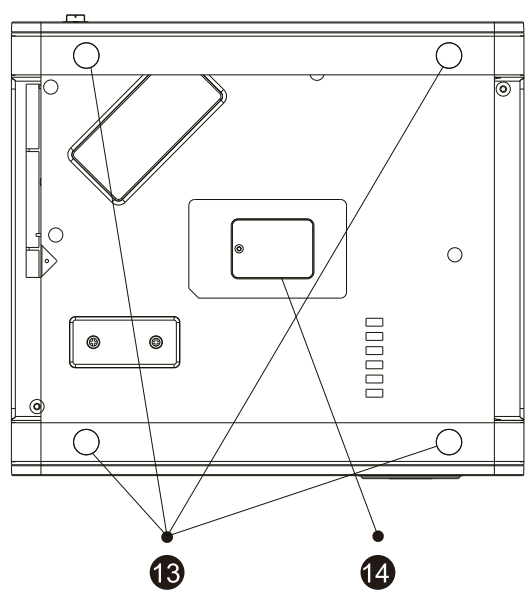
- Rubber Pads: Protective pads/remove to install ceiling mount
- Dust cleaning port: When black spots and dust appear on the screen, open the Port to clean the dust
Buttons
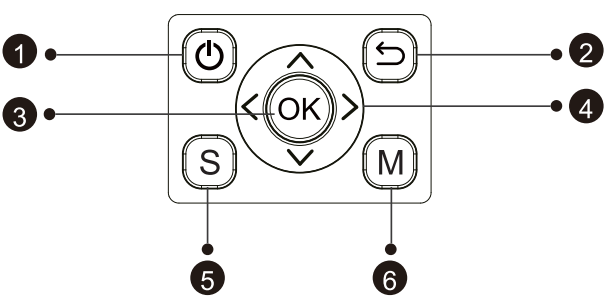
- Power: Turn on/off the power
- Back: Return to the previous menu
- OK: Confirm the option
- Arrow Keys: Used to adjust the parameter of the projector in the menu mode
- Source: Enter the signal source selection interface
- Menu: Enter the menu interface
Remote Control
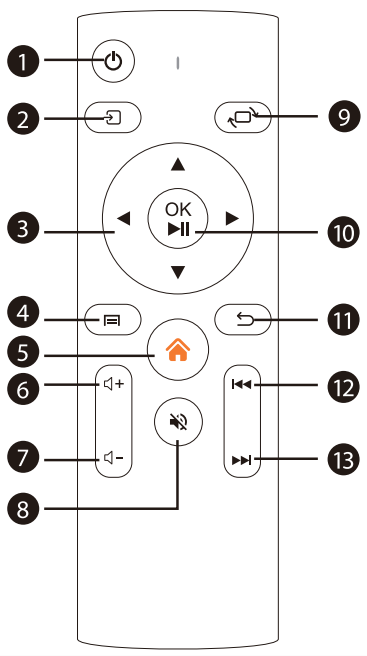

- Power: Turn on/off the power
- Source: Select the input signal source
- Arrow keys: Used to adjust the parameter of the projector in the menu mode
- Menu
- Press once: Back to the menu interface
- Press twice in succession: select 16:9/4:3 projection screen ratio
- Home page: Enter the home page
- Volume +: Volume up
- Volume -: Volume down
- Mute: Close the sound
- Picture flip: Picture flips
- Confirmation key (Play and Pause): Confirm the option/Play or pause the video
- Return: Return to the previous menu
- Previous: Switch to the previous video
- Next: Switch to the next video
Specification
How to Install
- Install 2 AAA batteries into the remote before using it. Do not combine new batteries with old ones in the remote controller, which can cause operation failure due to insufficient power supply.
- When using the remote controller, please make sure that the signal transmitter of the remote controller aims at the infrared signal receiver of the projector.
- If you are not using the remote controller for an extended period, please take out the batteries to prevent battery leakage.
Installation Method
The projector can be hung on the ceiling with a special hanger frame and placed on a stable desk to project the image according to the operating environment and requirements. In addition, the projector can be installed using the following methods:
- Front projection Ceiling mount

- Rear projection Ceiling mount

- Front projection Table mount

- Rear projection Table mount

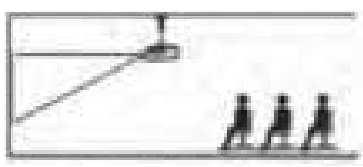
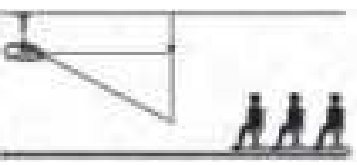
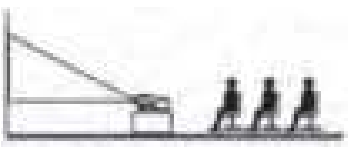
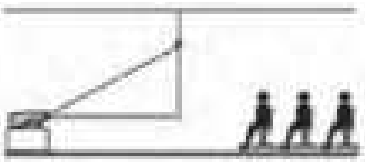
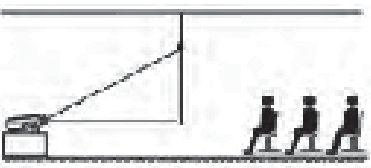
Keep the projector at a height where its lens is axially symmetric to the screen. If this is not possible, use the keystone correction function to adjust the projection image.
Projection Distance and Size
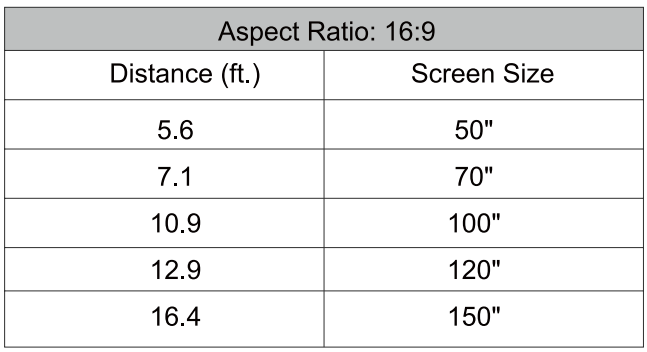
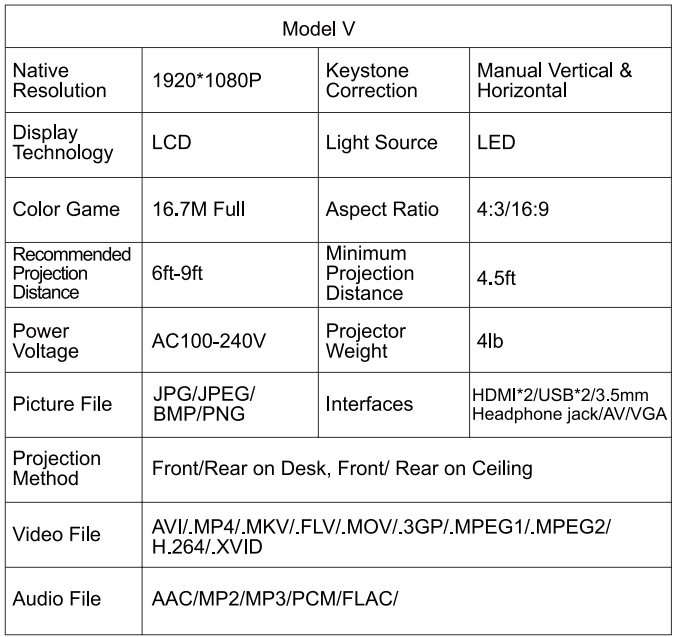
The recommended projection distance is about 9ft; the shortest projection distance is 4.5ft. The image size depends on the distance between the projector and screen; there may be 3% deviation among above listed data. Different settings cause various distances.
Install on the Ceiling
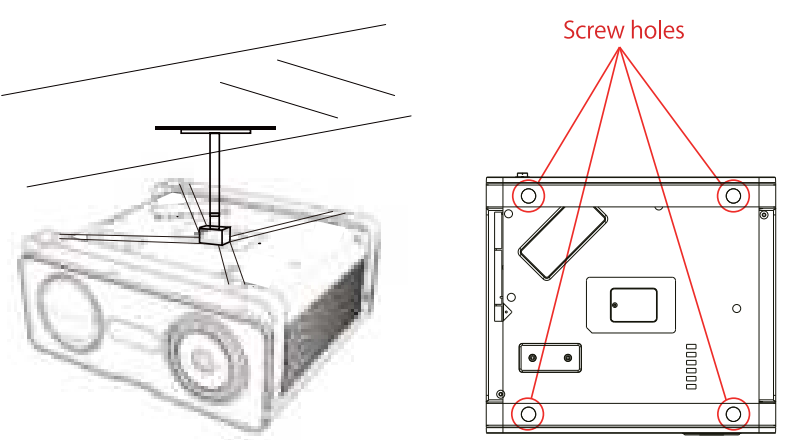
- A. Please purchase a universal projector ceiling mount.
- B. Remove the four rubber pads on the bottom of the projector. You will see the screw holes, and use the M4 screws for installing the ceiling, and then install it.
STARTING PROJECTOR
- Press the power key on the remote or projector, and the indicator light will turn Green.
- Adjust the focus ring on the left side of the projector to get the best image performance; (If it is still blurry, please try to adjust the projection distance.)
- Use the 4D keystone function of the projector to get a rectangular projection screen.
- Connect the external device (smartphone, iPad, Amazon Fire TV, TV box, DVD player, Computer, etc.) to the corresponding interfaces of the projector. Please be sure to select the corresponding source. If you do not select the correct source, the projector will not be able to detect the signal.
- Select the “{@” menu, then you can select the option [ Language ] to set your preferred language.
IMAGE ADJUSTMENT
When using the projector for the first time, it normally displays an unclear image. This is due to the lens being out of focus or the incorrect trapezoid setting. Please follow the steps below to correct:
Focus Adjustment
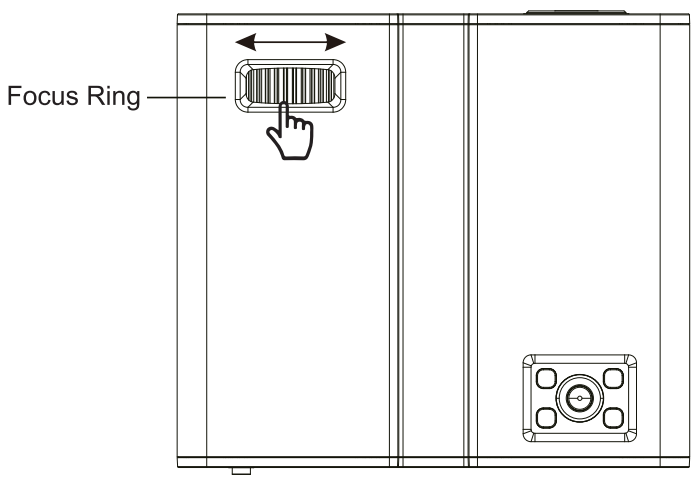
Rotate the focus ring or lens slowly. At the same time, check the focus point carefully. The best focus point for the lens would be where the image is most clear. If it is still blurry, please try to adjust the projection distance.

Digital 4D Keystone Correction.
Use the digital 4D keystone correction of the projector to change the image to be rectangular (vertical and horizontal). Please refer to page 16 of this manual.
SETTING UP THE PROJECTOR
The projector’s home page is as follows.
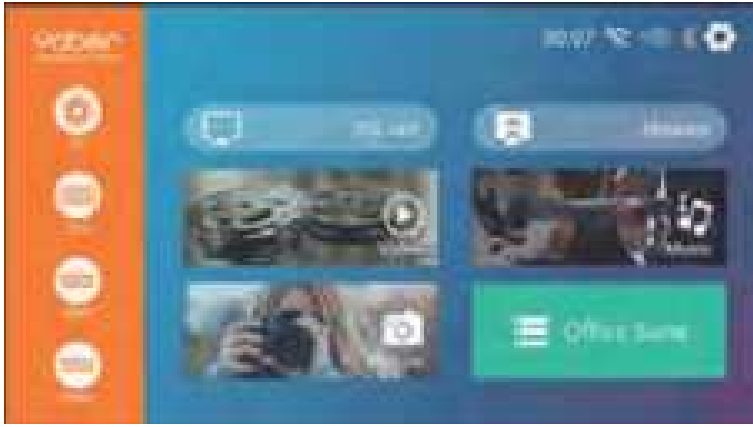
Select The Input Signal Source
- Select the desired input signal source (HDMI1/HDMI2/AV) on the home-page
USB Disk Input Mode
Play Movie/Music/Photo/Office Suite in the USB Disk Input Mode

- Insert the USB Disk, select [Office Suite ] on the homepage, and enter.
- Select the option [ Movie/Music/Photo/Office Suite]
- Select the desired file (or folder to enter the subfolder) in the USB disk, then press the [ OK] button to play it.
Play Interface
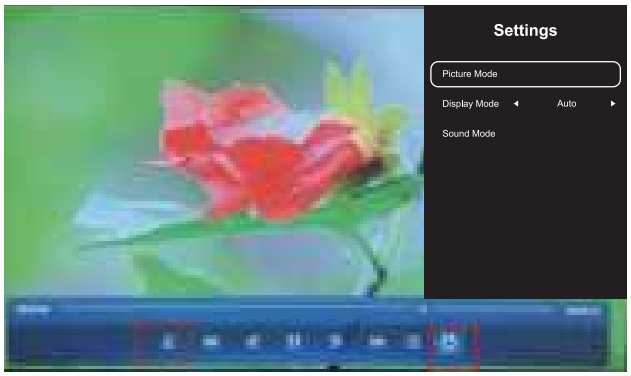

- Select play mode (single cycle/directory loop)
- Switch to the previous video
- Fast Backward rewinds the video quickly while playing it. The rewinding speed ranges from 2X to 32X
- Play or pause the current video.
- Fast Forward pushes the video to move forward quickly while playing it. The forward speed ranges from 2X to 16X
- Switch to the next video
- Select all playlists in the current folder
- TV Setting
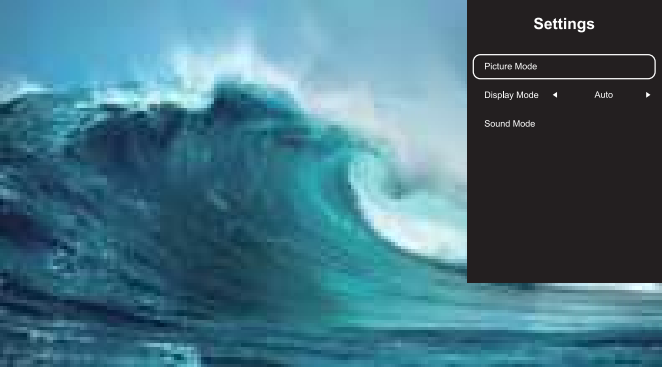
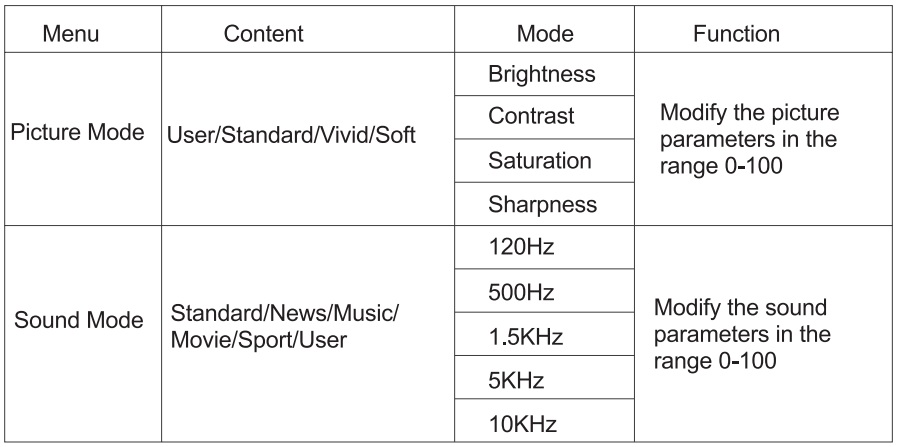
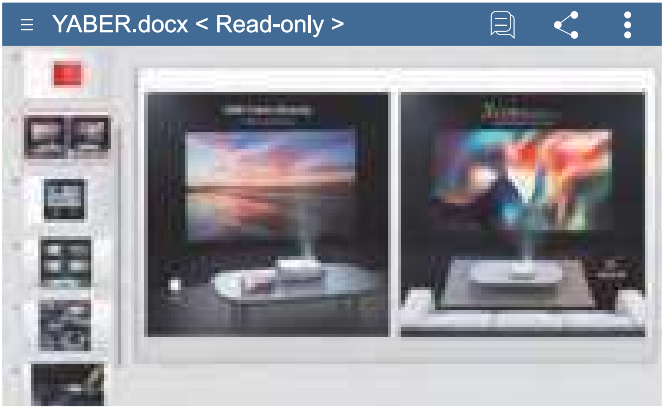
Office Suite Play Interface
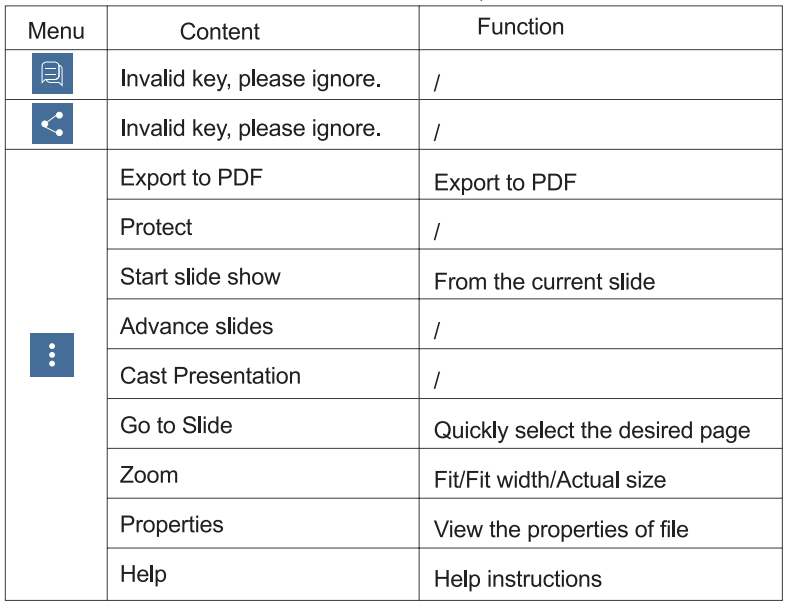
By pressing the button on the remote to enter the menus. (Note: the Office version may be automatically updated, and then the updated functions may change. Due to copyright, some functions are temporarily unavailable. Please refer to the actual version. )
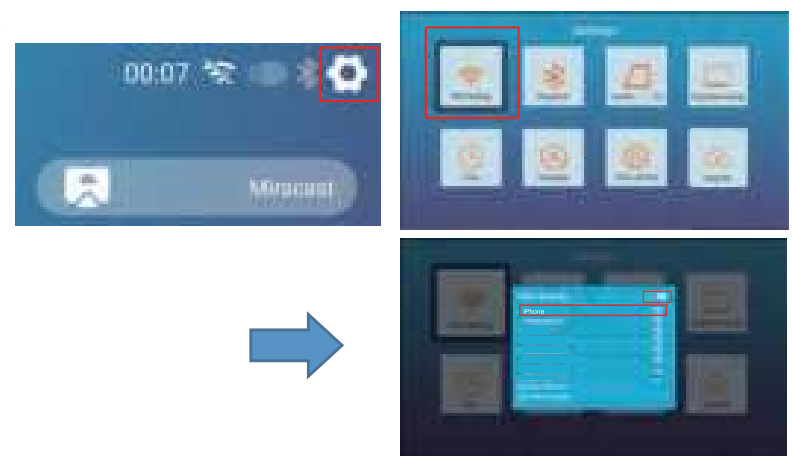
WiFi Setting
Wireless Connection
- The fluency of screen mirroring with wireless connection will be affected by the network environment. A bandwidth of 100 Mbps or more is recommended when using screen mirroring.
- Make sure your mobile device is close to the projector when using a wireless connection. A distance of within 1 meter is recommended.
- Some mobile devices may not support screen mirroring due to the compati- bility.
iOS Cast (for iOS Devices)
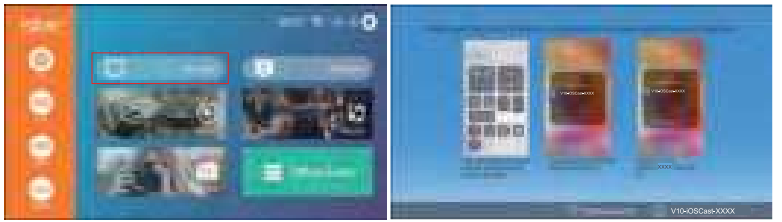
- Go to home page – Select the [<@ ] menu – Select the [WiFi Setting ] menu
- Open the WiFi function – Select your home WiFi from the list – Connect the V10 projector to your home WiFi.

- Open the WiFi function – Select your home WiFi from the list – Connect the V10 projector to your home WiFi.
- Back to home page – Select [iOS Cast ] menu — Press the OK button to enter the [iOS Cast ] menu.

- Select the [ Settings ] menu on your iOS device – Turn on the [Wi-Fi ] function — Connect your iOS device to the same home network as the projector.
- Open the [ Control Center ] on your iOS device – Select the [ Screen Mirroring ] function – Select and connect the iOS Cast receiver named [ V10 iOSCast-xxxx ] – your iOS device screen will be displayed on the projection screen after 3 seconds.
Miracast (for Android Devices)
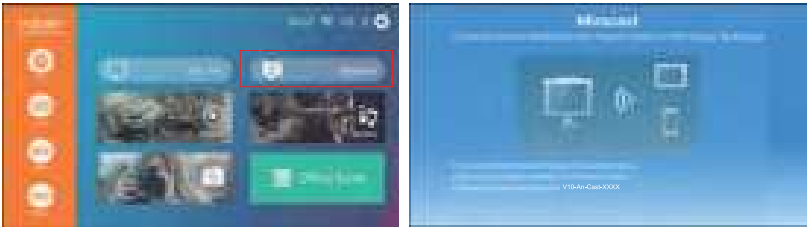
- Go to the home page – Select the [ Miracast ] menu – Press the OK button to enter the [ Miracast Setting ] Menu.

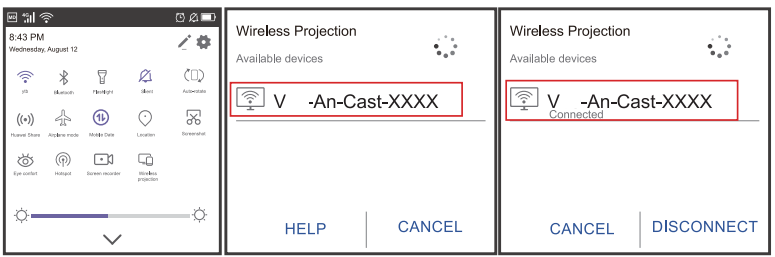
- Select the [ Settings ] menu on your Android device — Select the [ Screen mirroring ] function — Select your Miracast receiver named [ V10-An- Cast-XXXX ] — your Android device screen will be displayed on thprojection screenen after 3 seconds.

- On your Android device, tap [ Settings ] -[ WLAN Display ] -Turn [ Wi-Fi ] ON, Connect your home WiFi.
- Different brands of Android phones have different operations for selecting Screen Mirroring Display. PPlease referto your phone’s manual. [ Mul- tiscreen/Wireless display/WLAN display/Screen mirroring/Wireless projection/Smart view, etc. ]
- Not all Android phones support this function. Please make sure it is supported before use.
Bluetooth Setting
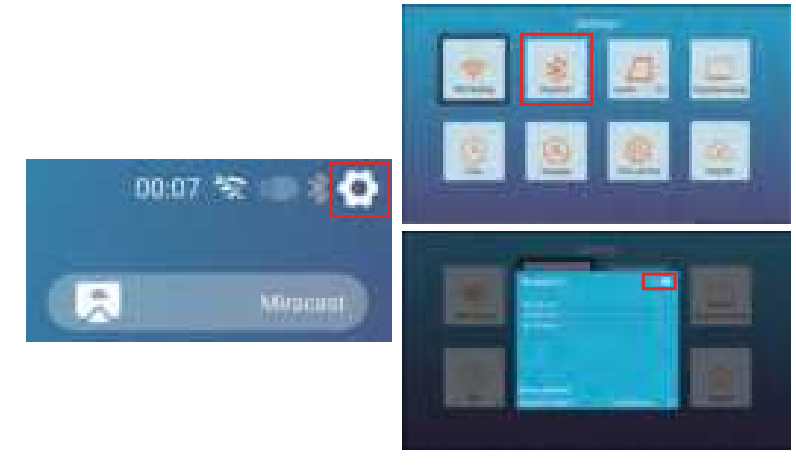
Go to the home page – Select the [ @ ] menu — Select the [Bluetooth Setting ] Option – Open the Bluetooth function and your Bluetooth device – Scan the Bluetooth devices nearby automatically – Choose the Bluetooth device desired – it will be paired and connected automatically.
- The V10 projector is compatible with Bluetooth headsets, Bluetooth speakers, and AirPods, but not Bluetooth keyboards or Bluetooth phones.
- If you have any questions, please feel free to email YABER via: support@y- abertech.com
Projector Image Setting
Projector Mode
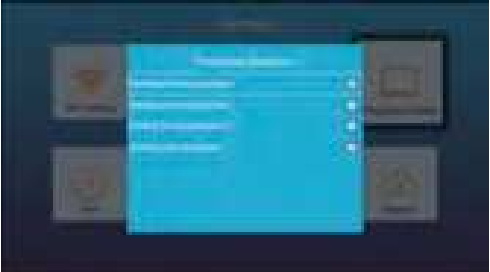
Go to home page – Select the | {0 ] menu — Select the [Projector Mode] Option—-then select the four projection directions you like.
- Desktop front projection

- Desktop rear projection

- Celling front projection

- Celling rear projection

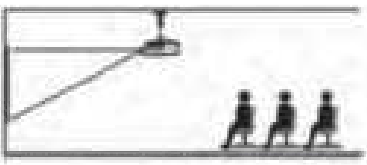
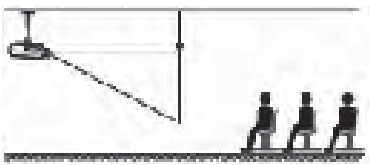
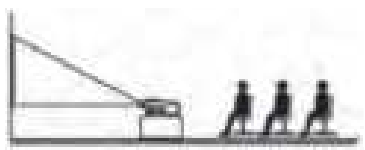
Four Point Keystone Correction
When the Projection screen is not rectangular, it can be adjusted by 4-point keystone correction.
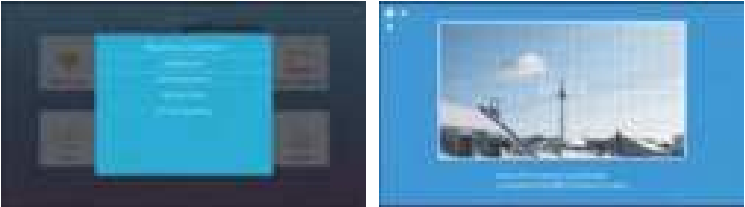
- Step 1: Go to home page – Select the []menu — Select the [Keystone Correction] Menu;
- Step 2: Press the button to select the[ 4-Point Keystone Imenu, then press the[OK]button to enter the submenu.

- OK Pick point: Keep pressing the OK button on the remote control or projector until the positioning icon appears at the point desired, then release the button immediately.
- Adjustment: Press the arrow keys on the remote control or projector to adjust the horizontal or vertical parameters.
- Back: Press the key on the remote control to go back to the home page.
- Reset: Long-press the MENU button on the remote to restore the original parameters.
Digital Zoom
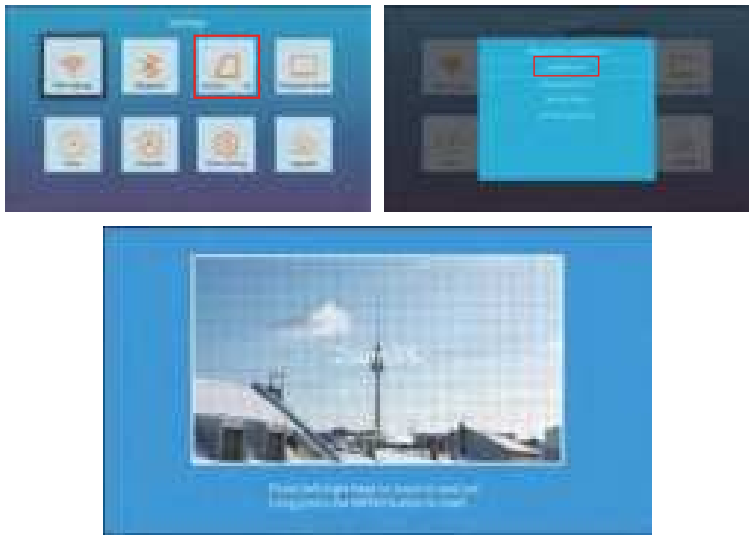
- Step 1:Go to the home page – Select the [Q ]menu – Select the [Keystone Correction] Menu.
- Step2:Press the button to select the[Digital Zoom ]menu, then Ppressthe[OK]button to enter the submenu.
- Step3:By pressing the button on the remote or projector, you can reduce the height and width of projection size up to 50%.
System Update
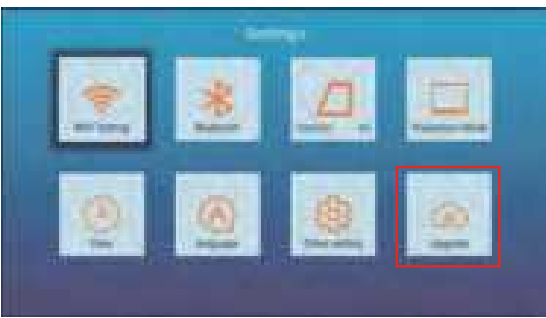
- Step1:contact Yaber to get the latest file update (Support@yabertech.com), download the software.
- Step 2: Copy the software<update.zip> to the root directory of the U disk, then insert the U disk into the projector and turn on the power switch. After booting up, go to settings, system upgrades, select the U disk storing update.zip, click to confirm the upgrade, it will automatically enter the upgrade, and it will automatically restart after the upgrade is completed.
Other Setting
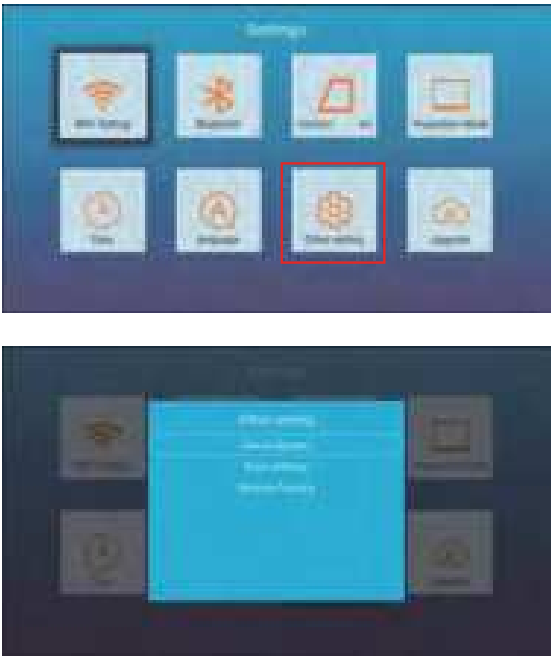
- About System: Detailed information about the system
- Boot Settings: Set to open the home page or HDMI signal interface when powering on
- Restore: Restore the user operation application configuration and system settings
Date
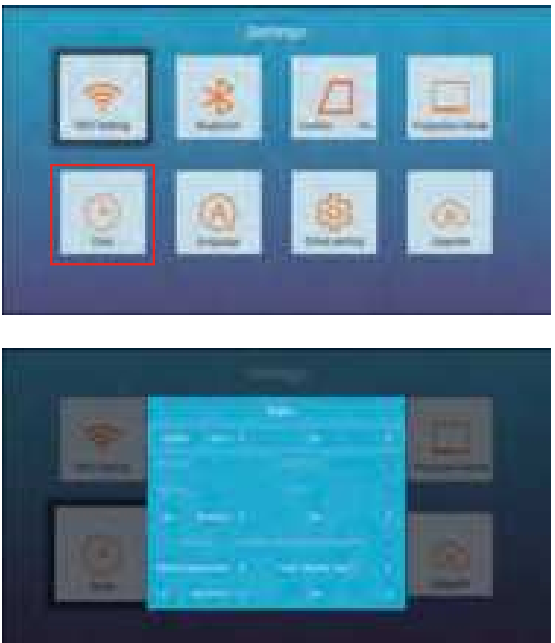
- Step 1: Go to the home page — Select the [ ]menu — Select the [Date] Menu, then press the|OK button to enter the submenu
- Step2: By pressing the button on the remote or projector, you can adjust the time and date.
SIGNAL LINES CONNECTION
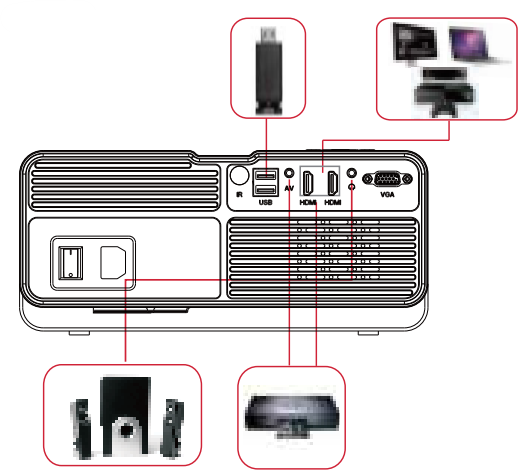
YABER V10 projector has 7 interfaces, HDMI ports*2/ USB ports*2/ 3.5mm headphone output/ AV output/ VGA interface*1.Please select the correct connecting port to connect your device(PC, Phone, DVD Player,r Sound bar, U, S4, etc.)
Connect USB Disk
- Insert the USB-C U disk into either of the USB-C USB input ports.
- You can directly enter the start-up screen on the home page, select the option [ Movie/Music/Photo/Office Suite]
- Select the desired file (or folder to enter the subfolder) in the USB disk, then press the [ OK ] button to play it.
Connect the Devices via the HDMI ports
- Connect your TV stick or laptop to any HDMI port of the projector.
- Enter the home page to select the corresponding HDMI1 or HDMI2 as the signal source.
Use the 3-in -1 AV cable in the package
- Turn on your DVD player and the projector.
- Connect the colorful female connectors to your DVD player’s RCA cable with the 3-in-1 AV cable in the package;
- Connect the black connector to the AV port of the projector, and enter the home page to select [ AV ] as the signal source.

- Or connect to the DVD Player with the HDMI cable in the package.

- Or connect to the DVD Player with the HDMI cable in the package.
- Connect to the Sound bar/Speaker.

- If your speaker has an AUX port, please use your 3.5mm audio cable connect the projector and your speaker as the picture shows, enter the home page to select [ AV ] as the signal source.



SAFE SHUTDOWN
- Press the button on the projector or remote.
- Unplug the power cord of the projector.
- Cover the lens and store the projector in a cool and dry place.
TROUBLESHOOTING
Problems listed below might occur during the operation of your projector. Please refer to the possible factors that might cause the issue to occur troubleshooting.
- When turning on the power switch, the indicator light does not work.
- The power might not be connected well.
- Check the over-heat protection system.
- The remote controller does not communicate with the projector.
- Is the power switch at the back of the projector turned on or off?
- Are the remote controller’s batteries depleted?
- Something is obstructing the signal between the remote and the IR
- Strong light on IR directly.
- No image on the screen.
- Is the channel set up correctly?
- Is there an input signal?
- Is the input cable plugged well??
- Under PC mode, is the refresh rate > 75KHz?
- Blue screen.no picture.no sound.
- Input cables connected correctly?
- Picture right, no sound.
- Input cables connected correctly?
- Volume at min or on Mute.
- Can’t play the movies.
- Is the format of the video right?
- Are files broken?
- Is the device broken?
- There is a picture, no sound?
- The decode system doesn’t match.
- Can’t find devices when connected with hard drive or flash drive.
- Check if the device is broken.
- Auto-off after working for a while.
- The projector ventilation is blocked.
- The voltage is not stable.
- The overheat or temperature protection system.
WARRANTY
Thank you so much for your purchase and support! We provide a 3-year warranty for the V10 projector.
Customer Support
- Website: www.yaber.com
- Email: service@yaber.com