


![]()
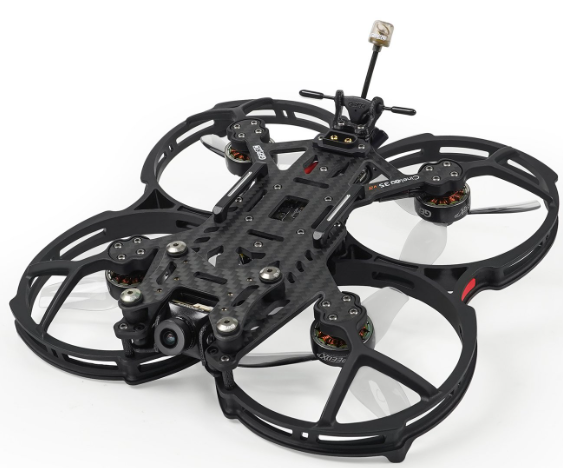
GEPRC CineLog35 Analog CineWhoop FPV Drone
Safety Instructions
The CineLog35 HD, developed by GEPRC specifically for mounting a complete GoPro HD camera, is now officially released. There are two versions currently available: HD VISTA Nebula Pro and Analog. CineLog35 is improved and developed on the basis of CineLog30. Integrated protection guard design, the overall structure is firmer and more durable. We adopt the latest GEP-F722-45A AIO FC with higher calculation speed and high efficiency. The 5 UART Ports bring perfect performance and sufficient extended function. and the electronic system runs more stably. CineLog35 is equipped with VISTA HD VTX and the Nebula Pro camera, and the picture quality is extremely clear and clean.
Features
- Upgrade the 3.5-inch integrated protection guard to ensure flight safety. The new design has significant roles in many aspects, such as reducing noise, reducing vibration, and durable, high-strength structural design.
- Equipped with VISTA HD VTX and Nebula Pro camera.
- The CineLog35 has great mount compatibility for the camera. It can install GoPro10, GoPro9, GoPro8,8 or Naked GoPro8, Insta 360 GO2 camera, and Caddx peanut cameras.
- Improving the damping rings, the shooting effect is more stable, clearer,,arer and reduces jelly. The TheThe
- GR2004 motor with D90-3 propeller has stronger power output.
- Independent receiver cabin, convenient and quick to bind.
- The GEPRC Team’s Splendid Tuning and the overall flight feel are delicate and flexible.
PS
- All components have been strictly inspected and tested before shipping.
- If you have any problems, please cooperate with our engineers to figure out solutions. (E-mail: support@geprc.com.)
DJI Digital FPV System
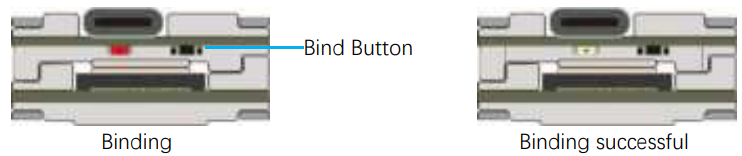
- Turn on the power of the DJI FPV Goggles, DJI FPV Transmitter, and Quadcopter. Press the DJI FPV Goggles bind button twice, and it will beep to indicate the binding state.

- Press the VISTA bind button; the indicator light turns red, indicating that it is binding. Then the indicator light turns yellow, which means the binding is successful, and the FPV Goggles will display the received picture.

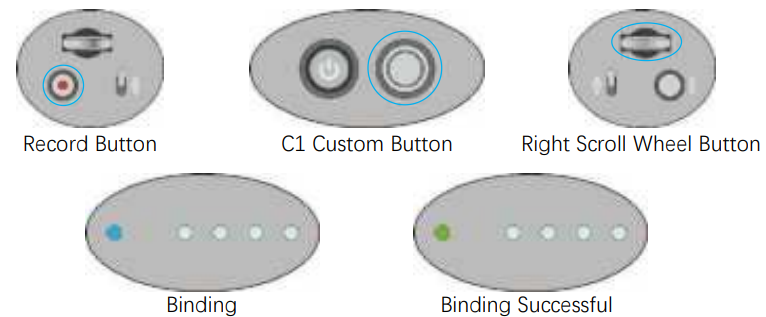
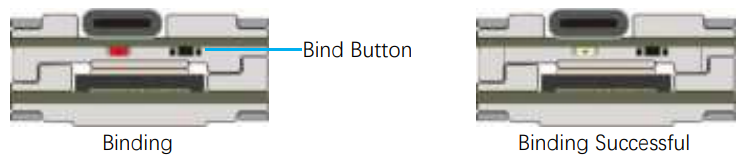
- Press the C1 custom button, record button,n and right scroll wheel button of the transmitter at the same time. The indicator light turns blue, and the transmitter sends a beep indicating that it is binding.

- Press the VISTA bind button; the indicator light turns green, indicating that it is binding. Then the indicator light turns yellow, which means the binding is successful. And the transmitter indicator light turns Green.


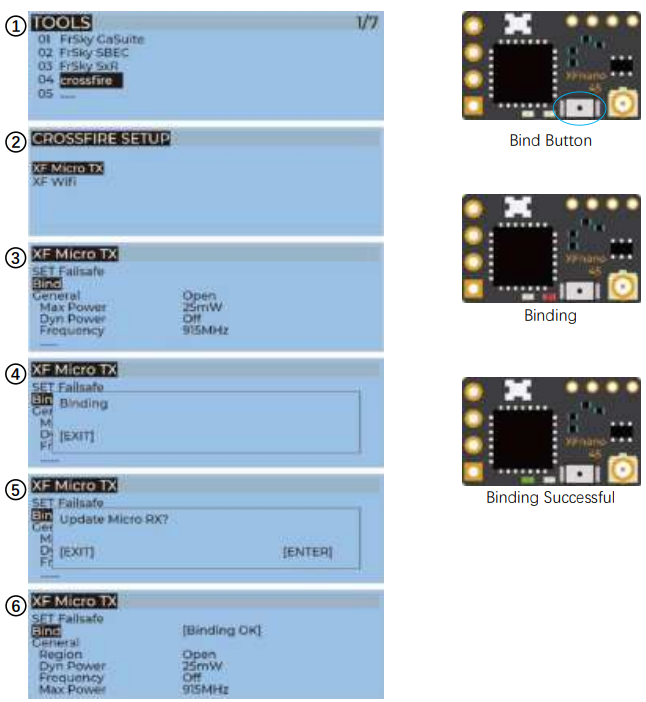
Bind TBS NanoRX
- For Taranis X9D/X9D Plus/X9E and Taranis QX7, turn on the transmitter, go to the TOOLS – CROSSFIRE SETUP – XF Micro TX, a nd select Bind.
- Turn on the receiver while holding the bind button on the receiver, release the button, and the green light will flash. Then, hold the button for 8 seconds, and release. And the green light is off, and the red light is flashing, ‘update micro RX?’ will appear on the transmitter screen, and select ‘ENTER’.
- Wait for the update to complete, the binding is successful, and the receiver green light is on.

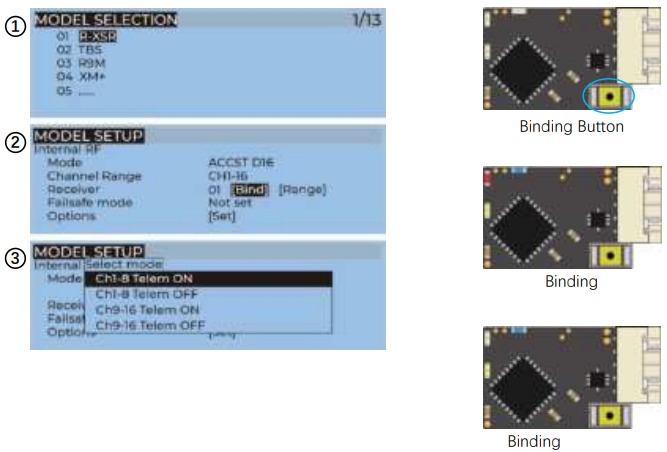
Bind FrSky R-XSR
- For Taranis X9D/X9D Plus/X9E and Taranis QX7, turn on the transmitter, go to the MENU – MODEL SETUP – PAGE 2, choose Internal RF, and select BIND.
- Turn on the receiver while holding the bind button on the receiver, release the button, and the blue, red, and yellow LEDs on
- When the red light flashes, it indicates that the binding is successful. Turn off the receiver, a nd then turn on the receiver. The blue light and yellow light of the receiver are on, indicating that the link is normal.

Install Betaflight
Although your Quadcopter comes from the factory nearly completely ready to fly, you still need to install Betaflight to facilitate your subsequent use of Betaflight for debugging. Installation package download address: https://github.com/betaflight/betaflight-configurator/releases. Enter the web page, scroll to the bottom, and select the appropriate installation package to download. EXE suffix is Windows system, DMG suffix is MacOS system, RPM / DEB suffix is Linux system, APK suffix is Android system.
Install Drivers
If you are on Windows, you must install the driver manually. MacOS and Linux do not. CP210x Drivers: https://www.silabs.com/products/development-tools/software/usb-to-uart-bridge-vcp-dri.
ARM
With the DJI FPV Transmitter, the toggle switch is set at the factory. The corresponding functions of each switch are as follows.
- SAAUX1(ARM)
- SBAUX2(MODES)
- SCAUX3(BEEPER)
- SDAUX4(Vacancy)
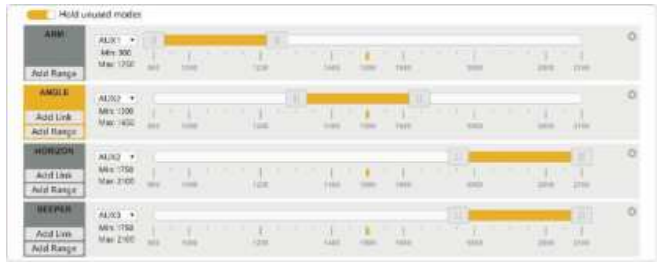
DJI toggle switches are all three sections. If you move the Yellow cursor of the corresponding aux channel of the switch, the corresponding function will be turned on when you move to the set range.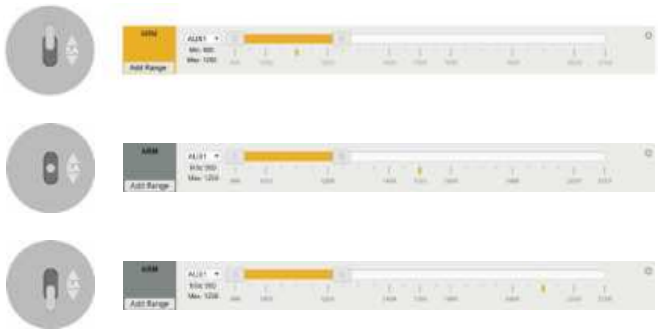
OpenTX Transmitter
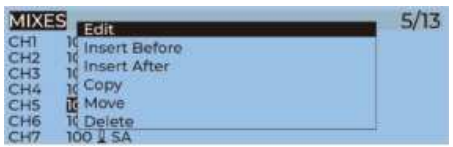
The transmitter of the openTX system needs to check the AUX channel. For Taranis X9D/X9D Plus/X9E and Taranis Q X7, turn on the transmitter, go to the MENU –MIXS and view the current AUX channel settings.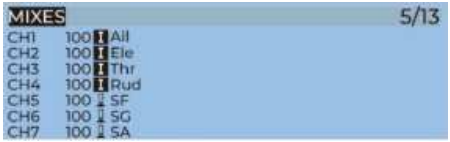
CH1-CH4 corresponds to four channels of the rocker.
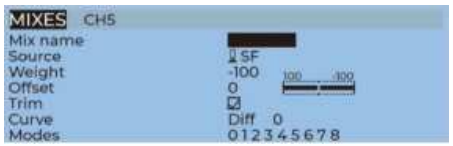
- CH5(SF)AUX1(ARM)
- CH6(SG)AUX2(MODES)
- CH7(SA)AUX3(BEEPER)
- CH8(Vacancy)AUX4(Vacancy)
FrSky X9D transmitter SF toggle switch has two sections. If you move the Yellow cursor of the corresponding aux channel of the switch, the corresponding function will be turned on when you move to the set range.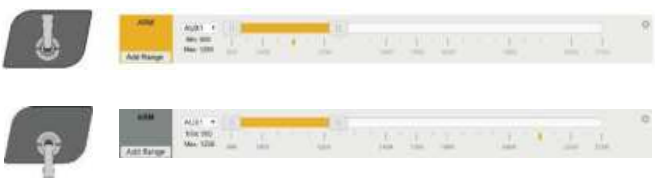
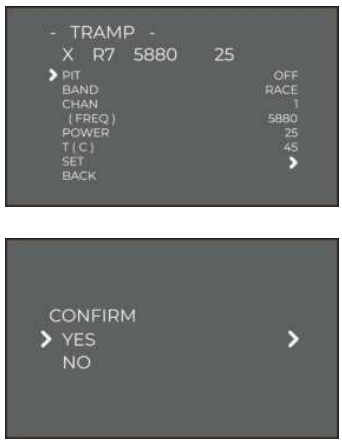
IRC Tramp
Turn on the transmitter, THR middle YAW left, P PITCH, and up, enter the OSD menu. The PITCH moves the cursor up and down, and the ELE moves right to enter the next item. Finally, save and exit.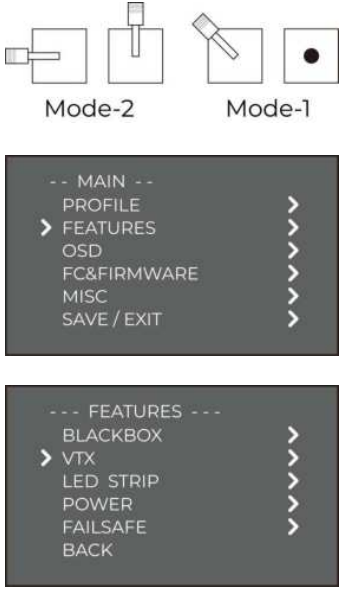
Install Silicone Pad, Landing pad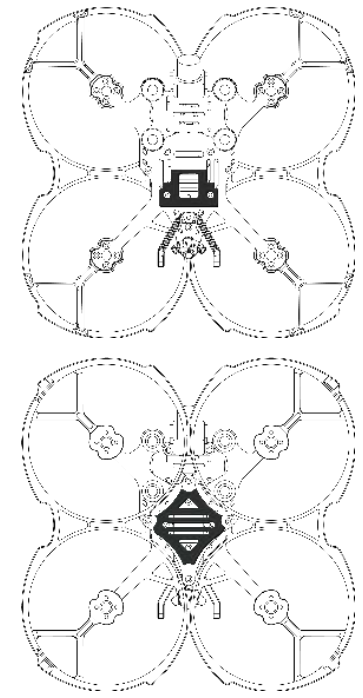
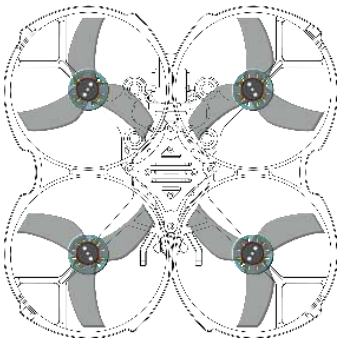
Install Propellers
Although the propeller of cinelog3isrei is installed in the factory, the direction of the propeller should be checked before taking off. Pre-flight Check
In many cases, the cause of a Quadcopter crash is not checked before takeoff. For the sake of safety, we suggest that you check before every flight. The steps are as follows:
- Turn on the transmitter and select the correct mode. Please confirm that the arming switch on the transmitter is in the “disarmed” position athe nd throttle is all the way down.
- Please perform a physical inspection of the Quadcopter for damage. If there is damage, please repair it first;
- Please confirm the propeller is in the right direction, and the propeller nut is locked; there is a risk of a crash.
- Check LiPo battery voltage. A fully-charged LiPo should be about 4.2 volts per cell, or about 12.6 volts for a 3S, or 16.8 volts for a 4S;
- Please confirm the battery is securely attached to the aircraft by the strap. And secure the balance lead so that it can’t be struck by the props;
- Please scan the flight area for any safety issues that might be present, such as people or animals.
- Verify that you have clean, strong video in your FPV goggles or screen. If you see interference or you see another pilot’s feed, resolve this issue before flying.
- Arm the quadcopter. Listen for the props hitting anything like an antenna or the battery wire.
- At this stage, take off and enjoy flying.
Include
- 1 x CineLog35 Quadcopter
- 2 x D90-3 propellers (pairs)
- 1 x Battery strap M15x200mm
- 2 x Battery Silicone Pads
- 2 x Landing Pads
- 4 x 15 degrees damping rings
- 1 x 3D print mounting combination
- 1 x Screw combination
- 1 x Screwdriver combination
- 1 x OSD menu board(Analog Version)
- 1 x Antenna fixed tube
Specification
- Model: Cinelog35 Quadcopter
- FC: GEP-F722-45A AIO
- ESC: BLheli_S 45A
- VTX: VISTA
- Camera: Caddx Nebula Pro / Caddx Ratel2
- Antenna: Momoda UFL LHCP / Momoda MMCX RHCP
- Motor: GR2004-1750KV / GR2004-2550KV
- Propeller: D90-3
- Frame: GEP-CL35
- Motor to Motor: 142mm
- Weight: 236.6g (CineLog35 HD VISTA Nebula Pro 4S PNP)
- Receiver: PNP Frsky R-XSR, TBS NanoRX
Warranty Policy
- If the Quadcopter is damaged or unknown issue, please contact GEPRC. We’ll do our best to get this taken care of quickly for you.
- Any impact damage, product liquid damage, high temperature burn, or other artificial damage is not covered by warranty.
CusmoterSupprt
- Website: https://geprc.com/