
Hama 00 222230 KO TAO Digital Wall Clock
Safety instructions
- The product is intended for private, non-commercial use only.
- Protect the product from dirt, moisture, and overheating, and use it in dry environments only.
- Do not use the product in areas where electronic products are not permitted.
- Do not drop the product, and do not expose it to any major shocks.
- Do not attempt to service or repair the product yourself. Leave any service work to qualified experts.
- Do not modify the product in any way. Doing so voids the warranty.
- Keep the packaging material out of the reach of children due to the risk of suffocation.
- Dispose of packaging material immediately according to the locally applicable regulations.
- Do not operate the product outside the power limits given in the specifications.
- Do not open the device or continue to operate it if it becomes damaged.
- As with all electrical products, this device should be kept out of the reach of children.
- Only use the article under moderate climatic conditions.
- Use the product only for the intended purpose.
Batteries
- When inserting batteries, note the correct polarity (+ and – markings) and insert the batteries accordingly. Failure to do so could result in the batteries leaking or exploding.
- Only use batteries that match the specified type. Keep the instructions for the correct choice of batteries included with the operating instructions of devices, for safe future reference.
- Before you insert the batteries, clean the battery contacts and the polarity contacts.
- Do not allow children to change batteries without supervision.
- Replace all the batteries in a set at the same time.
- Do not mix old and new batteries, or batteries of different types or from different manufacturers.
- Remove the batteries from products that are not being used for an extended period (unless these are being kept ready for an emergency).
Package contents
- “Ko Tao” digital wall clock
- 3 AAA batteries
- These operating instructions
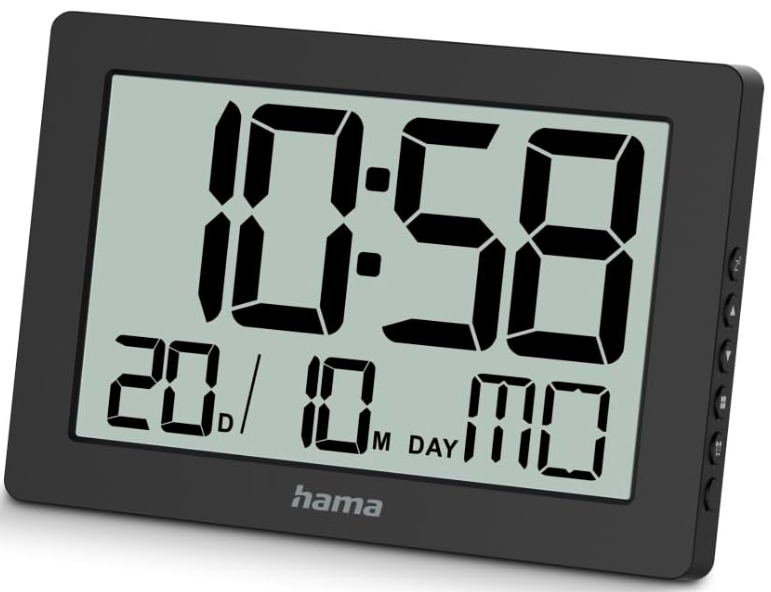
Control & Display
- Battery symbol
- Time
- Snooze symbol
- Day/month
- Alarm symbol
- Day of the week
- Snooze button
- Up button (increase set value)
- Down button (decrease set value)
- Mode button (confirmation of the set value)
- Alarm button
Important information
- This quick-reference guide contains the most important basic information, such as safety instructions and the steps necessary to operate the product.
- To help protect the environment and conserve valuable raw materials,
- Hama does not issue a printed manual and instead makes this available exclusively as a PDF download.
- Save the manual on your computer for reference and print it out if possible.
Setup
- Open the battery compartment on the back and insert 3 AAA batteries, observing the correct polarity.
- Then close the battery compartment.
- The clock is now ready for operation.
Installation
- Before mounting, check that the wall you have chosen is suitable for the weight to be mounted. Also, make sure that there are no electric, water, gas, or other lines running through the wall at the mounting site.
- Obtain suitable attachment material from specialist retailers.
- Do not mount the product above locations where persons might sit or stand.
- You can attach the wall clock to a wall using the cut-out on the back.
- Alternatively, place the wall clock on a flat surface using the stand.
Operation
- Press and hold the Mode button (10) for around 3 seconds to carry out the following settings in sequence: 12/24 h, hour, minute, year, month/day or day/month, month, day, language
- To select the individual values, press the Up button (8) or Down button (9) and confirm the selection by pressing the Mode button (10).
- If no entries are made for 20 seconds, the clock automatically exits settings mode.
Technical Data
- Power supply 4.5V 3xAAA batteries
Care and Maintenance
- Only clean this product using a lint-free, slightly damp cloth, and do not use any harsh cleaners.
- Ensure that no water is able to enter the product.
Warranty disclaimer
Hama GmbH & Co KG assumes no liability and provides no warranty for damage resulting from improper installation/ mounting, improper use of the product, or failure to observe the operating instructions and/or safety notes.
Customer Support
- Website: https://uk.hama.com
- Tel: +49 9091 502-2
FAQs
Q: How do I set the time on my Hama KO TAO Digital Wall Clock?
Holding down the “MODE” button until the hour numbers begin to flash will set the time. Press “MODE” once more to set the minutes after adjusting the hour using the “UP” or “DOWN” buttons.
Q: Does the clock automatically adjust for daylight saving time (DST)?
You can turn off the feature and manually change the time if you’re not inside a DCF range.
Q: My clock isn’t receiving the DCF radio signal. What can I do?
Wait a few minutes for synchronisation and place it next to a window that faces Central Europe for optimal effects.
Q: How do I switch between 12-hour and 24-hour time formats?
Until the display switches between 12H and 24H formats, press and hold the “UP” button. When the format of your choice appears, let go of the button.
Q: Can I mount the Hama KO TAO Clock on a wall?
Of course. The clock can be mounted on the wall or used on a table. Make sure it is firmly mounted on an appropriate hook or screw using the built-in wall-mount slot on the rear.
Q: How do I replace the batteries?
After removing the back cover for the battery compartment, insert two AA (1.5V) batteries, making sure they are polarity-correct, and replace the cover. It might be necessary to resynchronize the clock with the DCF signal after replacement.
Q: What should I do if the temperature or humidity reading seems incorrect?
Give the clock a full day to acclimatise to its new surroundings. Since these can alter sensor accuracy, keep it away from heat sources, air vents, and direct sunshine.