


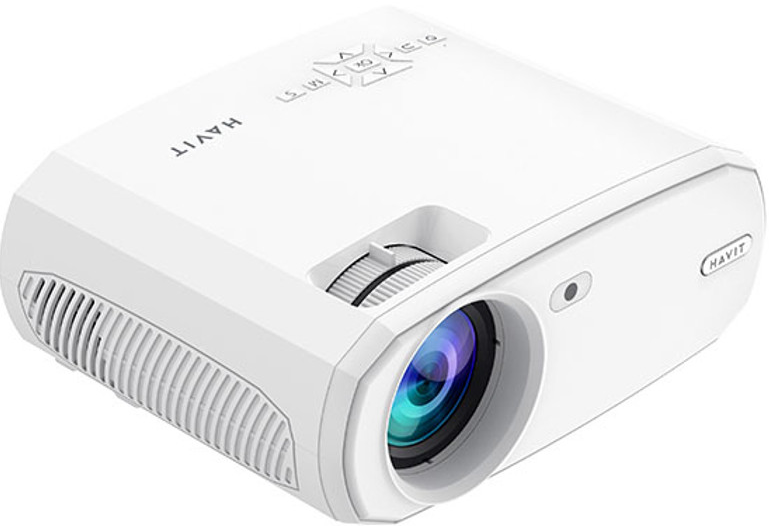
Havit PJ202 1080P HD Projector
Packing List
- Projector

- Remote (Batteries Not Included)
 User Manual

- AV Cable

- HD Cable

- Power Cable

Recommended

NOT Recommended

Function Overview


Quick Start

- Plug the power cord into an outlet.

- Take off the lens cover.

- Connect your device to the projector correctly

- Press the Power Button to turn on the projector.

- Select the correct input source by pressing the button.

- Adjust the kickstand accordingly.

- Adjust the keystone and focus to the best image performance

- Press the Power Button twice to turn off the projector
Input Source
Press the projector or remote to enter the interface of Input Source.
Multimedia Connection

HD Connection

VGA Connection

Screen Mirroring

Projector Connecting

Screen Mirroring
Step 1: Press the button “S” on the projector or press on the remote to enter the Input Source interface, then select Screen Mirroring.
Step 2: In the interface of screen Mirroring, press OK to enter the WiFi selection interface.
iOS Connect by Cables
- Connect the phone to the USB slot of the projector via the original iPhone charger cable. (Cable has USB port and Lightning port.
- Click “Trust” when connecting with the iPhone or Android Cast
Connect with an Android Phone
- Open the wireless display on your Phone.
- Find the device named “HAVIT PJ202” and connect it
iOS Cast
Connect with an iOS Phone via screen mirroring
- Open WIFI and find “HAVIT PJ202” from your phone. Then input the password “12345678” on your phone.
- Click AirPlay/Screen mirroring on your phone and connect to “HAVIT PJ202”.
Connect with an iOS Phone via WIFI
- Press OK to enter the WIFI selection interface from the projector. Choose your WIFI and select the password using the remote control.
- Connect to the same WIFI from your phone.
- AirPlay/Screen mirroring on your phone and connect to “HAVIT PJ202”.
Starting Screen Mirroring
Before screen mirroring, please press the button “S” on the projector or press the button to enter the Input Source interface and select Screen Mirroring.
Screen Mirroring through Wireless Connect for iOS System
- Turn on the projector, select Screen Mirroring as the input source to enter the Screen Mirroring Interface.
- Press OK to enter the WiFi selection interface and connect the projector to your router´s WiFi with the correct password.
- The WiFi icon on the interface will change to, and the router´s WiFi will be displayed on the interface of Screen Mirroring after a successful connection.
- Get back to the WiFi setting of your iOS mobile device, then connect it to the SAME router´s WiFi.
- Activate Screen Mirroring/Airplay Mirroring on your iOS mobile device and search for the projector, then select HAVIT PJ202 frsearcharching results to connect.
- The content of your iOS mobile device will be mirrored to the wall/screen after a WiFi connection.

Screen Mirroring via Cellular Data
- Turn on the projector, select Screen Mirroring as the input source, and enter the interface of Screen Mirroring.
- Go to the settings of your iOS mobile device and connect it to the WiFi HAVIT PJ202 (password: 12345678)
- Activate Screen Mirroring on your iOS mobile device and search for the projector.
- Select HAVIT PJ202 from the search results to connect.
- The content on your iOS mobile device will be mirrored to the wall/screen cellular data after a successful connection.on
For Android System
- To activate this function, your Android device must support Multi-Screen/Wireless display. Names may differ on different devices.
- Turn on the projector, select Screen Mirroring as the input, and source to enter the interface of Screen Mirroring.
- Turn on the WiFi switch in the Android device, and search for the projector´s WiFi “HAVIT PJ202” (Password: 12345678). A successful WiFi connection is not a must, but please make sure the switch is on.
- Activate Cast/Multi-screen/Wireless Display/Screen Mirroring/Smart View function on your Android device, then connect to the WiFi “HAVIT PJ202.”
- The content on your Android device will be mirrored to the wall/screen after a successful connection.
For Windows 10 System
- To activate this function, your Windows 10 device must support the Miracast feature.
- Turn on the projector, select Screen Mirroring as the input source, t o enter the interface of Screen Mirroring.
- Turn ON the WiFi switch in your Windows 10 device.
- Press the “Windows Logo+P” key combination on your keyboard to enter the PROJECT interface, then select “Connect to a wireless display” to search for the projector.
- Select HAVIT PJ202 from the search results to connect.
- The content on your Windows 10 device will be mirrored to the wall/screen after successful connection.
- The fluency of screen mirroring will be affected by the network environment.
- A bandwi100 Mbps100Mbit or more is recommended when using screen mirroring.
- Make sure your mobile device is close to the projector when using a wireless connection.
- A distance within 3ft is recommended.
- Some mobile devices may not support screen mirroring due to compatibility issues.
- Due to the restrictions from Hulu, Netflix, and similar services, the contents CAN NOT be mirrored or cast.
Screen Mirroring through the Wired Connection
For iOS System
- Turn on the projector, select Screen Mirroring as the input,, source to enter the interface of Screen Mirroring.
- Connect your iOS mobile device to the USB port of the projector with the ORIGINAL lighting cable.
- Select Trust in the pop-up window of Trust This Computer?
- The display of your iOS mobile device will be mirrored to the wall/screen after a while.

For Android System
- Turn on the projector, select Screen Mirroring as the input, and enter the interface of Screen Mirroring.
- Go to the settings of your mobile device, find Developer Options nd eenabledebugging.
- Connect your Android mobile device to the USB port of the projector with the ORIGINAL USB cable.
- Tap OK when your Android mobile device pops out the window of Allow USB debugging?
Then the display of your Android mobile device will be mirrored to the wall/screen after a while.

Specifications
| Display Technology | LCD |
| Resolution | Native 1920*1080 |
| Installation Type | Front/Rear/Ceiling |
| Focus | Manual |
| Speaker | 3W/4ohm |
| Until Dimension | 234.5*187.6*96.1 |
| Photo Format Supported | JPG/JEPG/PNG/BMP/GIF |
| Video Format Supported | AVI/MKV/MP4/MOV/MPG/MPEG/TS/TP/M2TS/ DAT/FLV/SWF/ASF/VOB/RM/RMVB/3GP/3GPP |
| Mounting Screw | 1/4“ |
| Light Source | LED |
| Input Signal | 480 576i576P 720i 720P 1080i 1080P |
| Aspect Ratio | 4:3/16:9/Auto |
| Keystone | ±15° |
| Power Supply | AC 100-240V, 50/60Hz |
| Unit Net Weight | 1.41kg |
| Audio Format Supported | MP3/AVI/WMV/MKV/DAT/VOB/MPG/MPEG/TS |
| Ports | AV*1\VGA*1\USB*1\HDMI*2\SD*1 |
| Number of Screw | 1 |
Projection Distance & Size

- The recommended projection distance varies with different projection contents.
- Please adjust the distance between the wall/screen and the projector as needed.
- Ambient darkness will improve the clarity of the projected images.
Troubleshooting
Blurry Image
- Adjust focus ring/keystone
- The projector and screen/wall must be at an effective distance.
Remote Unresponsive
- Make the remopinpointthe the IR receiver directly.
- Do not cover the IR receiver.
- Try a new pair of AAA batteries.
Mobile Connection
- iOS: Genuine lighting the the o HDMI cable
- Android: Micro USB to HDMI adapter/Type C to HDMI cable
Upside Down Images
- Go to Menu > Picture > Reduce Display Size to adjust sizeimage site.
Auto Off
- Go to Menu > Time > Sleep Timer to adjust the time period before the projector automatically turns off.
The symbol indicates for indoor use only.

- The symbol indicates for indoor use only.
- Class II equipment
- The symbol indicates DC voltage
- The symbol indicates AC voltage
- RECYCLING
Warranty Conditions
- Using the product for any purpose other than that for which the product is intended or failing to follow the instructions for maintenance, operation, and service of the product.
- Damage to the product by a natural disaster, the intervention of an unauthorized person, mechanical damage, or through the fault of the buy, er (e.g., during transport, cleaning by inappropriate means, etc.).
- Natural wear and aging of consumables or components during use (such as batteries, etc.).
- Exposure to adverse external influences, such as sunlight and other radiation or electromagnetic fields, fluid intrusion, object intrusion, mains overvoltage, electrostatic discharge voltage (including lightning), faulty supply or input,,t voltage and inappropriate polarity of this voltage, chemical processes such as used power supplies, etc.
- If anyone has made modifications, modifications, alterations to the product, he has made adaptations to change or extend the functions of the product compared to the purchased design or use of non-original components.
EU Declaration of Conformity
Identification data of the manufacturer’s / importer’s authorized representative
- Importer: Alza.cz a.s.
- Registered office: Jankovcova 1522/53, Holešovice, 170 00 Prague 7
- CIN: 27082440
Subject of the declaration
- Title: HD Projector
- Model / Type: PJ202
Customer Service
- Ph: +420 255 340 111
- Website: www.alza.cz/kontakt