
Hayward HYDRAPURE AOP Water Treatment Device
Introduction
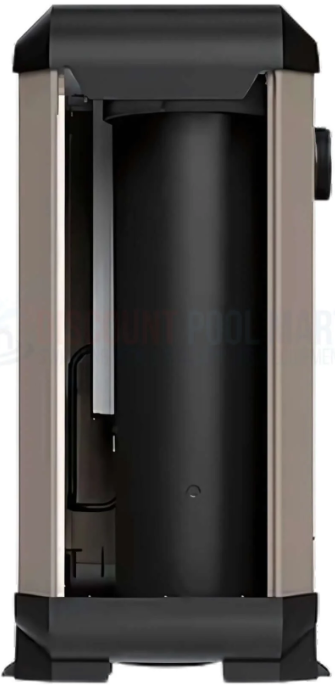
Your Sandmaster high-rate sand filter is a high-performance, totally corrosion-proof filter that blends superior flow characteristics and features with ease of operation. It represents the very latest in high-rate sand filter technology. It is virtually foolproof in design and operation, and when installed, operated, and maintained according to instructions, your filter will produce clear, sparkling water with only the least attention and care.
How it Works
The Sandmaster uses special filter sand to remove dirt particles from pool water. Sand is loaded into the filter tank and functions as the permanent dirt-removing media. The pool water, which contains suspended dirt particles, is pumped through your piping system and is automatically directed by the patented filter control valve to the top of the filter tank.
Specifications
| MODEL NO. | EFFECTIVE FILTRATION AREA | DESIGN FLOW RATE | MAXIMUM WORKING PRESSURE | SIDE CLEARANCE | ABOVE CLEARANCE | MEDIA REQUIRED | |||||||
| FT² | M² | GPM | LPM | PSI | BAR | INCH | CM | INCH | CM | TYPE | LBS | KG | |
| SM1706T | 1.50 | 0.14 | 38 | 144 | 50 | 3.45 | 18 | 45 | 18 | 45 | .45 mm – | 125 | 57 |
| SM1906T | 1.80 | 0.17 | 40 | 151 | 50 | 3.45 | 18 | 45 | 18 | 45 | .55 mm No 20 or No 1/2 Silica Filter | 175 | 80 |
| SM2106T | 2.20 | 0.20 | 44 | 161 | 50 | 3.45 | 18 | 45 | 18 | 45 | Sand | 225 | 100 |
| SM2306T | 2.64 | 0.25 | 53 | 200 | 50 | 3.45 | 18 | 45 | 18 | 45 | 250 | 114 | |
| SM2506T | 3.14 | 0.29 | 63 | 238 | 50 | 3.45 | 18 | 45 | 18 | 45 | 300 | 136 | |
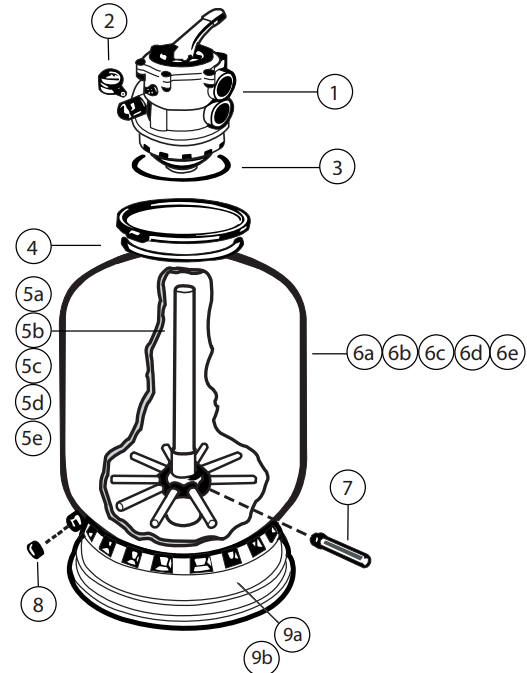
| REF. NO. | PART NO. | DESCRIPTION | NO. REQ’D. |
| 1 | SP-0714TC | Vari-Flo Control Valve 6-Position | 1 |
| 2 | EC-2708-1 | Pressure Gauge | 1 |
| 3 | GM-600-F | Valve/Tank O-Ring | 1 |
| 4 | GM-600-NM | Flange Clamp (Valve Tank) | 1 |
| 5a | S-170-DA | Lateral Assy. (SM1706T) | 1 |
| 5b | S-180-DA | Lateral Assy. (SM1906T) | 1 |
| 5c | S-210-DA | Lateral Assy. (SM2106T) | 1 |
| 5d | S-220-DA | Lateral Assy. (SM2306T) | 1 |
| 5e | S-244-DA | Lateral Assy. (SM2506T) | 1 |
| 6a | DP-10298-B | Filter Tank (SM1706T) | 1 |
| 6b | S-180-AB | Filter Tank (SM1906T) | 1 |
| 6c | S-210-AB | Filter Tank (SM2106T) | 1 |
| 6d | S-220-AB | Filter Tank (SM2306T) | 1 |
| 6e | S-244-AB | Filter Tank (SM2506T) | 1 |
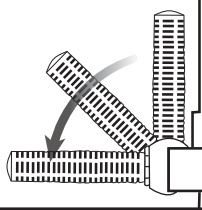
| 7 | S-200-Q | Lateral | 10 |
| 8 | S-180-LM | Drain Cap & Gasket | 1 |
| 9a | S-164-B | Base (SM1706T) | 1 |
| 9b | S-200-J | Base (SM2306T, SM1906T, SM2106T & SM2506T) | 1 |
Installation
- Loading sand media. Filter sand media is loaded through the top opening of the filter.
- Loosen flange clamp and remove Filter Control Valve (if previously installed).
- Cap the internal pipe with a plastic cap to prevent sand from entering it. Be sure the pipe is securely in place in the bottom underdrain hub.
- Assemble the Filter Control Valve to the filter tank
- Make a return to the pool pipe connection to control valve opening marked RETURN and complete other necessary plumbing connections, suction lines to the pump, waste, etc.
- Make electrical connections to the pump per the pump instructions.
- To prevent water leakage, be sure the winter drain cap is securely in place and all pipe connections are tight.
Initial Start-Up
- Depress the Vari-Flo control valve handle and rotate to the BACKWASH position. (To prevent damage to the control valve seal, always depress the handle before turning.)
- Prime and start the pump according to the pump Hayward HYDRAPURE AOP Water Treatment Device instructions (be sure all suction and return lines are open), allowing the filter tank to fill with water.
- Turn the pump off and set the valve to the RINSE position. Start the pump and operate until the water in the sight glass is clear – about 1/2 to 1 minute. Turn the pump off and set the valve to the FILTER position and restart the pump. Your filter is now operating in the normal filter mode, filtering particles from the pool water.
- Adjust pool suction and return valves to achieve the desired flow. Check the system and filter for water leaks and tighten connections, bolts, and nuts, as required.
- Note the initial pressure gauge reading when the filter is clean. (It will vary from pool to pool depending upon the pump and general piping system.) As the filter removes dirt and impurities from the pool water, the accumulation in the filter will cause the pressure to rise and the flow to diminish. When the pressure gauge reading is 8-10 Lbs. (4-6 BAR) If higher than the initial “clean” pressure you noted, it is time to backwash (clean) the filter (see BACKWASH under Filter and Control Valve Functions).
Functions
- FILTER – Set valve to FILTER for normal filtering. Also, use regular vacuuming.
- BACKWASH – For cleaning lter. When the pressure gauge rises 8-10 lbs. (4-6 BAR) Above start-up (clean pressure): Stop the pump, set valve to BACKWASH. Start the pump and backwash until waste wastewater is clear. Approximately 2 minutes or less, depending on dirt accumulation. Proceed to RINSE.
- RINSE – After backwashing, with pump off, set valve to RINSE. Start the pump and operate for about 1/2 to 1 minute. This assures that all dirty water from backwashing is rinsed out of the filter to waste, preventing possible return to the pool. Stop pump, set valve to FILTER, and start pump for normal filtering.
- WASTE – To bypass the filter for draining or lowering the water level and for vacuuming heavy debris directly to waste.
- RECIRCULATE – Water is recirculated through the pool system by-passing the filter.
- CLOSED – Shuts off from the pump to the filter.
- VACUUMING – Vacuuming can be performed directly into the filter. When vacuuming heavy debris loads, set the valve to the WASTE position to bypass the filter and vacuum debris.
Winterizing
- Completely drain the tank by unscrewing the drain cap at the base of the filter. Leave the drain cap off for the duration of the winter months.
- Depress the Vari-Flo control valve handle and rotate so as to set the valve pointer on the valve top between any position. This will allow water Hayward HYDRAPURE AOP Water Treatment Device to drain from the valve. Leave the valve in this “inactive” position.
Service
Consult your local authorized Hayward dealer or service center. No returns may be made directly to the factory without the express written authorization of Hayward Pool Products, Canada, Inc \
Troubleshooting
| REMEDY | LOW WATER FLOW | FILTER SHORT CYCLES | POOL WATER WON’T CLEAR UP |
| 1. Check skimmer and pump strainer baskets for debris. 2. Check for restrictions in intake and discharge lines. 3. Check for an air leak in the intake line (indicated by bubbles returning to the pool). 4. Backwash filter. | 1. Check for algae in the pool and superchlorinate as required. 2. Be sure chlorine and pH levels are in the proper range (adjust as required). 3. Check the surface of the filter sand for crusting or caking (remove 1” of sand if necessary). | 1. Check chlorine, pH, and total alkalinity levels and adjust as required. 2. Be sure the flow rate through fi filter is sufficient. 3. Operate the fire for longer periods. 4. Be sure the control valve is set on the “Filter” position. |
Pool Chemistry Guidelines
| SUGGESTED POOL CHEMIS | TRY LEVELS | ACTION REQUIRED TO CORRECT POOL CHEMISTRY | |
| TO RAISE | TO LOWER | ||
| pH | 7.2 to 7.6 | Add Soda Ash | Add Muriatic Acid or Sodium Bisulfate |
| TOTAL ALKALINITY | 100 to 130 ppm | Add Sodium Bicarbonate | Add Muriatic Acid |
| CHLORINE (UNSTABILIZED) | 0.3 to 1.0 ppm | Add Chlorine Chemical | No action – chlorine will naturally dissipate |
| CHLORINE (STABILIZED) | 1.0 to 3.0 ppm | Add Chlorine Chemical | No action – chlorine will naturally dissipate |
| CHLORINE STABILIZER (Cyanuric Acid) | 40 to 70 ppm | Add Stabilizer | Dilution – partially drain & refill the pool with water that has not been treated with Cyranuric Acid. |
Customer Service
- Ph: 1-800-657-2287
- Website: www.haywardcommercialpool.com
FAQs
What is the primary function of the HYDRAPURE AOP device?
By producing hydroxyl radicals that efficiently eliminate impurities, smells, and dangerous microbes, the HYDRAPURE AOP (Advanced Oxidation Process) gadget improves pool water sanitation and produces cleaner, clearer water.
How does the HYDRAPURE AOP technology work?
It reduces the need for excessive chemical use by disinfecting water and breaking down organic molecules using a mix of ultraviolet (UV) radiation and oxidation processes.
Where should the HYDRAPURE AOP device be installed?
Make sure the device is accessible for maintenance and inspection by installing it in the pool’s filtration system, usually on the return line following the filter and heater.
What power supply is required for the HYDRAPURE AOP unit?
A regular electrical socket with adequate grounding is needed for the gadget. For precise voltage and power ratings, consult the handbook.
Is the HYDRAPURE AOP device suitable for all pool types?
Indeed, it works with freshwater and saltwater pools in both residential and business settings.
Does the device affect water pH or chemical balance?
The HYDRAPURE AOP can lower chemical usage by improving sanitation efficiency, but it doesn’t change pH.