Labnet C2500 Prism Air Cooled Microcentrifuge
Introduction
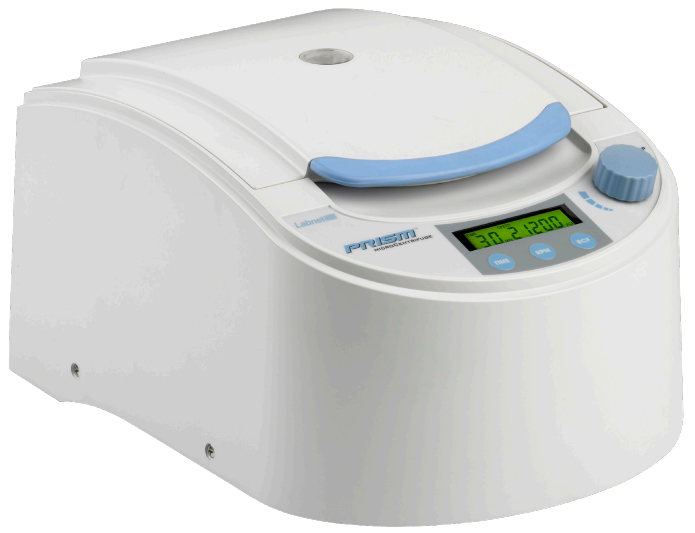
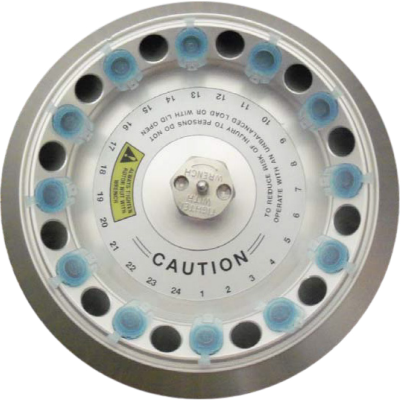
The Labnet Prism™ microcentrifuge is a small benchtop centrifuge designed for the separation of various research samples. The motor is brushless and requires no routine maintenance. This microcentrifuge is supplied with a 24 x 1.5/2.0 mL rotor for microsample tubes. Adapters are available for tubes smaller than 1.5 mL. This reaches speeds of up to 15,000 rpm/21,200 x g.
Safety Instruction
Before using the Labnet Prism microcentrifuge for the first time, please read this entire manual carefully. If the equipment is used in a manner not specified by the manufacturer, the protection provided by the equipment may be impaired.
- Never use the centrifuge in any manner not specified in these instructions.
- Never operate the centrifuge without a rotor properly attached to the shaft.
- Always use a wrench to tighten the rotor nut. Never tighten the rotor nut by hand only.
- Never fill tubes while they are in the rotor. Liquid spillage may harm the unit.
- Never put your hands in the rotor area unless the rotor is completely stopped.
- Never move the centrifuge while the rotor is spinning.
- Never use solvents or flammables near this or other electrical equipment.
- Never centrifuge flammable, explosive, or corrosive materials.
- Never centrifuge hazardous materials outside of a hood or a proper containment facility.
- Always load the rotor symmetrically. Each tube should be counter-balanced by another tube of the same type and weight.
- Always locate the centrifuge within easy access to an electrical outlet.
- Always use only microcentrifuge tubes made from plastic and designed to withstand centrifugal forces of at least 21,200 x g.
- Always use a wrench to tighten the rotor nut.
Do not operate the centrifuge if any of the following conditions exist: - The centrifuge has not been installed properly.
- The centrifuge is partially dismantled.
- Service has been attempted by unauthorized or unqualified personnel.
- The rotor has not been installed securely on the motor shaft.
- The centrifuge is located in an explosive atmosphere.
- Materials to be centrifuged are combustible and/or explosive.
- Materials to be centrifuged are chemically reactive.
- The rotor load is not properly balanced.
- The rotor nut was not tightened with a wrench.
Specifications
- Dimensions (W x D x H) 10.1 x 14.2 x 7.6 in. (25.7 x 36.0 x 19.4 cm)
- Maximum Speed 15,000 rpm
- Maximum RCF 21,200 x g
- Maximum Volume 24 x 2.2 mL
- Timer 0.5 to 99 minutes or continuous
- Admissible Sample Density 1.2 kg/dm3
- Electrical/Fuse Rating
- C2500 C2500-230V C2500-100V
- 120V~, 50/60Hz, 250W, 3.4A
- 230V~, 50/60Hz, 200W, 1.4A
- 100V~, 50/60Hz, 230W, 3.5A
- Temperature Range 5°C to 40°C (up to 80% RH at 31°C, decreasing linearly to 50% RH at 40°C)
- Protection Class IP21
- The Labnet Prism™ microcentrifuge is designed to be safe at least when operated under the following conditions:
- Indoor use only
- Altitude up to 2,000 meters
- Pollution Degree 2
- Changes or modifications not expressly approved by the party responsible for compliance could void the user’s authority to operate the equipment.
Package Contents
- Labnet Prism microcentrifuge
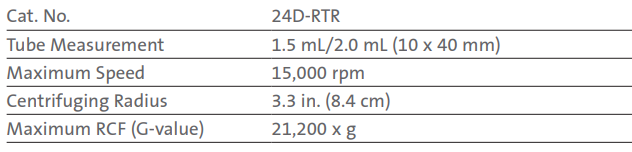
- Standard angle rotor (Cat. No. 24D-RTR)
- Rotor removal tool
- Power cord
- Instruction manual
Installation
The centrifuge should be installed on a rigid, even surface such as a stable laboratory bench, countertop, etc. To guarantee sufficient ventilation, ensure that the centrifuge has at least 6 inches (15 cm) of free space on all sides, including the rear. The centrifuge should not be located in areas subject to excessive heat, such as in direct sunlight or near radiators or the exhaust of a compressor, as a buildup of heat may occur within the chamber. Before operating the centrifuge, check that the power source (electrical outlet on the wall) corresponds to that on the manufacturer’s rating label, then connect the power cord to the centrifuge and the power source.
Installation and Maintenance
Rotors and Accessories
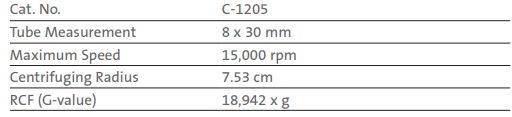
- The following accessories are included or available for the Labnet Prism™ microcentrifuge:
Angle Rotor for 24 x 1.5 mL/2.0 mL Tubes (included)
Rotor Wrench (included)

0.5 mL Tubes (6/Pk)
0.4 mL Tubes (6/Pk)

0.2 mL Tubes (6/Pk)
Rotor Maintenance
The rotor should be cleaned thoroughly after each use. NOTE: Thorough cleaning must be performed when spinning samples containing phenol or phenol chloroform. Periodically inspect the rotor for dents, dings, scratches, discoloration, and cracks. If any damage to the rotor is found, discontinue use of the rotor immediately and replace it.
Removing and Installing the Angle Rotor
The Labnet Prism™ microcentrifuge comes complete with a standard 24-place rotor installed. To remove the rotor for cleaning, using the rotor wrench, remove the rotor securing screw from the motor shaft by turning the screw counterclockwise. Lift the rotor directly upward in a straight vertical motion.
To replace the rotor, first make sure the motor shaft and rotor mounting hole are clean. Place the rotor on the motor shaft. Reinstall the rotor securing screw on the motor shaft by turning it clockwise. Hold the rotor with one hand and tighten the rotor securing screw, using the rotor wrench.
Loading the Rotor
Tubes to be loaded should be filled equally by eye. The difference in weight between the tubes should not exceed 0.1 gram. Tubes should always be loaded so there is equal spacing between all tubes. One or two additional loaded tubes may need to be added to achieve this. See Figure 1 for a typical balancing scheme.
Overloading Rotors
In order to centrifuge liquids with a higher density, it is necessary to reduce the speed. NOTE: Failure to reduce the speed may result in damage to the rotor and centrifuge. The revised maximum speed can be calculated with the following formula:
Example: Where the density of the liquid is 1.7, the new maximum speed would be calculated as follows:
If in doubt concerning maximum speeds, please contact the manufacturer for assistance.
Operation
Never attempt to operate the centrifuge with rotors or adapters that show signs of corrosion or mechanical damage. Never centrifuge strongly corrosive materials that may damage the rotors, accessories, or bowl of the unit.
Attaching Rotor Lid
Always use the rotor lid for safety and to allow the rotor to reach proper speed. Make sure the rotor lid snaps securely into place by pressing down on the center catch.
Closing the Lid
Close the centrifuge lid. This microcentrifuge has a lid lock that activates only when a run is started.
Lid Release
The lid will remain locked during a centrifuge run. Do not attempt to open the lid of any centrifuge until the rotor has come to a complete stop. In the event of a power failure or malfunction, it may be necessary to open the lid manually.
- Disconnect the power cord from the wall socket.
- Remove the plastic plug, located on the left side of the unit.
- Pull the wire (attached to the plug) to open the lid lock manually
Lid Lock
The centrifuge can be started only when the lid is securely closed. When a run is started, the lid lock automatically activates.
Speed Selection
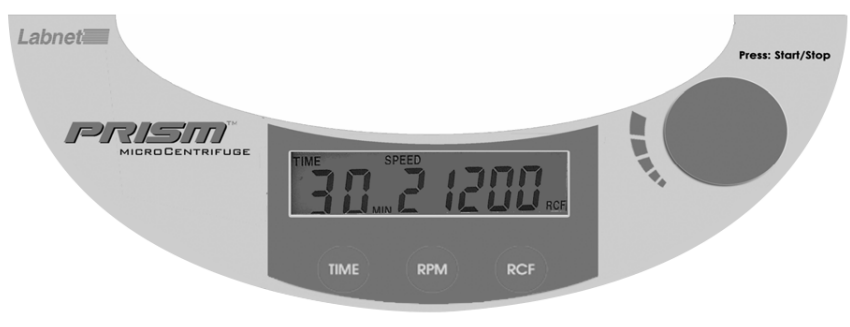
Then, turn the control knob to increase or decrease the value.
Start/Stop
After 99 minutes, the display shows “–” which indicates continuous run. In this mode, the centrifuge will run until manually stopped. To start a run, press the control knob. When the preselected time expires, the centrifuge will stop automatically. To stop the centrifuge prior to the expiration of the set time, press the control knob.
Service and Maintenance
Centrifuge Service
The brushless motor in this microcentrifuge requires no routine maintenance. Any required service should be performed by authorized, qualified personnel only. Repairs performed by unauthorized personnel may void the warrant.y
Cleaning
Always keep the centrifuge housing, rotor chamber, rotor, and rotor accessories clean. For more thorough cleaning, use a neutral cleaning agent (pH between 6 and 8) applied with a soft cloth. Liquid should not come into contact with the motor.
Replacing Fuses
Disconnect the power cord from the wall socket before checking the fuses. The fuse holder is located in the power inlet on the rear of the unit. Open the fuse holder drawer by inserting a small screwdriver under the tab and prying it open. Remove the innermost (operative) fuse from its retaining tabs, and replace the fuse if necessary. A spare fuse is located in the outermost chamber of the fuse drawer. Replace only with a fuse of the same value as the original. See Section 3.0 for information on fuse type.
Troubleshooting Guide
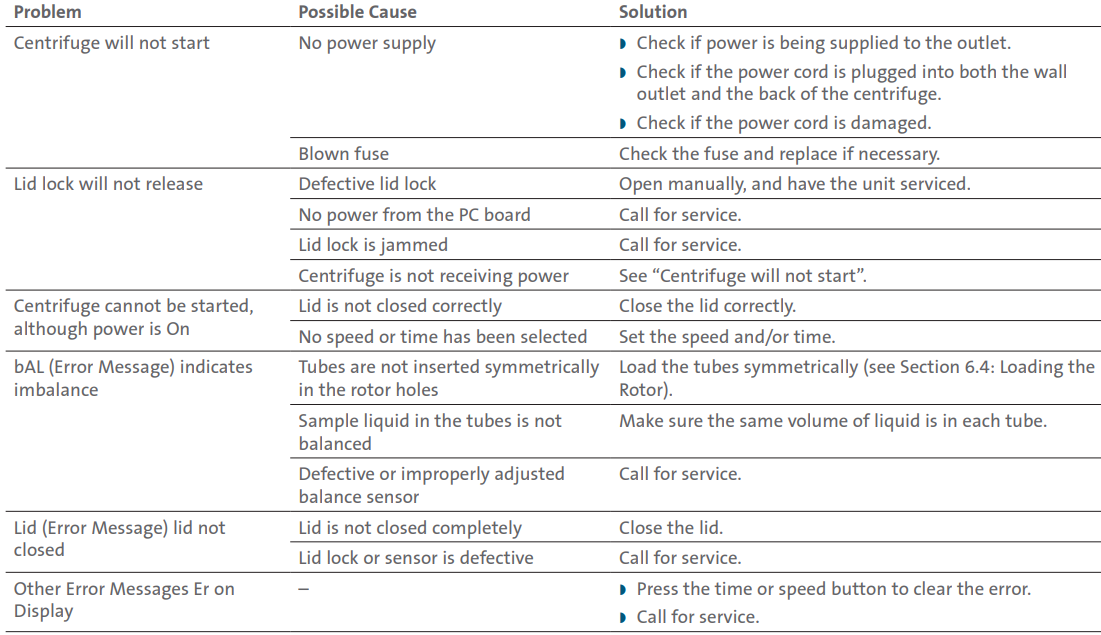
Do not send in a unit for service without first calling to obtain a repair authorization number. Any damage resulting from improper packaging shall be the responsibility of the user.
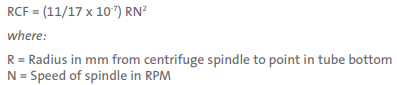
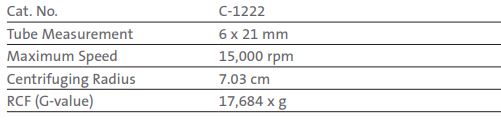
Determination of G-values
The centrifuging radius of the 1.5/2.0 mL rotor is 8.23 cm.

To calculate the RCF value at any point along the tube or bottle, measure the radius (in mm) from the center of the centrifuge spindle to the particular point. Draw a line from the radius value on the right-hand column to the appropriate centrifuge speed on the left-hand column. The RCF value is the point where the line crosses the center column. The nomogram is based on the formula: