

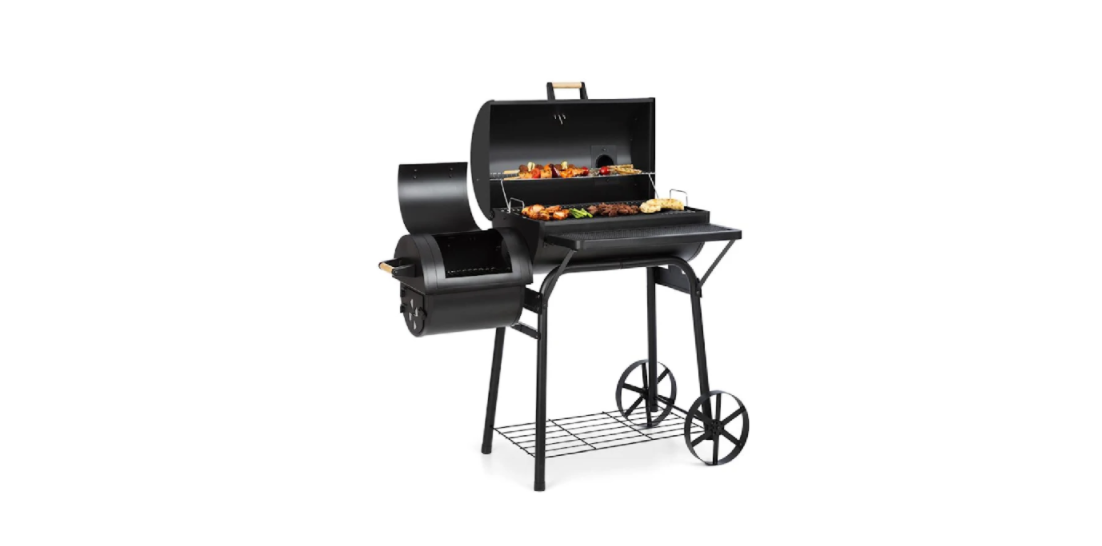

KLARSTEIN 10033460 BEEF BRISKET Smoker Grill
Safety Instructions
- This fire pit is not for commercial use.
- Do not handle or move the fire pit when in use, as it is hot.
- Do not leave a burning fire unattended.
- Fire hazard-Hot embers may be emitted while in use.
- Do not burn fuel directly on the fire bowl base.
- Do keep the fuel away from the wall of the fire pit, as the high temperature may damage it.
- Avoid breathing smoke from the fire and avoid getting it into your eyes.
- A slight discolouration of the finish may occur after use.

Parts


 Assembly
- Assemble the feet.

- Assemble the feet.

- Assemble the bottom grid.

- Assemble the wheel with 2 pcs M8 Lock nuts.

- Assemble foot brackets with 8 pcs M6*2 screws.

- Assemble the side box bracket with 2 pcs M6*12 screws.

- Assemble the main body with 6 pcs M6*12 screws and 2 pcs M6 nuts

- Assemble the lid with 1 pc M6*20 step screws.

- Assemble the lid with 1 pc M6*20 step screw.

- Assemble the smokestack with 2 pcs M6*12 screws and 2 pcs M6 nuts.

- Assemble the smoke stack lid with the spring (usually this part was assembled).

- Assemble the handle with 4 pcs M6*12 screws and 4 pcs M6 nuts.

- Assemble the warming bracket with 2 pcs M6*15 screws.

- Assemble the side box with 8pcs M6*12 screws and 2 pcs M6 nuts.

- Assemble the handle with 4 pcs M6*12 screws and 4 pcs M6 nuts.

- Assemble the side box with 8 pcs M6*12 screws and 2 pcs M6 nuts.

- Assemble the side door and damper

- Assemble the side box lid stand with 1 pc M5*10 screw and 1 pc M5 nut.

- Assemble the handle on the side box lid with 4 pcs M6*12 screws and 4 pcs M6 nuts.

- Assemble the side box lid with 4 pcs M5*10 screws.

- Assemble the Front shelf with 6 pcs M6*12 screws and 2 pcs M6 nuts.

- Assemble the charcoal grid.

- Assemble the grill grid in the body.

- Assemble the charcoal grid in the side box.

- Assemble the grill grid in the side box.

- Assemble the thermometer on the lid and finish assembling.

Cleaning & Care
Risk of injury! To avoid the risk of electric shock, injury, or damage, unplug the appliance from the wall outlet before cleaning and never immerse the base unit in water.
- Clean the base unit with a damp cloth. If necessary, you can also use some washing-up liquid.
- Then wipe with a damp cloth.
- Do not reuse the base unit until it is completely dry.
- Place the parts in cold or lukewarm water to soak KLARSTEIN BELLA PICO 2G Food Processor the dough residues. If necessary, you can also use some washing-up liquid.
- Use a dishwashing brush to remove the dough residue.
- Rinse the parts with clear water.
- Allow the parts to dry completely before using them again.
- The mixing bowl is made of stainless steel and can be cleaned in the sink or dishwasher.
Disposal
By disposing of it according to the rules, you are protecting the environment and the health of your fellow human beings from negative consequences. For information about the recycling and disposal of this product, please contact your local authority or your household waste disposal service.
Environmental Safety
- During cooking, make sure that there is sufficient air KLARSTEIN 10035380 ELEONORA Range Hood supply so that the cooker hood can operate efficiently and with low operating noise.
- Adjust the fan speed to the amount of steam KLARSTEIN BELLA PICO 2G Food Processor produced during cooking. Use the intensive mode only when necessary.
- Switch off the cooker hood when you no longer need it.
- Switch off the lighting when you no longer need it.
- Clean the filter at regular intervals and replace it if necessary to increase the effectiveness of the ventilation system and prevent fire hazards.
- Always put the lid on when cooking to reduce cooking steam and condensation.
Customer Service
Manufacturer & Importer (UK)
- Manufacturer: Chal-Tec GmbH, Wallstrasse 16, 10179 Berlin, Germany.
- Importer for Great Britain: Berlin Brands Group UK Ltd PO Box 42 272 Kensington High Street, London, W8 6N, D United Kingdom
- Website: http://www.klarstein.com
- Scan the QR code to get access to the latest user manual for the KLARSTEIN 10035380 ELEONORA Range Hood and more product information.

Dear Customer
Congratulations on purchasing this device. Please read the following instructions carefully and follow them to prevent possible damage. We assume no liability for damage caused by disregard of the instructions and improper use.