


Seeed Studio S-DTS210-01 Industrial Turbidity Sensor
Introduction
The Seeed Studio S-DTS210-01 Industrial Turbidity Sensor is designed based on the principle of scattering light turbidity measurement. When a light beam is transmitted into the water sample, turbidity particles cause the light to scatter. This sensor measures the intensity of the scattered light at a direction perpendicular to the incident light and compares it with internal calibration values to calculate the turbidity of the water sample. The final value is obtained after linearization processing.
Features
The Seeed Studio S-DTS210-01 Industrial Turbidity Sensor is accurate and easy to use. It works well for checking water quality in factories and other industrial places.
- 90° scattering light principle, with an integrated temperature sensor
- Supports RS-485, Modbus/RTU protocols
- Optical fiber structure, offering strong resistance to external light interference
- Infrared LED light source, ensuring high stability
- IP68 protection level, allowing normal operation in deep water
- Convenient, fast, stable, and easy to maintain.
Specification
| Model | S-DTS210-01 |
| Measurement Principle | Scattered light method |
| Range | 0~1000.0NTU |
| Resolution | 0.1NTU/0.1℃ |
| Accuracy | ±5% F.S, ±0.3°C |
| Calibration method | Two-point Calibration |
| Temperature Compensation | Auto Temperature Compensation (Pt1000) |
| Output | RS-485(Modbus/RTU) |
| Operating Condition | 0~50℃,<0.2MPa |
| Storage Temperature | -5~65℃ |
| Installation Method | Immersion Mount, 3/4” NPT Pipe Threads |
| Cable Length | 10 Meter |
| Power Consumption | 0.3W@12V |
| Power Supply | 12~24V DC (Typical values 12V DC) |
| Protection Level | IP68 |
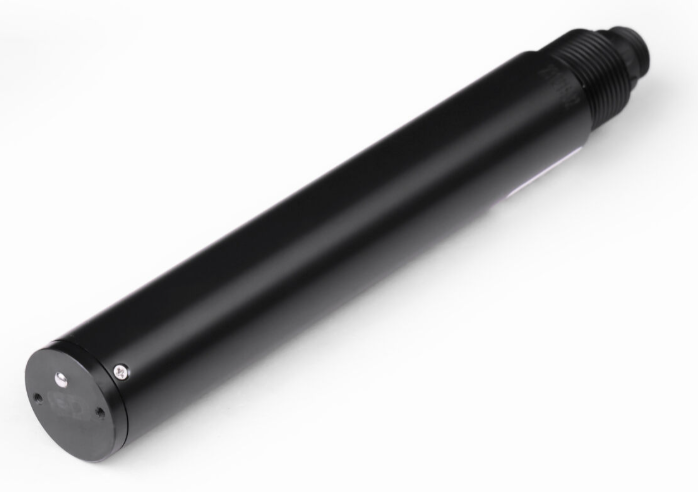
Hardware Overview
Wiring

Dimensions

Connector: M16-5-Pole waterproof M connector.
Installation
The sensors are kept more than 5cm from the side walls and more than 10cm from the bottom.

RS-485 Modbus Protocol
Modbus Protocol
- Modbus Protocol is widely used to establish master-slave communication between intelligent devices or sensors.
- A MODBUS message sent from a master to a slave contains the address of the slave, the function code (e.g., ‘read register’ or ‘write register’), the data, and a checksum um(LRC or CRC).
- Industrial Turbidity Sensor (S-DTS210-01) with RS-485 interface, supports Modbus protocol. The communication parameters to factory default values for:
- Baud rate 9600 bps, one start bit, 8 data bits, no parity, one stop bit.
Modbus Registers
| Parameter Name | Register Address | Parameter Type | Number ofRegister (bytes) | Parameter Range and Description |
| Measured Value & Temperature | 0x0000 | Read, unsigned short | 4 (8 bytes) | 4 double-byte integers: measured value, decimal places of the measured value, temperature value, and decimal places of the temperature value. |
| Temperature Value | 0x0100 | Read, unsignedshort | 1 (2 bytes) | ℃x10 (25.6℃ temperature is displayed as 256, default 1decimal place) |
| Turbidity Value | 0X0101 | Read, unsignedshort | 1 (2 bytes) | NTU x 10 (10 NTU of turbidity is displayed as 100, defaulting to 1 decimal place) |
| Temperature Calibration | 0x1000 | Read/Write, unsigned short | 1 (2 bytes) | Write data is the actual temperature value x 10; read data is the temperature calibration offset x 10. |
| Turbidity Zero Point Calibration | 0x1001 | Read/Write, unsigned short | 1 (2 bytes) | Calibrated in zero turbidity water or distilled water, calibrated with a write data of 0. (Can also be calibrated in 0-10NTU turbidity standards) |
| Turbidity Slope Calibration | 0x1003 | Read/Write, unsigned short | 1 (2 bytes) | Calibrate in a 1000 NTU standard solution. The data written for calibration is the actual value of the standard solution x 10. |
| Sensor Address | 0x2000 | Read/Write, unsignedshort | 1 (2 bytes) | The default is 50, and the data range is 1-255. |
| Baud Rate Settings | 0x2003 | Read/Write, unsigned short | 1 (2 bytes) | The default is 9600. write 0 can be set to 4800; write 1 can be set to 9600; write 2 can be set to19200. |
| Restore Factory Settings | 0x2020 | Write, unsigned short | 1 (2 bytes) | The calibration value restores the default value after writing 0. Note that the sensor needs to be calibrated again after resetting before it can be used. |
Command Examples
Change the slave address
| Register address | Number of registers | Function code | Default address |
| 0x2000(42001) | 1 | 0x06 | 01 |
To change the Modbus device address of the sensor, change the device address from 01 to 06; the example is as follows:
- Send: 01 06 20 00 00 06 02 08
- Response: 01 06 20 00 00 06 02 08;
- Note: The address is changed to 06 and saved by powering down.
Baud rate
| Address | Number of registers | Function code | Default Value | Supported values |
| 0x2003 (42004) | 1 | 0x06 | 1 (9600bps) | 0-2 (4800-19200bps) |
Baud rate can be changed by the upper computer setting. It can work without rebooting after the change. The baud rate is saved upper computer setting after powering down.
Baud rate supports 4800,9600,19200. The Integer value assigned baud rate is as follows:
| Input | Baud rate |
| 0 | 4800 bps |
| 1 | 9600 bps |
| 2 | 19200 bps |
- Send command: 01 06 20 03 00 02 F3 CB
- Response: 01 06 20 03 00 02 F3 CB
- Note: The baud rate was changed to 19200 bps and saved by powering down.
Function registers
- Read example value: 19.2°C
- Send: 01 03 01 00 00 01 85 F6
- Response: 01 03 02 00 C0 B8 14
- Return hexadecimal unsigned integer data, temperature value = Integer/10, keep 1 decimal place.
Address Number of registers Function code 0x0002 2 0x03 - Read example value: Temperature 18.5°C
- Request frame: 01 03 00 02 00 02 65 CB
- Answer frame: 01 03 04 00 B9 00 01 EA 16
Example:
| Temperature |
| 00 B9 00 01 |
Measurement temperature
| Address | Number of registers | Function code |
| 0x0100 (40101) | 1 | 0x03 |
Measurement of turbidity
| Address | Number of registers | Function code |
| 0x0101 (0x40102) | 1 | 0x03 |
- Read example value: 98.5NTU
- Send: 01 03 01 01 00 01 D4 36
- Response: 01 03 02 03 D9 79 2E
- Return hexadecimal unsigned integer data, turbidity value = Integer/10, retain 1 decimal place.
Address Number of registers Function code 0x0000 2 0x03 - Read example value: turbidity value 86.6 NTU
- Request frame: 01 03 00 00 00 02 C4 0B
- Answer frame: 01 03 04 03 62 00 01 9A 69
- Example:
Turbidity 03 62 00 01 - Turbidity value 03 62 indicates a hexadecimal reading turbidity value, and 00 01 indicates a turbidity value with 1 decimal place, which converts to a decimal value of 86.6.
Continuous reading of temperature and turbidity
| Address | Number of registers | Function code |
| 0x0100(40101) | 2 | 0x03 |
- Read sample values: temperature 19.2°C and turbidity value 98.5 NTU
- Send instruction: 01 03 01 00 00 02 C5 F7
- Response: 01 03 04 00 C0 03 D9 3B 65
- The register returns hexadecimal unsigned integer data, temperature value =
- Integer/10, with 1 decimal place.
- Register returns hexadecimal unsigned integer data, turbidity value = Integer/10, keep 1 decimal place.
Address Number of registers Function code 0x0000 4 0x03 - Read sample value: temperature 18.5℃ and turbidity value 86.6NTU
- Request frame: 01 03 00 00 00 04 44 09
- Answer frame: 01 03 08 03 62 00 01 00 B9 00 01 BB E1
- Example:
Turbidity Temperature 03 62 00 01 00 B9 00 01 - Turbidity value 03 62 indicates a hexadecimal reading turbidity value, and 00 01 indicates a turbidity value with 1 decimal place, which converts to a decimal value of 86.6.
- The temperature value 00 B9 denotes the hexadecimal reading temperature value, 00 01 denotes the temperature value with 1 decimal point, converted to a decimal value of 18.5℃.
Calibration
Temperature calibration
| Address | Number of registers | Function code |
| 0x1000(41001) | 1 | 0x06 |
- Calibration example: Calibration at a temperature of 25.8°C
- Send command: 01 06 10 00 01 02 0D 5B
- Response: 01 06 10 00 01 02 0D 5B
Turbidity zero calibration
| Address | Number of registers | Function code |
| 0x1001(41002) | 1 | 0x06 |
- Calibration example: Calibration in distilled water or deionized water with zero turbidity
- Send command: 01 06 10 01 00 00 DC CA
- Response: 01 06 10 01 00 00 DC CA
Turbidity slope calibration
| Address | Number of registers | Function code |
| 0x1003(41004) | 1 | 0x06 |
- Calibration example: Calibration in a 1000 NTU turbidity solution
- Send command: 01 06 10 03 27 10 67 36
- Response: 01 06 60 03 27 10 67 36
Error response
If the sensor fails to execute the host computer command correctly, a message of the following format is returned:
| Define | Address | Function code | CODE | CRC |
| Data | ADDR | COM+80H | xx | CRC 16 |
| Byte | 1 | 1 | 1 | 2 |
- CODE: 01 – Function Code Error 03 – Data error
- COM: received function code
Maintenance
Use and Maintenance
- Cleanse
- Use tap water to clean the external surface of the sensor. If there is still debris residue, wipe with a moist soft cloth. For some stubborn dirt, you can add some household detergent solution to tap water to clean.
- Check the cable of the sensor
- The cable should not be taut during normal operation; otherwise, it will be easy to cause the internal wires of the cable to break, so that the sensor can not work properly.
- Check for dirt
- Check whether the measuring window of the sensor is dirty and whether the cleaning brush is normal.
- Avoid impact
- The sensor contains sensitive optical and electronic parts. There are no parts inside the sensor that require maintenance by the user.
Calibration
- Zero Calibration
- Use a larger beaker to measure the appropriate amount of zero turbidity solution.
- Slope Calibration
- Place the measuring end of the sensor in the standard solution, the measuring end of the sensor from the bottom of the beaker at least 10cm, 3 ~ 5 minutes to stabilize for slope calibration.
Document Version
| Version | Date | Description | Editor |
| V1.0.0 | 1/21/2025 | First edition | Zeke CAI |
Customer Support
- Website: www.seeedstudio.com
- Ph: +86-0755-86095676
2008-2025 Seeed Technology Co., Ltd. All rights reserved.