Autel Robotics EVO II Pro 6K Camera Drone
Safety Instructions
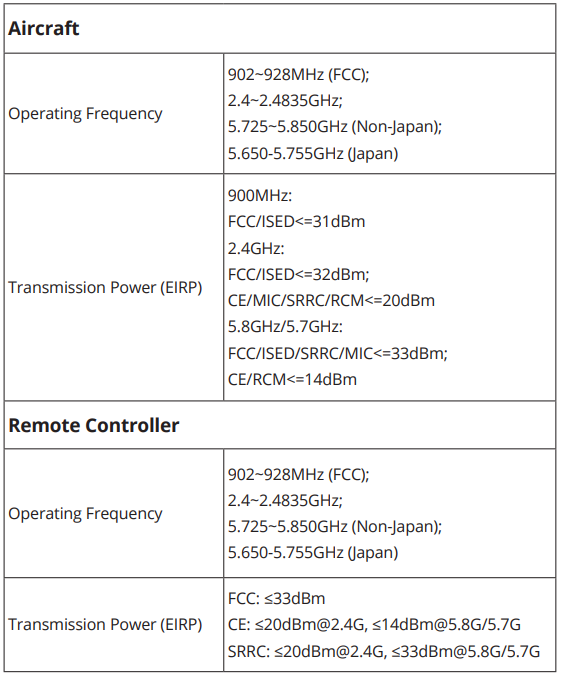
The EVO II Pro V3 brings excellent flight performance, achieving a top speed of 20m/s (45mph), 40-minute flight time, and an operating distance of 15km (9.32miles, FCC). The aircraft comes with a 6.4-inch touch-screen controller, which allows users to view the live feed at up to 1080p.
Aircraft
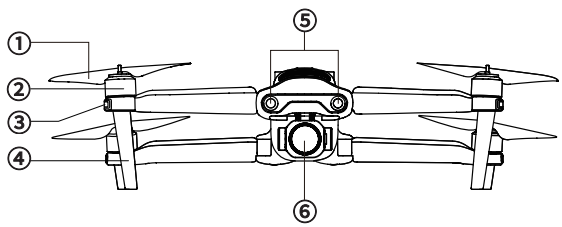
- Propellers
- Motors
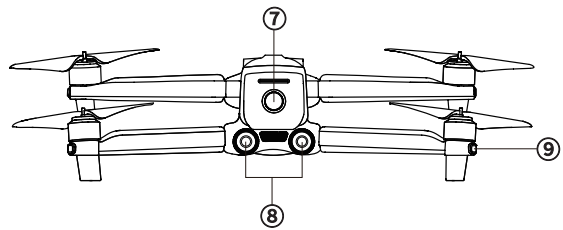
- Front LED Indicators
- Landing Gear
- Front Vision System
- Gimbal Camera

- Power Button
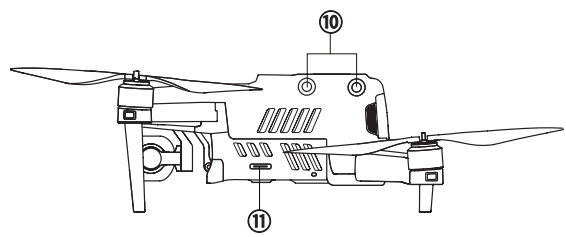
- Rear Vision System
- Rear LED Indicators

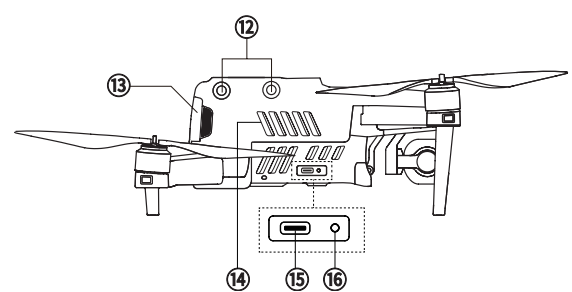
- Left Side Vision System
- SD Card Slot

- Right Side Vision System

- Upward Vision System

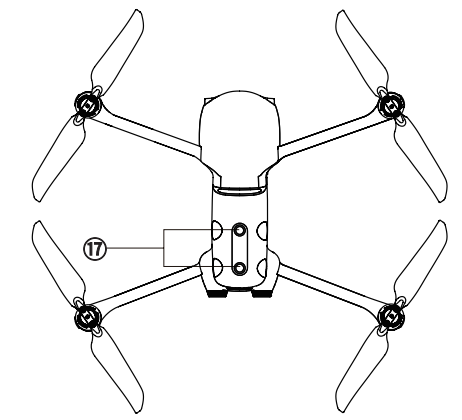
- Ultrasonic Sensor
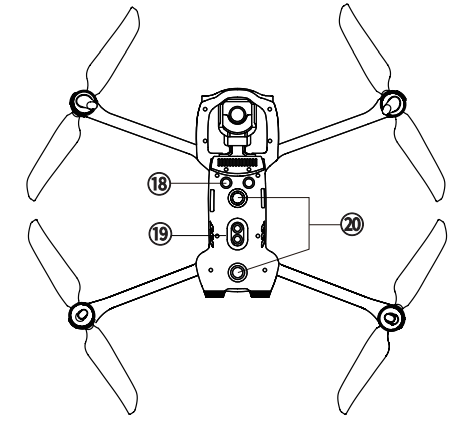
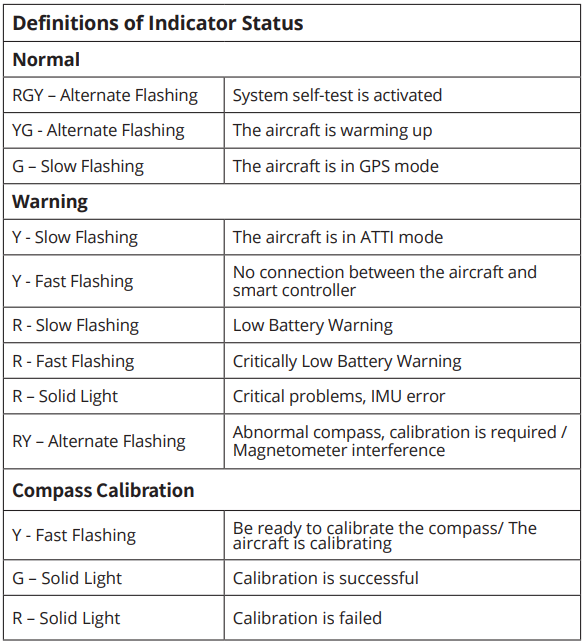
FLIGHT LED INDICATIONS
An LED indicator is located on the end of each aircraft arm. The front LEDs will light up solid red to help you identify the direction of the aircraft’s nose. The rear LEDs will display the current flight status of the aircraft. The chart below shows the meaning of each status indicator.
- Indicator Key: Color Key:
- Slow Flashing: Flashes once every 2s R – Red Color
- Fast Flashing: Flashes twice per second,d G – Yellow Color
- Alternate Flashing: Alternates among different colors Y – Green Color
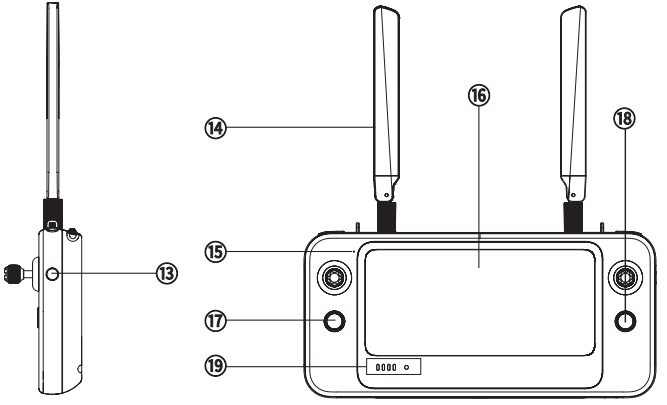
Remote Controller
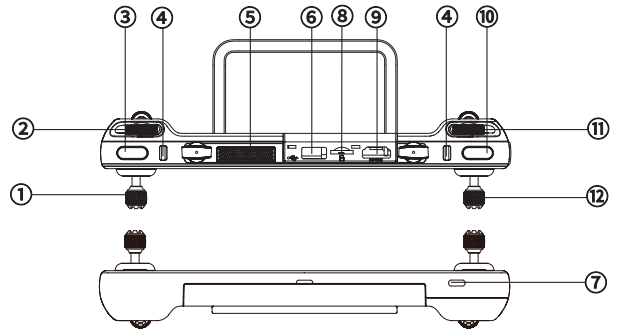
- Left Control Stick
- Gimbal Pitch Dial
- Customizable Button
- Chest Strap Hook
- Air Outlet
- USB-A Port
- USB-C Port
- Micro-SD Card Slot
- HDMI Port
- Record/Shutter Button
- Zoom Control Wheel
- Right Control Stick

- Power Button
- Antenna
- Microphone
- Touch Screen

- Speaker Hole
- Tripod Mount Hole
- Air Inlet
Charging
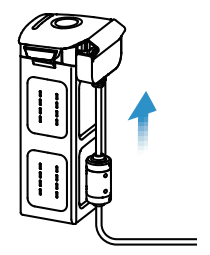
- Aircraft Battery: Plug the charging connector into the battery’s charge port, and connect the other end to the power adapter. Plug the power adapter into a power outlet (100-240V).

- Controller: Connect the USB-C cable to the USB-C port at the top of the controller, and the other end to the power adapter. Plug the power adapter into a power outlet (100-240V)


AUTEL EXPLORER APP
Search for ‘Autel Explorer’ from Google Play and install the app on your controller.
PREPARING THE AIRCRAFT
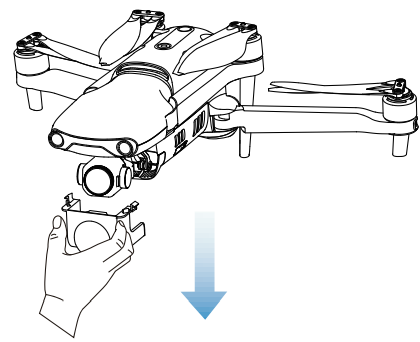
- Before powering on the aircraft, please remove the gimbal guard.

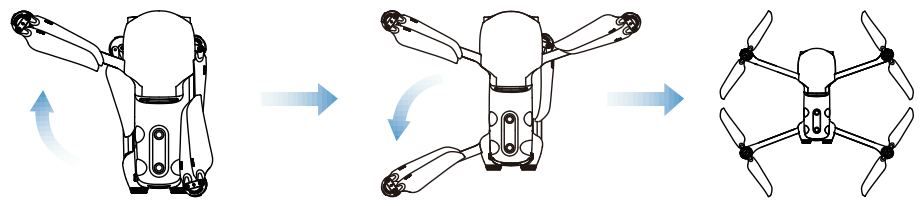
- Unfold the arms and propellers.

PROPELLERS
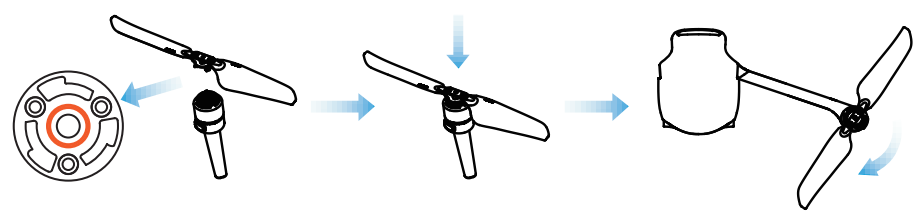
Because the propellers come attached to the aircraft, the following instructions apply if you need to reinstall propellers.
Attaching the Propellers
- Power off the aircraft.
- Pair the propellers and corresponding motors according to the white mark.
- Press each propeller down firmly and rotate in the lock direction to securely attach the propeller.

Detaching the Propellers
- Power off the aircraft.
- Press each propeller down firmly and rotate in the unlock direction to detach the propeller.
LEGEND
- Lock Direction: Fasten the propeller by rotating it as indicated.
- Unlock Direction: Unfasten the propeller by rotating it as indicated.
Preparing the Controller
- The stick storage slots are located on the back of the controller. Please take out the sticks and screw them into the corresponding bases.

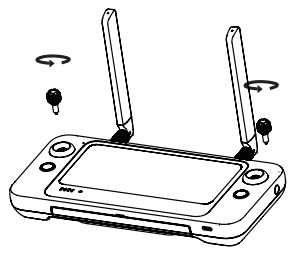
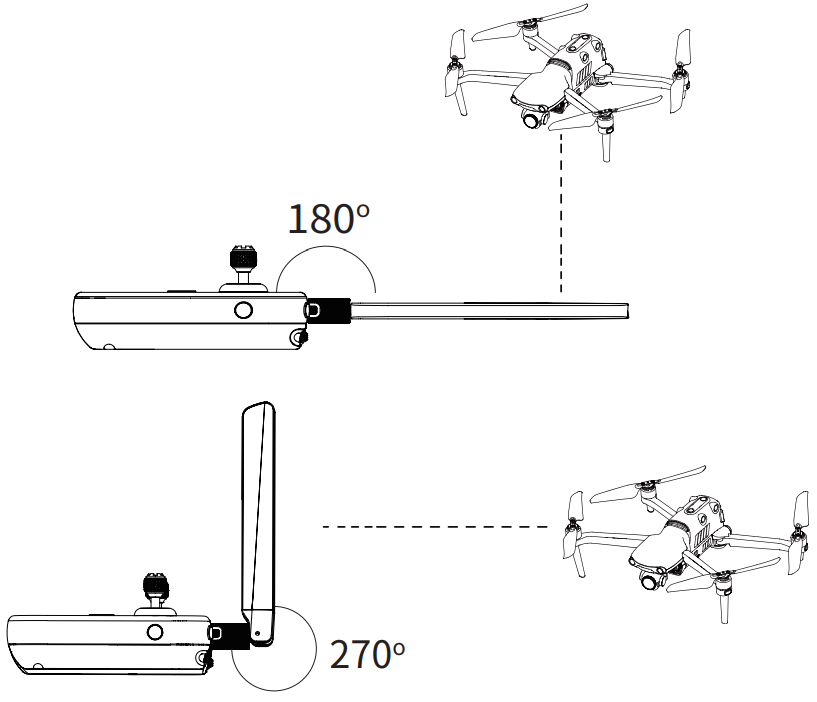
- Unfold the antennas. When the antenna and the back of the controller are at an angle of 180° or 270°, and the antenna surface is facing the aircraft, the signal quality between the aircraft and the controller will reach the optimal condition.

POWERING UP
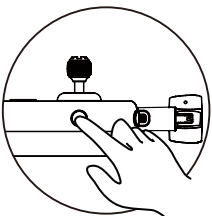
- Press and hold the power button for 2 seconds

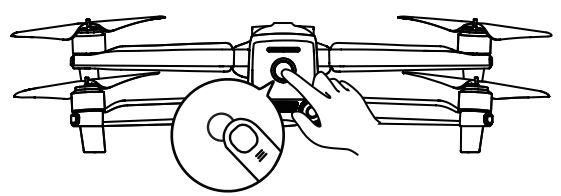
- Press and hold the power button for 3 seconds to turn on the aircraft. The current battery level will be clearly displayed.

TAKE OFF
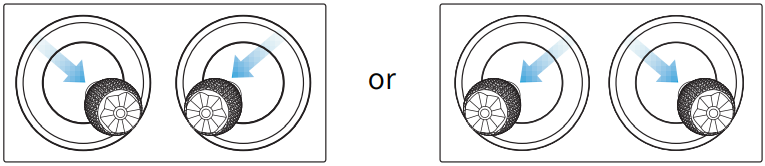
- Start the motors by holding both command sticks for two seconds as shown below.

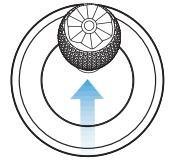
- Push the left command stick slowly upward.

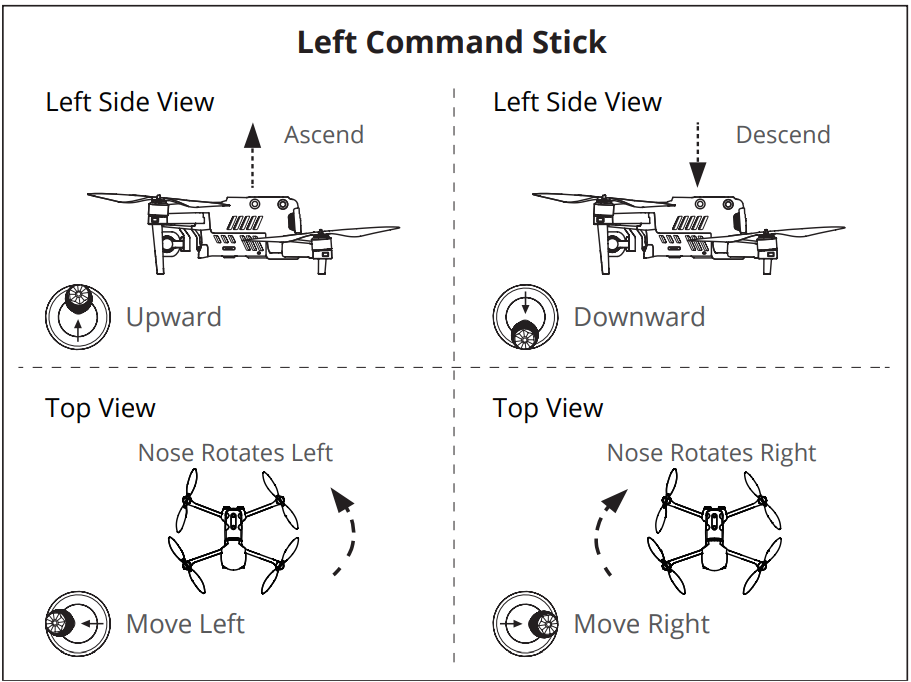
COMMAND STICK CONTROLS

SPECIFICATIONS